In this article
You’ve seen the headline. Nepal’s Everest permit jumped to $15,000 in 2025, up more than a third overnight, and here’s the part it leaves out: that permit is one of the smaller numbers you’ll deal with. There is no single “Everest price.” The median guided climb runs around $55,000, but where you land between $45,000 and $130,000 or more depends almost entirely on which operator tier you choose, not on the mountain. This is the honest version, the one the planning forums and the season-end numbers tell, not the brochure.
What an Everest Expedition Costs in 2026

Ask three climbers what an Everest expedition costs and you’ll get three honest answers that are $40,000 apart. None of them is lying. The price is a spread, and the spread is the whole story.
There’s No Single Everest Price
The 2026 numbers land like this: an average around $61,000, a median near $55,000, and a real working range from roughly $30,000 on the rock-bottom end to $130,000 and beyond at the top, with a handful of ultra-premium trips clearing $300,000. The median is the number to anchor on, not the cheapest quote you can find. A cheap quote tells you what someone is willing to charge, not what the climb actually takes.
What sets your place in that range is the operator tier, not the route or the summit. Two climbers can stand on top on the same morning having paid half as much as each other. They climbed the same mountain. They bought very different amounts of support to get there, and that difference is where this entire article lives.
Where the Money Actually Goes
Strip an expedition down and the bill sorts into a handful of buckets. There’s the climbing permit and the government fees stacked on top of it. There’s supplemental oxygen, which is a recurring cost, not a one-time purchase. There’s Sherpa support, the single biggest variable in how hard or easy your climb is. Then travel and logistics to get you and a few hundred pounds of gear to base camp, and the guiding itself.
If you want a repeatable way to lay this out before you commit, it’s worth working through a step-by-step way to budget a major alpine climb so the line items don’t ambush you one deposit at a time. The mistake that blindsides people isn’t any single number. It’s adding them up too late.
The Gear Bill Most Quotes Ignore
Here’s the cost that almost never shows up in a “total price” pitch: your personal kit. Outfitting yourself from scratch for an 8,000-meter peak runs about $21,000 at minimum.
High-altitude boots, the rigid double boots built for 8,000-meter cold, run around $1,200 a pair. A full down suit clears $2,000. A sleeping bag rated to twenty below adds another grand, and that’s before crampons, an ice axe, gloves, goggles, and the rest.
That gear bill rivals the entire cost of a Denali trip, and it’s real money whether the quote mentions it or not. You can trim it by renting the big-ticket items for a first expedition, which is exactly the kind of rent-versus-buy call laid out in the full Everest gear list and what to rent vs buy. Either way, budget for it now, not at the gear shop in Kathmandu.
Permits and the 2026 Rules — the Fees Before You Climb
The permit is the part everyone quotes and the part almost nobody fully understands. The headline figure is real. It’s also just the floor of the floor.
The $15,000 Permit and What Else Nepal Charges
As of September 1, 2025, Nepal’s spring climbing permit is $15,000 per climber, up 36 percent from the old $11,000 rate. Anyone still quoting you $11,000 is running on stale 2024 math. The autumn permit is cheaper at $7,500, but almost nobody climbs in autumn, for reasons the season section gets into.
Now add the rest of the government and agency paperwork, because the permit doesn’t travel alone. A realistic Nepal floor lands around $27,500 per team before a single rope gets fixed: the $15,000 permit, roughly $3,500 in agency fees, about $5,000 for the mandated liaison officer, and a $4,000 trash deposit. The trash deposit is refundable if your team carries out what it carries in, so think of it as a bond, not a sunk cost.
Tibet’s Bundled Permit
Cross to the north side and the permit math changes shape. The Tibet, or CTMA, permit runs $15,800 to $18,000 per person on a team of four or more. On paper that looks pricier than Nepal’s permit, but it bundles things Nepal charges separately: transport to base camp, hotels, the liaison officer, the trash fee, and the yaks that haul your loads up the Rongbuk Glacier.
So you’re not comparing like for like. A Nepal permit is a line item. A Tibet permit is closer to a small package. When you weigh the two sides later, remember the sticker prices aren’t measuring the same thing.
The New Rules You Can’t Skip
The 2026 rulebook added teeth. Nepal now requires a guide, one per two climbers, and has banned true solo attempts. Climbers carry GPS tracking. You must hold repatriation insurance with a minimum around $37,000 in coverage, the policy that pays for an evacuation or worse, because getting an incapacitated climber off the mountain costs real money and someone has to be on the hook for it. The permit’s validity also shrank from 75 days to 55, which sounds generous until you realize how much of that you’ll spend acclimatizing.
The mistake here is treating insurance as optional fine print. Book without the mandated coverage and you’re either turned away or gambling with a number far larger than the premium you skipped.
Operator Tiers — What Your Money Actually Buys
This is the section that matters most, because the price gap between a budget outfit and a Western operator isn’t arbitrary. It’s a list of specific things, and every one of them is a margin between you and a hard day high on the mountain.
Nepali Outfits vs Western Operators
The split is roughly this. Nepali operators run a median around $45,250, with a range of $30,000 to $55,000. Western “fully guided” trips on the Nepal side carry a median around $76,000 and climb to $125,000 or more. Same summit, about $30,000 apart.
You are not buying a different mountain with that extra $30,000. You’re buying margin. The question that actually matters isn’t “which is cheaper,” it’s “what did the cheaper one remove to get there.” Sometimes the answer is fair. Sometimes it’s the stuff that keeps you alive.
What the Price Gap Buys
Here’s where the delta goes. The first piece is the support ratio, the number of Sherpas per client. A higher ratio means more hands carrying oxygen, fixing rope, and short-roping you on a bad day. The second is oxygen, the flow rate and total allotment of bottled oxygen in your contract, measured in liters per minute, which decides how hard you breathe up high.
A full rig runs several bottles plus an oxygen mask and oxygen regulator, and the budget tier is where that allotment quietly shrinks. From there it’s an IFMGA-certified lead guide, who commands roughly a $10,000 premium for a reason, then professional weather forecasting, then the rescue and medical infrastructure standing behind you when something goes sideways.
Sherpa pay is a quiet tell, too. Quality outfits pay $5,000 to $10,000 a season plus a summit bonus. Cut-rate operators have historically paid as little as $800 to inexperienced porters hauling loads to the South Col. You can guess which arrangement attracts the more seasoned climbers.
Don’t read the headline price. Read the contract for two numbers: the Sherpa-to-client ratio and the oxygen flow rate in liters per minute. That’s where the tier difference actually lives. If an operator won’t put both in writing, you’ve learned what you needed to know.
Reading the Contract, Not the Brochure
The single best proxy for a serious operation is the certification of the lead guide. IFMGA or UIAGM after a name isn’t marketing, it’s years of assessed mountain work. Past that, look at oxygen allotment, the support ratio, and whether rescue coverage is spelled out or hand-waved.
Veterans will tell you the same thing every season: the operators who answer those questions plainly are the ones worth your deposit. The ones who steer you back to the price are telling you what they’re selling.
South vs North — Choosing Your Side
There are two ways up Everest, and the internet will tell you one is “the safe one.” The internet is reading the numbers wrong. Let’s read them right.
The Two Routes
The South side, in Nepal, climbs the Southeast Ridge over the South Col. It runs through the Khumbu Icefall, up the Western Cwm, across the Lhotse Face, and over the Hillary Step near the top, the rock step named for Edmund Hillary, who with Tenzing Norgay made the first ascent in 1953. It has more crowds and, critically, helicopter rescue is available low on the mountain.
The North side, in Tibet, climbs the Northeast Ridge over the North Col and the Second Step. It’s colder, more exposed, and more committing, with no helicopter rescue if things go wrong up high. If you want to see how the mountain straddles two countries and why that shapes the whole decision, how Everest straddles Nepal and Tibet lays out the geography that drives it.
The Success-Rate Myth
Here’s the data people misread. In 2025, the North side posted roughly a 90 percent success rate against the South’s 64 percent. Read fast, and the North looks like the safer bet. Read carefully, and the story changes.
The season-end tallies that climbers like Alan Arnette compile each year tell a quieter story. Normalize the long-run fatality rate across all the summits each side has produced, and the two are nearly identical: about 1.07 per 100 summits on the South, 1.05 on the North.
The North’s success edge isn’t a gentler mountain. It reflects who shows up. The North draws a stronger, more self-sufficient pool of climbers, runs a leaner 0.76-to-1 support ratio against the South’s 1.4-to-1, and sees fewer crowds.
The mountain isn’t safer. The clientele is just more experienced, which tells you something about how much your own experience matters.
Which Side Should You Pick
If you want fewer crowds, accept brutal cold, and bring a genuine high-altitude résumé, the North rewards self-sufficiency. If you want helicopter rescue within reach and don’t mind sharing the route, the South is the more forgiving choice for a first 8,000-meter trip. Cost-wise, remember the CTMA permit bundles logistics the Nepal permit doesn’t.
One signal worth reading: a number of veteran Western outfits have quietly shifted operations to the North to escape South-side overcrowding and the inexperienced climbers that come with it. When the pros move, it’s worth asking why. None of this makes Everest a beginner’s mountain, and it’s worth being honest about where it really sits on the difficulty scale before you pick a side at all.
The Season and the 60-Day Timeline
You can’t shortcut the calendar on Everest. Your physiology sets the pace, and it’s slow. Plan for two months, almost all of it spent waiting and adapting.
Why Spring Owns the Mountain
About 96 percent of Everest climbs happen in the spring season, from April into May, with May the prime summit stretch. The reason is the jet stream. For most of the year it sits parked over the 8,848-meter summit, screaming across it at speeds nothing survives. In spring it lifts briefly, in the lull before the summer monsoon arrives. That gap is the summit window, and the whole expedition is built around being ready when it opens.
A short autumn season exists, with that cheaper $7,500 permit, but almost nobody uses it. The weather is less reliable and the route less established. If you’re weighing the calendar seriously, the best time to climb Everest for planners breaks the windows down further than a cost guide can.
The 60-Day Calendar
Plan on 50 to 65 days, typically 58 to 65 from Kathmandu. The shape of it is consistent: trek in to the South Base Camp on the Khumbu Glacier, then run a series of acclimatization rotations up to Camps 1, 2, and 3 and back down, each one teaching your system to make do with less oxygen. Then a rest, then the summit push when the forecast lines up.
The rotations are the point, not a delay. In plain terms, you climb high and sleep low, over and over, so you build more red cells and your lungs adjust before you ever set foot in the death zone. Skip that process and the mountain removes you from it.
With a 55-day permit and one good weather slot, your operator’s forecasting quality stops being a luxury and becomes a survival feature. Ask who provides their summit forecasts before you book. A bad call on a one-day window can cost the whole trip, or worse.
The Summit Window Is Days, Not Weeks
The window everyone imagines as a season is actually a handful of days. When the jet stream lifts, teams that have acclimatized and positioned correctly get a short run at the top. Miss it, or move too slowly when it opens, and there may not be a second chance that year.
That’s why the 55-day permit is tighter than it sounds. Most of those days are committed to the rotations. The summit itself comes down to a forecast, a few good mornings, and whether you’re ready to move when the sky finally clears.
Do You Qualify? Experience and Prerequisites
Here’s the conversation a good friend has with you before you wire a deposit. The permit is the easy part. The résumé is the real gate, and not everyone reading this clears it yet. That’s not an insult. It’s the difference between a hard trip and a tragedy.
The New 7,000-Meter Rule
Nepal now requires you to have summited a 7,000-meter peak before it issues an Everest permit, or an 8,000-meter peak if you’re climbing from the China and Tibet side. On paper, that’s the bar. The honest caveat is that the rule is new and inconsistently enforced, so a determined budget operator can still find a way to put an underqualified client on the mountain.
This sits right next to the deeper question of readiness, which Everest’s real prerequisites, where the permit is the easy part digs into past the paperwork. The rule is a floor. Your actual preparation should clear it by a wide margin.
The Skills You Actually Need
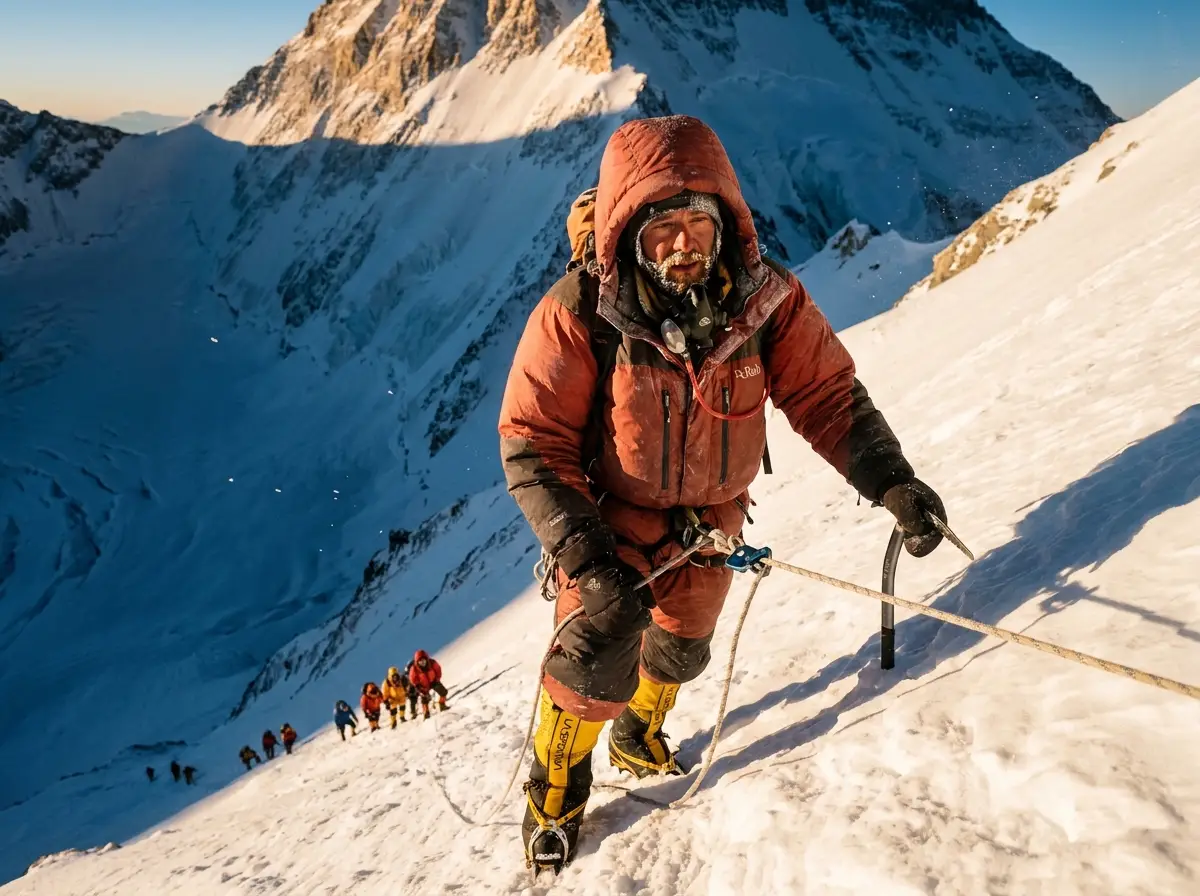
Beyond a paper summit, Everest assumes a real base of technical mountaineering. You need to move efficiently in crampons under a heavy load. You need fixed-line technique, sliding an ascender and clipping past anchors without thinking about it. You need glacier travel, ladder crossings in the Khumbu Icefall, and genuine comfort breathing on supplemental oxygen.
Most climbers build that résumé on a ladder of peaks first, often working up the Seven Summits as they go. A 7,000-meter-tier peak like Aconcagua teaches high-altitude suffering on a forgiving route. An 8,000er like Cho Oyu is the classic prerequisite peak and proving ground, sharing the permits, the Yellow Band, and the rotation rhythm you’ll repeat on Everest. These are the peaks that teach you what the big one assumes you already know, and you can see what the world’s famous peaks actually demand before you slot Everest at the top of your own list.
Everest Is Not Where You Learn
This is the line the blog will say plainly when others won’t: Everest is not where you learn to use fixed lines. The new rule exists because, for years, there were effectively no experience requirements, and budget operators took clients who’d never climbed under load in their lives.
That gap shows up in the worst place. The fatalities that stack up at the Hillary Step bottleneck are often about experience, not just crowding. They’re slow, underqualified climbers stalled in a line that exposes exactly the gap the permit rule was written to close. The queue doesn’t create the problem. It reveals it.
Training and Fitness to Survive the Death Zone
Everest fitness isn’t a gym number. It’s an engine, the kind that keeps moving slowly for twelve hours in air with a third of the oxygen you’re used to. You build that over months, not weeks.
The 9-to-12-Month Build
The standard prep runs 9 to 12 months of structured physical fitness work, and “cardio” undersells it. The real currency is weighted-pack volume: hours of uphill movement under load, week after week, building an endurance base and the leg strength to carry it. A treadmill alone won’t get you there. The mountain asks for sustained output, not a sprint.
The benchmarks people train toward are practical ones. Sustained vertical feet per hour with a loaded pack. Back-to-back long days that don’t wreck you for the week. Recovery that holds up when you’re tired, cold, and underfed, because that’s the actual state you’ll climb in.
What Fit Enough Really Means
Fit enough for Everest doesn’t mean a big lift or a fast mile. It means the diesel engine to grind upward all day at a pace that would bore a runner, and to do it again tomorrow. The bottleneck punishes exactly the climber who can’t, the one who slows the line because the tank is empty.
The North American proving ground for that kind of self-sufficiency is Denali, where the load-carrying, the cold, and the lack of porters mirror what Everest demands of you. A load-heavy proving ground like Denali’s West Buttress is on a lot of Everest résumés for that reason.
You Can’t Train Altitude at Sea Level
Here’s the part no stair-climber fixes: altitude itself can’t be trained at sea level. You can build the engine at home, but the adaptation to thin air is earned on the résumé peaks and on Everest’s own rotations. That’s biology, and it’s why the calendar can’t be rushed.
So build the engine for a year, then respect the mountain’s schedule for adapting it. The two jobs are different, and you need both. The strongest climber on the trail at home is still a beginner at 8,000 meters until the rotations do their work.
The Risks Nobody Sugarcoats
Let’s talk plainly about what actually goes wrong up there, the way a friend would, not a liability waiver. The risks are real and specific, and most of them have a margin you can buy or train your way toward.
The Death Zone and Your Oxygen
Above 8,000 meters is the death zone, and the name is literal. You can’t acclimatize there. Your system is breaking down the entire time you’re in it, running down a clock that started the moment you arrived. Everything above the South Col is a race against your own physiology.
Oxygen is the single biggest survival variable, and the numbers are stark. Climbing with supplemental oxygen, success runs around 80 percent with a fatality rate near 1.03 percent. Without it, success drops to roughly 4 percent and the rate climbs, with no-oxygen climbers accounting for 53 percent of all fatalities on the mountain.
Skimping on oxygen, or having it rationed thin by a budget outfit, is how the death zone earns its name. For the underlying physiology and how to prepare yourself for thin air, a climber’s acclimatization protocol for altitude sickness is worth reading before you go.
The Icefall, the Weather, and the Crowds
The hazards change by zone. Low on the South side, the Khumbu Icefall just below Camp 1 is a slow-collapsing maze of ice blocks and ladder crossings, most lethal in the warming afternoon. Higher up, weather and exposure take over, and frostbite is a constant threat in the wind. Camp 4 on the South Col, where you wait for the window is the launch point, a brutal flat saddle where teams sit above 8,000 meters hoping the forecast holds.
Crowds add their own hazard, but not the way headlines frame it. The problem isn’t only how many people are in line. It’s who.
When the Bottleneck Becomes the Hazard
The Hillary Step queue exposes slow, underqualified climbers, and a stalled line that high burns oxygen and time nobody can spare. The hazard in the bottleneck is as much about experience as numbers. A line of competent climbers moves. A line with a few who shouldn’t be there backs up, and the backup is where people get hurt.
The story that keeps surfacing captures the quiet version of this risk: a climber who wired $45,000 to a budget outfit, then discovered at the South Col that his oxygen allotment had been rationed lower than the Western team camped next door. Thin oxygen margins don’t announce themselves at base camp. They show up above 8,000 meters, which is the worst possible place to learn what you actually bought.
The Budget-Tier Trap
This is the section to read twice. The cheapest expeditions aren’t a bargain. Statistically, they’re where people lose their lives, and the math behind that is worth sitting with before you chase a discount.
The Stat That Should Stop You
Of the 26 Everest fatalities in 2023 and 2024, 23 were with operators charging below the median price. Sit with that ratio. The budget tier isn’t a coincidence in those numbers. It’s the common thread.
That doesn’t mean every cheap trip ends badly or that price alone determines who comes home. It means the discount usually comes from somewhere, and on Everest the somewhere is often the exact margin that keeps you alive when the day goes long.
Before you sign with the cheapest outfit, ask one question: what got removed to hit this price? Then ask specifically about oxygen flow rate, Sherpa ratio, weather service, and rescue insurance. A real bargain answers all four. A trap changes the subject.
What Gets Cut to Hit the Price
The corners are predictable. Thinner oxygen margins, so you climb on less and have less in reserve. Fewer and less-experienced Sherpas, so there are fewer hands when you need them.
Weaker weather forecasting, so your one-day window is a guess. Thinner medical and rescue support, so a bad turn has nowhere to go.
None of these show up in the brochure. They show up at the South Col, high on the mountain, on the worst day of the climb. “Saving” $30,000 by removing the margins that keep you alive isn’t saving. It’s a bet, and the fatality statistics say it’s a bad one.
How to Tell a Real Bargain From a Trap
A lower price isn’t automatically the trap. Nepali outfits can be excellent and run leaner than Western operators for legitimate reasons. The honest question is never “is it cheap,” it’s “which margins got cut to make it cheap.” Ask about the oxygen flow rate, the support ratio, the weather service, and the insurance, and you’ll know fast.
A genuine bargain has answers for all four. A hazardous one has a low number and a change of subject. The cheapest operator who “saves” you $30,000 by quietly thinning your oxygen isn’t a deal. It’s the most expensive choice on the mountain, paid in the only currency that matters up there.
Conclusion
Three things to carry out of all this. First, there’s no “Everest price,” there’s a tier you choose, and the median near $55,000 is the honest anchor, not the cheapest quote in your inbox. Second, the real floor is higher than the package: roughly $27,500 in Nepal fees and about $21,000 in personal gear before the climb even starts. Third, the cheapest trip is statistically the most hazardous, so buy the margins, the oxygen, the Sherpa ratio, the weather service, and a certified guide, not just a spot on the summit.
Before you wire a deposit, price the climb the honest way. Total the fees and the gear, read the contract for support ratio and oxygen flow, and make sure your résumé clears the bar by more than a paper summit. The mountain will still be there next season. The whole point is to come back down from it.
Frequently Asked Questions
01How much does it cost to climb Mount Everest in 2026?
Most guided Everest expeditions in 2026 run between $45,000 and $130,000+, with a median around $55,000. Nepali operators sit lower, near $45,000, and Western fully-guided outfits higher, around $76,000+. That’s before roughly $21,000 in personal gear and the Nepal fee floor.
02What are the requirements to climb Mount Everest?
Nepal now requires a prior 7,000-meter summit, or 8,000 meters from the Tibet side, plus repatriation insurance and a guide. Beyond the paper rule you need real fixed-line, crampon, and glacier skills and a high-altitude résumé. Everest is not where you learn them.
03How long does an Everest expedition take?
Plan on roughly 50 to 65 days, typically 58 to 65 from Kathmandu. Almost all of it is acclimatization, trekking in and running rotations up to the high camps. The actual summit window is only a handful of days in spring.
04Should you climb Everest from the Nepal or Tibet side?
The Tibet (north) side had a higher 2025 success rate, near 90 percent versus 64 percent, with fewer crowds but no helicopter rescue and colder terrain. Once you normalize the long-run fatality rate, both sides are nearly identical. The north’s edge reflects a stronger client pool, not a safer mountain.
05What is the best time of year to climb Mount Everest?
Spring, from April into May with May the prime window, accounts for about 96 percent of climbs. A short autumn season exists but is rarely used. The spring lull in the jet stream is what opens the few good-weather summit days.
Safety Notice: Rock climbing and mountaineering are inherently high-risk
activities that can involve physical trauma or fatal incidents. The information on Rock Climbing Realms is for
educational and informational purposes only. Techniques and advice presented here are not a substitute
for professional, hands-on instruction. Conditions and risks vary by location. Always seek guidance
from a qualified instructor before attempting new techniques. By using this website, you agree that you
are solely responsible for your own safety. Any reliance you place on this information is strictly
at your own risk, and you assume all liability for your actions. Rock Climbing Realms and its authors
will not be held liable for any harm, damage, or loss sustained in connection with the use of this information.
Affiliate Disclosure: We are a participant in the Amazon Services LLC Associates Program, an
affiliate advertising program designed to provide a means for us to earn advertising fees by advertising and linking
to Amazon.com. As an Amazon Associate, we earn from qualifying purchases. We are also an official affiliate partner
of Black Diamond Equipment via the AvantLink network. If you click on a Black Diamond affiliate link and make a
purchase, we may earn a commission at no additional cost to you. We also participate in other affiliate programs.
Additional terms are found in the terms of service.