
In this article
Here’s the math nobody runs before the trip. A climber saves a few hundred dollars renting boots in Kathmandu, then spends summit morning fighting shin-bang and numb toes above the South Col. The cheapest gear on the list became the most expensive mistake of the climb. Ask the people who have actually stood at 8,000 meters and they draw the same line every time: rent the suit and the bag if money is tight, never rent the boots. This is the full Mount Everest climbing gear list, what each piece really costs, and the buy-or-rent verdict for every line, including the break-even that kills the assumption that renting is always cheaper.
Here’s the short version before we walk through each piece.
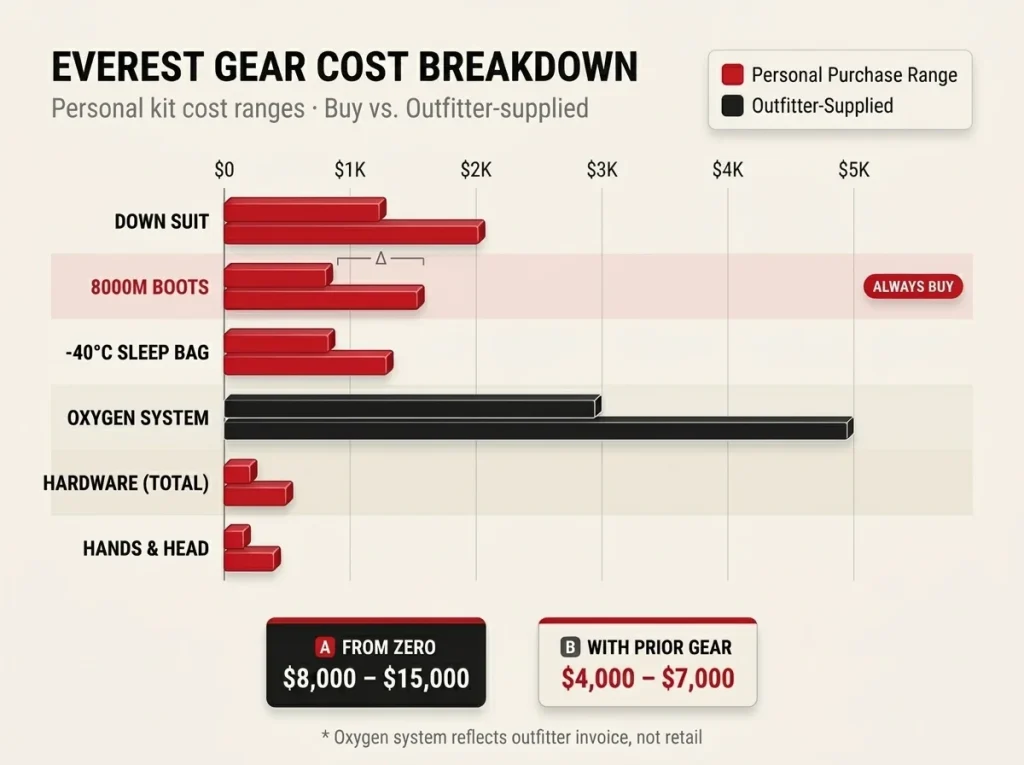
| Gear Item | Typical Cost (New) | Rentable in Thamel? | Buy or Rent |
|---|---|---|---|
| 8000m Down Suit | $1,200–$2,000 | Yes, ~$1–$2/day | Rent if budget is tight |
| 8000m Boots | $800–$1,500 | Yes, but don’t | Always buy |
| -40°C Sleeping Bag | $800–$1,300 | Yes, ~$1–$2/day | Rent only if you inspect the loft |
| Oxygen System | $3,000–$5,000 | Outfitter-supplied | Provided, not bought at retail |
| Technical Hardware | A few hundred total | Sometimes | Just own it |
| Mitts & Eyewear | Moderate | Rarely | Buy |
What Your Everest Climbing Gear Actually Costs
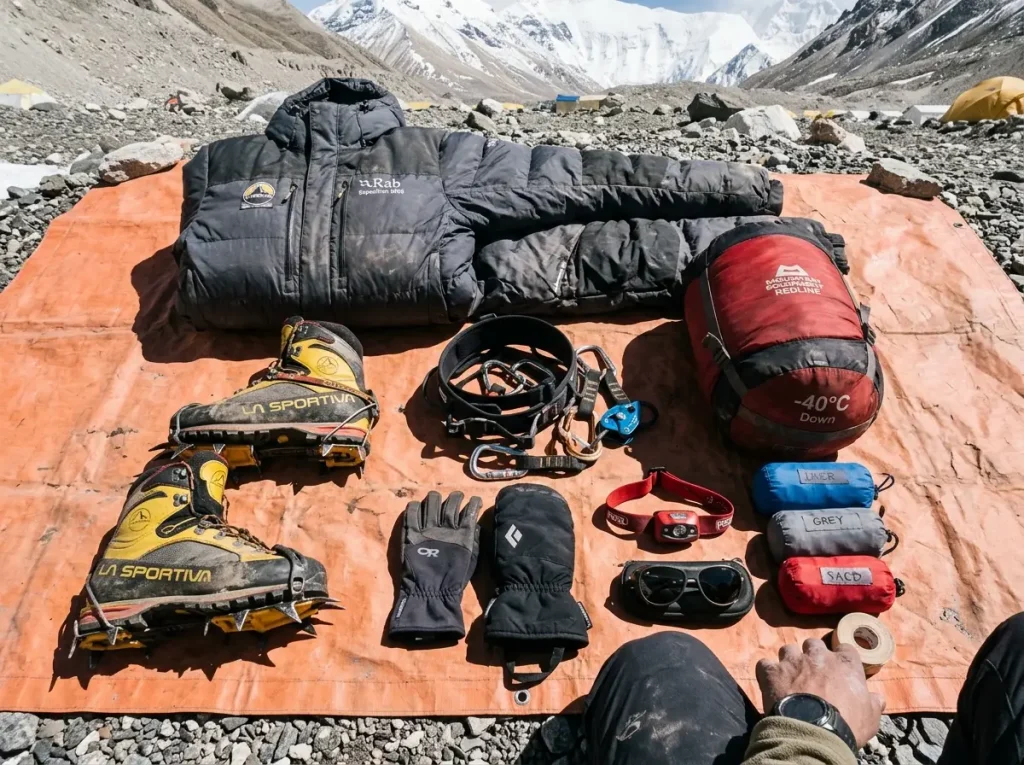
Nobody quotes you the personal-kit number cleanly. You budget for the expedition fee, the permit, the flights, and then the gear bill lands like a second mortgage. Understanding that number, and what moves it, is the whole reason the rent-or-buy decision matters at all.
The $8,000 to $15,000 Reality
A full personal Everest climbing gear kit runs $8,000 to $15,000 if you are building from zero. That is the price of a used car, spent on clothing and hardware you might use for six weeks. The headline items drive most of it: the down suit at $1,200 to $2,000, 8000m boots at $800 to $1,500, a -40°C expedition bag at $800 to $1,300, and the oxygen system at $3,000 to $5,000.
That oxygen figure is the biggest single line after the expedition fee, but you rarely shop for it. The outfitter provides the bottles, the regulator, and the mask as part of the package, so it shows up on your invoice rather than your gear receipts. The number that actually lands on your credit card is the soft goods and the hardware, and that is where every buy-or-rent call gets made.
Where the Money Actually Goes
First-timers consistently misjudge the split. They over-budget the shiny technical hardware, the carabiners and the axe, and under-budget the soft goods that cost real money: the suit, the bag, and the boots. The hardware is a rounding error next to a single 8000m boot.
That misjudgment is exactly why the rental receipt surprises people. Totaled at the end of a 45-day trip, a stack of daily rental fees on the expensive soft goods can quietly climb past what buying used would have cost. Most of this builds on the core alpinism kit most of this gear extends, so the more of that you already own, the less of this list is new spending.
What You Already Own Changes Everything
If you have done Denali or Aconcagua, the number roughly halves to $4,000 to $7,000. The cold-weather sleep system, the harness, the crampons, the axe, and often the boots carry straight over from a previous high-altitude climb. Someone walking off an Aconcagua expedition kit is buying maybe the suit and the summit mitts, not the whole list.
So before you price anything, sort your existing gear into two piles: what transfers and what is genuinely Everest-specific. That single sort decides which half of the cost range you live in.
The Down Suit and Layering System
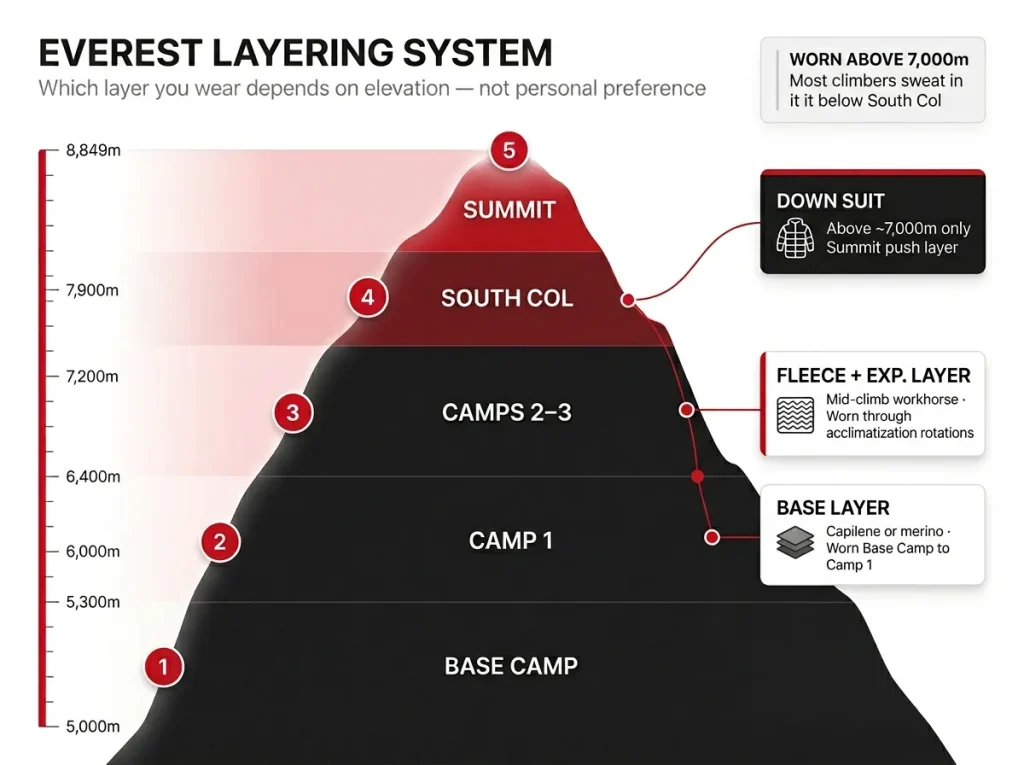
New climbers picture wearing the down suit from base camp to the top. You don’t. It lives in your pack for most of the climb and only comes out near the top, which means the layers underneath it matter as much as the suit itself.
Why the Suit Only Comes Out Up High
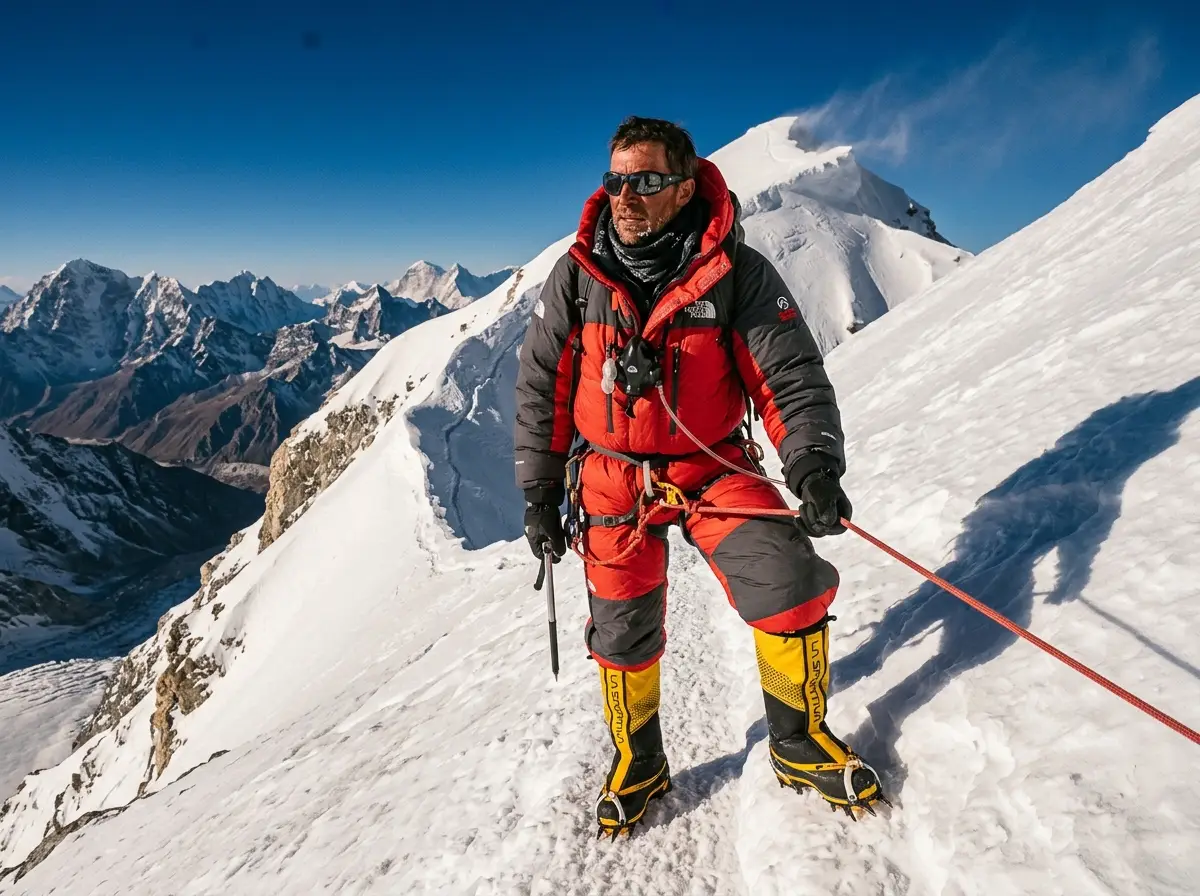
The one-piece 8000m down suit is the single most expensive clothing item on the list. A true expedition down suit packs 800 to 900 fill power goose down with full-leg zips for venting and bathroom logistics, and the names you see most are The North Face, Rab, Mountain Hardwear, and Feathered Friends. It is genuinely worn only from roughly 7,000 meters up. Below that, you climb in a layering system: a midweight base layer, a fleece bodysuit, and an expedition-weight layer.
The common mistake is buying a suit mismatched to that system. Too warm and you sweat inside it, then the sweat freezes when you stop. Too cold and you shiver at the South Col while the layers underneath can’t close the gap. It is the same 8000-meter clothing system you would run on a peak like Cho Oyu, so dialing it once pays off across more than one mountain.
The Reference One-Piece
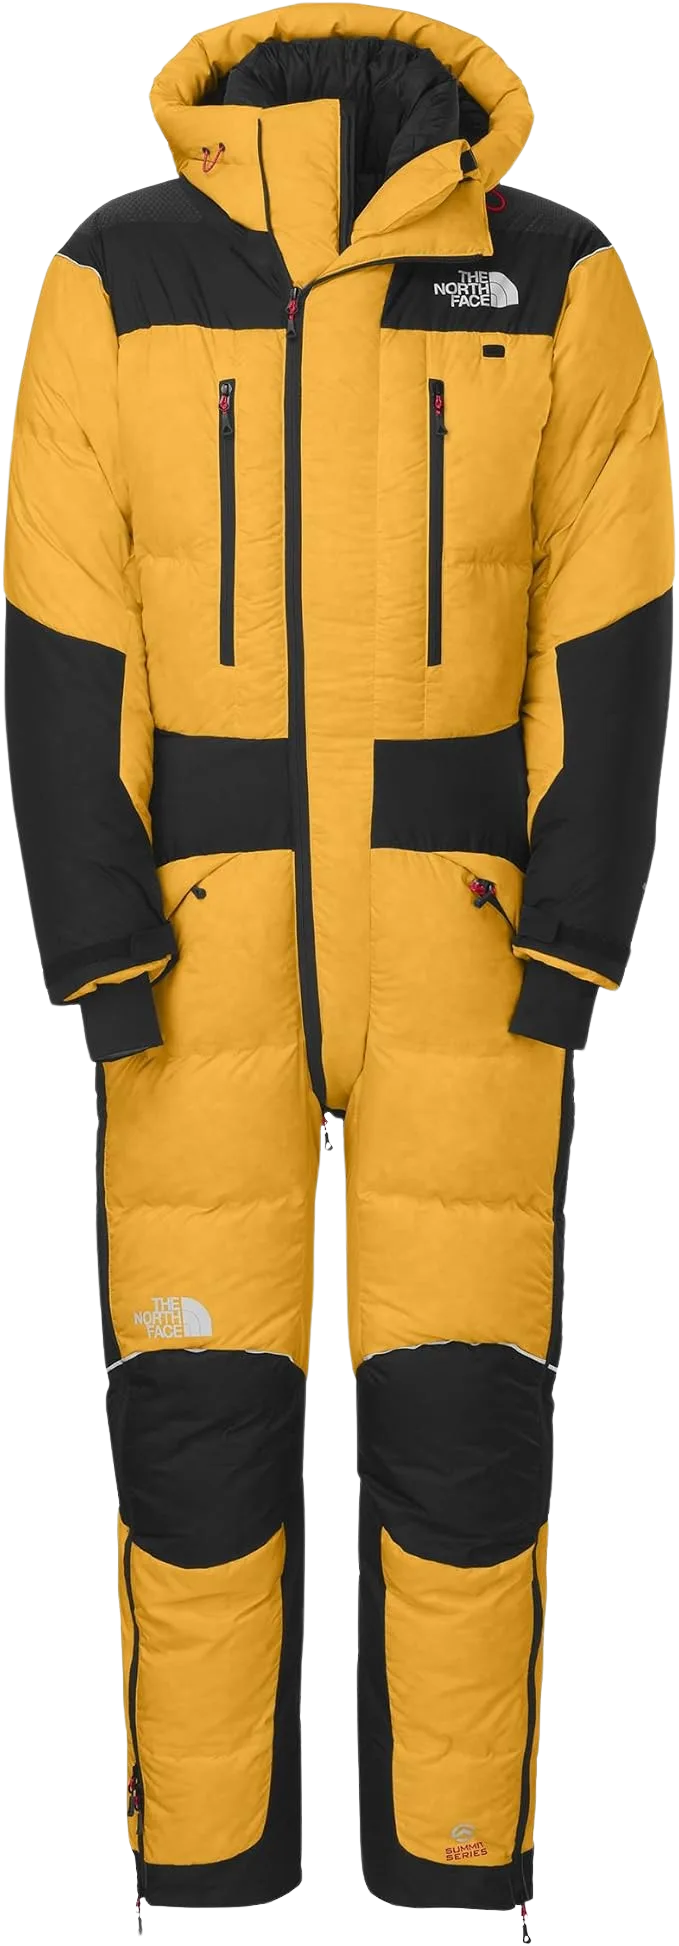
The Himalayan suit earns its spot because it does the boring things right: warmth where your core needs it, venting where you sweat, and a cut that fits over the layers without binding at the shoulders on a long jumar. It is a splurge-worthy piece, and it is also the textbook rent candidate, which we will come back to in the rent-versus-buy section.
The 850-Fill Alternative
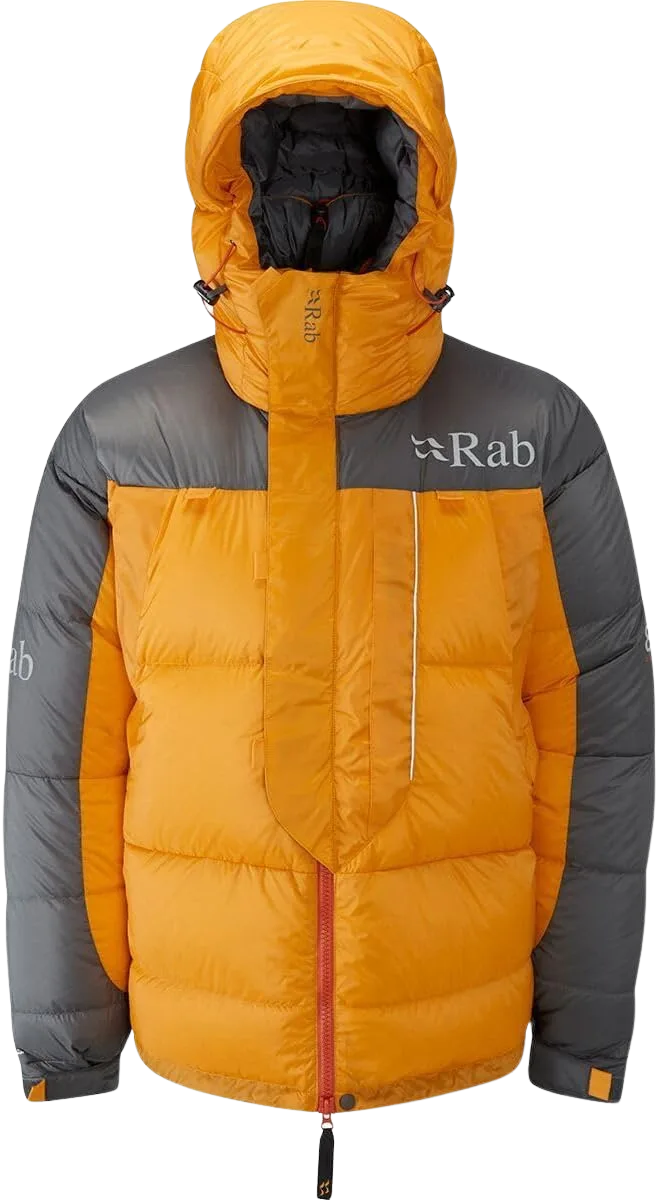
Where the Himalayan is the rent-or-buy suit, the Rab line leans toward buy. The hydrophobic 850 fill holds loft better when frost and tent condensation are unavoidable, and as a belay layer it keeps working long after the summit push is over.
The Layers Underneath That Do the Real Work
Spend on the base and mid layers, because that is what you actually climb in for weeks before the one-piece down suit ever comes out. A Capilene or merino base layer, a fleece bodysuit, an expedition-weight layer, and a belay parka for the cold stops carry you from base camp through the acclimatization rotations. Skimp here and you are cold and miserable long before altitude is the problem.
8000-Meter Boots and Crampon Fit
Of everything on the list, this is the one item every guide tells you to buy. Not for snobbery. For fit, break-in, and getting your crampon to seat right, all of which are a frostbite question, not a money question.
The One Item Everyone Says Buy
8000m boots, the triple boots built for high altitude mountaineering, run $800 to $1,500 new, with a used market around $250 to $800. Alongside the La Sportiva Olympus Mons, the Scarpa Phantom 8000 and the Millet Everest One Sport are the boots you see most on the mountain. They are the consensus always-buy item, and the reasons are physical. A boot has to be broken in to your foot, and the crampon has to lock onto that specific boot, and neither happens on a rack in Kathmandu the night before you fly to base camp.
The cold itself is unforgiving. Exposed skin freezes fast at the temperatures up high, which is part of the documented cold extremes climbers actually face above 8,000 meters. A boot that doesn’t fit or doesn’t seat a crampon is not a comfort problem at those temperatures, it is a toe-loss problem.
Crampon Fit Is a Safety Issue
Here is the part the gear lists skip. A rental boot your crampon won’t lock onto cleanly gives you insecure footing on hard ice, and insecure footing on a fixed line above the Khumbu Icefall is how falls and cold injuries start. The boot and the crampon are a matched system, not two separate purchases.
The fix is simple and it has to happen at home. Take your own boots into the shop and fit your crampons to them before the expedition, the same way you would match a 12-point crampon to your boot for any technical climb. If you want to pressure-test the pairing on real terrain first, a Nepal trekking peak like Island Peak is the classic place to break in double boots before Everest.
Bring your own boots to the crampon fitting and walk through a full step-in and lockout while someone watches the heel lever and toe bail. A welt that seats sloppy at sea level seats worse with frozen hands at 8,000 meters. Mark the binding adjustment with a paint pen so you can reset it identically in the cold.
The Benchmark 8000-Meter Boot
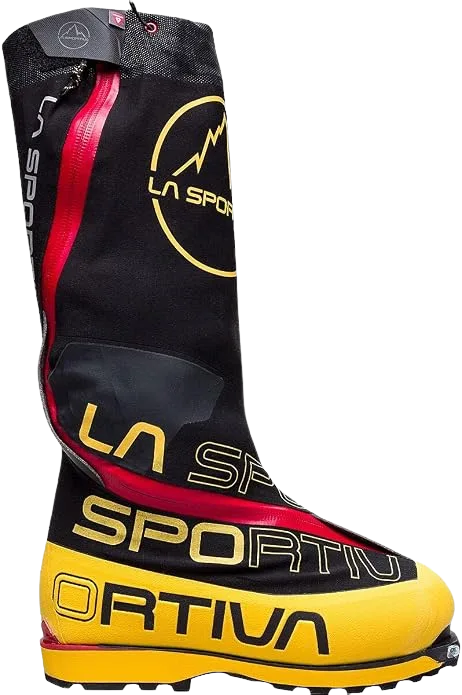
Buy these months out and put real miles on them. The bootie that dries in your sleeping bag is not a gimmick, it is the difference between a warm start and stepping into frozen liners at high camp. Keep a separate, cheaper pair of base camp boots or approach shoes for the trek in, with a warm insulated pair like a Sorel or Baffin for camp itself, because you do not want to burn break-in mileage walking to base camp in your summit boots.
Your Sleeping System for the High Camps
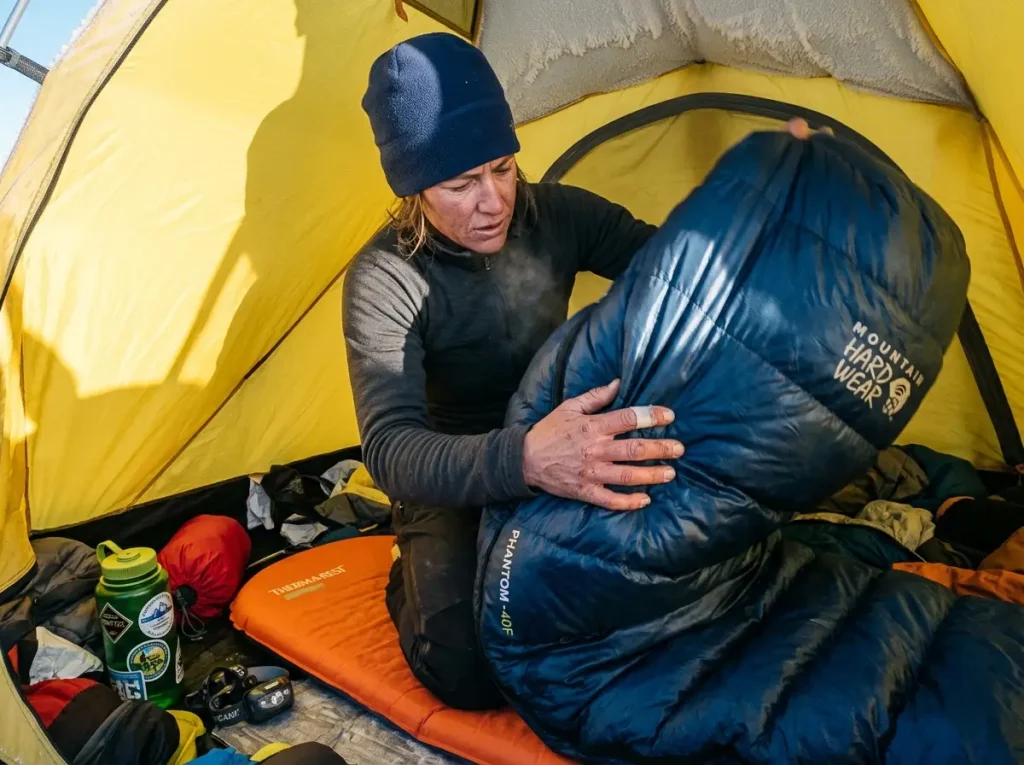
One bag does not do both jobs well. The -40°C monster you need up high is overkill and a hauling penalty down low, which is why experienced climbers carry two.
Why a -40°C Bag, and Why Two
A -40°C expedition sleeping bag runs $800 to $1,300 and is part of the same cold-survival system as the suit. Western Mountaineering and Mountain Hardwear make the down bags you see most at this rating. Temperatures at the high camps drop to -40 and lower, so the rating is not marketing, it is the floor you have to clear to sleep at all. A GORE-TEX-shelled bag in the Mountain Hardwear Phantom -40F class adds real value up high, where tent frost and condensation soak a bare shell overnight.
Running a second, lighter bag rated around -20°C for the lower camps is the move most first-timers miss. The big bag is too hot and too heavy to haul through the rotations, and the light bag is useless up top. It is the same cold-weather sleep logic you would run on a peak like Denali’s West Buttress, where one bag genuinely can’t cover both ends of the climb.
Run a -40°C bag for the high camps and a lighter -20°C bag for the lower ones. Sleep in your next-day base layers, keep a chemical warmer near your feet, and stuff tomorrow’s boot liners inside the bag overnight so you start the day warm and dry instead of fighting frozen gear at dawn.
The Rental Trap With Down Bags
A -40°C bag is a legitimate rent candidate, with one hard condition: you have to be able to inspect the loft. Down that has been stored compressed or stored damp loses warmth permanently, and you cannot see lost loft on a rack the way you can see a torn zipper. A degraded rental bag is a cold night you cannot fix at 7,900 meters, which is exactly the kind of blind-rental risk we break down next.
Technical Hardware for the Fixed Lines
This is the gear that is mostly not worth renting, but for the opposite reason from boots. It is cheap enough and personal enough that you just own it. The entire South Col route is fixed lines, so you are jumaring, not leading, and the hardware list reflects that. Round out the rack with a few locking carabiner and oval carabiner options for the fixed lines and your safety tether, plus a climbing helmet for the rockfall and ice in the Khumbu Icefall.
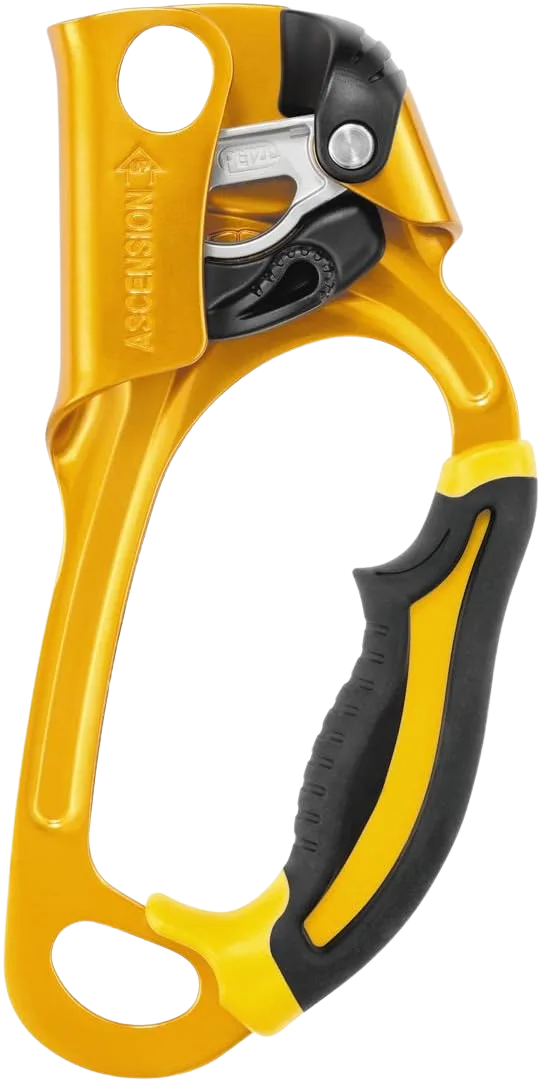
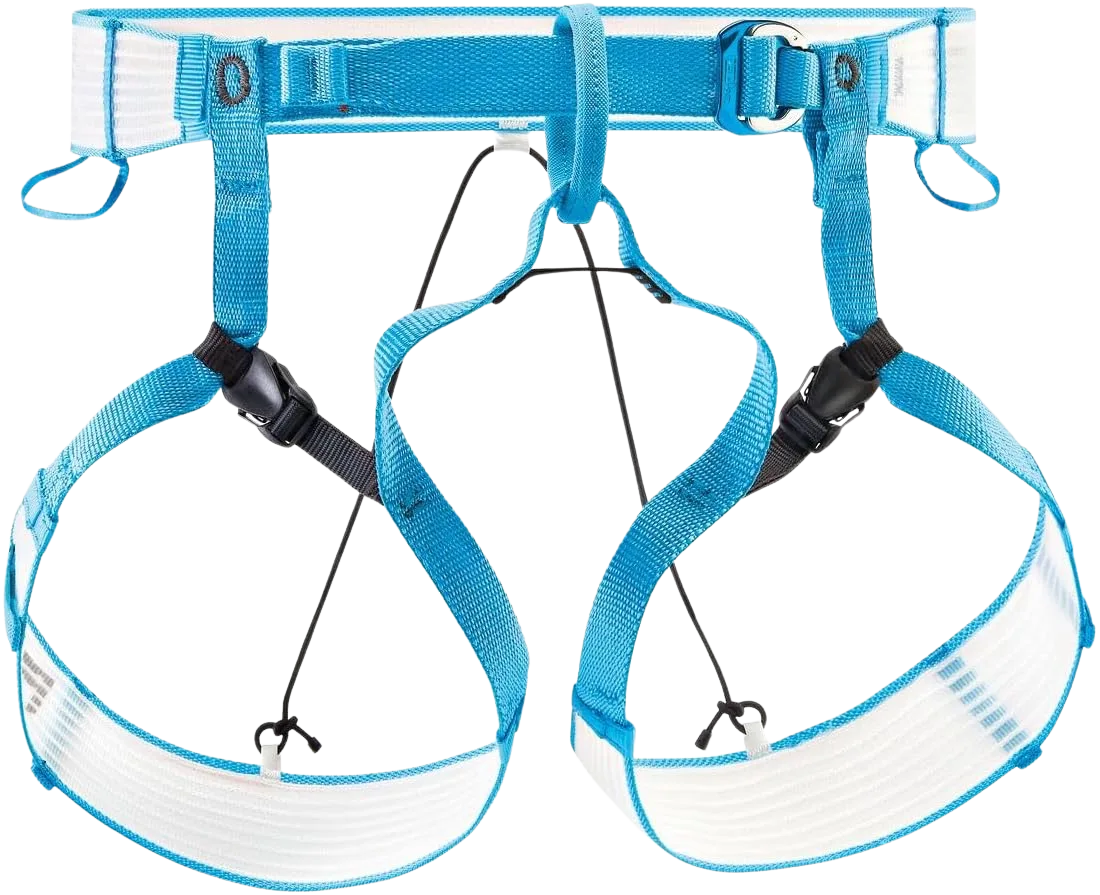
Ascender and Harness for the Fixed Lines
You clip a handled ascender to the fixed rope and slide it up the mountain, so it is the single most-used piece of hardware on the climb. Pair it with a lightweight alpine harness, a Petzl Altitude or Petzl Sitta, that cinches fully adjustable over the bulk of the down suit, because a snug summer harness will not close over an 8000m suit.
Crampons That Match Your Boots
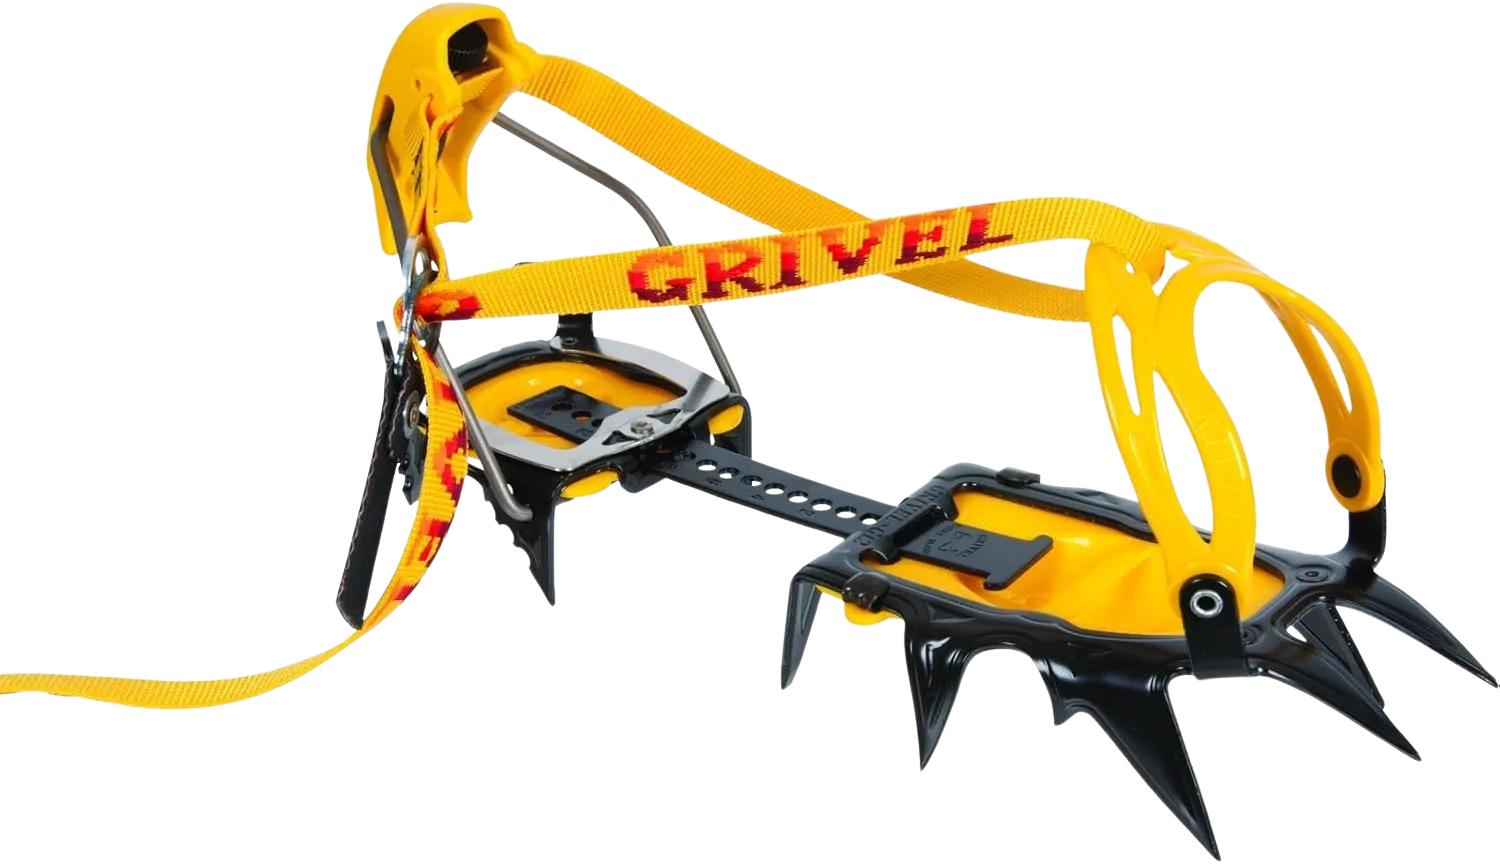
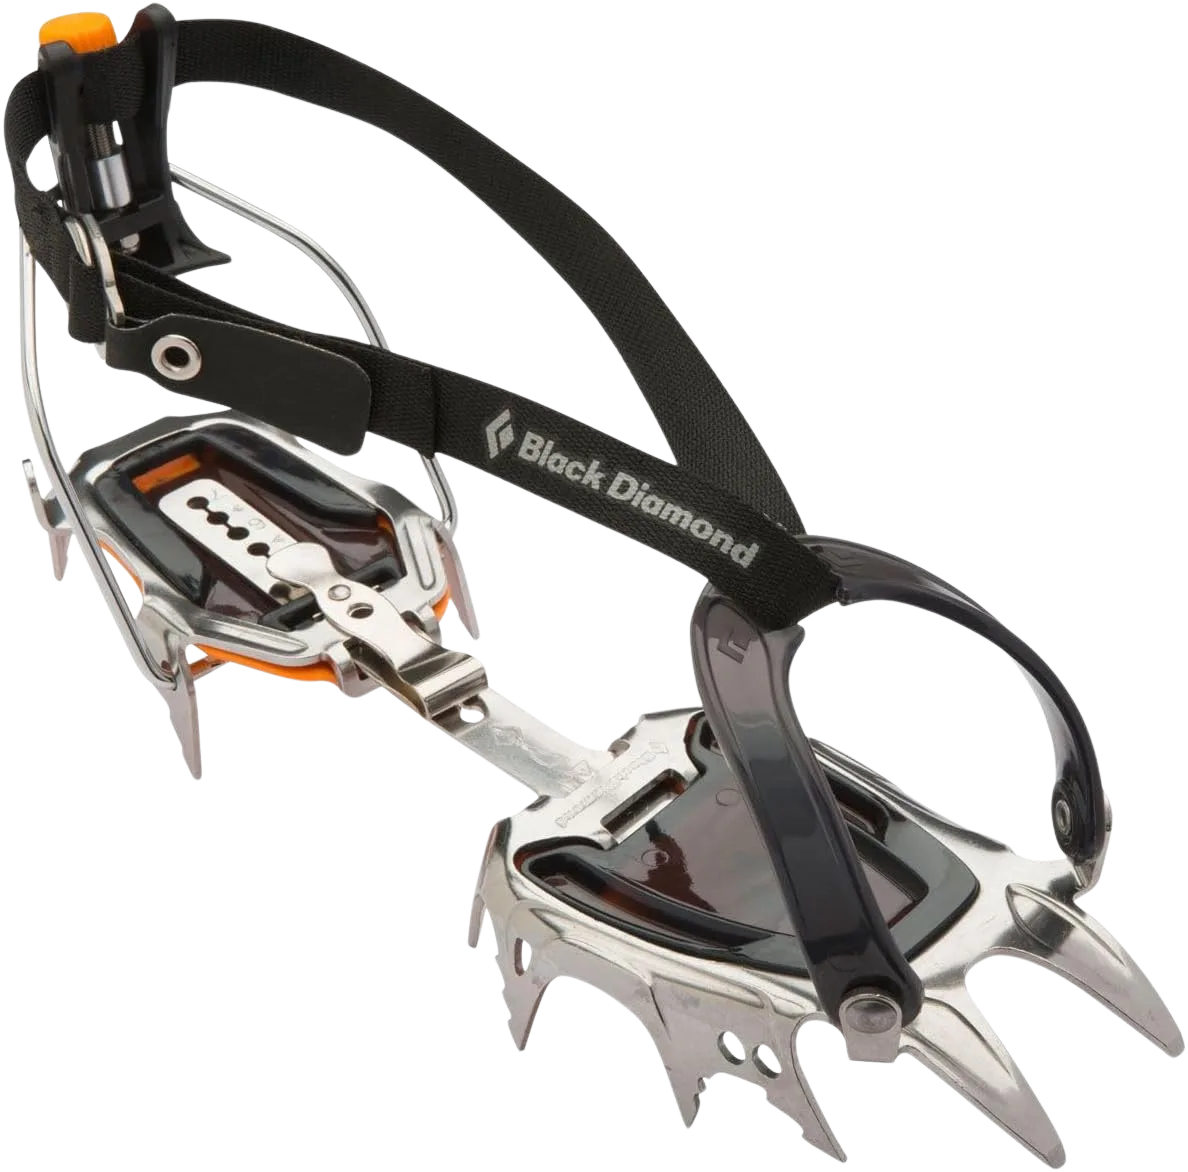
Your 12-point step-in crampons have to be fitted to your boots before the trip, which ties straight back to the boot section. Two proven options cover most budgets, and the cheaper one is genuinely fine. This is not a place to chase premium.
Ice Axe and Belay Device
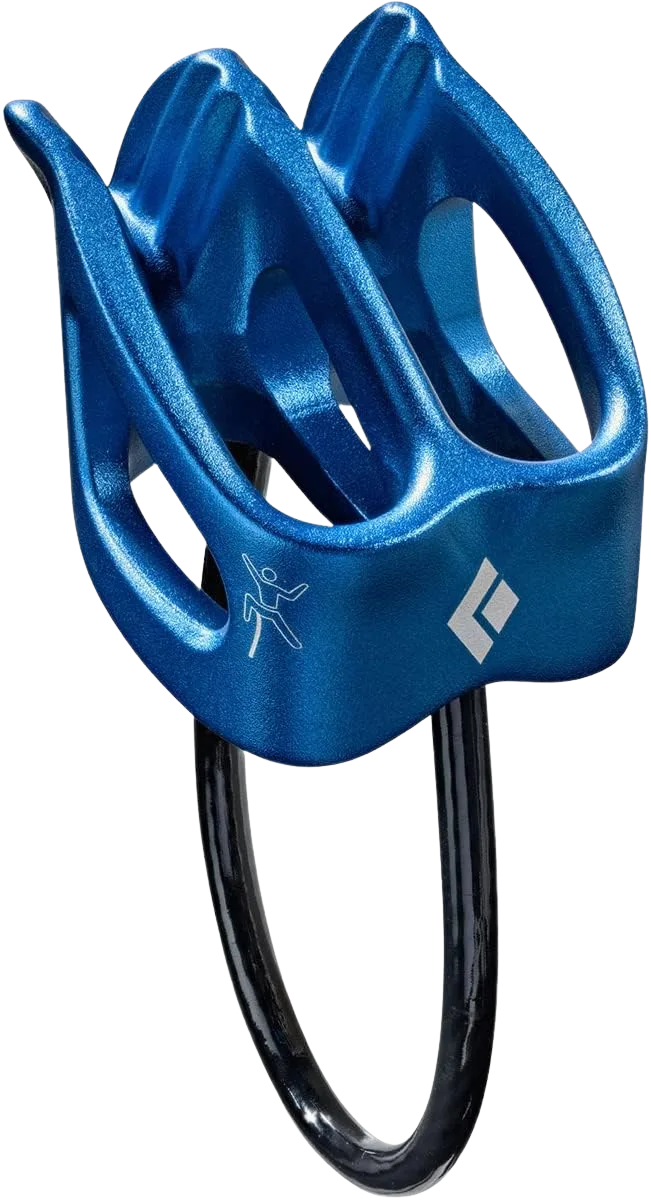
The ice axe here is a general-mountaineering axe in the 60 to 80 cm range, not a curved technical tool. Overbuying a steep-ice tool is a common first-8000m mistake, because the South Col route is walking and fixed lines, not vertical ice. Round out the kit with a simple tube belay and rappel device for the descents.
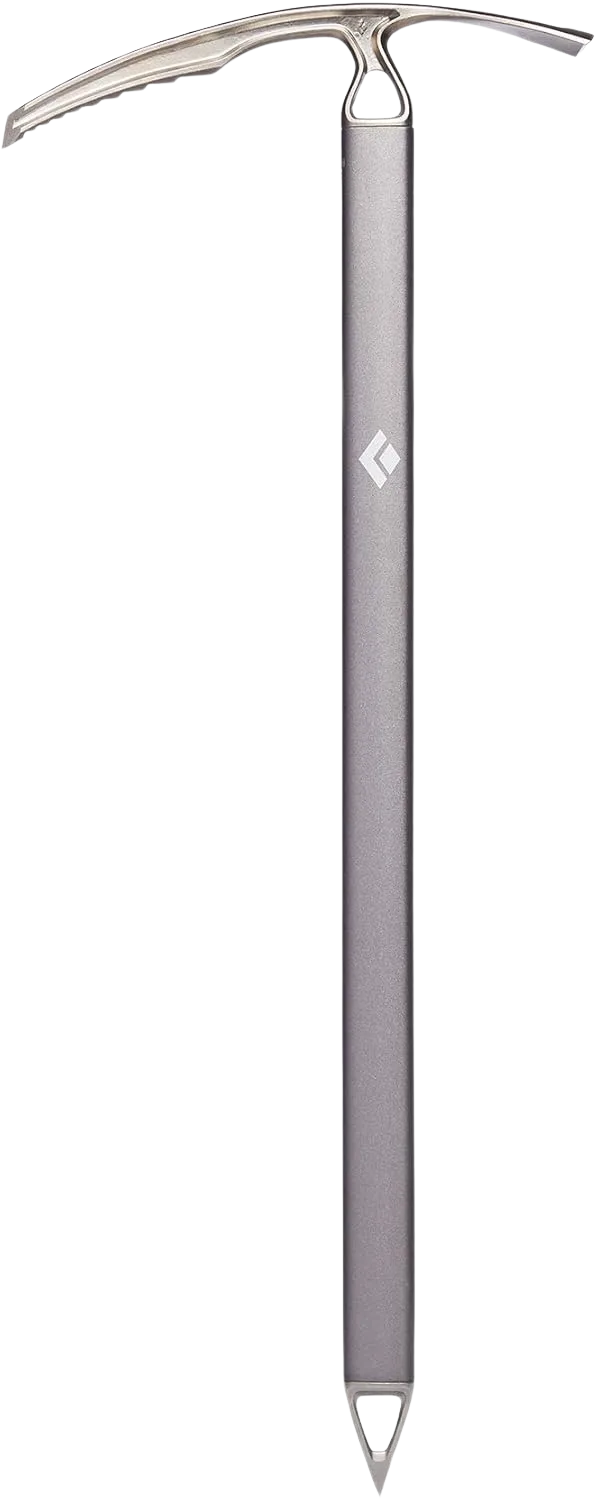
The axe is also worth knowing how to use before you need it, so brush up on the self-arrest basics that axe is actually for at home. The fixed-line and jumaring skills carry across other Himalayan climbs too, which is part of why the fixed-line skills you lean on for Ama Dablam transfer so cleanly onto Everest.
The Oxygen System and the Death Zone
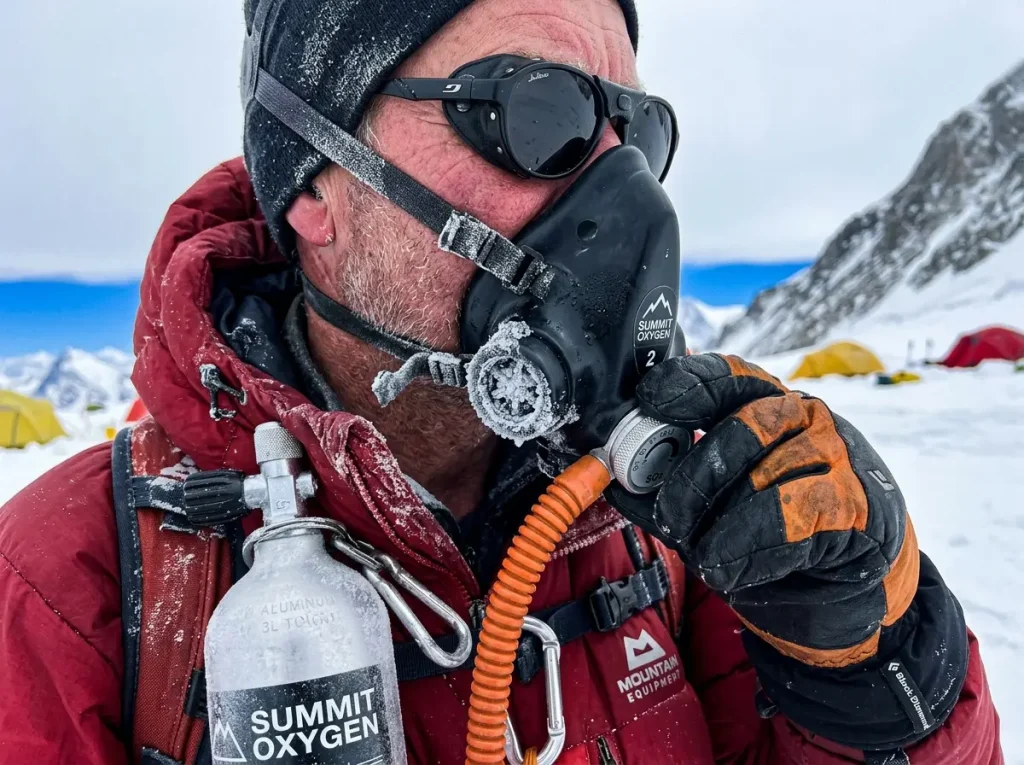
This is the one gear line you do not actually shop for. The outfitter provides it. You still need to understand it, because it is the difference between turning around alive and not, and because the mask quietly dictates a gear choice nobody warns you about.
Why It’s Life Support, Not Comfort Gear
The oxygen system, supplied as a Summit Oxygen, Poisk, or TopOut setup depending on the outfitter, runs $3,000 to $5,000, with a single oxygen bottle around $500 to $600 and six to eight bottles used per climber. It is the biggest line after the expedition fee, and it is supplied by the outfitter rather than bought at retail. The reason it is not optional is physiological.
At the summit, your blood oxygen saturation drops to 40 to 50 percent, against 95 to 100 at sea level, and the air pressure sits near a third of sea level. That is what oxygen saturation actually does to the body above 8,000 meters, and it is why the suit, the bag, and the bottled oxygen are not comfort items. Without supplemental oxygen, survival in the Death Zone maxes out around 16 to 20 hours even for elite climbers, while bottled oxygen extends that to 24 to 36. Bottled oxygen is also why you train your body first, the same way high-altitude training pays off before you ever clip into a regulator.
The Mask Dictates Your Eyewear
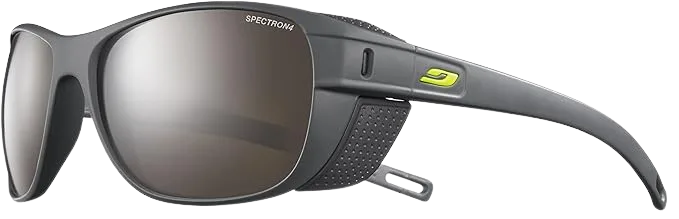
Here is the detail that bites people on summit morning. The oxygen mask sits on your face, and full-size ski goggles often will not seat cleanly over it. Smaller glacier glasses fit under the mask far better, which is why you carry both: glacier glasses for the masked summit push, ski goggles for storm conditions lower down. It is a fit problem you want to solve at home, not while fumbling with frozen fingers at -40.
Hands, Head, and Eyes
The stuff that looks like an afterthought on the packing list is where summit day is won or lost. Warm enough mitts, eyewear that fits the mask, a headlamp that does not quit. This is where you carry two of things.
Summit Mitts Over Gloves
Summit day is mitts, not gloves, with thin liner gloves underneath so you can handle hardware without going bare-handed. The summit mitts keep all your fingers in one warm chamber, and at the temperatures up high that is a frostbite-prevention decision, not a comfort one. A balaclava covers the face and neck the suit hood cannot reach. This is always-buy gear, and the same cold-weather handwear you would run on a cold peak like Elbrus.
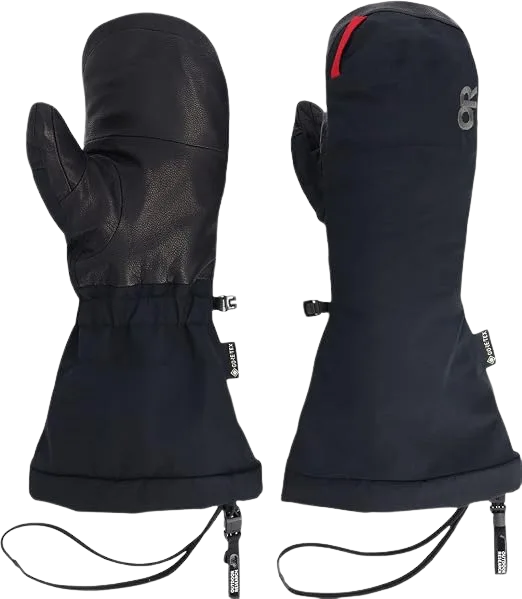
Carry two mitt setups: your summit pair and a beater pair for hauling through the Khumbu Icefall. Trashing your summit mitts on a load carry two weeks before the top is a quiet way to end up cold on the one morning it counts. Clip the spares to your pack, never bury them at the bottom.
Two Sets of Eyes
You need both glacier glasses and ski goggles, and they do different jobs. Glacier glasses with a Cat-4 lens block the brutal high-altitude glare and sit under the oxygen mask on summit morning. Ski goggles take over when wind and spindrift make open lenses useless.
The Pre-Dawn Headlamp
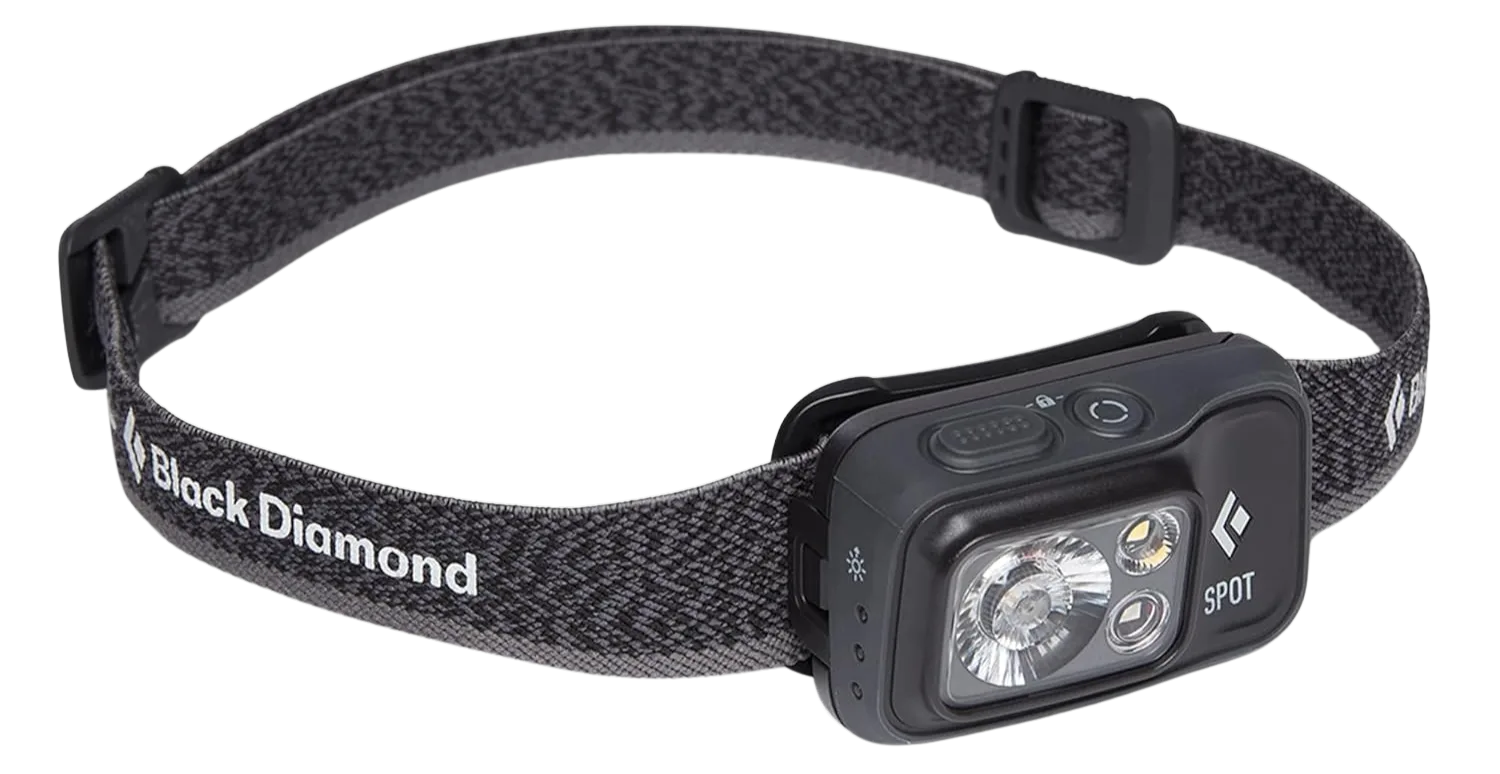
Summit pushes start in the dark, so a reliable headlamp from Petzl or Black Diamond is not optional. You want enough output to read the fixed line and the terrain, and enough battery discipline to keep it alive through a long cold night.
Rent vs Buy, Piece by Piece
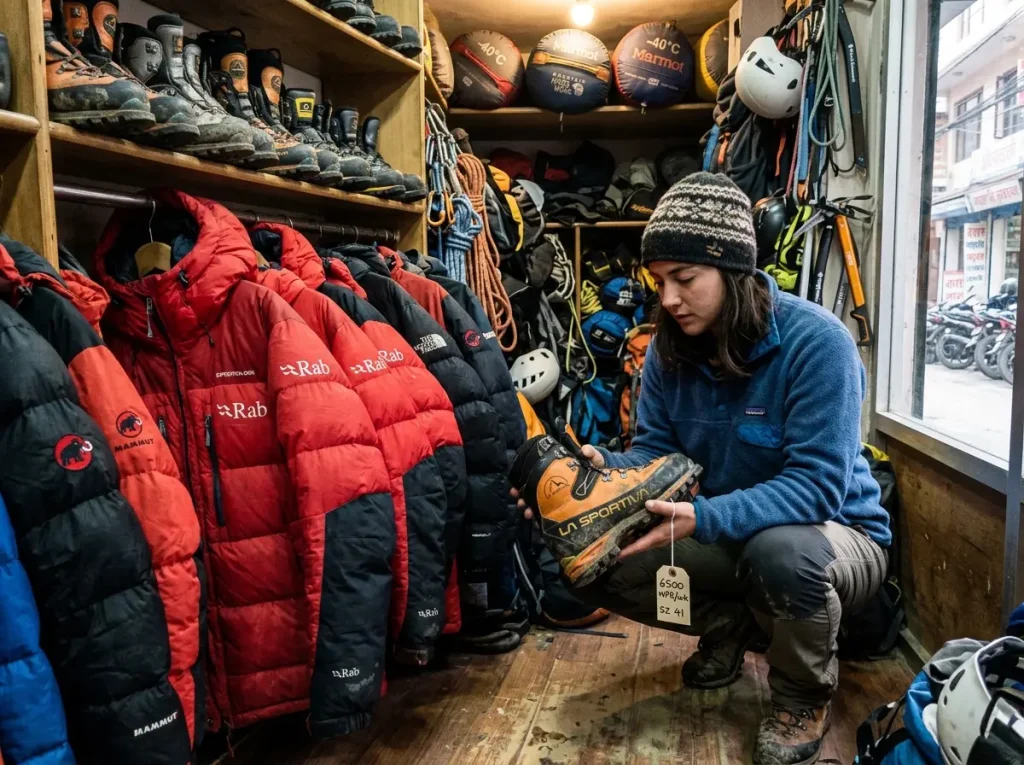
Here is the table the outfitter lists never give you. Not “bring an 8000m boot,” but for each piece, is renting actually the smart money, or does the 45-day math quietly flip it? This is where the title promise gets paid.
The Thamel Rental Math
Thamel, the gear district in Kathmandu, runs rentals at roughly $1 to $15 a day. A down jacket or suit goes for about $1 to $2 a day, a sleeping bag about the same, and a full rental package lands somewhere around $1,500 to $3,000. Per day, renting looks like the obvious budget move.
That daily framing is the trap. An Everest expedition runs around 45 days from arrival to summit window, and rental fees are charged the whole time you hold the gear, not just on summit day. The number you should compare is the season total, not the daily rate.
The Break-Even That Kills the Myth
Run the rent vs buy math on boots and the myth falls apart. Over a 45-day expedition, boot rental adds up to roughly $225 to $540 or more, which approaches or exceeds the $250 to $800 you would spend buying a used pair. You take on all the fit and safety risk of an unfamiliar boot and you barely save anything, if you save at all.
The suit and the bag math works differently, because their daily rates are lower and a new one costs more, so renting genuinely saves money there if your budget is tight. That asymmetry is the whole point: the right answer is not “rent everything” or “buy everything,” it is item by item.
Why Renting Blind Fails
Cost is only half the case against renting the wrong items. Rental down you cannot inspect properly may have been stored compressed or damp, and degraded down loses loft you cannot see on the rack. Down you own, you can keep lofted with a proper Nikwax down wash between trips, but a gear rental comes with no such history. Unbroken-in rigid double boots cause shin-bang and blisters, and over-warm boots make your feet sweat, then that sweat freezes.
This is the test-before-the-mountain rule, and it is why the gear lists that say “just rent it in Thamel” are giving you incomplete advice. You want to have slept in the bag, walked in the boots, and worn the suit before your life depends on them. For the full framework on when renting wins and when it doesn’t, the rent-versus-buy break-even math for travel gear lays out the same logic across the rest of your kit.
Before you commit to any rental down, turn it inside out under a good light and squeeze the baffles. Healthy down springs back fast and feels evenly distributed; tired down stays flat or clumps in the corners. If a shop won’t let you inspect the loft, walk to the next one, because there are dozens in Thamel.
The Verdict Grid
Put it all together and the buy-or-rent call sorts into four buckets. Rent if budget is tight: the down suit and the -40°C bag, as long as you inspect the loft. Always buy: the boots, full stop, because fit, break-in, and crampon match are a safety call. Outfitter-supplied: the oxygen system, which you do not buy at retail at all. Just own it: the hardware, because it is cheap, personal, and safety-critical enough that renting makes no sense.
Modern Upgrades Worth the Money
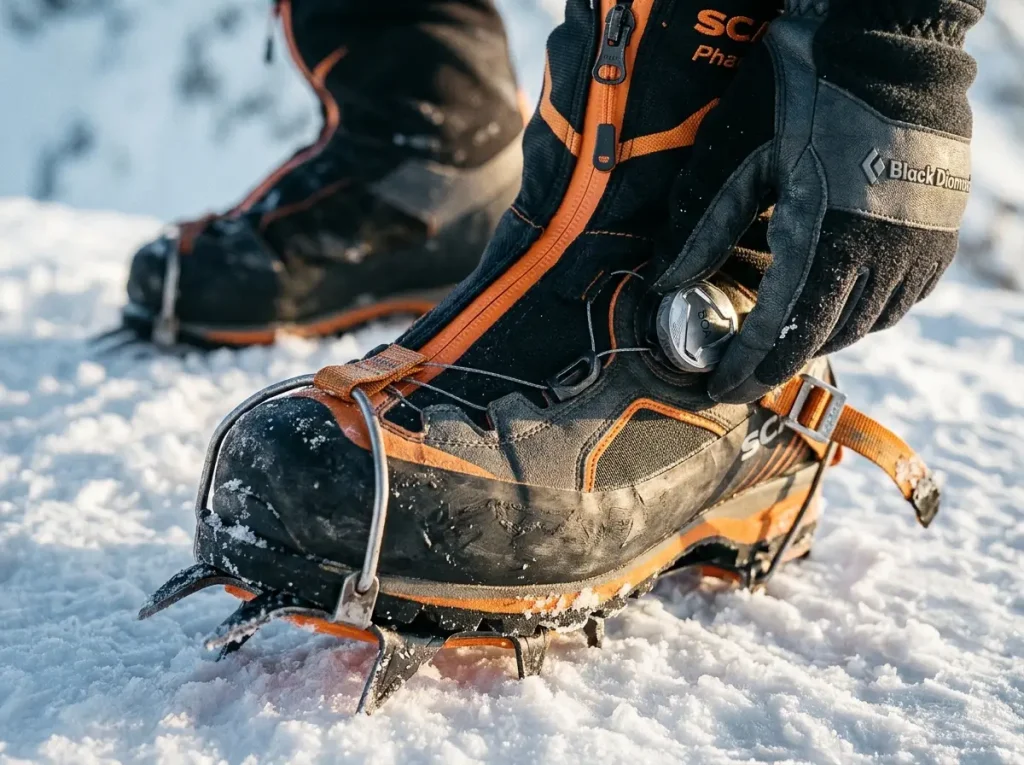
Every season brings a new must-have upgrade. Some genuinely matter where mistakes cost toes, and some are marketing on a mountain that does not care. Here is the honest split.
Worth the Money
A few modern upgrades earn their price. An aerogel liner and a carbon-fiber midsole buy you warmth-to-weight exactly where frostbite is the risk. GORE-TEX bag shells fight the tent condensation and frost that quietly flatten the loft up high. And smaller Cat-4 glacier glasses sized for mask compatibility solve a real summit-morning failure point.
Situational at Best
Some upgrades depend entirely on the climb. Heated gloves sound great until you do the battery math at -40, where cold murders run time and a dead battery leaves you worse off than good mitts would have. Digital oxygen regulators are genuinely nice, but the outfitter usually dictates the system, so your preference may not even be on the table.
Mostly Marketing
Then there is the hype. Marginal fill-power bragging on a suit you are going to rent anyway does nothing for you. Ultralight savings that quietly trade away warmth are a bad deal up where the air is thinnest, and warm and proven beats new and light every time. The mountain is the wrong place to field-test an unproven upgrade, and the same warm-and-proven logic carries onto a high-altitude peak like Huascarán just as cleanly. Spend where it buys safety, on boots, mitts, and mask-compatible eyewear, and skip the vanity.
Conclusion
Three things to carry out of all this. The kit is $8,000 to $15,000 from zero, and what you already own decides which half of that range you live in. Rent the suit and the bag if you must, but never the boots, because fit, break-in, and crampon seating are a frostbite call, not a money call. And run the 45-day math before you assume renting is cheaper, because on the items that matter most, it usually isn’t.
Before you book anything, build your own line-by-line list with three columns: own, rent, and outfitter-supplied. Price it honestly, season total not daily rate, and the climber who does that math at home is the one not fixing a mistake at the South Col.
Frequently Asked Questions
01How much does it cost to gear up for Mount Everest?
A full personal Everest kit runs about $8,000 to $15,000 from zero, or roughly $4,000 to $7,000 if you already own Aconcagua or Denali-grade gear. The biggest items are the down suit, 8000m boots, the -40°C bag, and the outfitter-supplied oxygen system.
02Should you rent or buy Everest climbing gear like boots and down suits?
Rent the down suit and the -40°C sleeping bag if budget is tight, since both are widely available in Thamel and used only part of the climb. Buy your boots every time, because fit, break-in, and crampon compatibility make them the one non-negotiable purchase.
03Can you rent Everest climbing gear in Kathmandu or Thamel?
Yes. Thamel shops rent down suits, -40°C bags, and plastic boots for roughly $1 to $15 a day, with full packages around $1,500 to $3,000. Inspect the loft on any down item, because degraded, poorly stored down loses warmth you cannot see on the rack.
04What boots do Everest climbers wear?
8000m triple-insulated boots like the La Sportiva Olympus Mons class, with dual-BOA closures, removable thermal booties, and 12-point step-in crampon compatibility. Plan to break them in and fit your crampons to them before the expedition, not in Kathmandu.
05Why should you never rent mountaineering boots for Everest?
A rental boot you have not broken in causes shin-bang and blisters, and an unfamiliar last may not seat your crampon securely on ice, which are both frostbite and footing risks. Over a 45-day expedition, rental cost also approaches buying used, so you take the risk without even saving money.
Safety Notice: Rock climbing and mountaineering are inherently high-risk
activities that can involve physical trauma or fatal incidents. The information on Rock Climbing Realms is for
educational and informational purposes only. Techniques and advice presented here are not a substitute
for professional, hands-on instruction. Conditions and risks vary by location. Always seek guidance
from a qualified instructor before attempting new techniques. By using this website, you agree that you
are solely responsible for your own safety. Any reliance you place on this information is strictly
at your own risk, and you assume all liability for your actions. Rock Climbing Realms and its authors
will not be held liable for any harm, damage, or loss sustained in connection with the use of this information.
Affiliate Disclosure: We are a participant in the Amazon Services LLC Associates Program, an
affiliate advertising program designed to provide a means for us to earn advertising fees by advertising and linking
to Amazon.com. As an Amazon Associate, we earn from qualifying purchases. We are also an official affiliate partner
of Black Diamond Equipment via the AvantLink network. If you click on a Black Diamond affiliate link and make a
purchase, we may earn a commission at no additional cost to you. We also participate in other affiliate programs.
Additional terms are found in the terms of service.