
In this article
Two out of three people who start up Mount Whitney don’t reach the summit, and the ones who turn back are rarely the ones who couldn’t hike it. Talk to anyone who has spent a season around the Whitney Portal message boards and the same pattern comes up again and again: strong, fit people undone by pacing, altitude, and a turnaround clock they didn’t respect. The mountain is a walk-up, not a technical climb, and that’s exactly the trap. This guide walks through the five mistakes that actually end summit bids on Mount Whitney, plus the honest gear, permit, and acclimatization details that decide the climb weeks before you ever reach the trailhead.
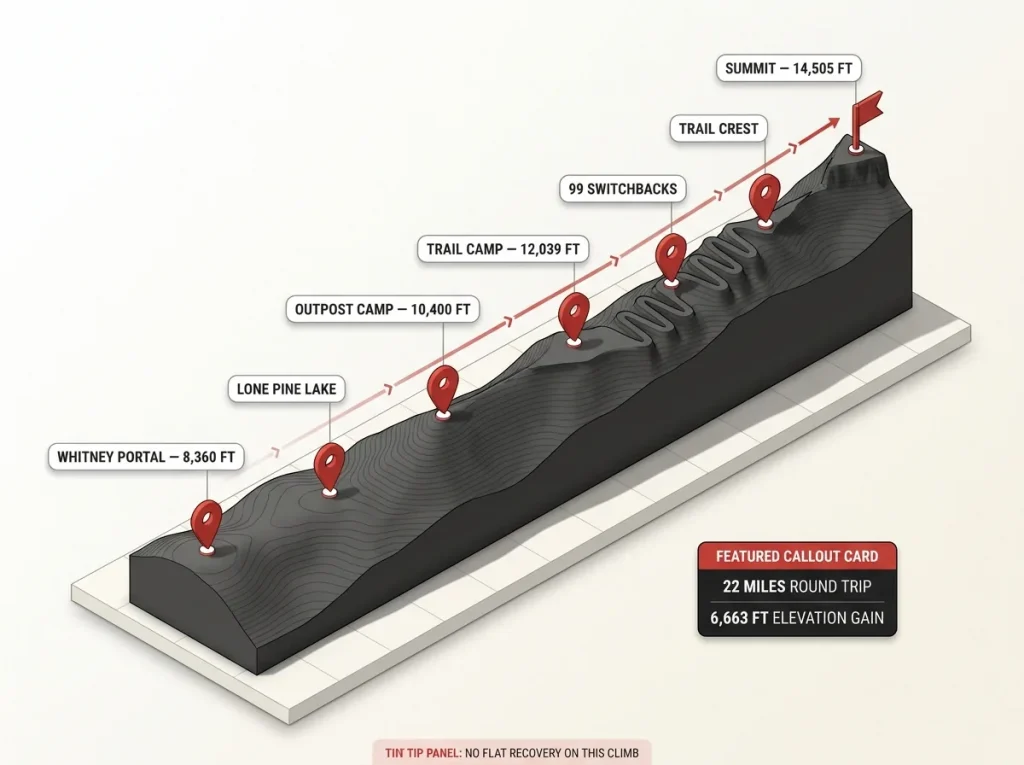
Here are the core numbers to size up before you commit to a permit application.
| Detail | Mount Whitney Trail | Key Context |
|---|---|---|
| Summit elevation | 14,505 ft | Highest peak in the lower 48 |
| Round-trip distance | 21.7–22 mi | Full day of climbing, no flat recovery |
| Elevation gain | ~6,663 ft | Averages ~550 ft per mile |
| Difficulty | Strenuous, non-technical (Class 1) | Mountaineer’s Route is Class 3 |
| Permit | Required (Whitney Zone quota) | Quota season May 1–Nov 1 |
| Best season | July–September | Snow travel likely outside this window |
What Climbing Mount Whitney Actually Involves
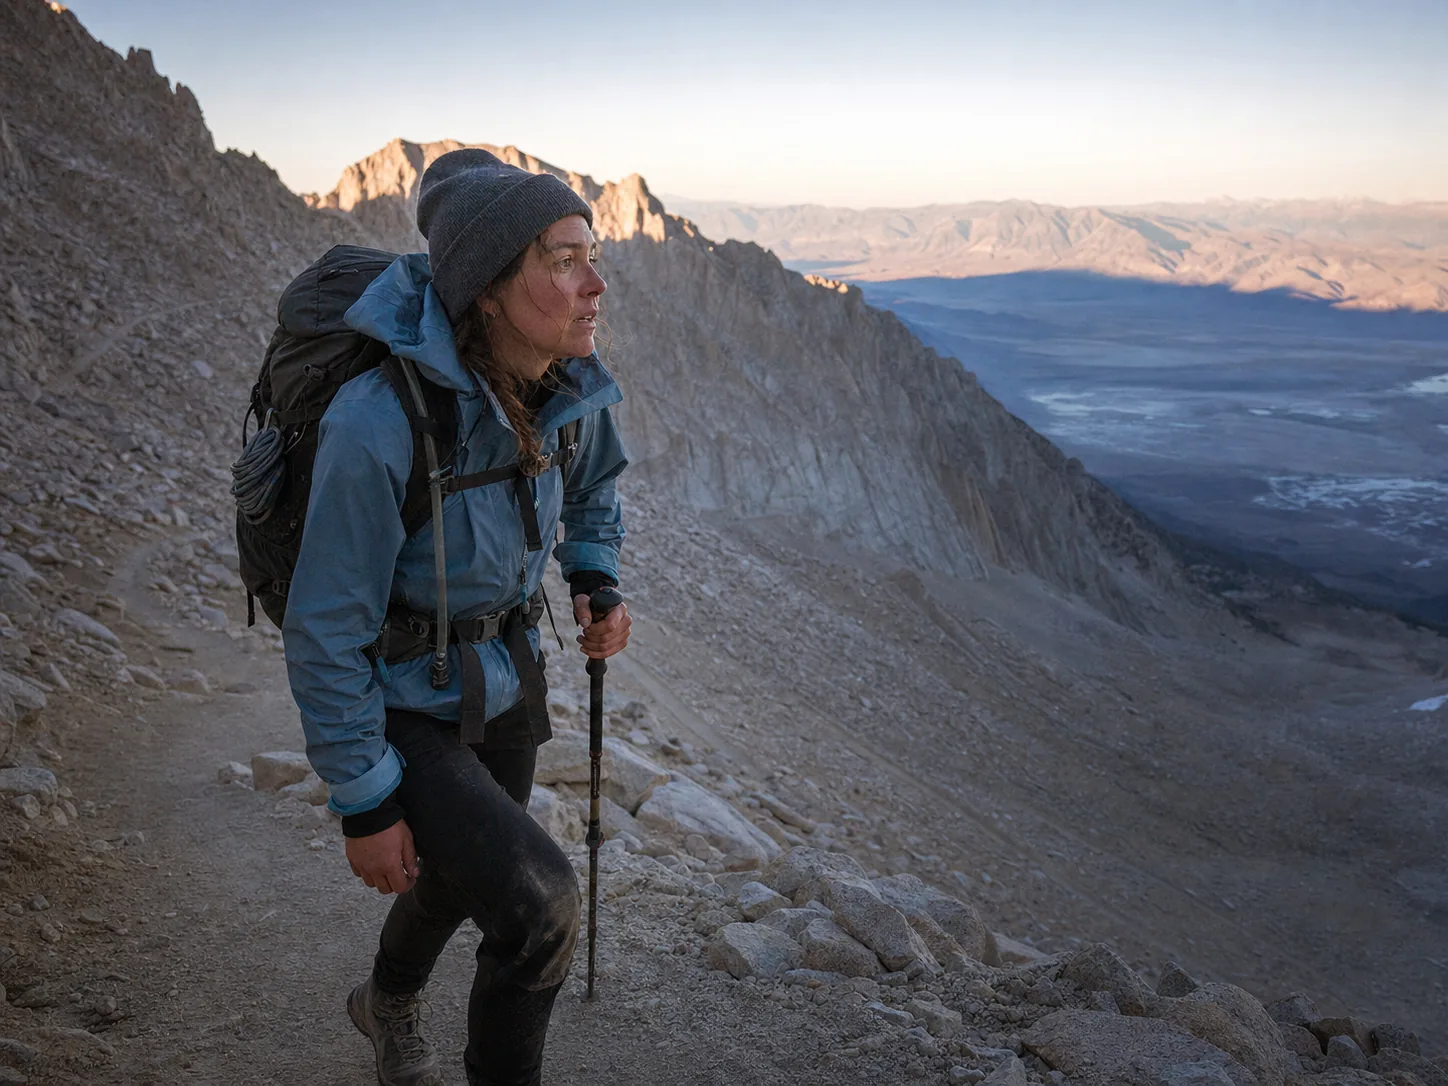
Mount Whitney is one of the famous peaks that draws climbers every year to test what a big mountain really demands, and on paper it looks almost gentle: a maintained trail, no ropes, a walk up a granite fourteener to the highest point in the contiguous United States, straddling the Sequoia National Park boundary. That reputation is where the trouble starts. The Mount Whitney Trail covers roughly 21.7 to 22 miles round trip with about 6,663 feet of elevation gain, topping out at 14,505 feet. That’s a full marathon of climbing before you even factor in what thin air does to your legs.
The grade tells the real story. The trail averages around 550 feet of gain per mile with no flat stretch to catch your breath and let your heart rate settle. There’s no recovery built into the terrain, which is why a small pacing error early compounds into a big problem by the switchbacks. You don’t get the mile back later.
Altitude changes the math again. Up high, a normal uphill pace of 20 to 25 minutes per mile stretches toward 40 minutes per mile, and that’s for people doing everything right. If you benchmark your Whitney speed against a normal day hike at home, you’ll feel like you’re crawling and start pushing harder to compensate. That instinct is exactly how strong hikers blow up before Trail Camp.
Throw your normal trail pace out the window on summit day. Forty minutes a mile above 12,000 feet is not slow, it’s correct. The hikers who feel “behind” and speed up to fix it are the ones sitting on a rock two hours later wondering why their legs quit.
“Non-technical” and “easy” are not the same word, and Whitney punishes anyone who confuses them. The peak actually offers three very different ways up, and choosing the wrong one for your skill set is the first mistake we’ll break down.
The Permit Lottery and How to Actually Land One
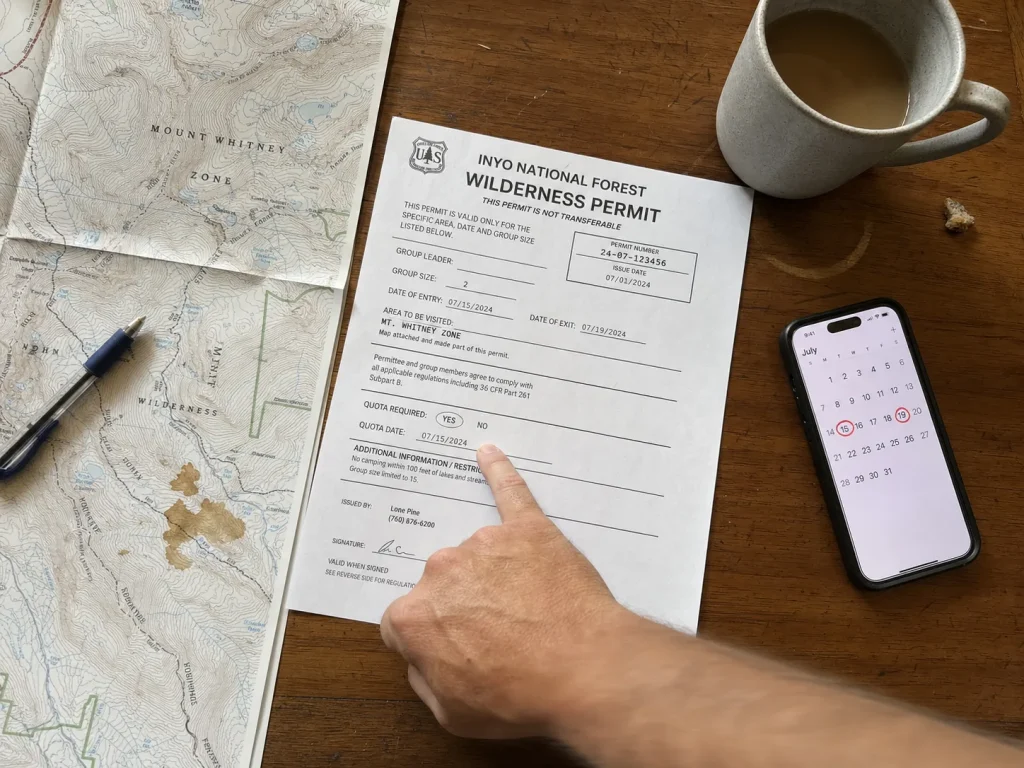
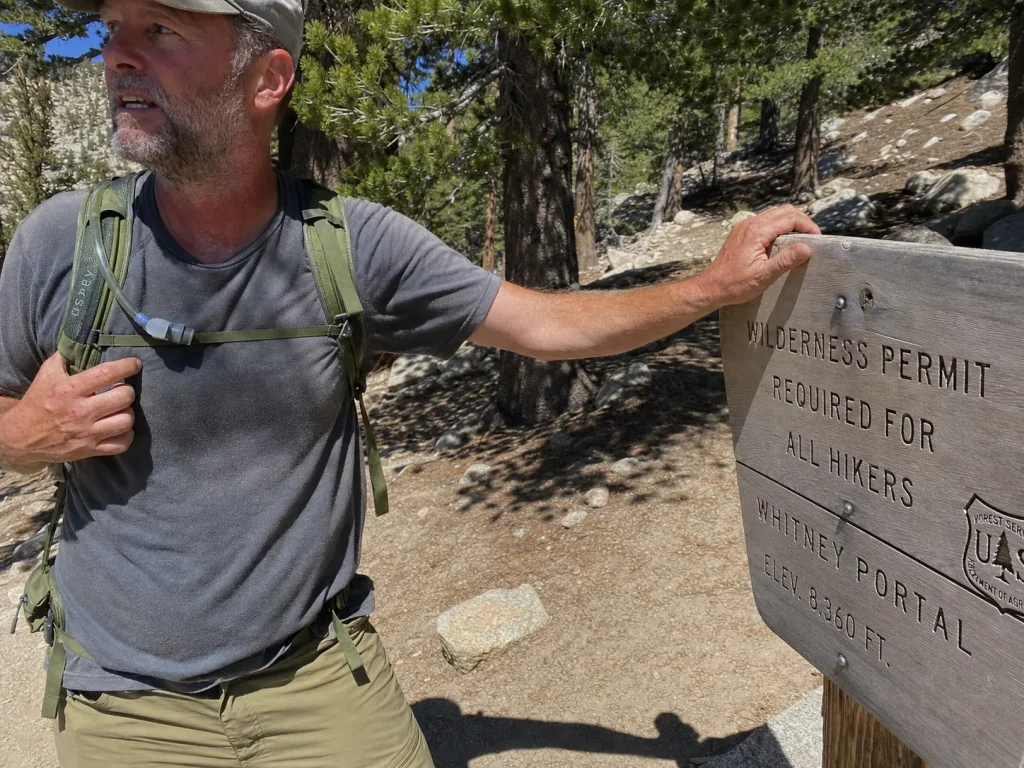
The permit is the first place people fail Mount Whitney, months before they ever lace up. The Whitney Zone is a quota-controlled wilderness area that requires a wilderness permit, and during quota season from May 1 to November 1, only 100 day-use and 60 overnight permits are issued per day. That scarcity is the entire reason a lottery exists. You can reserve your slot directly through Recreation.gov, which is also where the Whitney Zone quota rules are spelled out.
Most people treat the February lottery as their one and only shot. That’s mistake number two. The lottery does allocate the bulk of the quota, but the release is split: roughly 60 percent of permits go out about six months ahead, and the remaining 40 percent open up closer to the date, around two weeks prior. Missing the February draw is not the end of your season.
The real tactical edge is the cancellation game. Canceled permits return to the Recreation.gov calendar within about 24 hours, but the timing is unpredictable and the freed slots vanish within minutes. Sitting there manually refreshing the page is, in the words of hikers who’ve done it, exhausting and usually pointless. This is where a cancellation-alert service earns its keep, pinging you the moment a slot opens instead of forcing you to guess.
Don’t refresh Recreation.gov by hand for days. Set up a cancellation-alert service, pick a flexible range of dates instead of one, and stay ready to grab a weekday slot on short notice. Weekdays free up far more often than weekends.
Flexibility is the whole trick. If you can only go on one specific Saturday, your odds are grim. If you can take a Tuesday or Wednesday and jump on a canceled permit with a day or two of notice, you’ll get on the mountain far more often than the lottery-only crowd.
Which Whitney Route Is Actually Right for You
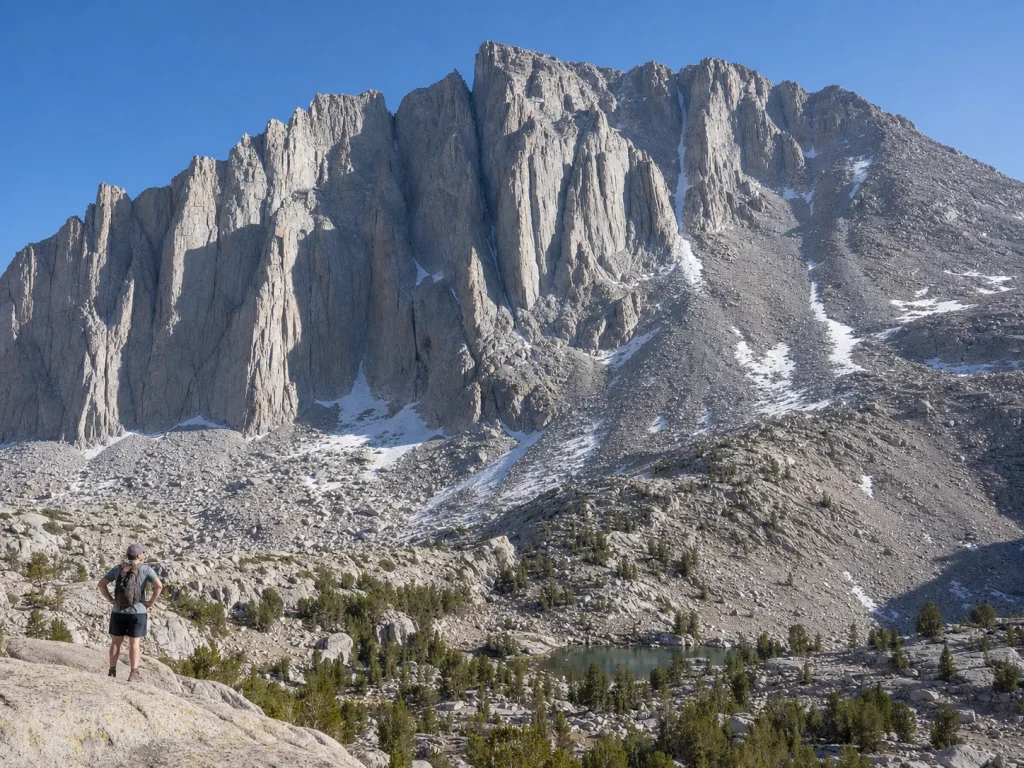
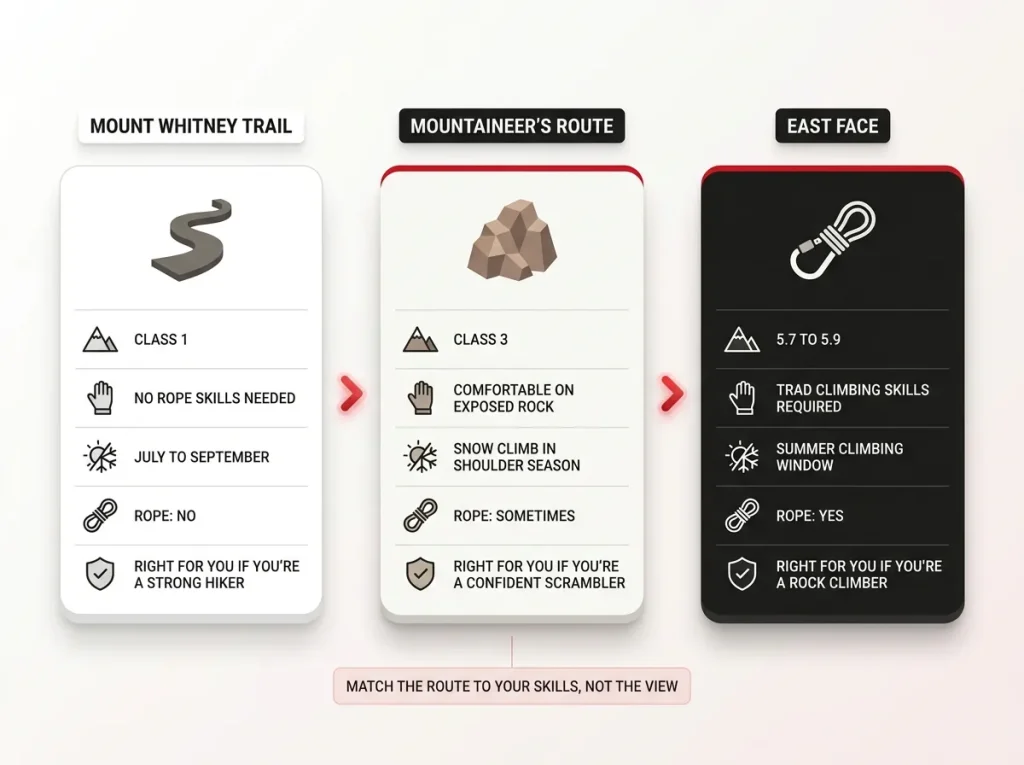
Everyone Googles “which route up Whitney” and gets handed a distance chart. That misses the real question, which isn’t about mileage at all. It’s about what kind of climber you actually are, because the mountain has a route for a highpoint-chasing hiker, a route for a scrambler, and a route for a rock climber, and they are not interchangeable. Picking a route by scenery or bragging rights instead of an honest look in the mirror is mistake number one, and it’s the one that gets people in over their heads.
Mount Whitney Trail, the Strong Hiker’s Route
This is the classic path, a Class 1 trail that anyone reading this guide most likely came for. It’s the 99-switchback grind up to Trail Crest and along the ridge to the summit. No ropes, no technical moves, just a very long, very high day of hiking. If you’re a fit hiker with no rope skills, this is your route, and it’s the one this guide covers in depth. It demands endurance, altitude tolerance, and discipline, not climbing technique.
Mountaineer’s Route, the Scrambler’s Step-Up
The Mountaineer’s Route is a Class 3 scramble that becomes a snow-and-ice climb in the shoulder seasons. It’s shorter and steeper than the trail, and it’s the right call for people who are comfortable moving over exposed rock without a rope. The catch is the “Class 3” label, which reads harmless on a chart and hides a real consequence trap when snow fills the chute. If you want the full picture, the honest breakdown of the Mountaineer’s Route and its Class 3 trap is a required read before you commit to it, especially early in the season.
East Face and the Technical Lines, for Rock Climbers Only
The East Face and East Buttress are real trad rock climbs in the 5.7 to 5.9 range, and they belong to climbers with a rack and the skills to use it. If you’re a rock climber eyeing Whitney as a climb rather than a hike, that’s a different objective entirely, and the reasons the East Face isn’t really the 5.7 the grade suggests are worth understanding before you rope up. For everyone else, the walk-up is the move, and there’s no shame in it. The same walk-up-myth trips people on plenty of non-technical peaks, where an easy grade still turns back strong but unprepared hikers.
Best Season and the Snow Problem Nobody Plans For
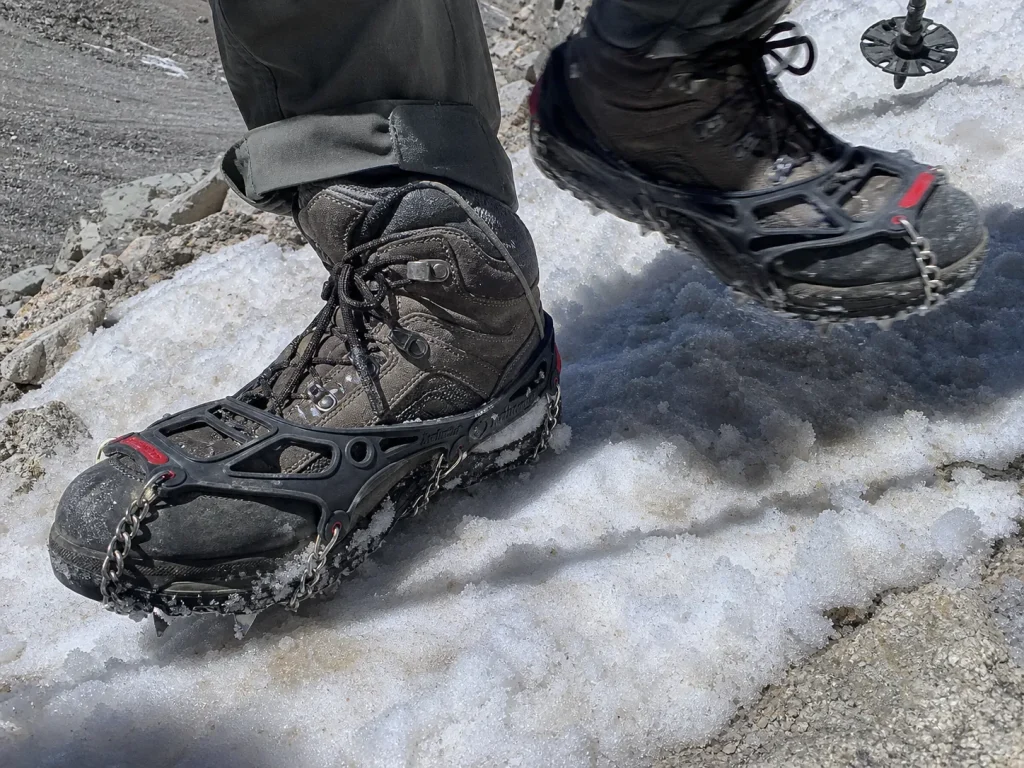
The permit says the season runs May to November, but the mountain you get in June is a completely different animal than the one you get in August. That gap catches people who show up in trail runners expecting bare, dry switchbacks and instead find a firm snow slope tilting toward a long slide.
The prime window is July through September. Conditions are at their most consolidated, snow is minimal or gone on the main trail, and the footing is what most guidebook photos show. The tradeoff in summer is the afternoon thunderstorm, which builds fast above treeline and is the single best argument for an early start and an early turnaround.
Outside that window, and in big snow years even inside it, the story changes. Early season leaves the switchbacks and the Mountaineer’s Route chute under snow, and suddenly traction and self-arrest skills stop being optional. For firm morning snow patches on the switchbacks, a set of Kahtoola MICROspikes is the standard answer, giving you bite on consolidated snow without the weight and commitment of full crampons. When the snow gets steeper or harder than that, you’ve crossed into ice-axe and mountaineering territory, and you want an ice axe you actually know how to use rather than one strapped to your pack for looks.
That distinction matters because self-arrest is a skill you practice before you need it, on a safe slope, not something you improvise on a firm traverse with a runout below you. Treating “permit season” as “hikeable season” and getting caught on a hard snow slope with nothing but spikes is a fast way to turn a hike into a rescue.
Training and Acclimatization That Actually Works
You can be gym-fit and still get crushed at 13,000 feet. The mistake here isn’t skipping leg day, it’s arriving at the Portal without ever having slept up high. Fitness gets you up the trail; acclimatization decides whether you keep climbing or get turned back once the air thins out.
Training the right way
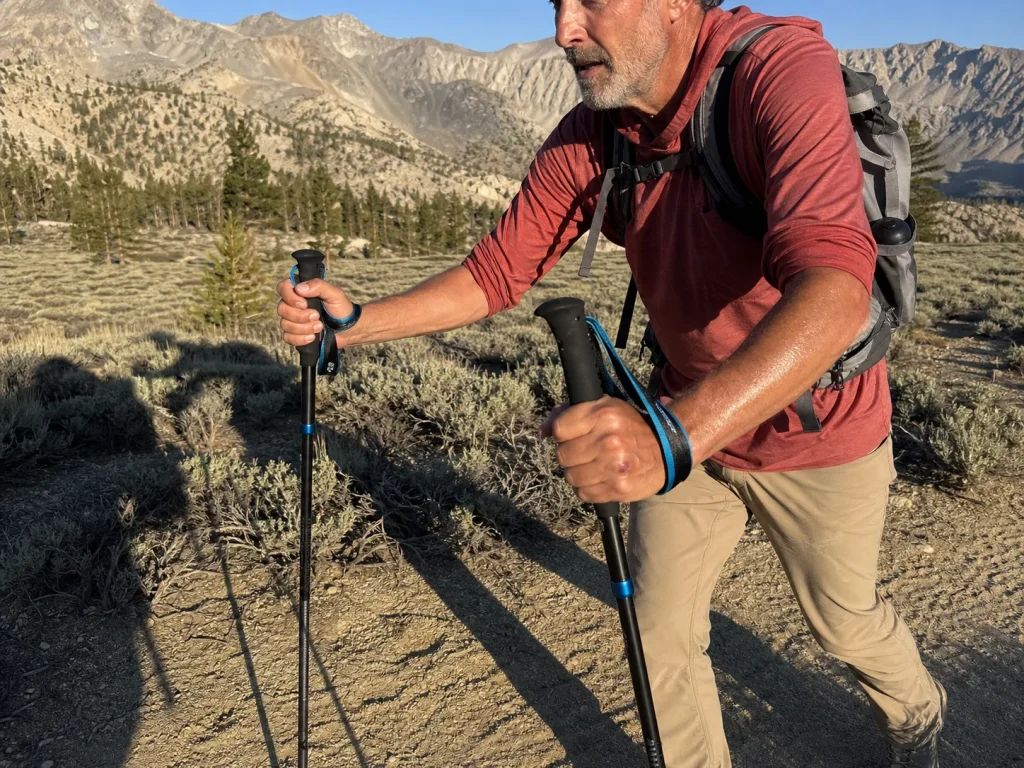
Train the actual demand, not a proxy for it. Long back-to-back days of pack training under real elevation gain prepare you far better than flat cardio or a treadmill at incline. You’re rehearsing a specific event: many hours of continuous uphill under weight, followed by an even longer descent that quietly wrecks unprepared knees. Speaking of that descent, a pair of Black Diamond Distance Z trekking poles folds down small enough to stash on the way up and saves your knees over 6,600 feet of downhill. Poles are a training-day habit, not a summit-day afterthought.
The acclimatization schedule that prevents the Trail Crest turnaround
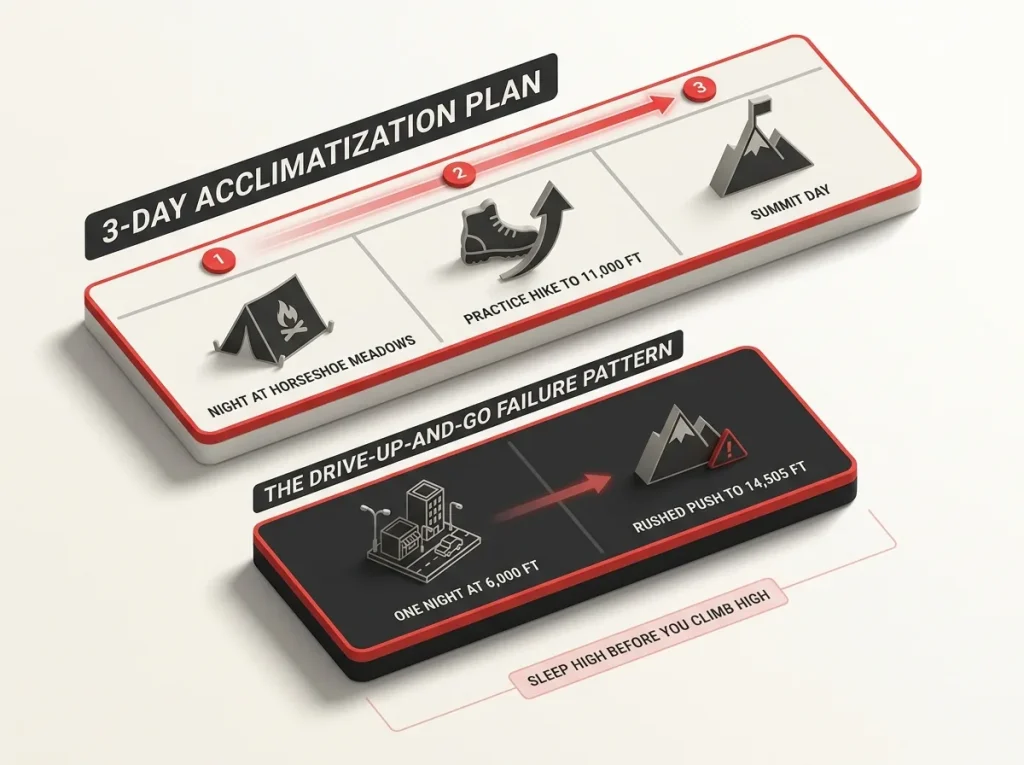
This is the part most people under-do, and it’s the difference between a summit and a sick, miserable retreat. The goal follows the old climb high, sleep low rule: sleep higher than home before your attempt. Camping at Horseshoe Meadows or Whitney Portal, both around 10,000 feet, does far more for your acclimatization than sleeping in Lone Pine town at 6,000 feet the night before. The same altitude math that turns back roughly two of every three climbers on Aconcagua is at work on Whitney, just at a scale people underestimate because it’s “only” a day hike.
Sleep high, but don’t trade a full night’s rest for it. Veterans on the Portal boards say the same thing: on a day hike you’re only at the high point for a couple of hours, so what matters is where you slept, not where you stood. A night at 10,000 feet beats a restless one spent chasing marginal altitude gains.
The failure pattern shows up over and over on the message boards: a hiker spends one night at 6,000 feet, does a single practice hike, then tries to push to 14,505 feet in the same trip, and their system simply refuses. The classic version is someone turning back within yards of Trail Crest, sick with altitude symptoms after a rushed acclimatization schedule. They were fit. They just didn’t give their acclimatization time to catch up.
Why Fit People Still Fail the Day Hike
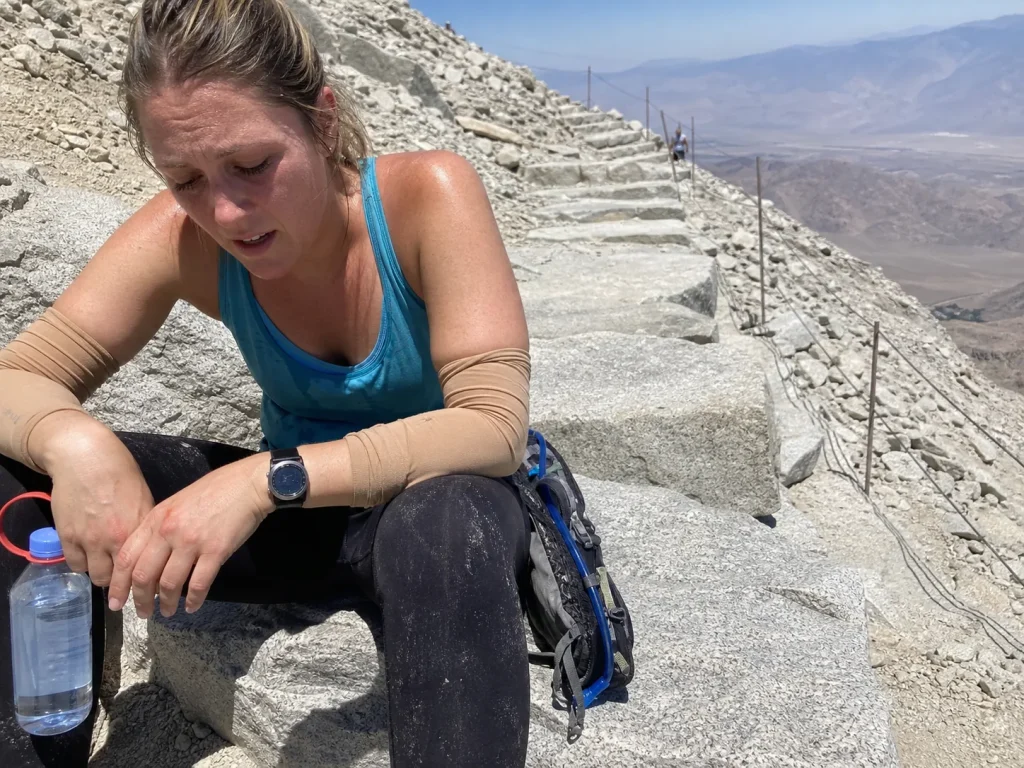
Roughly 30,000 people attempt the Whitney day hike each year, and only about 10,000 summit. Two out of three turning back is not a fringe outcome, it’s the median. And the people who turn back are usually strong hikers who did everything except manage their pace and the clock. This is the section that reframes Whitney from a fitness test into a discipline test, which is exactly why competitors quote the success rate but never explain it.
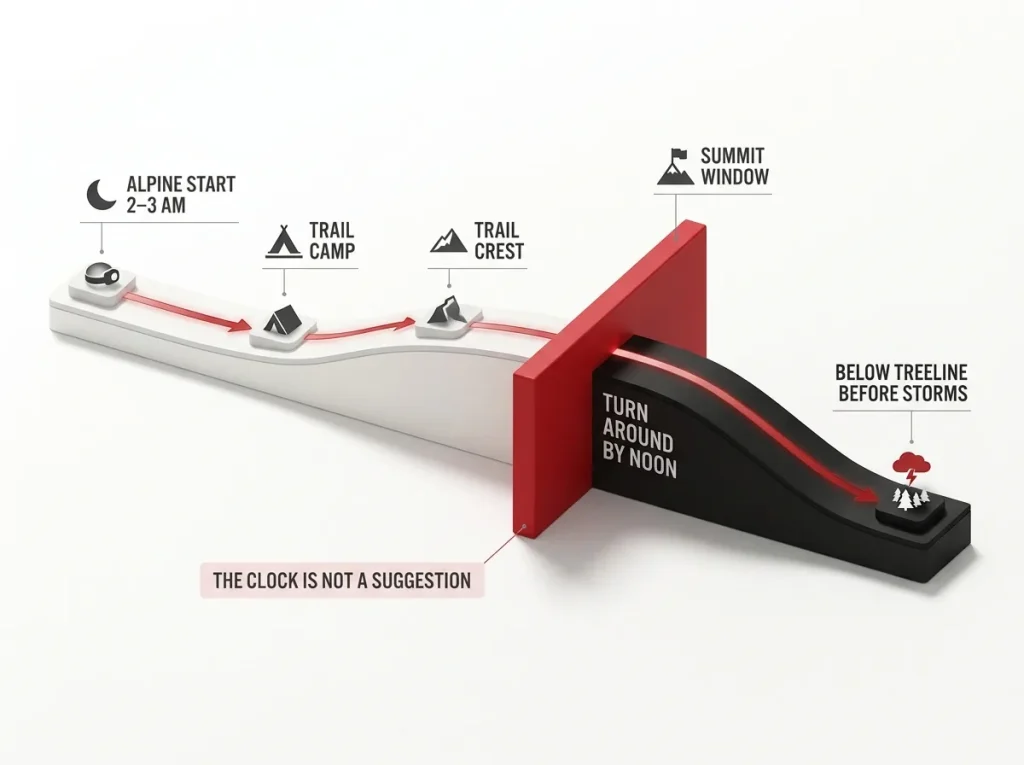
Start with the clock, because it’s non-negotiable. The turnaround rule on Whitney is a number, not a feeling: be at or very near the summit by 11 AM to noon, or turn around, no matter how close it looks. Afternoon storms and the long descent both need daylight, and the summit that’s “right there” at 1 PM has ended more trips than any snow patch. Committing to that number in advance, and honoring it when the moment comes, is the same skill as a pre-committed turnaround time you actually enforce on any climb.
Then there’s pace and fuel, the two quiet killers. Hiking too fast early and getting winded is the most common error on the mountain, and it’s usually driven by that “I feel slow” panic we covered earlier. Right behind it are overpacked “what-if” daypacks that punish you all day, and under-eating because altitude suppresses your appetite until you bonk on the switchbacks with nothing in the tank.
Eat and rest on a schedule, not on how you feel. Altitude lies to your appetite. Take a real ten-minute sit-down every hour and force in calories whether you want them or not. The old guide line fits: why stand when you can sit, why sit when you can lie down. Conserving energy is the actual skill here.
The fix is boring and it works: a hard rest cadence every hour, disciplined eating whether you’re hungry or not, and a turnaround time you set at the trailhead and refuse to renegotiate at 12,500 feet when your judgment is already fogged by altitude.
The Mental Game of the Exposure
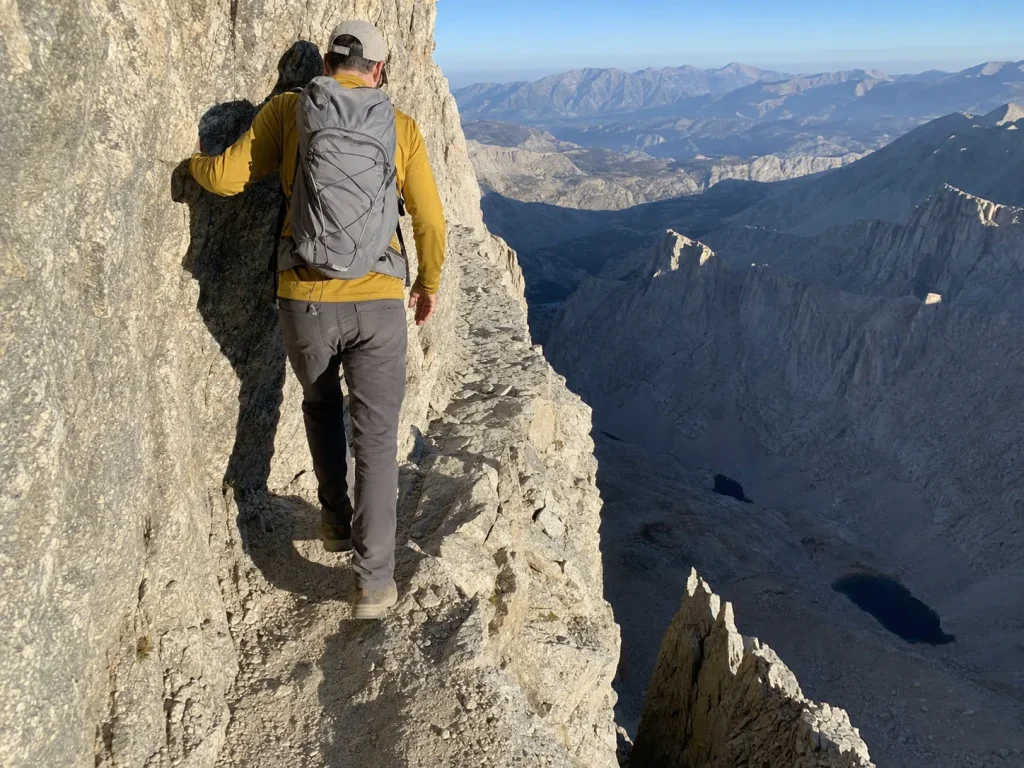
Almost everyone fixates on the wrong scary part. Ask a first-timer what worries them and they’ll say “the Windows,” the rock notches near the summit block that photograph like something out of a nightmare. The stretch that actually rattles people gets almost no warning in the standard guides.
The real psychological test comes just past Trail Crest, where the trail is cut straight into a cliff face heading toward the John Muir Trail junction. You’ve got solid rock rising on one side and a big, uninterrupted drop falling away on the other, and the tread is narrow. Experienced Whitney hikers will tell you this section, not the Windows, is where the exposure gets into your head. The Windows look terrifying in photos but feel far more secure underfoot than their reputation suggests.
Managing that kind of exposure is a trainable skill, not a character flaw. Slow down and shorten your steps, keep your eyes on the trail and your next foot placement rather than down the drop, and keep contact with the rock wall where it helps. What changes the calculus completely is snow or ice on this cut, which turns a mental challenge into a genuine hazard where a slip has real consequences. This is the same low-grade-but-exposed problem climbers meet on classic mountain routes, where the moves aren’t hard but the air under your heels demands respect.
The point isn’t to scare you off. It’s to make sure you brace for the right section. People who mentally prepare for the Windows and get blindsided by the Trail Crest cut are the ones who freeze at the worst possible moment.
Staying Safe Up High
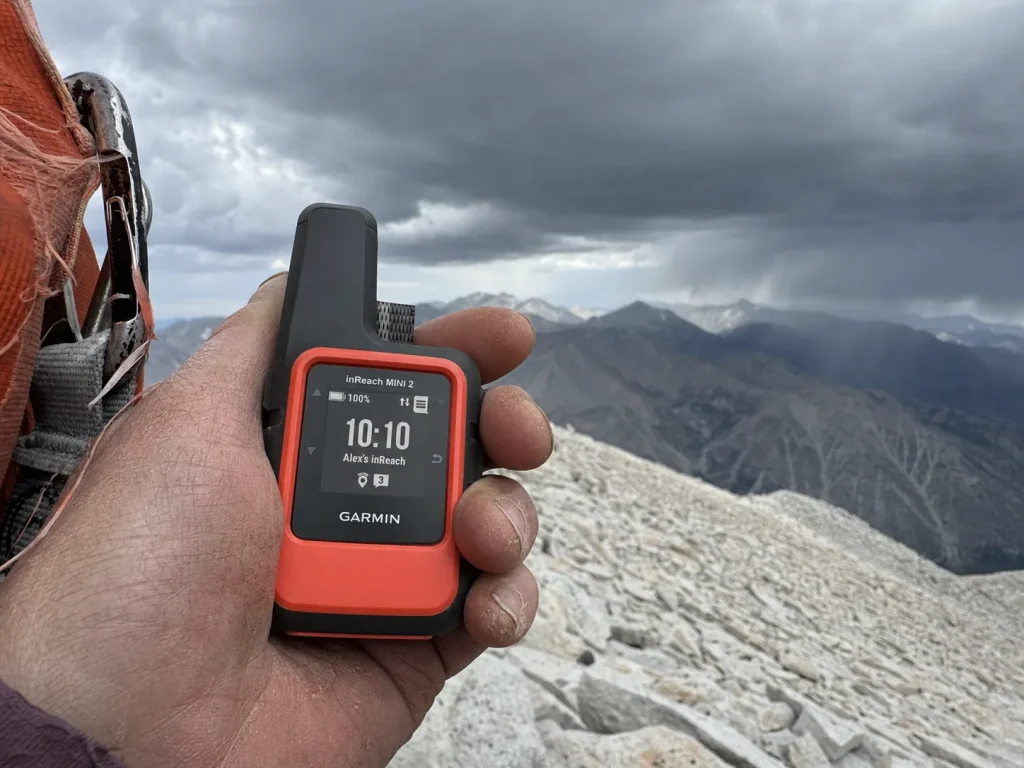
The part that hurts people on Whitney isn’t the summit block. It’s altitude sickness, an afternoon lightning cell above treeline, and being out of cell range when something goes sideways. None of these are exotic, and all of them are manageable if you plan for them.
Altitude sickness is close to a coin-flip, not an edge case. One experienced-hiker estimate puts it plainly: a third or more of unacclimatized people heading up Whitney will develop some form of acute mountain sickness. Know the early symptoms, the headache and nausea and that hollow, wrung-out feeling, and follow the one rule that matters: if it’s getting worse, you go down. Pushing past early symptoms because the summit is “right there” is the mistake pattern that turns AMS into an emergency.
Lightning is the other serious hazard, and it’s the reason the turnaround clock exists in the first place. The afternoon storm window in July means standing on an exposed summit ridge at 2 PM is exactly the scenario to avoid. Being off the high ground before the cells build is a scheduling decision you make at 3 AM, not a gamble you take at noon.
For the moments when something goes genuinely wrong, there’s no cell signal in the Whitney Zone, which is why a satellite communicator like the Garmin inReach Mini 2 is the safety net that turns a bad situation into a rescued one, with two-way messaging and an SOS. Honest take: it’s a premium-priced device, and plenty of people rent or borrow one for a single trip rather than buying outright. If you’re only doing Whitney once, that’s a smart way to get the safety without the sticker. Early-season parties dealing with the snow traverses we covered earlier should treat their communication and self-arrest skills as seriously as they treat the firm-morning-snow gate you meet on Mount Shasta, where the same conditions decide who’s ready and who isn’t.
Camping and Your Itinerary Options
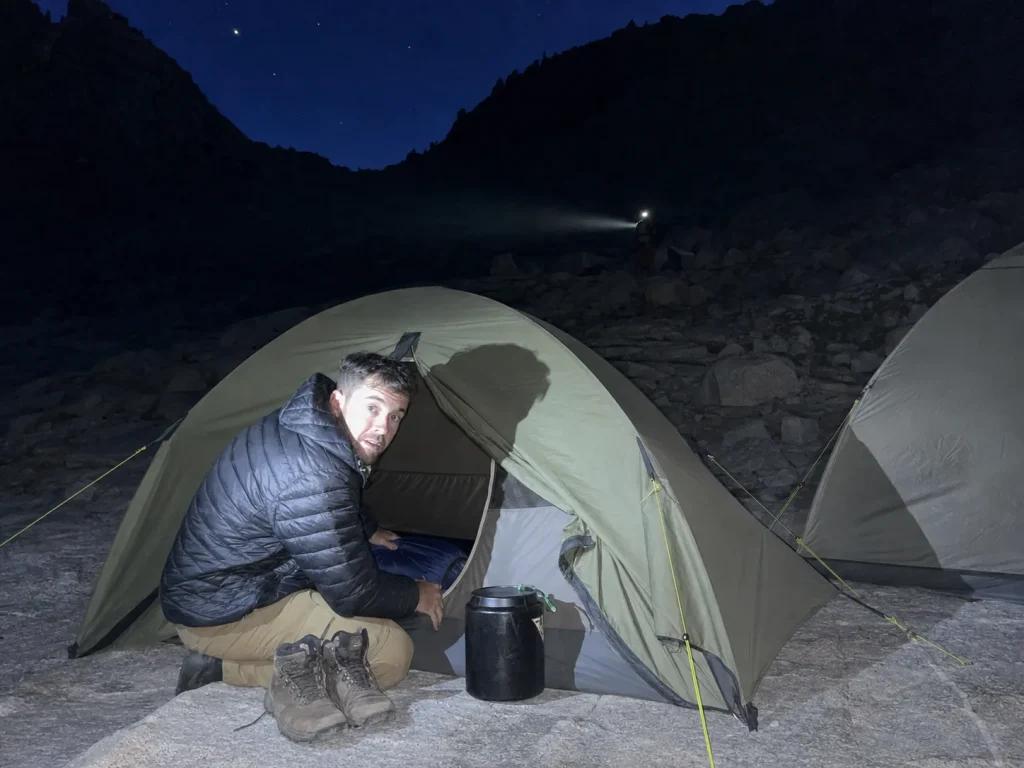
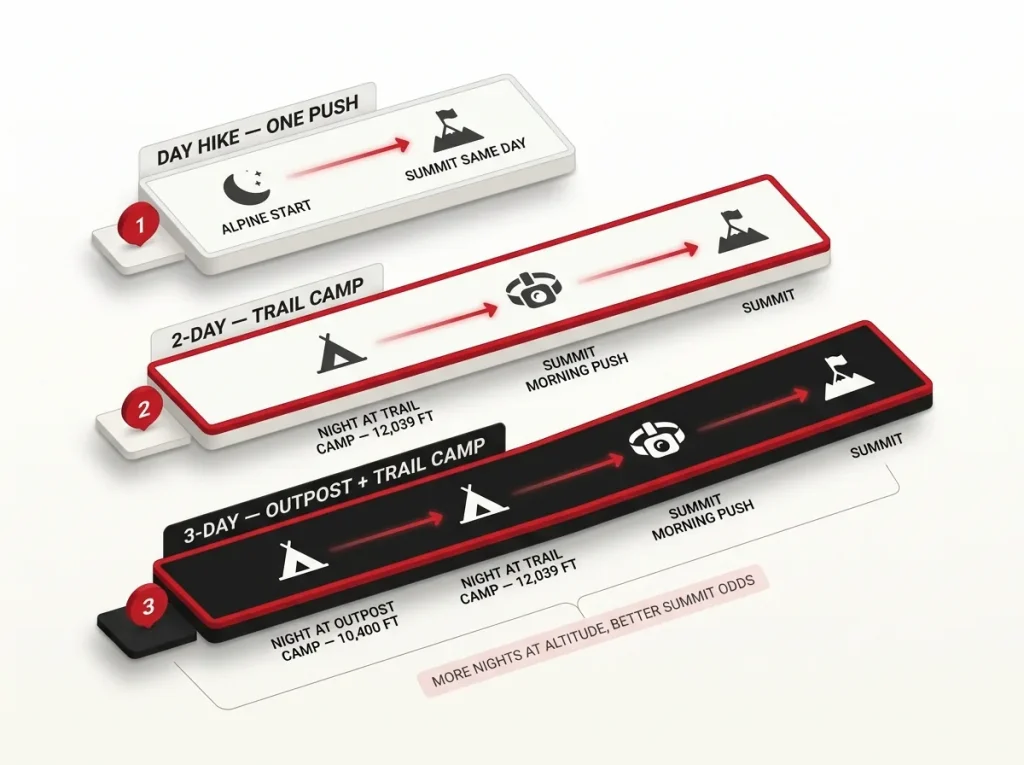
The day-hike-versus-overnight decision is really an odds decision in disguise. Spreading Whitney over two days trades a heavier pack for a much better shot at the summit, mostly because you sleep higher and hit summit day with more in the tank.
The two staging camps are worth knowing by name. Outpost Camp sits at mile 3.8 around 10,400 feet, and Trail Camp at mile 6 around 12,039 feet, right at the base of the 99 switchbacks. Trail Camp is the last flat ground before the big switchback climb, which makes it the standard launch pad for a summit morning.
The one-day push
The single-day effort is a 10 to 14 hour march for most hikers, starting with an alpine start somewhere between midnight and 3 AM to bank enough daylight for the round trip. It’s the simpler logistics, only a day-use permit, no camping gear, but it carries that roughly 33 percent success rate because you’re doing the whole thing in one go with minimal acclimatization. Choosing the day hike specifically to dodge the overnight permit hassle, when your fitness and altitude tolerance actually point to a two-day trip, is a quiet way to stack the odds against yourself.
The two-to-three day backpack
Spreading the climb over two or three days, with a night at Trail Camp or a first night at Outpost Camp, lets you adjust to the altitude and generally leaves people with far better summit-morning energy. Most hikers who camp at 12,000 feet report a real difference over those who drive up and push through. The cost is a heavier load, the overnight permit, and a required bear canister, plus you’ll want water sources sorted at Trail Camp and Consultation Lake. It’s the same summer-window and guided-versus-independent calculus that plays out on Rainier in July, where a little more time on the mountain buys a lot more summit odds.
The Gear That Matters (and What’s Overhyped)
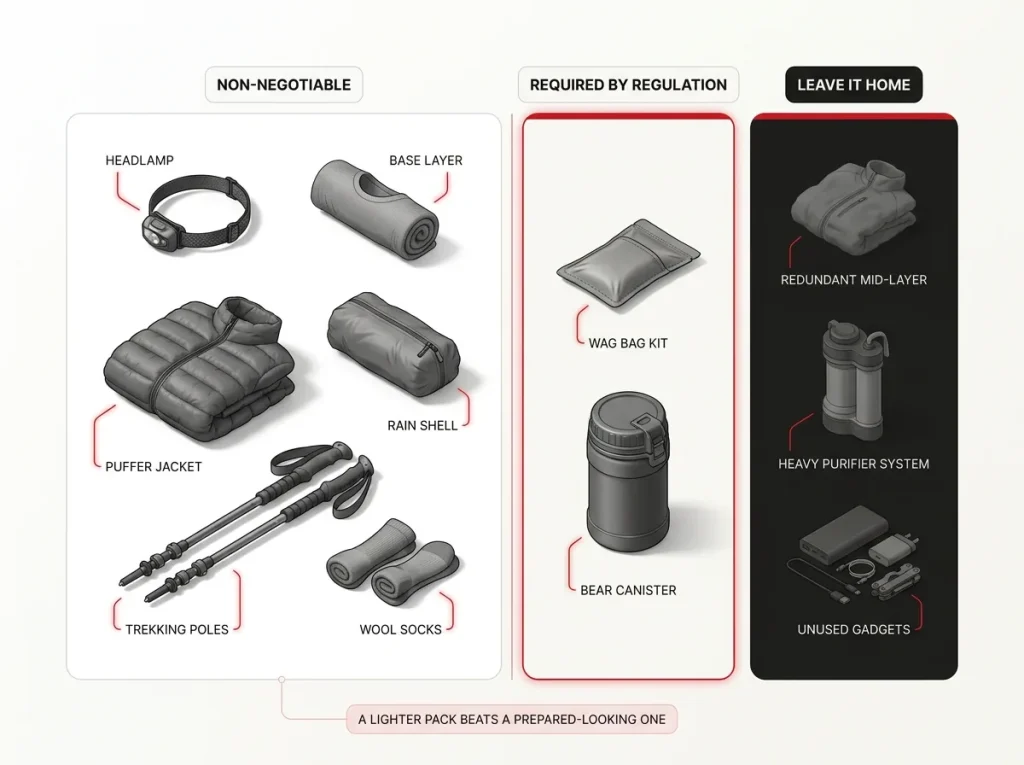
Every Whitney gear list reads like a shopping spree, and that’s the problem. Most of what ends a day on this mountain isn’t missing gear, it’s an overpacked bag full of “what-if” items that punish you for 22 miles. The honest kit is lighter than retail fear wants you to believe, closer to nine pounds than the loadout some lists push. Here’s what earns its weight and what to leave in the car.
Non-negotiable gear
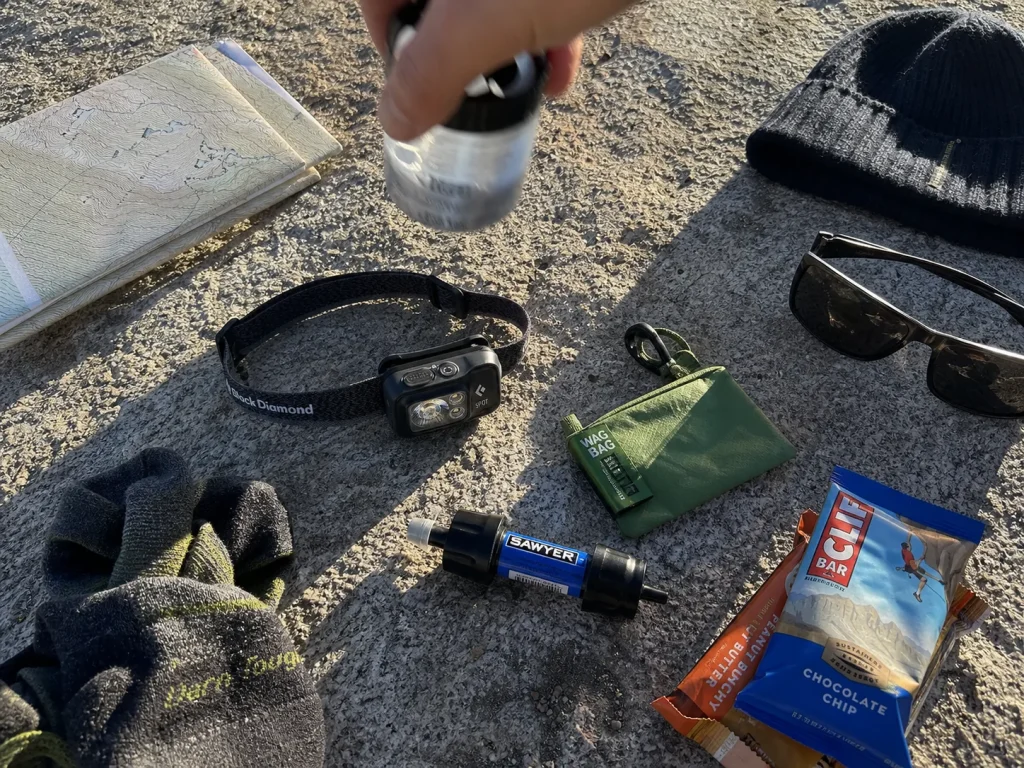
A few things genuinely aren’t optional. You’re starting in full dark, so a headlamp is mandatory, and a Black Diamond Spot 400 headlamp covers route-finding on the switchbacks at 400 lumens without paying for a 1,000-lumen model you’ll never need on a trail. Add a solid navigation setup, a layering system of a base layer, a mid layer or puffer jacket, and a rain shell for the big temperature swing between a pre-dawn start and a windy summit ridge, and traction in season. Over 20-plus miles, blister prevention beats boot brand for most first-timers, and the Darn Tough Hiker Boot Full Cushion socks (men’s or women’s) hold up because merino regulates temperature and resists the hot spots that end days early.
Required by regulation
Two items aren’t suggestions, they’re rules. WAG bag use is mandatory above Lone Pine Lake, and a Cleanwaste WAG Bag kit is the standard-issue answer: you pack your waste in, you pack it out, full stop. For overnights, a bear canister is required. Both requirements come straight from the Inyo National Forest’s human-waste and bear-canister rules, and they’re the same Leave No Trace pack-it-out ethic that keeps fragile climbing areas open and accessible. Skipping them isn’t a shortcut, it’s how zones get restricted.
What’s Overhyped and Worth Trimming
Water treatment matters, but a simple lightweight water filter handles the creek and lake sources fine, whether you drink from bottles or a hydration bladder; you don’t need a heavy purifier system for a Sierra day hike. Beyond that, the honest advice is subtractive. Skip the redundant premium duplicates, the third mid-layer, the gadget you’ll never pull out. A lighter pack you can actually carry all day beats a “prepared” one that grinds you down before Trail Camp.
The Bottom Line on Mount Whitney
Mount Whitney rewards planning far more than raw fitness. Pick the route that matches who you actually are, not the one that photographs best. Respect the clock and the altitude by acclimatizing properly and turning around on time, because the mountain fails fit people through discipline, not strength. And carry the gear that earns its weight while leaving the rest at home.
Do the boring work first. Sort your permit strategy and your acclimatization nights before you think about summit day, because that’s where Whitney is really won or lost. When you know which of the three routes fits you, dig into the dedicated guide for that line and start building the plan that gets you to the top and, more importantly, back down.
Frequently Asked Questions
01How hard is it to climb Mount Whitney?
Strenuous but non-technical on the main trail: about 22 miles and 6,600 feet of gain at altitude, with no ropes needed. The real difficulty is endurance, thin air, and pacing, which is why roughly two of three day-hikers turn back.
02Do you need technical climbing experience to summit Mount Whitney?
No for the Mount Whitney Trail, which is a Class 1 walk-up. Yes for the Mountaineer’s Route in snow, which is Class 3 and calls for self-arrest skills, and definitely for the East Face, which is real rock climbing.
03How do you get a permit to climb Mount Whitney?
Through the Recreation.gov Whitney Zone quota, with the main lottery in February. About 40 percent of permits plus cancellations release closer to the date, so missing the lottery still leaves the cancellation game as a strong backup.
04What is the success rate on the Mount Whitney day hike?
Roughly one in three day-hikers summits, about 10,000 of some 30,000 attempts a year. Pacing and turnaround discipline, not fitness, decide most of the failures, which is why strong hikers turn back so often.
05Can you climb Mount Whitney in one day?
Yes, and most people do: a 10 to 14 hour single push with an alpine start between midnight and 3 AM. An overnight at Trail Camp improves acclimatization and summit odds if you can secure the overnight permit.
Safety Notice: Rock climbing and mountaineering are inherently high-risk
activities that can involve physical trauma or fatal incidents. The information on Rock Climbing Realms is for
educational and informational purposes only. Techniques and advice presented here are not a substitute
for professional, hands-on instruction. Conditions and risks vary by location. Always seek guidance
from a qualified instructor before attempting new techniques. By using this website, you agree that you
are solely responsible for your own safety. Any reliance you place on this information is strictly
at your own risk, and you assume all liability for your actions. Rock Climbing Realms and its authors
will not be held liable for any harm, damage, or loss sustained in connection with the use of this information.
Affiliate Disclosure: We are a participant in the Amazon Services LLC Associates Program, an
affiliate advertising program designed to provide a means for us to earn advertising fees by advertising and linking
to Amazon.com. As an Amazon Associate, we earn from qualifying purchases. We are also an official affiliate partner
of Black Diamond Equipment via the AvantLink network. If you click on a Black Diamond affiliate link and make a
purchase, we may earn a commission at no additional cost to you. We also participate in other affiliate programs.
Additional terms are found in the terms of service.