
In this article
Look at a calendar and July almost makes the decision for you. It brings the most consolidated snowpack of the year, the most stable weather, and the highest summit success rates on Mount Rainier, which is exactly why it is the busiest month on the mountain. But peak season is a trade, not a free pass. You swap May’s storm lottery for two things that never make the brochure: a crowded boot pack and aluminum ladders laid flat over open crevasses. Here is what actually changes on the Disappointment Cleaver route in July, section by section, so you know what you are signing up for before you pay the fee.
Is July Actually a Good Month to Climb Rainier?
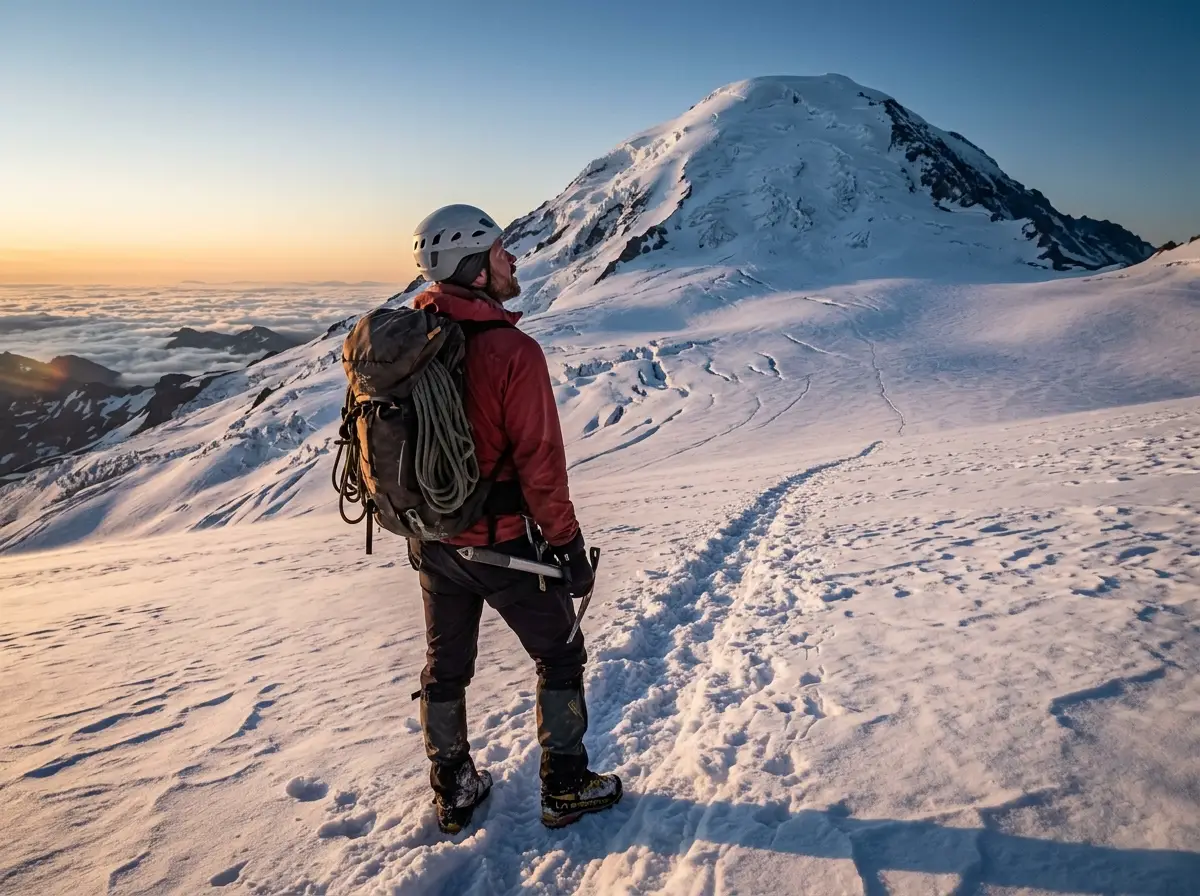
Short answer: yes, and the numbers back it up. Ask anyone who has climbed the mountain more than once and they will point you at June and July, when the snowpack is consolidated, the weather windows open up, and the season posts its best summit rates. If you only get one shot at the mountain, this is the window you want.
Why June and July Win on Snow and Weather
By July the winter snow has settled into firm, supportable travel, which is what you want under crampons on a glacier. The storm cycles that make May a gamble have mostly backed off, so your odds of drawing a clear summit window go up. That combination of firm snow and calmer weather is the whole reason guide services stack their heaviest calendars into these weeks.
What “Peak Season” Actually Costs You
Here is the fine print. The same warmth that consolidates the snowpack keeps the glacial melt running, so as summer wears on the crevasses widen and the route-finding gets more involved through the late season of August and September. July sits in the pocket between the early season storm risk of May and that late-summer widening, the real shoulder season trade. It hands you a different bill: crowds and the ladder crossings that come with a mid-season route. If you are weighing the broader summer picture, how Rainier’s summer conditions stack up against the fitness demands is worth reading alongside this month-specific angle.
Where Rainier Fits Among the Big Objectives
Rainier is a proving ground, not a walk-up. Climbers use it to build glacier-travel resumes before bigger trips, which is part of why it stays busy and why it earns its place among the major mountain routes and peaks worth training toward. If you want the year-round picture beyond the July angle, the full Disappointment Cleaver route breakdown covers the general case; this guide zooms in on what the month of July changes.
What the Route Really Looks Like in July
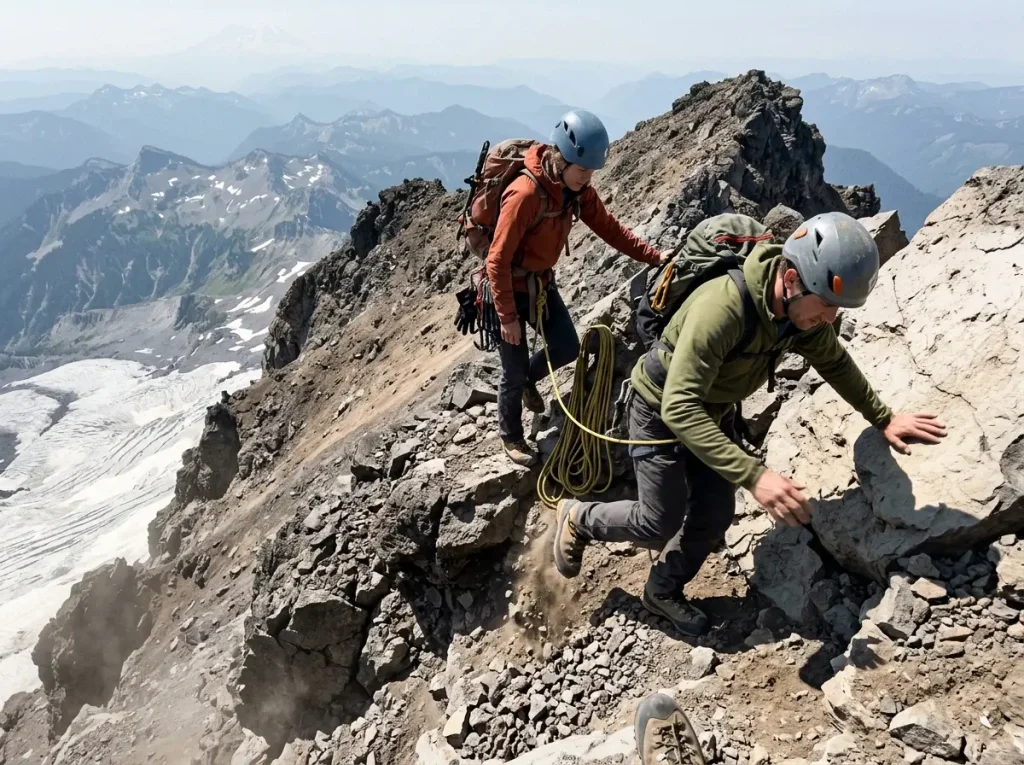
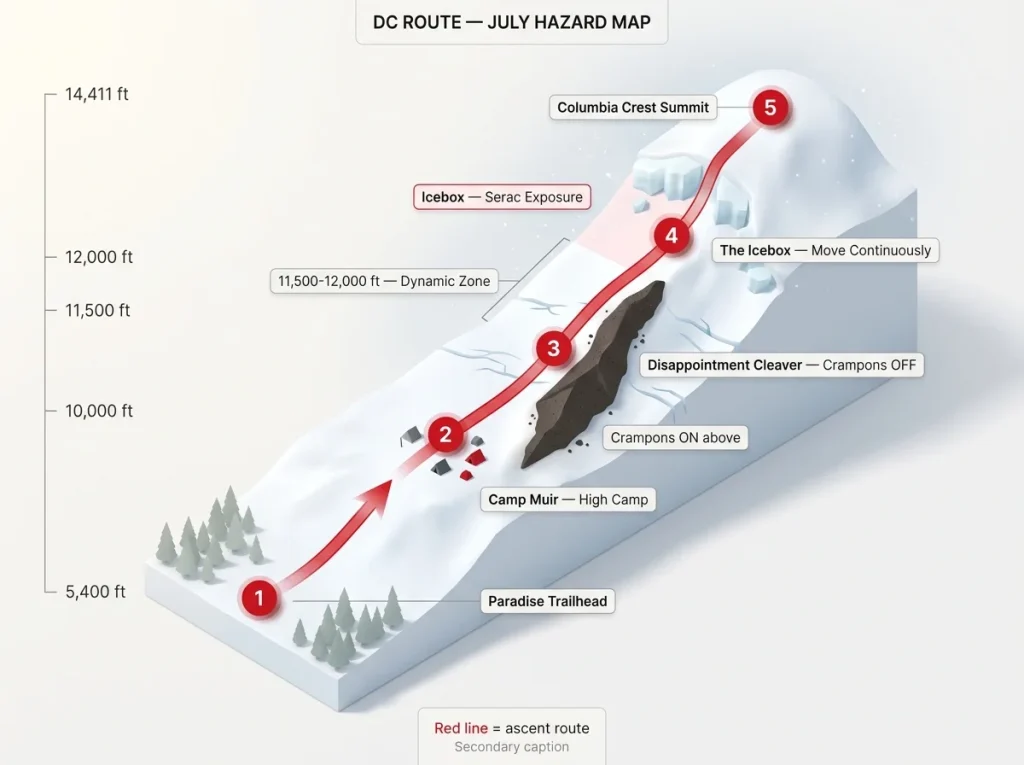
Standing at Camp Muir the evening before your push, you are looking up at a route that will not look the same next week. That is not a figure of speech on Rainier in July. From Muir the standard line crosses the Cowlitz Glacier, climbs through Cathedral Gap, and traverses Ingraham Flats before it reaches the Cleaver, with the true summit at Columbia Crest still hours above. The band between roughly 11,500 and 12,000 feet is the most dynamic stretch of the Disappointment Cleaver route, where snow bridges collapse, ladders get relocated, and the boot pack up the Cleaver itself can reroute overnight. Cross-check the conditions against more than one source, from the climbing rangers to the NOAA and University of Washington mountain forecasts, because route beta from even a few days ago is a starting point, not gospel.
Ask the ranger at registration what today’s route looks like, not an old blog post or a friend’s photos from last week. Ladder positions and the Cleaver boot pack can change overnight, and the rangers see it every morning.
The Cleaver Goes Bare — Crampons On, Crampons Off
By early to mid-July the Cleaver itself is usually melted out, which means you scramble a rib of loose, dark volcanic rock without crampons through that stretch. You pull them off at the base and strap them back on at the top, and that transition is its own small hazard: loose blocks, rockfall from parties above, a steep drop to the glacier on one side, and a moat where the rock pulls away from the ice at the edges. Higher up, a bergschrund can open where the summit slopes separate from the glacier, one more feature that shifts as the month warms. Treating the Cleaver as “just a scramble” is how people get careless on the one section where a slip has real consequences. Cross-check current conditions against the climbing rangers’ own route-conditions blog before you commit to a date.
The Icebox and Why You Don’t Stop There
Above the Cleaver sits a section climbers call the “Icebox,” exposed to icefall and serac collapse overhead. It is the site of the mountain’s worst mountaineering accident, in 1981, when a group of eleven climbers was lost to an ice collapse there. Guides brief their teams to move through it continuously, without stopping for photos or a snack, and that instinct is worth borrowing whether or not you hire one. The move is simple: keep the rope team spacing tight and keep walking.
Why the Summit Push Starts at Midnight
That midnight-to-1 a.m. alpine start is not guide-service theater. It is a direct answer to the turnaround time math: leave early enough to tag the summit and get back down through the crevasse zone before the afternoon sun softens the snow bridges. The summit bid from Camp Muir covers more than 4,000 feet of vertical gain on thin air, so pace for the altitude and watch your team for signs of acute mountain sickness on the way up. Descending late is when a bridge that held firm at 3 a.m. quietly stops holding, and that effect is sharper in July’s heat than in the cooler months on either side. If you want a repeatable way to set and hold that clock, a field-tested turnaround protocol is worth reading before your climb, not after.
The Ladder Crossings Over the Crevasses
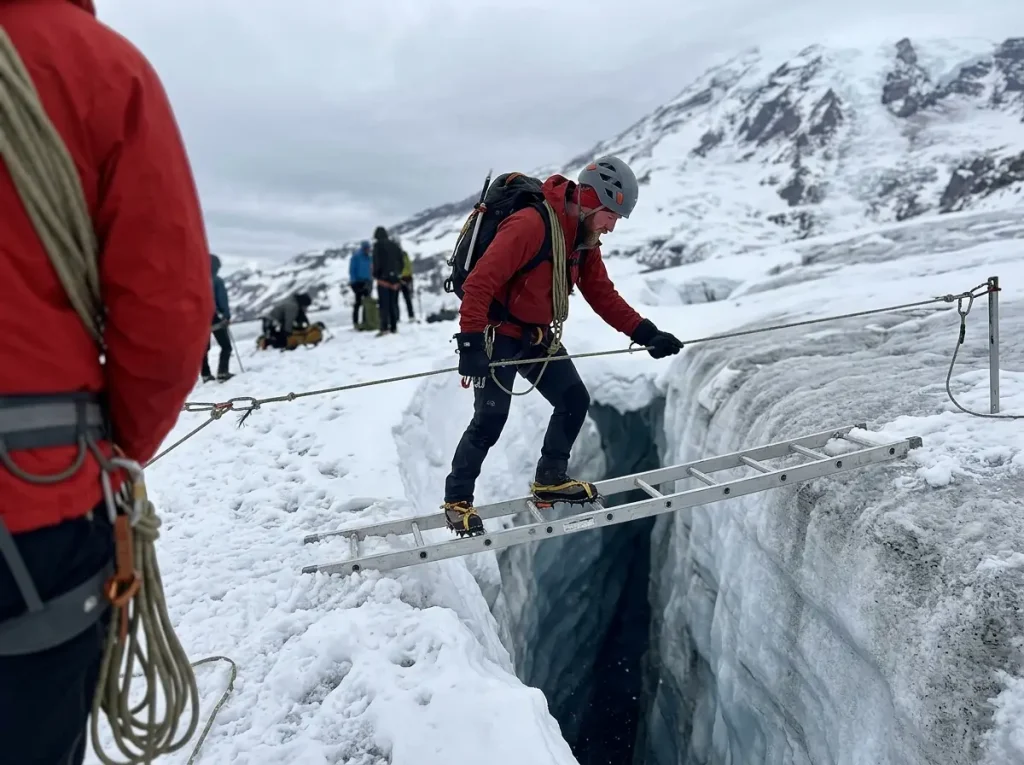
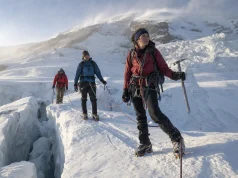
Here is the detail most seasonal guides skip. By July there are typically several ladders in place across crevasses on the route, and one well-known crossing near 13,100 feet spans a gap of five to six feet at roughly a 70-degree angle, with anchored handlines running alongside. This is not a metaphorical “watch your step.” You physically walk or crawl across an aluminum ladder laid over an open crevasse, clipped to a fixed line the whole way, with blue-black depth under the rungs.
What a July Ladder Crossing Actually Involves
The mechanics are straightforward and still get your attention. You clip your rope into the fixed handline, keep your weight low and centered, and move across the rungs one at a time while the ladder flexes underfoot. The near lip is usually soft crusted snow and the far lip firmer ice, with pickets biting the snow at each end to hold the handline. It goes fine thousands of times a season, and it still deserves your full focus every single time.
Why the Ladders Move Week to Week
The ladders are not fixed infrastructure. Rangers and guide services place and relocate them as the glacier shifts and bridges fail, which is why a photo from early July might show a crossing that no longer exists by late July. On the busy DC route that maintenance mostly happens because guide traffic keeps the line established, one more reason the crowded route is also the marked one. Do not assume last season’s crossing is this season’s crossing.
The Skills a Crossing Assumes You Already Have
A ladder crossing quietly assumes you can move confidently on a rope team, hold a solid self-arrest, and set up a basic crevasse rescue if it comes to that. If those skills are not automatic yet, that is a signal about how you should climb the mountain, not a detail to figure out at 13,000 feet. This is exactly the glacier-travel and crevasse-rescue skill set these crossings assume, and it is worth drilling at sea level before you need it on the ladder.
Disappointment Cleaver vs Emmons: Which Route in July?
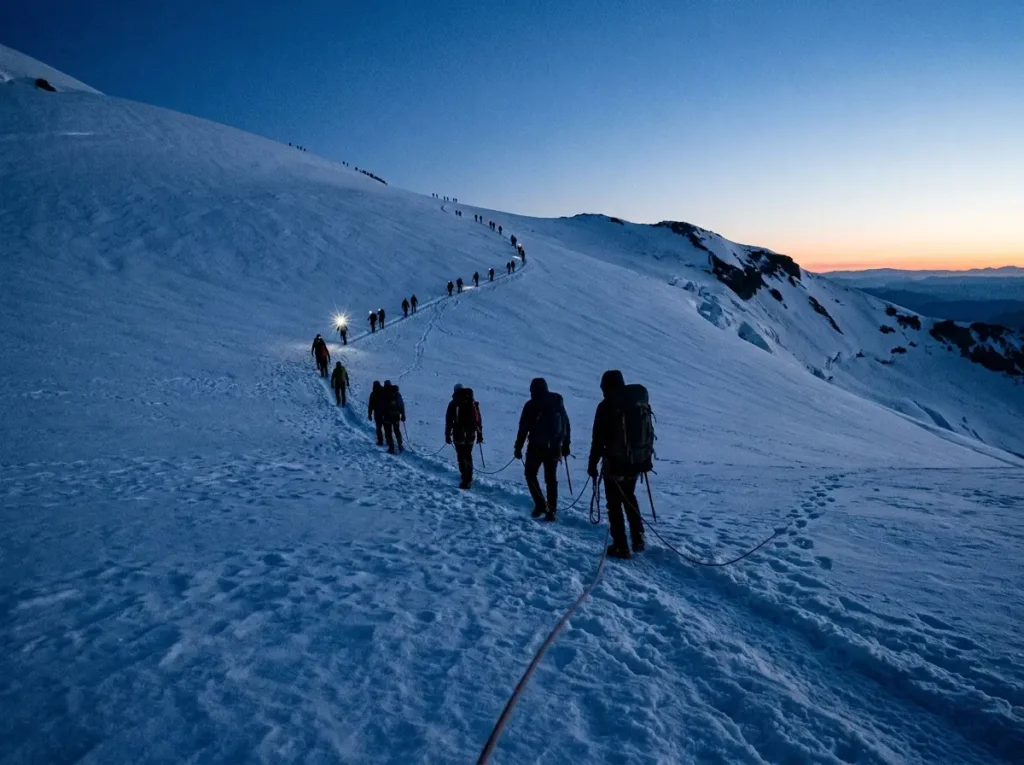
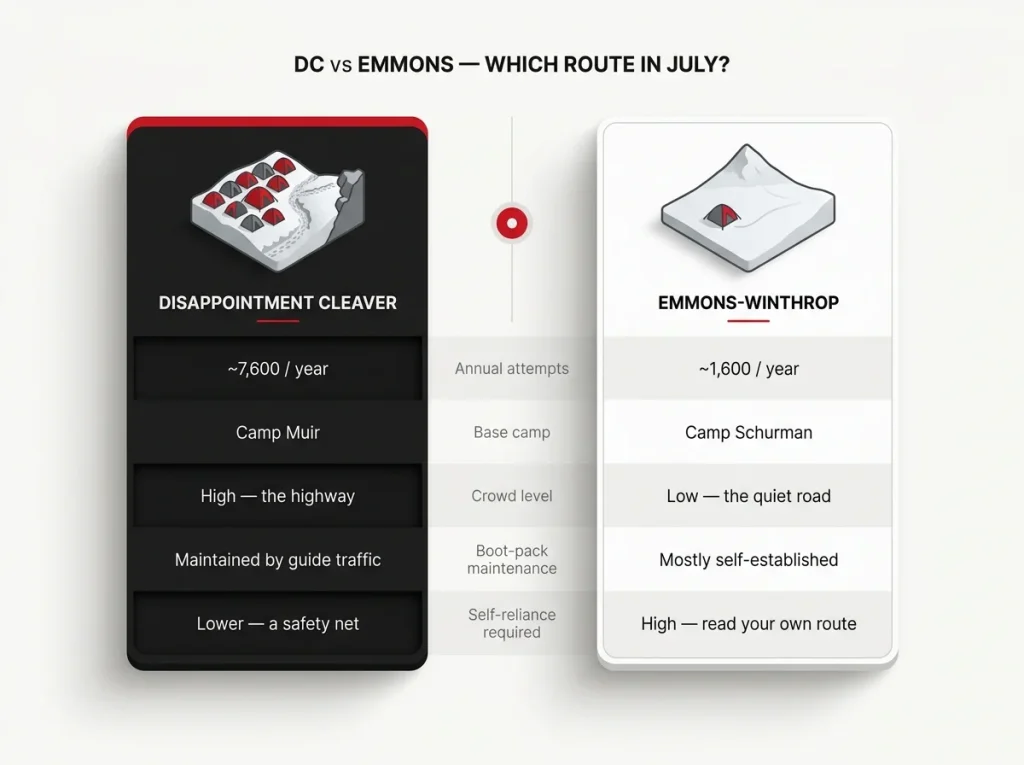
Rainier gives July climbers two standard doors, and they have different personalities. The Disappointment Cleaver route out of Camp Muir is the highway: heavily traveled, boot pack broken in, ladders maintained by the steady stream of guide teams. The Emmons-Winthrop route out of Camp Schurman is the quieter road, where you do more of your own route-finding and see far fewer headlamps ahead of you.
The DC Route: The Highway and Its Crowds
Camp Muir sees roughly 7,600 climbing attempts a year, by a wide margin the most popular way up the mountain. That traffic cuts both ways. You get a set track, established ladder crossings, and other teams within shouting distance if something goes sideways, but you also get queues at the crossings and competition for camp slots in peak July. The crowds are the flip side of the very reframe this whole month is built on.
The Emmons-Winthrop Alternative
Camp Schurman sees around 1,600 attempts a year, a fraction of Muir’s traffic. Reached from the White River side, the Emmons climbs the broad Emmons Glacier as a beautiful, less “maintained” line where you should expect to make more of your own decisions about the route. It rewards a team that is already confident on a glacier and can read a snow bridge without a line of bootprints pointing the way.
Which One Fits Your Team in July
If Rainier is your first big glacier climb, the DC route’s traffic is a genuine safety net worth accepting the crowds for. If your team already moves well on ice and wants a calmer experience, the Emmons is the better fit. Harder lines like Liberty Ridge, the Kautz Glacier, and the Fuhrer Finger exist for experienced alpinists, but none of them is July beginner terrain. It is the same self-reliance question you would weigh on other Pacific Northwest glacier objectives, just concentrated onto one famous mountain.
Permits, Fees, and Reservations for a July Climb
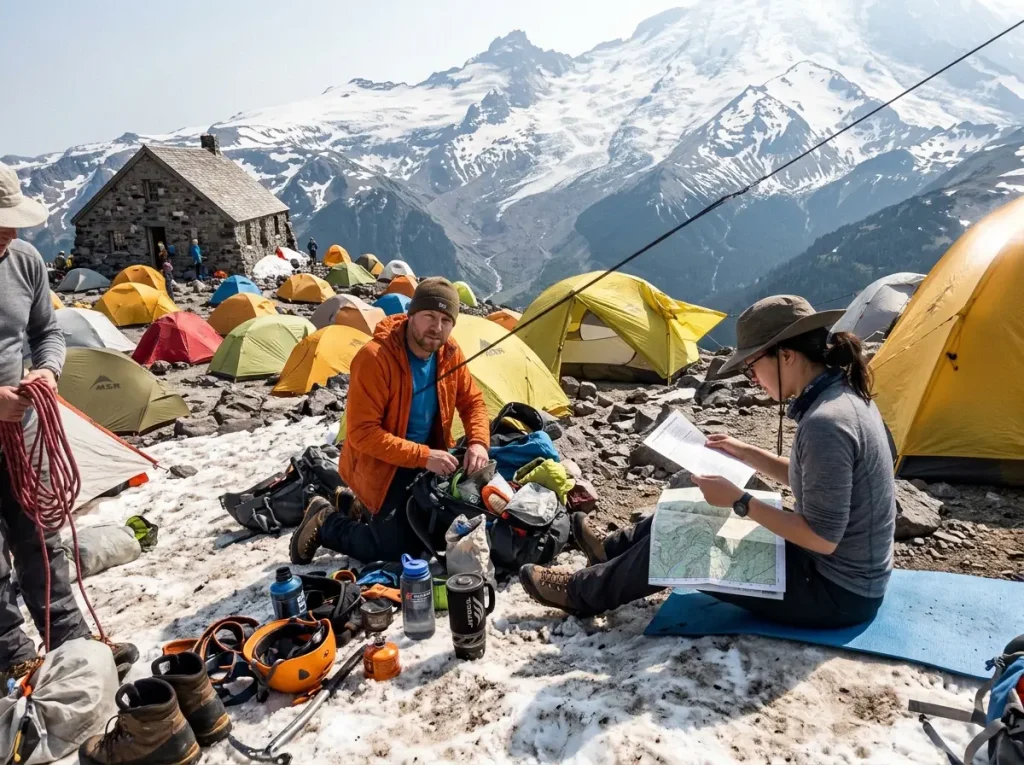
The paperwork is where peak-season climbers get tripped up, because July is not a walk-up month. You need to have your permits and fees sorted weeks before you arrive, not the morning you show up at Paradise.
The 2026 Climbing Fee and How You Pay It
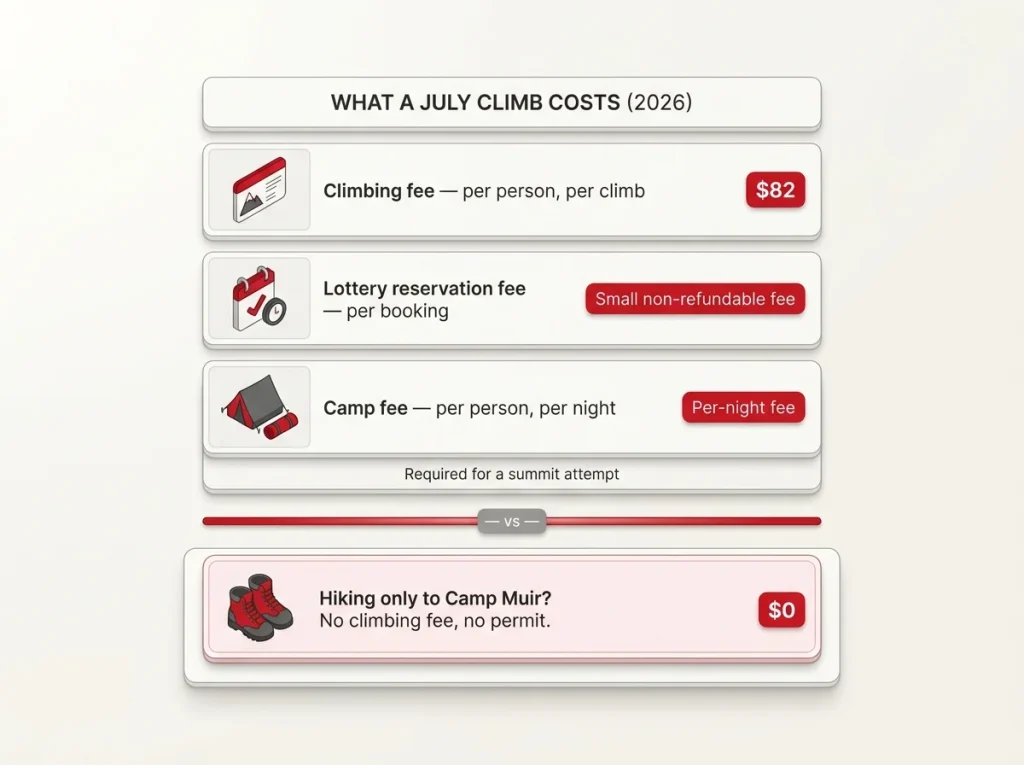
The 2026 climbing fee is $82 per person per climb, for all ages, and it is paid online before you arrive, not with cash or a check at the ranger station. That fee is separate from your park entrance pass, so budget both. The exact figure and payment method are laid out in the National Park Service’s official climbing fee FAQ, which is the source to trust over older numbers still floating around other sites.
Reservations, Camp Fees, and the July Window
Your wilderness permit and climbing reservation run through Recreation.gov, released for the high-use months of June through September, so July falls squarely inside the window. You book at least two days ahead, there is a small non-refundable lottery reservation fee for the most sought-after dates, and a per-person, per-night camp fee on top of that. Watch the permit return deadline and the no-show policy, since cancelling late or failing to show can cost you a fine and a future slot; solo climbers also need a separate solo climbing permit. Plan your dates early through the wilderness and climbing permit reservation system on Recreation.gov, pack out everything under Leave No Trace with a blue-bag system for waste, and remember a walk-up Camp Muir slot in peak season is not a plan you can count on.
The Camp Muir Hiker Exception
Here is a useful wrinkle for mixed-ability groups. Anyone hiking only as far as Camp Muir or Camp Schurman, with no summit attempt and no glacier travel above camp, needs neither the climbing fee nor a climbing permit. If a member of your party wants to see high camp and turn around, they can do exactly that without paying the $82.
Guided or Independent: The Real Cost and Skills Gap
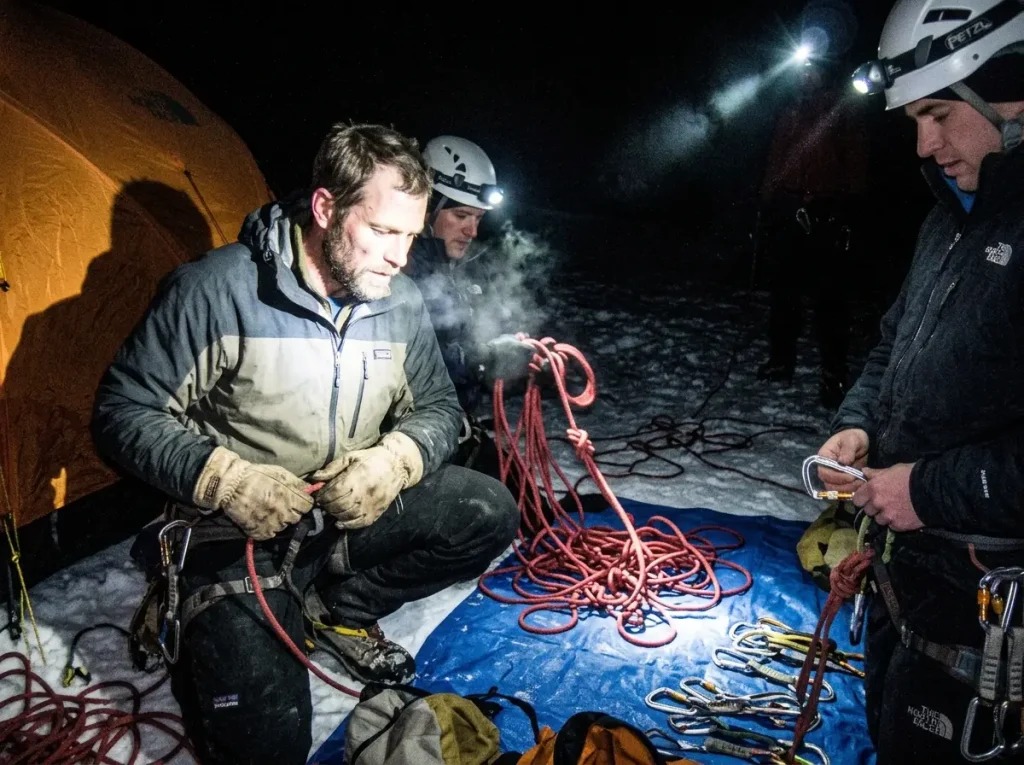
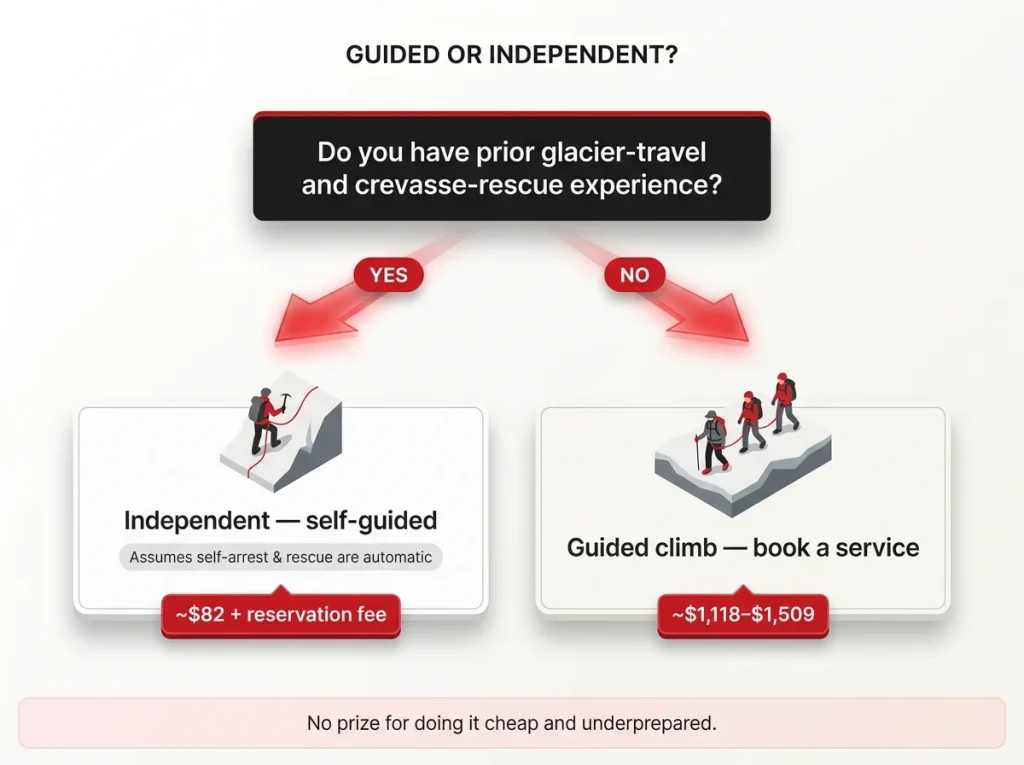
This is the decision most July guides skip, and it is the one worth the most. The gap between hiring a guide service and climbing independently looks like a money question, and underneath it is really a skills question.
What Guided and Independent Actually Cost
A guided climb on the DC route runs somewhere around $1,118 per climber for four days, and the five-day version closer to $1,509. An unguided, DIY climb costs the $82 fee plus the small reservation fee, and then whatever your own gear amortizes to. On paper that is a 15-to-20x spread, which looks like an easy call until you factor in what the cheap number assumes. For a structured way to run those numbers for any big trip, a step-by-step framework for budgeting a major alpine climb is a better starting point than a spreadsheet from scratch.
The Skills That Decide, Not the Price
The independent path assumes your team already owns rope-team travel, self-arrest, and crevasse rescue as automatic skills, plus the physical conditioning to move for twelve-plus hours at altitude, and most weekend climbers do not. That is not a knock, it is just the honest bar. Guide services and clubs like the Mountaineers exist precisely because the mountain assumes a skill set that takes seasons to build, and paying for it is the safety-rational move when you do not have it yet, regardless of the cost gap.
The real climb starts the afternoon before, not at the midnight alarm. Budget the whole first afternoon for the four-to-six-hour Paradise-to-Muir approach plus camp chores, because melting glacier ice for the next day’s water alone can eat 90 minutes for two people.
How to Tell Which One You Are
Be honest about where your team sits. If you can build a snow anchor, run a crevasse rescue, and hold a self-arrest without thinking, independent is a reasonable and far cheaper path. If any of that made you pause, book the guide this time and use the climb to learn, the same guided-versus-self-guided call climbers weigh on Mount Shasta. There is no ego prize for doing it the cheap way underprepared.
The Gear You Actually Need on the Glacier
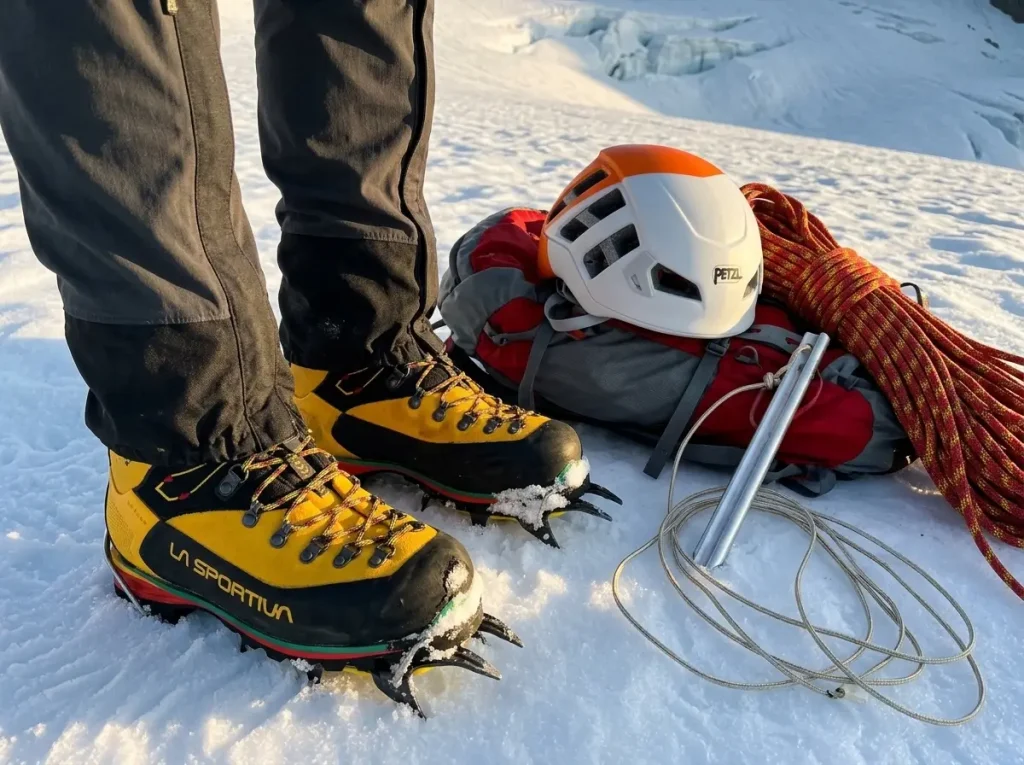
This is a packing list, not a wish list. July on the Disappointment Cleaver demands gear that handles glacier travel, a snow-free rock scramble, ladder crossings, and a cold night at 10,000 feet. None of it substitutes for the skills above, and the anti-sell rule holds: the best purchase is often the practice you already own.
Boots and Helmet: The Non-Negotiables
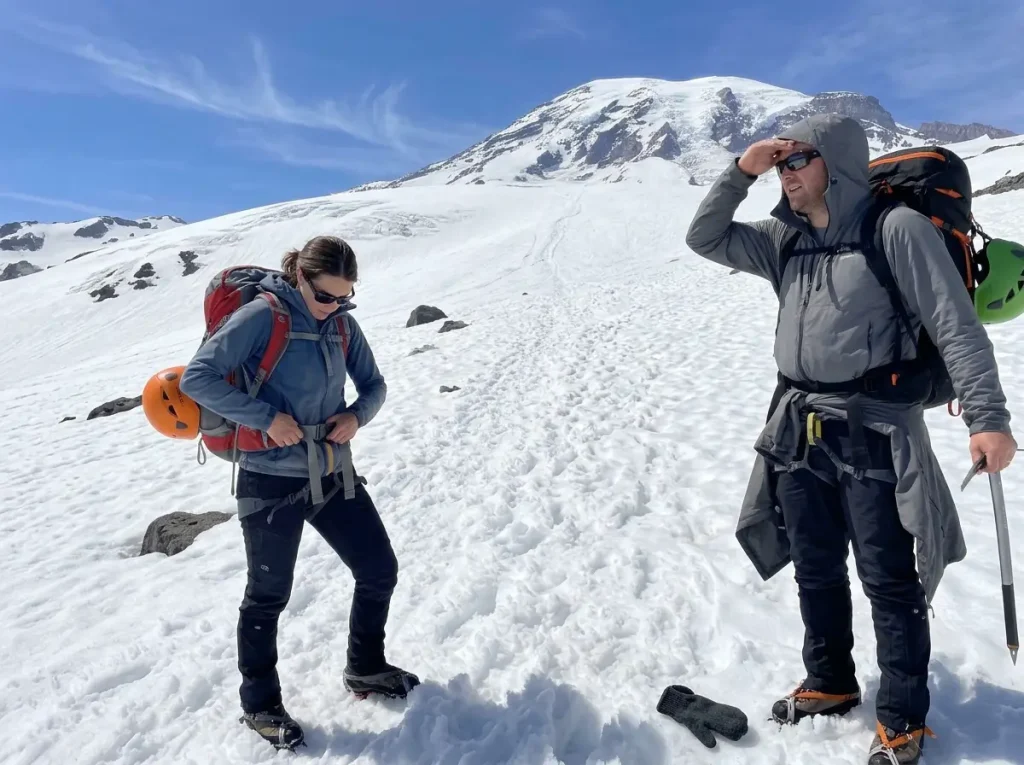
Start with a boot that takes a crampon, because a casual waterproof hiker will not. Insulated, crampon-compatible glacier-rated boots like the La Sportiva Nepal Evo GTX (men’s · women’s) are the right category here, stiff enough for step-in crampons and warm enough for a glacier start, and these are the mountaineering boots most guide services spec for the route. Overhead you want a helmet for the rockfall and icefall exposure on the Cleaver and near the Icebox, and the Petzl Meteor Helmet covers that at a weight you will forget you are wearing. Add a mountaineering harness and an ice axe, the two tools every glacier rope team clips into, then drill a solid ice-axe self-arrest until it is automatic.
Glacier-Travel Hardware: Rope, Cord, and Picket
For rope-team travel you want a dry-treated rope, because untreated nylon soaks up wet snow and gets heavy and stiff fast. The Black Diamond 9.4mm Dry Climbing Rope 60m is a solid dry-treated option, though a note on length: most guided DC rope teams run shorter, lighter glacier-specific ropes in the 30-to-40 meter range split among the team rather than a single 60-meter lead line, so confirm your rope length and configuration with your team or guide service. Round out the kit with Sterling 6mm Accessory Cord for tying your own prusik loops, and an MSR Snow Picket for anchors and crevasse-rescue readiness. If the picket is new to you, how to build a bombproof snow anchor walks through the T-slot placement that actually holds.
A picket and a length of cord are dead weight without the crevasse-rescue reps to use them. Buy the hardware, then practice hauling a weighted pack out of a mock crevasse in a park until the system is muscle memory.
The Overnight System at Camp
Camp Muir and Camp Schurman sit near 10,000 feet, and the nights run below freezing even in July. That makes an insulated sleeping pad with a real cold-weather R-value a genuine safety item, not a comfort upgrade, because a cold night wrecks the sleep you need for a midnight start. An insulated sleeping pad rated for below-freezing ground is the piece people most often under-spec, and they feel it at 2 a.m. Match it to a bag rated for the same range and you protect the rest you are about to spend.
The Bottom Line on Climbing Rainier in July
July earns its reputation on Rainier. You get the most consolidated snow, the calmest weather, and the best summit odds of the year, and that is worth planning your season around. Just go in with the full trade in view: the same window hands you crowds on the boot pack and ladder crossings over open crevasses, and the Cleaver you scramble bare.
Match the route and the guided-or-independent call to the skills your team actually owns, not the ones you hope to have by the trailhead. Book your permits early, ask the rangers what today’s route looks like, and let turnaround time run the clock instead of the summit. Do that, and July gives you the best odds the mountain offers all year.
Frequently Asked Questions
01Can beginners climb Rainier in July?
Beginners can climb Rainier in July, but almost always with a guide service. Independent climbing assumes prior glacier travel, self-arrest, and crevasse rescue skills, so if you do not already own those, a guided program is the safe path.
02How cold is it at Camp Muir at night in July?
Nights at Camp Muir, near 10,000 feet, drop below freezing even in July. Bring an insulated sleeping pad with a cold-weather R-value and a bag rated for sub-freezing temperatures, since poor sleep before a midnight start hurts your summit odds.
03Do you need a permit just to hike to Camp Muir?
No. Hiking only to Camp Muir or Camp Schurman, with no summit attempt and no glacier travel above camp, requires neither the climbing fee nor a climbing permit. It is a good option for mixed-ability groups traveling together.
04How risky are the crevasses on Rainier in summer?
Crevasses are a real hazard managed with rope-team travel and ladder crossings. In July they are narrower than later in summer, but as August and September melt out, they widen and route-finding gets more involved, which is part of why July is the sweet spot.
05How long does it take to climb Rainier in July?
Most independent DC-route climbs run two days: a four-to-six-hour approach to Camp Muir on day one, then a midnight summit push and descent on day two. Guided programs stretch it to four or five days to build skills and acclimatize.
Safety Notice: Rock climbing and mountaineering are inherently high-risk
activities that can involve physical trauma or fatal incidents. The information on Rock Climbing Realms is for
educational and informational purposes only. Techniques and advice presented here are not a substitute
for professional, hands-on instruction. Conditions and risks vary by location. Always seek guidance
from a qualified instructor before attempting new techniques. By using this website, you agree that you
are solely responsible for your own safety. Any reliance you place on this information is strictly
at your own risk, and you assume all liability for your actions. Rock Climbing Realms and its authors
will not be held liable for any harm, damage, or loss sustained in connection with the use of this information.
Affiliate Disclosure: We are a participant in the Amazon Services LLC Associates Program, an
affiliate advertising program designed to provide a means for us to earn advertising fees by advertising and linking
to Amazon.com. As an Amazon Associate, we earn from qualifying purchases. We are also an official affiliate partner
of Black Diamond Equipment via the AvantLink network. If you click on a Black Diamond affiliate link and make a
purchase, we may earn a commission at no additional cost to you. We also participate in other affiliate programs.
Additional terms are found in the terms of service.