
In this article
The photo in your guidebook was shot fifteen years ago, and the mountain does not look like that anymore. A party trusting three-year-old beta on Forbidden Peak found this out the hard way when the standard snow couloir was reported “totally out” by the Fourth of July, forcing a scramble onto the Cat Scratch Gullies that half the climbers on the mountain did not know existed. This is the pattern climbers keep flagging on CascadeClimbers and the NPS conditions blog season after season: the range is changing faster than the printed beta. This is a straight-talk guide to North Cascades climbing — which objectives fit your level, when they are actually in shape, what the permits and the rack really demand, and the honest calls the guide services leave out of the brochure.
What Sets North Cascades Climbing Apart
People throw around “the American Alps” like a marketing line, but it means something specific once you are out there. It means you are often days from a road, and a rescue here is a helicopter-and-luck problem, not a quick pluck off a roadside crag. Start with that and the rest of your decisions get more honest.
The Glaciated Character of the Range
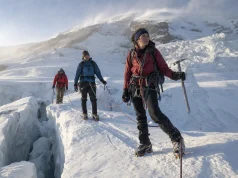
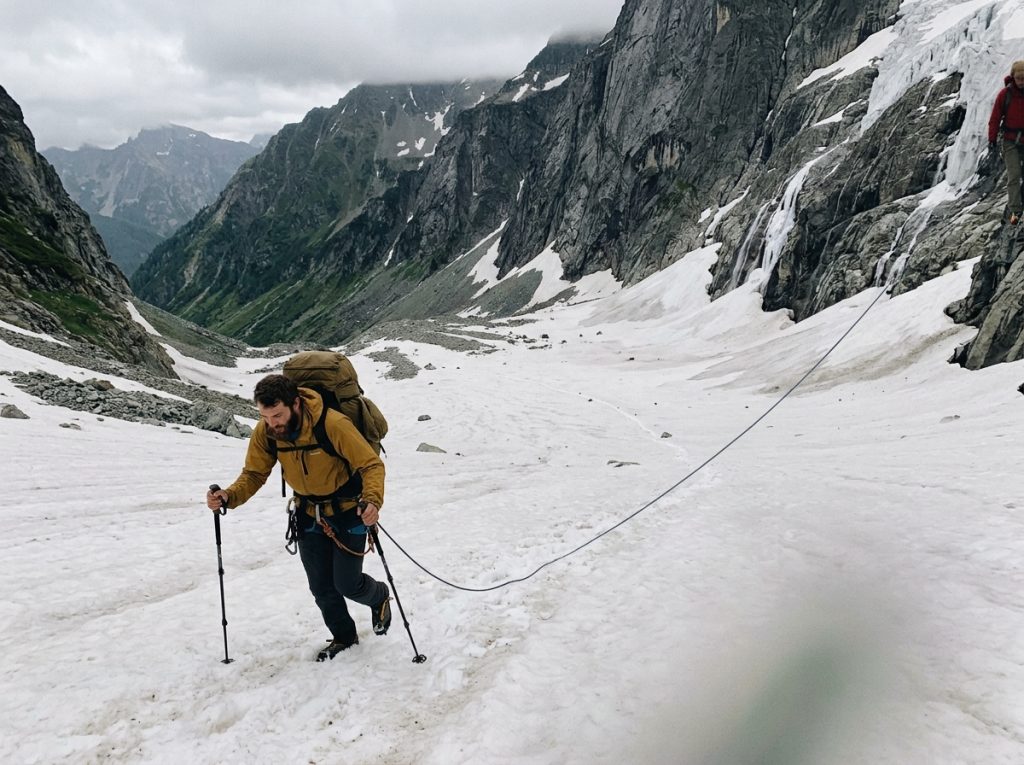
This range is built on ice. Almost every classic objective involves glacier travel, which means roped travel, self-arrest, and crevasse rescue are baseline skills here, not advanced add-ons you grow into later. If you can climb 5.10 in the gym but cannot build a haul system on a glacier, you are a beginner in the North Cascades. The mountain sorts people by that skill, not by their gym grade.
Remoteness and the Self-Rescue Reality
The hidden hazard here is not the climbing. It is how far you are from help when something goes sideways. The American Alpine Club’s own accident records for the range include a rappel-anchor failure on Sharkfin Tower that cost three lives, and the sobering part is not just the failure, it is that the remoteness turned it into a multi-day search and rescue problem. Weather volatility, not technical difficulty, turns back more parties than any crux move.
Why “Alpine” Here Means More Than Rock
A North Cascades objective is usually a package: an approach that is a climb in itself, a glacier crossing, maybe a snow couloir, then some rock, then a descent that is often the real test. If you are still working out whether you are ready for that package, the honest test is whether you can handle the glacier and the descent, not just the rock. The word “alpine” here is doing a lot of quiet work, and underestimating it is how strong rock climbers end up benighted.
The Big Five Objectives Most Climbers Start With
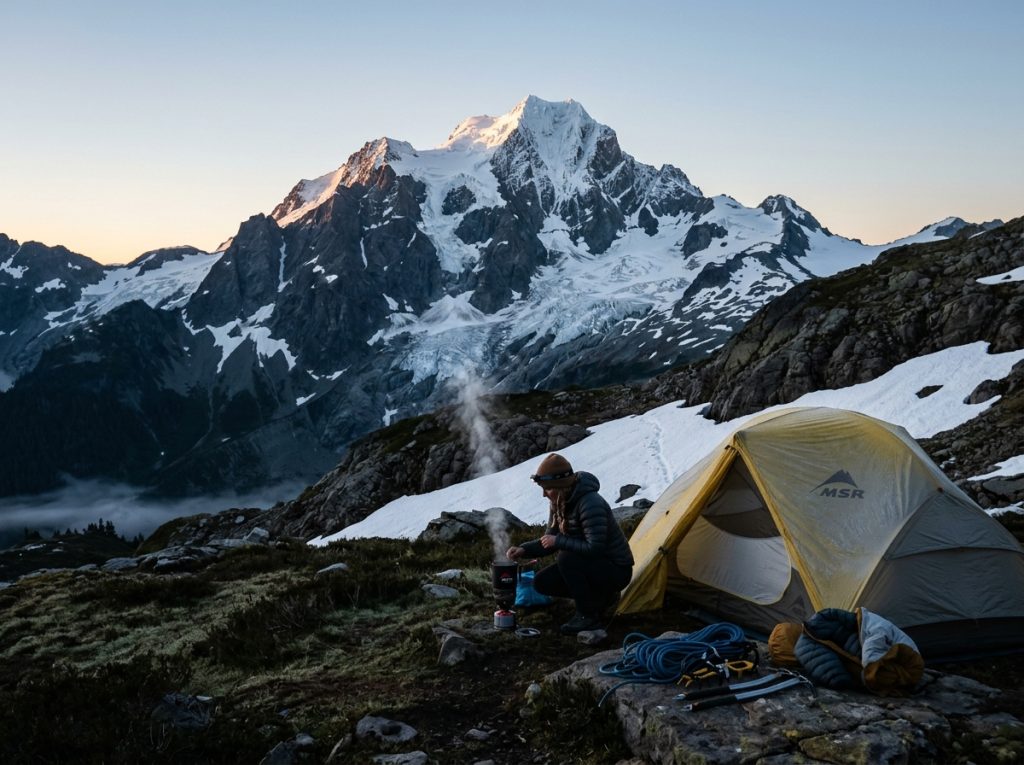
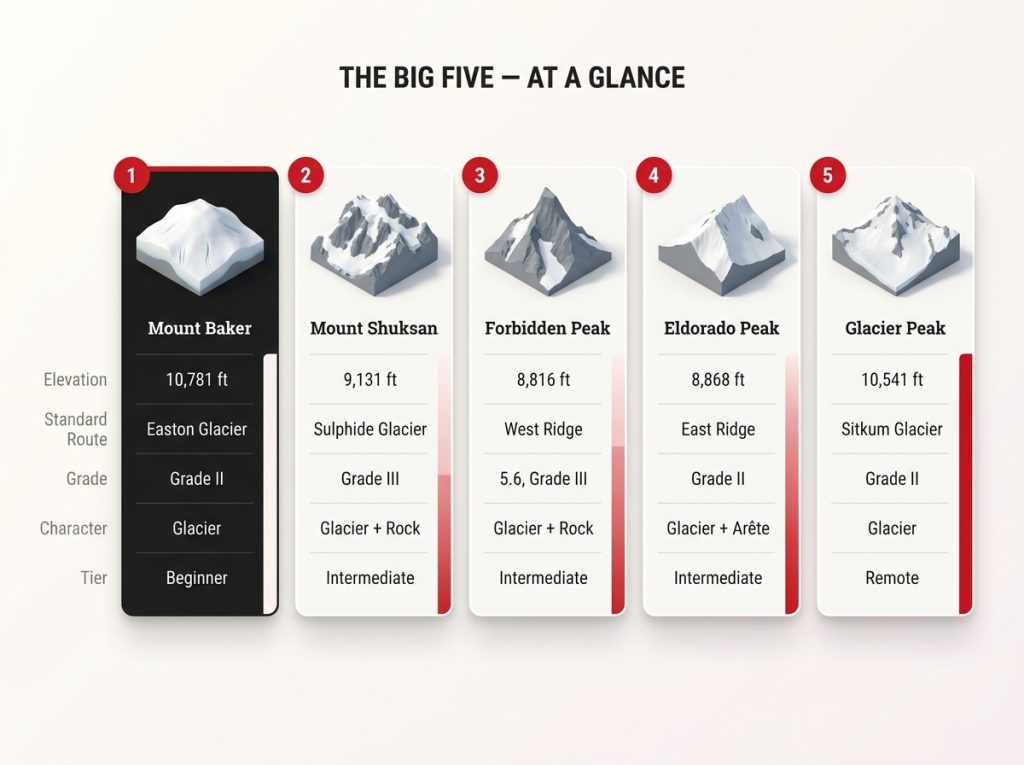
Every climber planning a Cascades trip ends up circling the same five names. Here is the honest one-paragraph read on each before you fall down a guidebook rabbit hole, and it is worth seeing how these stack up against the world’s famous mountain peaks and what each one demands so you can calibrate your expectations.
Mount Baker, the Forgiving Volcano
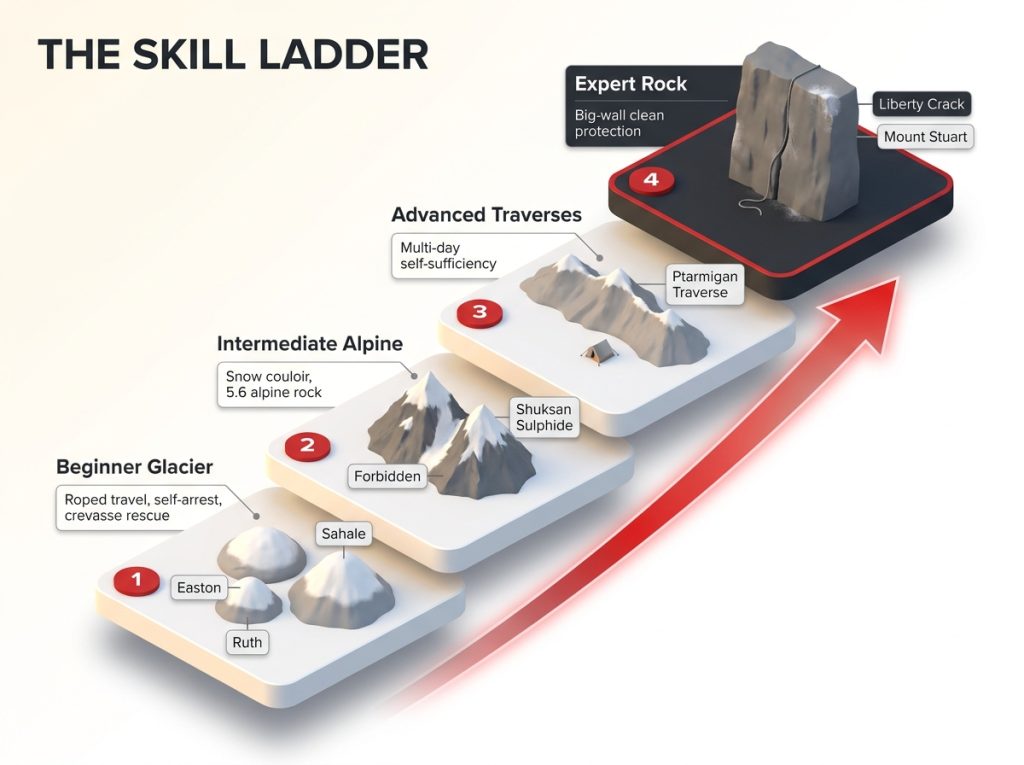
Mount Baker (10,781 feet) is where most people should start. The Coleman-Deming route from the Heliotrope Ridge trailhead and the Easton Glacier are the most forgiving glaciated objectives in the range, but “forgiving” still means a full alpine day with real crevasse hazard on the Roman Wall. It is the honest first glacier climb, not a hike with a view.
Mount Shuksan and Forbidden Peak, the Postcard and the Trap
Mount Shuksan (9,131 feet) is the peak on every postcard, its hanging glaciers and seracs the reason for the fame, and its Sulphide Glacier route is moderate, but the Fisher Chimneys line is a committing, route-finding-heavy day that is nobody’s beginner objective. Forbidden Peak (8,816 feet) is the trap. Its West Ridge gets called a “classic beginner alpine rock” route at 5.6, which quietly hides the glacier crossing and the snow couloir you climb before the rock even starts.
Eldorado, Glacier Peak, and the Rest of the Roster
Eldorado Peak is famous for its knife-edge summit snow arête, a photo-op that is more exposed than it looks. Glacier Peak is the remote one, a long approach that filters out anyone short on time or patience. Beyond the big five sit dozens of objectives, so where each one lands on your own list depends on the season and the skills you can actually commit to it.
The classic first-timer gut-punch is real: the “quick 10 to 12 hour” Forbidden day is actually an overnight commitment once you have burned five or six hours just reaching Boston Basin camp with a full pack. Nobody puts that in the trip report headline.
Picking Your First Glacier Route
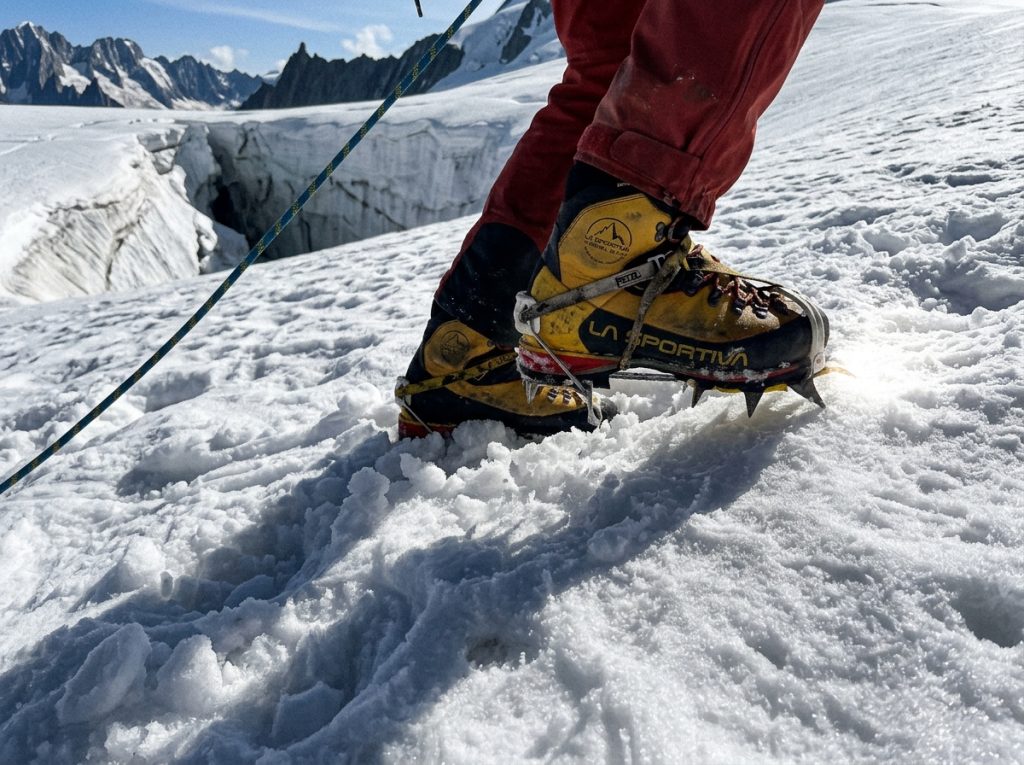
Say you have taken a glacier skills course and you want to climb something real. The friend-at-the-campfire answer is almost always the same, and it is not the flashy one.
Why Mount Baker’s Easton Glacier Is the Honest Starting Point
The Easton Glacier route on Baker is the honest place to start. It runs about 5,000 feet of gain from camp to summit, roughly three to four hours from trailhead to camp and another five to eight from camp to the top, and it comes into shape late May through early July. The slope is moderate with one steeper section on the Roman Wall, which is exactly the profile a first glaciated volcano should have.
Ruth and Sahale as Stepping Stones
If Baker still feels like a lot, Ruth Mountain and Sahale Peak, the latter reached from Cascade Pass, are lower-commitment stepping stones that let you practice roped movement and route-finding without a huge summit day hanging over you. They are not consolation prizes. They are where you build the judgment that keeps you alive on the bigger objectives.
What a “Beginner Glacier Route” Actually Requires
Here is the part the phrase “beginner glacier route” buries: beginner means beginner alpinist, not beginner climber. You still need roped travel, ice axe arrest, and crevasse rescue basics genuinely dialed before you go, which is the same buy-vs-rent and self-arrest gate you’d face on Mount Shasta or any other West Coast volcano. A moderate slope with one steep section is still a place people get hurt when the snow softens and a foot punches through.
The most common first-timer mistake here is treating the approach as “just the hike in.” The Boston Basin approach, for one, is a 3,300-foot, 3.5-mile grind under an overnight pack that eats half your day and half your legs before the technical climbing even starts. Budget the approach as its own climb, or you will be making camp in the dark.
Stepping Up to the Technical and Expert Tier
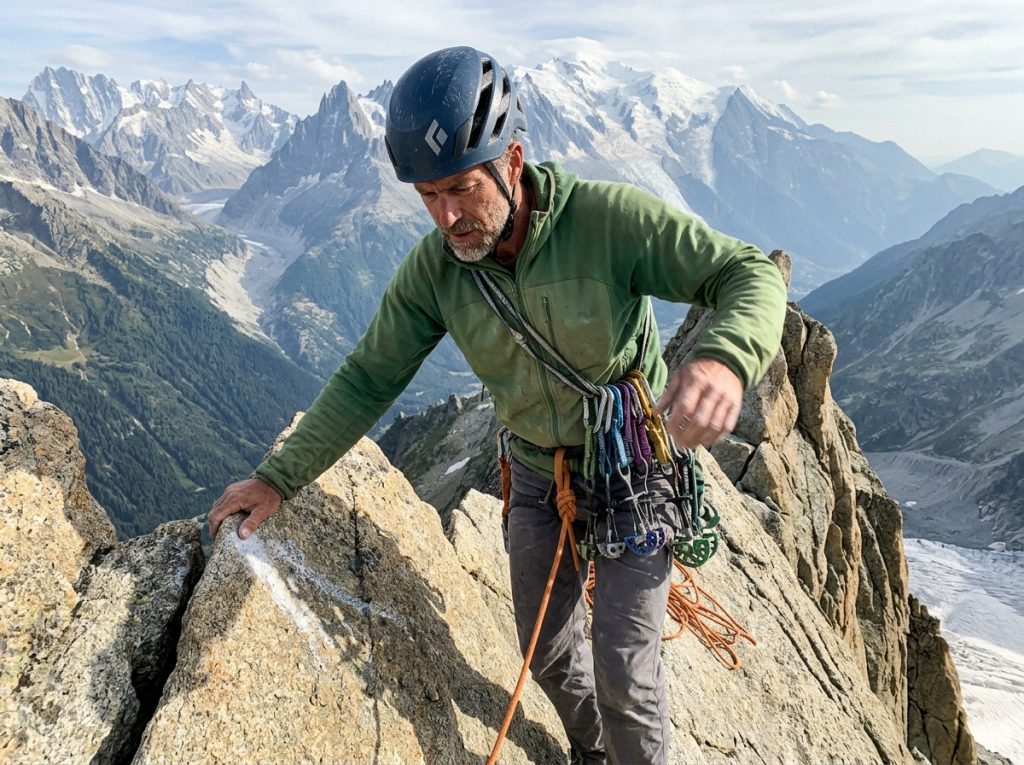
This is the tier where the numbers stop telling the whole story. A grade describes the rock. It says nothing about the glacier crossing, the bergschrund, or the descent that turns strong parties around.
Alpine Rock Steps Up (Forbidden, Dragontail, Torment)
The Forbidden Peak West Ridge (5.6, Grade II to IV) is a 10 to 12 hour round trip where snow often covers the rock until early July, and the bergschrund in the approach couloir opens up as the season goes on. Peaks like Dragontail and Mount Torment raise the alpine-rock commitment further, with longer technical sections and less margin for a slow party. The rock climbing is rarely the hard part. Getting to it and getting off it is.
The Classic Traverses (Ptarmigan, Torment-Forbidden)
The Ptarmigan Traverse and the Torment-Forbidden Traverse are multi-day commitments where self-sufficiency and route-finding matter far more than your hardest move. You are carrying your world on your back across glaciers and cols for days, reading terrain that does not always match the topo. These reward patience and punish ego.
The Expert End (Liberty Crack, Mount Stuart)
At the top of the ladder sit Liberty Crack, the Thin Red Line, and the Mount Stuart Direct North Ridge, big walls and sustained alpine rock that assume you already have everything below them dialed. If you are curious how these compare to the hardest mountains in the world, the honest answer is that the technical grades are approachable to a strong rock climber, but the alpine wrapper around them is what earns the respect.
Why the Guidebooks Are Already Out of Date
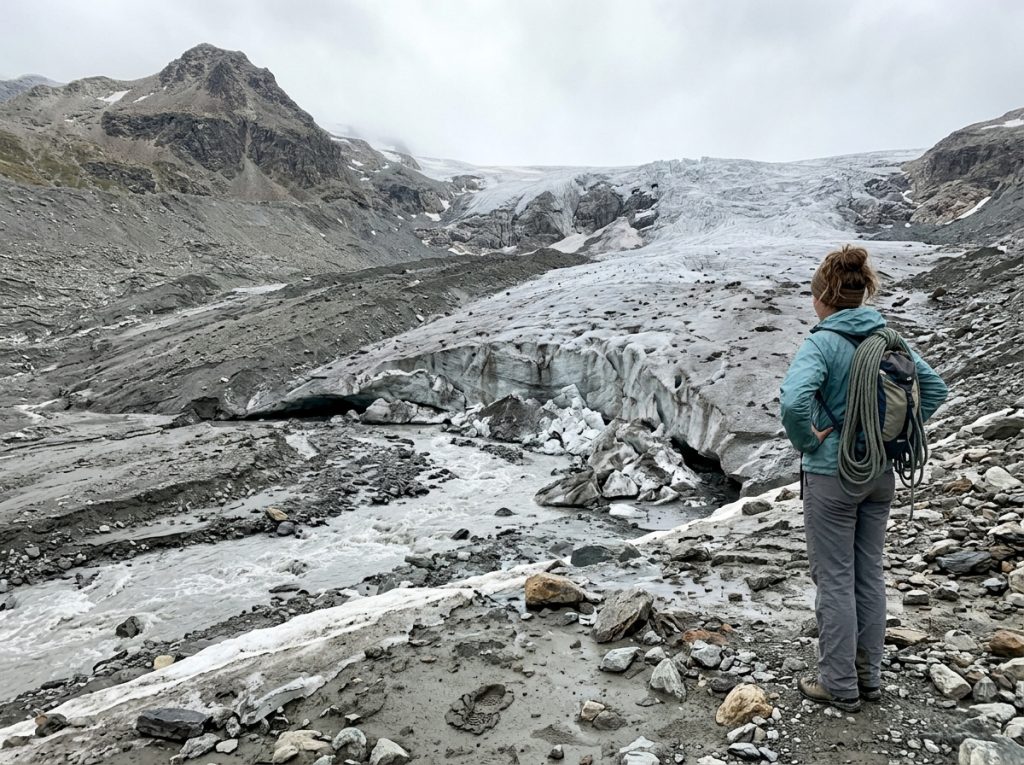
This is the part nobody at the guide service will lead with. The mountains in your guidebook photos are measurably smaller now, and it changes how you plan every glacier objective on the list. Even Fred Beckey‘s Cascade Alpine Guide, the standard reference for the range, was written when these glaciers reached hundreds of meters farther down the valley.
What Glacier Recession Did to the Climbing Calendar
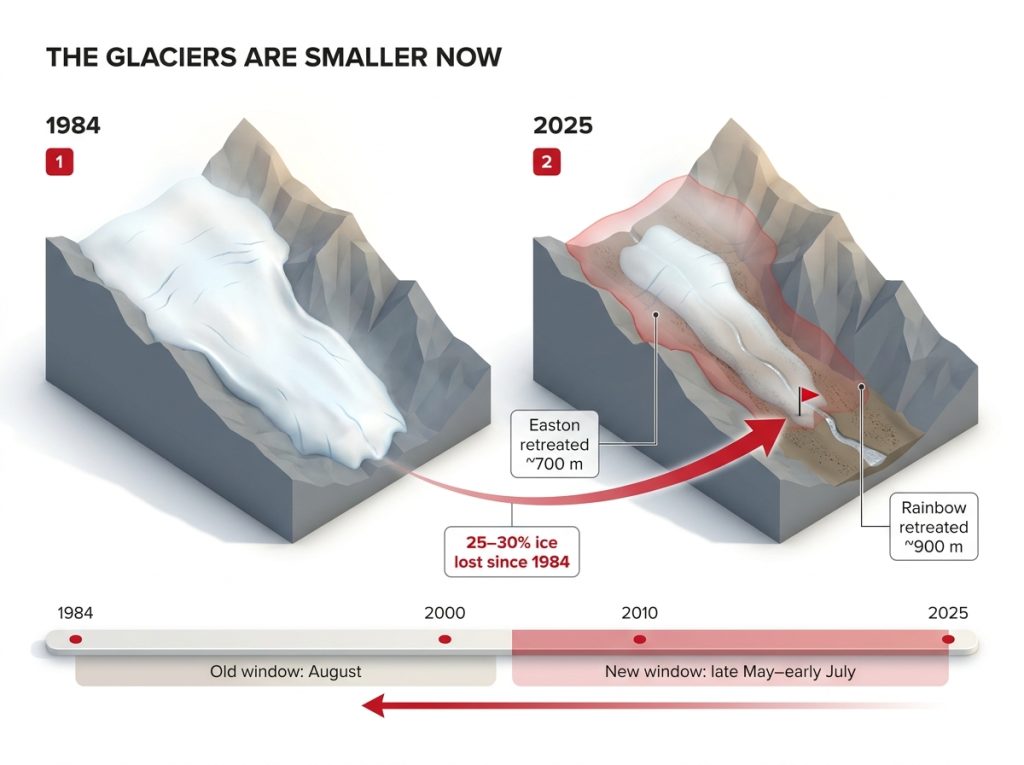
The North Cascades have lost roughly 25 to 30 percent of their glacier mass since monitoring began in 1984. Rainbow Glacier on Baker has retreated about 900 meters and the Easton Glacier about 700, with half of that pullback happening in just the last decade. The practical consequence is that glacier recession has shifted the climbing window earlier: the good snow-bridge conditions now run late May through early July, weeks ahead of the traditional August dates the old guidebooks still quote.
When “Standard” Routes Stop Holding Snow
When a route loses its snow, the “standard” line can stop existing. In July 2023 climbers reported Forbidden’s usual snow couloir “totally out” by the Fourth, and parties rerouted onto the Cat Scratch Gullies to finish. Guides describe Baker’s Roman Wall as almost unrecognizable in early August now, with mudflows and bare moraine appearing where there used to be continuous snow, a direct result of the same glacial retreat reshaping the whole range. The route in the book and the route on the mountain are two different climbs by late season.
How to Read Current Conditions Instead of Old Beta
The fix is not a better guidebook. It is reading current conditions before every trip. Cross-reference the Park Service’s own climbing-conditions updates for the range, which post real dates for snow-line elevation and bergschrund status, instead of trusting a photo from a decade ago. In the local vocabulary, a route that is “out of conditions” is impassable regardless of what the book promises.
Before you commit to a snow route, pull the current-season conditions for that exact sub-area, not the range in general. Snow line, bergschrund status, and moat openings change week to week now. A trip report from the same date two years ago is a starting guess, not a plan.
The Real Climbing Window, Season by Season
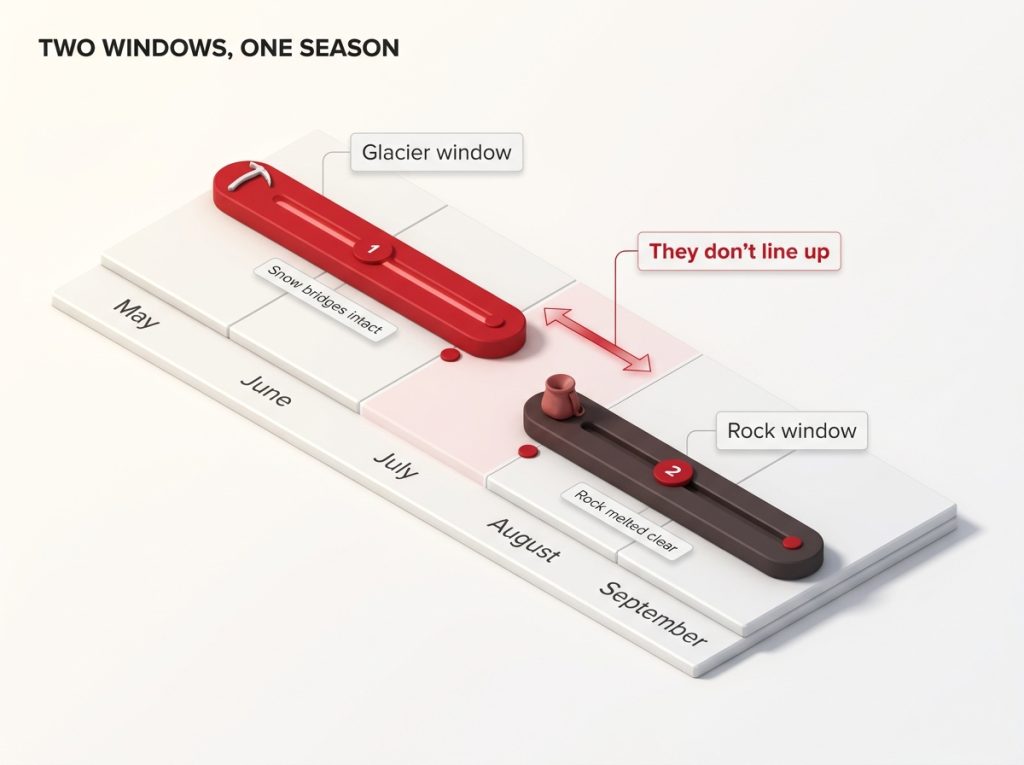
“When should I go” has two answers here, and mixing them up is how people end up on a route that is out of shape. It depends entirely on whether you are after a glacier volcano or an alpine rock route.
The Early Glacier Window
The glacier window opens late May and closes in early July, while the snow bridges are still intact enough to cross safely. This is the same early-season logic and the same July trade-offs that shape a Mount Rainier climb: firmer snow and better bridges, but a shorter, earlier window than the guidebooks imply. Go too late and the bridges are gone.
The Later Rock Window
The alpine rock routes want the opposite. They come into shape mid-July through September, once the snow has melted off the rock. That sounds convenient until you realize the glacier crossing you need to reach many of those rock routes still depends on the earlier snow-bridge season.
Why the Two Don’t Line Up
So the two windows genuinely do not line up the way a casual reader assumes. NPS conditions data shows the granularity: patchy snow starting around 4,900 feet on May 21 in 2024, the bergschrund half-open by late June in 2023, numerous open crevasses by early September in 2025. Plan around real dates, not a fixed calendar, and check the avalanche forecast for your weather window rather than trusting the month on a guidebook page. A moat opens on approach terrain earlier than the glacier’s main bergschrund and surprises people who only budgeted for the schrund.
Permits and the Boston Basin Lottery
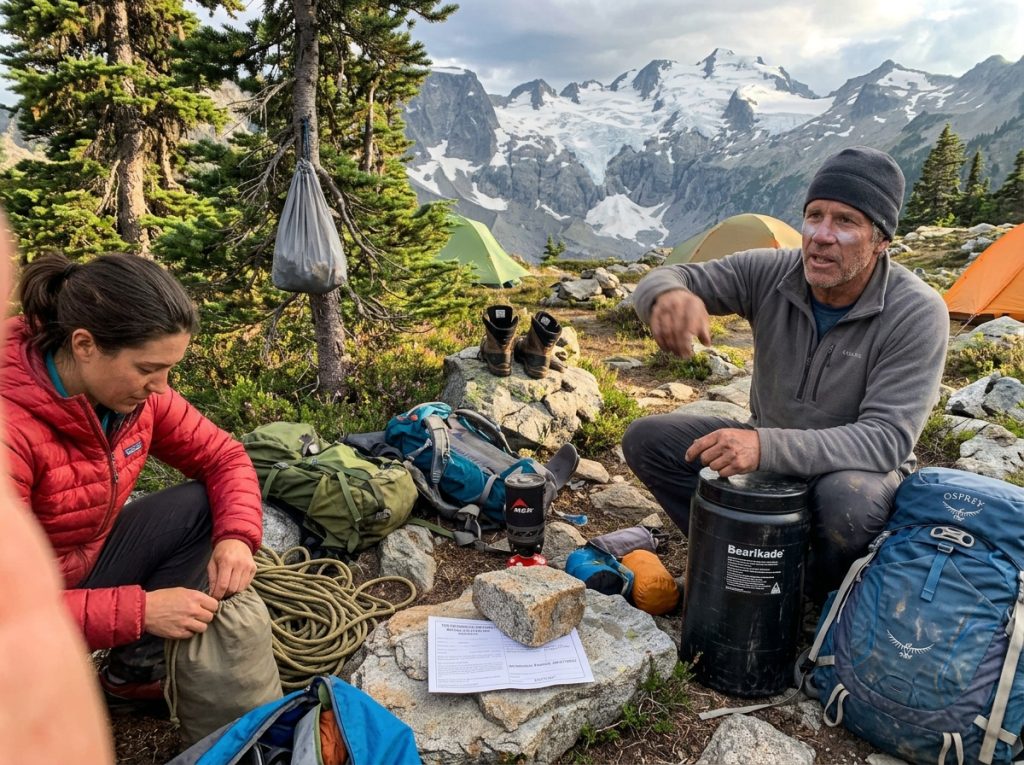
Most people start “planning a summer trip” in May, right around the time the reservable slots for the popular basins are already gone. The permit game here starts in winter, and it pays to actually play it.
How the Lottery Actually Works (and the Odds)
The Boston Basin early-access lottery drew 13,202 applicants for 2,000 timeslots in 2025. That is roughly a 15 percent shot, about one in six and a half, for your first-choice camp and date. You can lean on the National Park Service’s backcountry reservation system to understand the mechanics, but the odds are the part nobody advertises.
The Walk-Up Backup Plan
The system holds 40 percent of permits for in-person walk-up, with 60 percent reservable online. That walk-up pool is your backup, but it means showing up at the Marblemount Wilderness Information Center and taking your chances in person, not locking anything in from home. Smart parties always have a second objective ready.
The 2026 Timeline and What to Do Now
For 2026, winners are notified March 20, the early-access booking window runs March 24 through April 21, and general on-sale opens April 29 at 7 a.m. Pacific. This is the same permits-plus-narrow-season squeeze you get on the Grand Teton, where the paperwork is as much of a crux as the climbing. One more line for the packing list: the bear-canister requirement runs June 1 through November 15 and rangers do check.
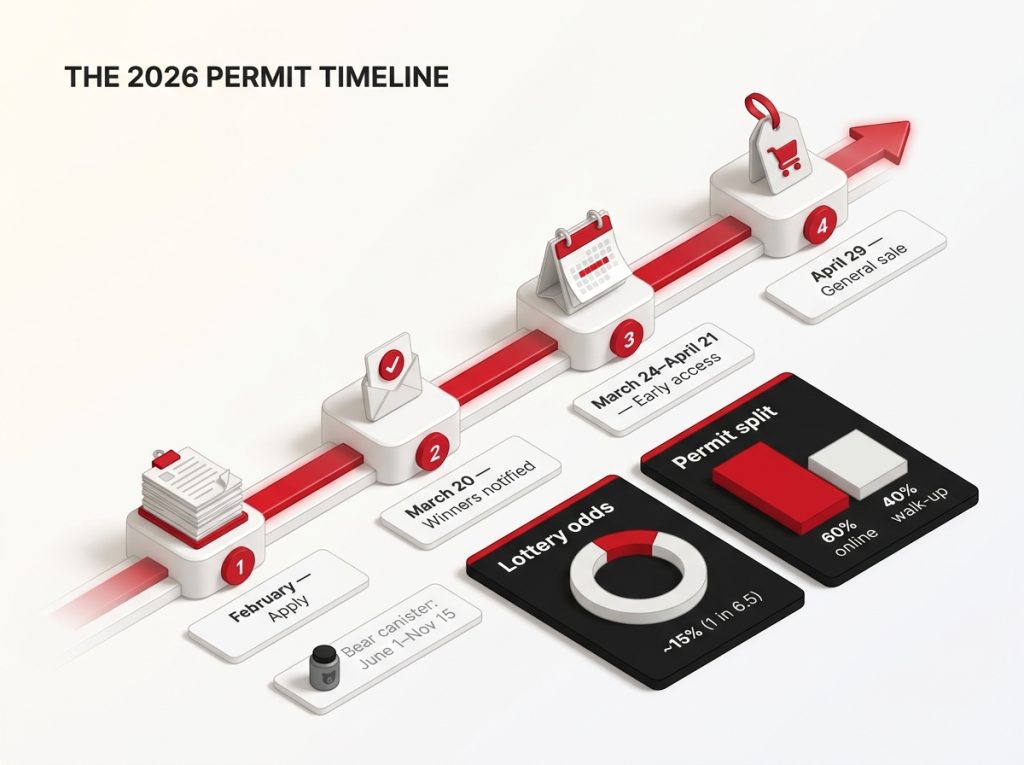
Apply for the lottery in February or March and pick a walk-up backup objective at the same time. If Boston Basin does not come through, you want Baker’s Easton Glacier already researched and ready, not a scramble to salvage the trip the night before.
The Fixed-Anchor Moratorium Nobody Explains
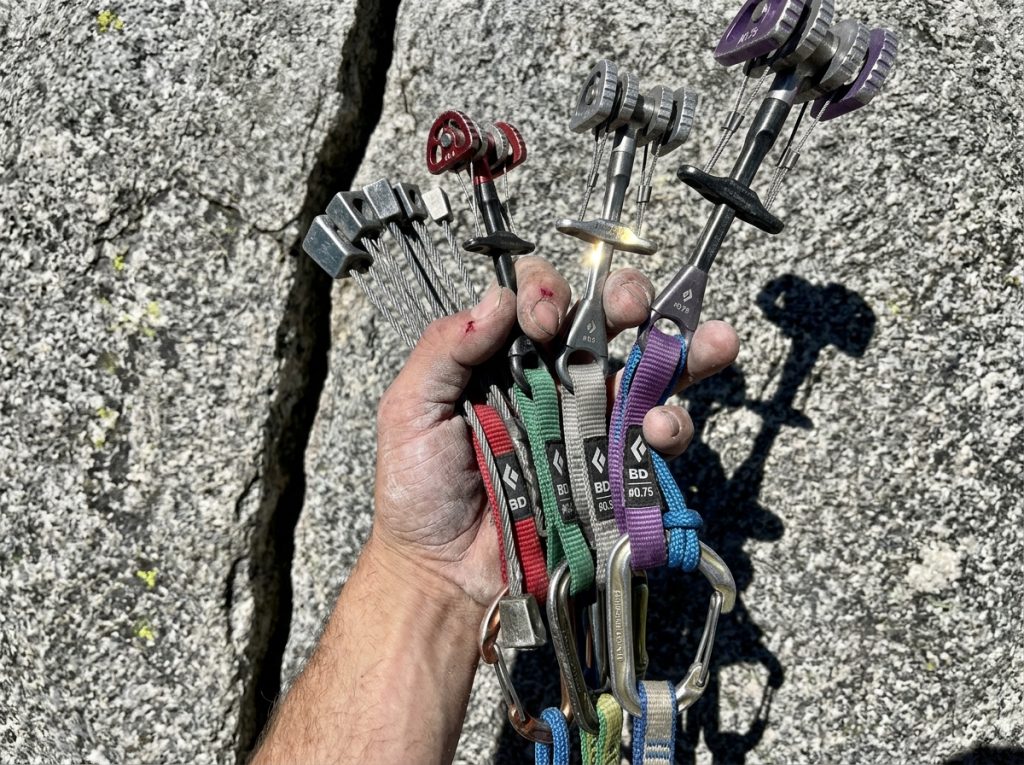
Show up expecting bolted rap stations like Red Rock or Index, and the descent is where you find out the hard way that this is not that kind of place. This gets one buried sentence on the NPS site and shows up nowhere in the guide brochures.
What Wilderness Designation Means for Your Rack
Nearly all of the park is designated wilderness, and installing new bolts or hangers there is prohibited. That is not a detail, it is a rack-planning rule. Almost everything you climb sits inside the Stephen Mather Wilderness, which covers nearly all of the park, so the fixed anchor moratorium shapes what you carry.
Legacy Anchors vs. Building Your Own
Practically, that means clean climbing: parties used to sport-crag rack logic need to plan real protection, cams, nuts, and slings, for routes like the Washington Pass classics. Some legacy fixed anchors exist, but you have to know which ones predate the moratorium and which you must build or back up yourself. Assuming there will be a bolted station waiting is how people get stuck at the top of a rappel with no way down.
Planning Clean Protection Before the Trip
The move is to plan your protection around the route’s reality before you leave home, not at the base while you are burning daylight. Read the route beta specifically for anchor information, and pack the rack that lets you build your own belays and rappels. The same Leave No Trace wilderness ethic that shapes these anchor rules also means you pack out everything you bring, so self-sufficiency on the descent is not optional.
Why “Non-Technical” Still Gets People Hurt
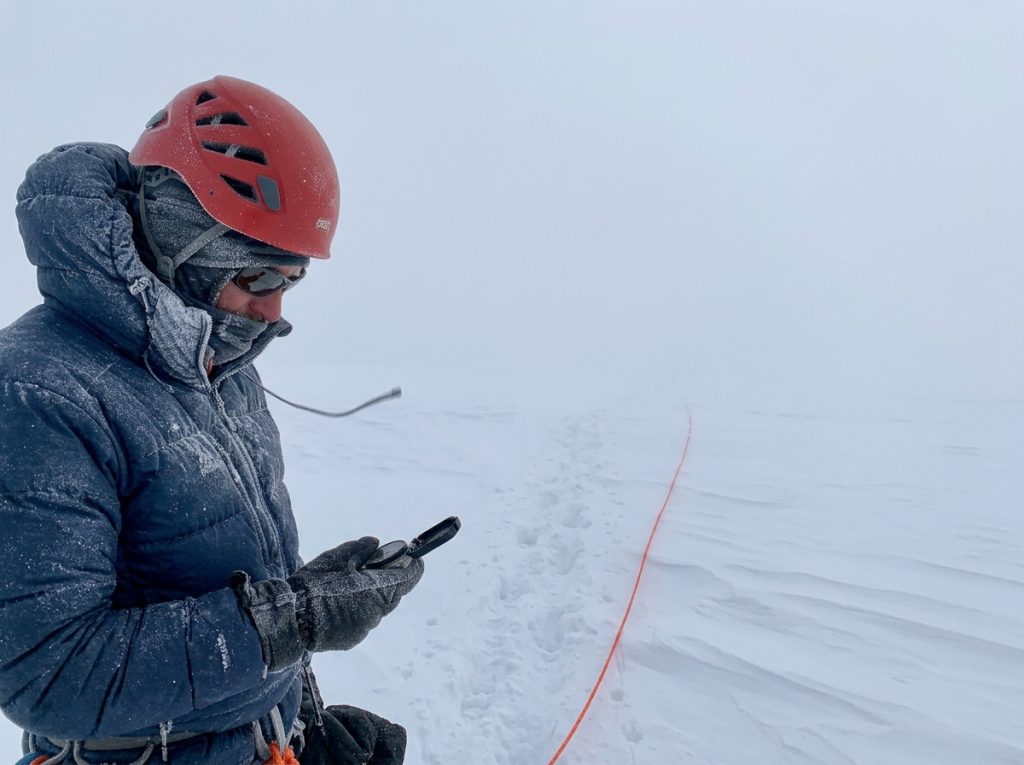
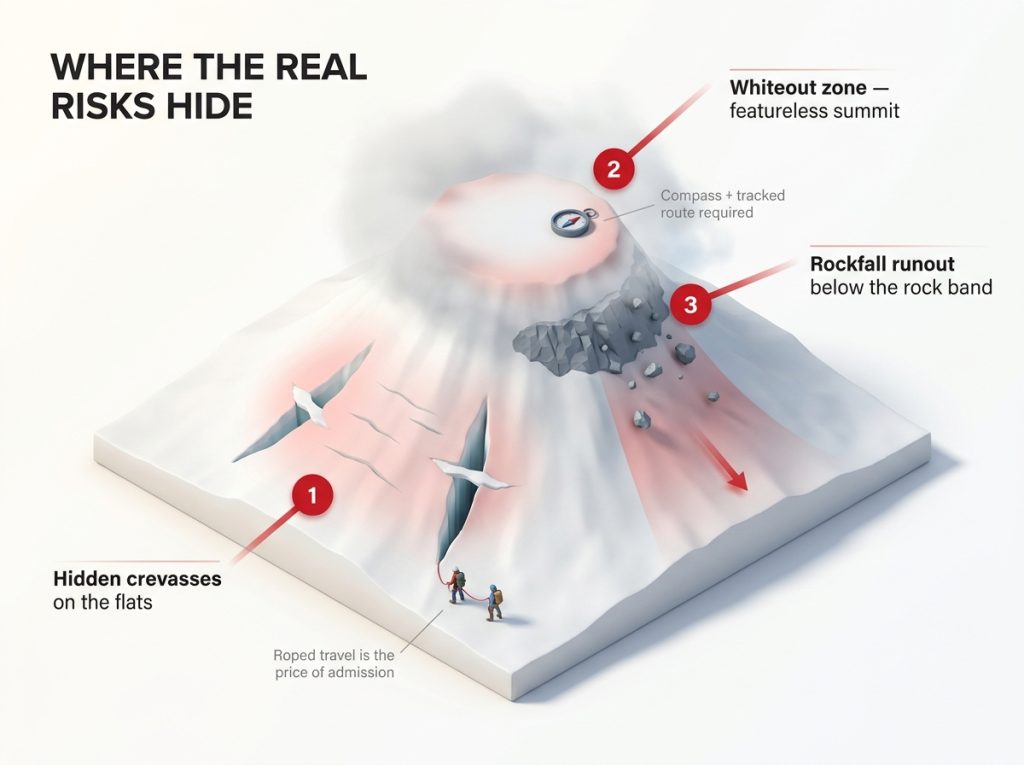
The word “non-technical” does a lot of quiet harm. It makes a glaciated volcano with hidden crevasses and a whiteout-prone summit sound like a walk-up, and the guide-service tiering that ranks routes by technical difficulty alone reinforces the illusion.
Crevasse Risk on the “Easy” Glaciers
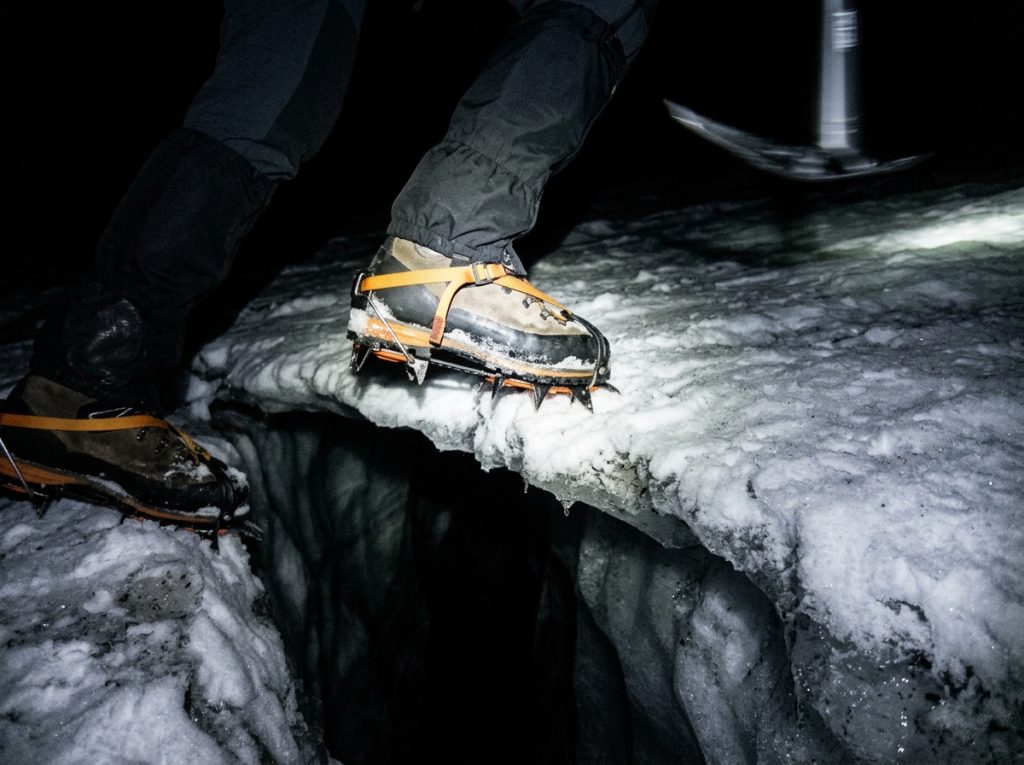
The “easy” glaciers still have crevasses, and the Coleman-Deming is no exception. When the climbing feels moderate is exactly when people get casual about rope management, and a hidden slot does not care that the slope angle is gentle. Roped travel is the price of admission even on the mellow days.
Whiteout Navigation on Featureless Summits
Baker’s summit plateau is flat and featureless, which turns into a serious problem the moment cloud rolls in. Whiteout navigation off a blank summit is where people get lost descending, walking confident circles a hundred yards from the correct line. A compass bearing and a tracked route in are not optional gear here, they are how you find the car.
When Warm Rock Turns to Rockfall
Rockfall on the Roman Wall in warm, dry afternoon conditions is a timing hazard, not a fluke, and it is one more argument for the alpine start. The moat-versus-bergschrund distinction bites here too: one climber’s report of post-holing to the chest near a moat below a couloir they assumed was “still fine” is the kind of thing that ends a trip. All of it is amplified by the remoteness, and the American Alpine Club’s own accident records for the range show how a single mistake out here becomes a long, serious rescue. None of it is worth treating as beneath your attention just because the grade on paper looks gentle.
The Gear This Range Actually Demands
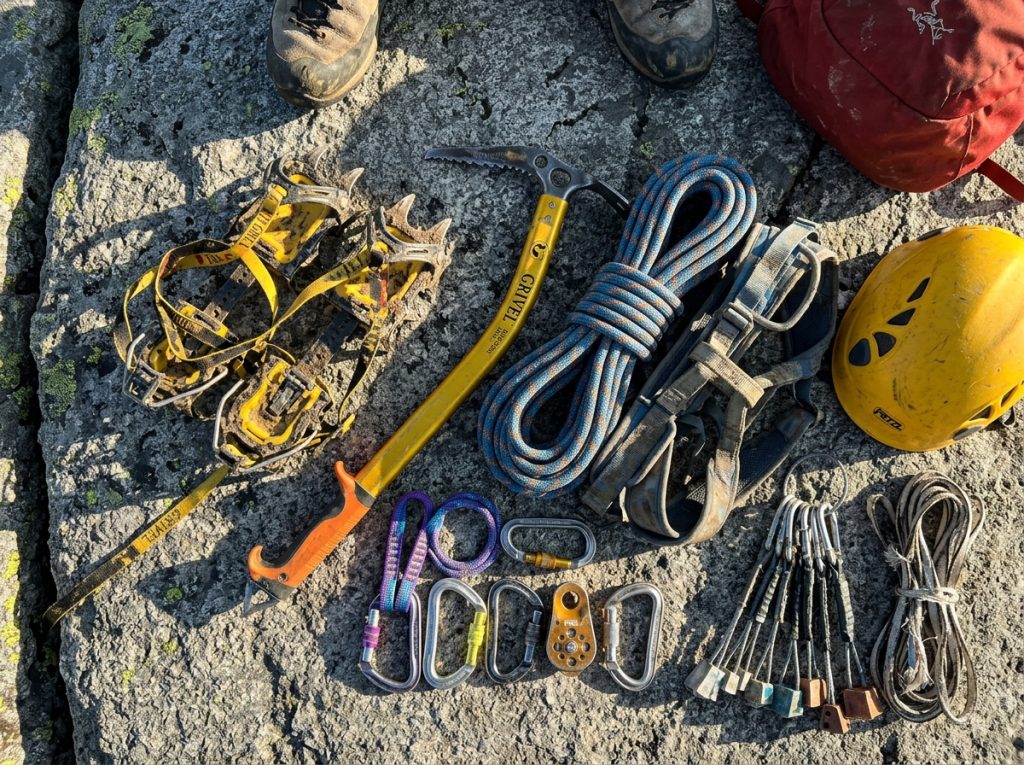
You do not need to buy the whole catalog, but you do need the right kit, and the mountain does not care about the brand on it. If you want the full breakdown, start with building a full mountaineering gear system and treat this as the short version keyed to the North Cascades.
Glacier Travel Kit
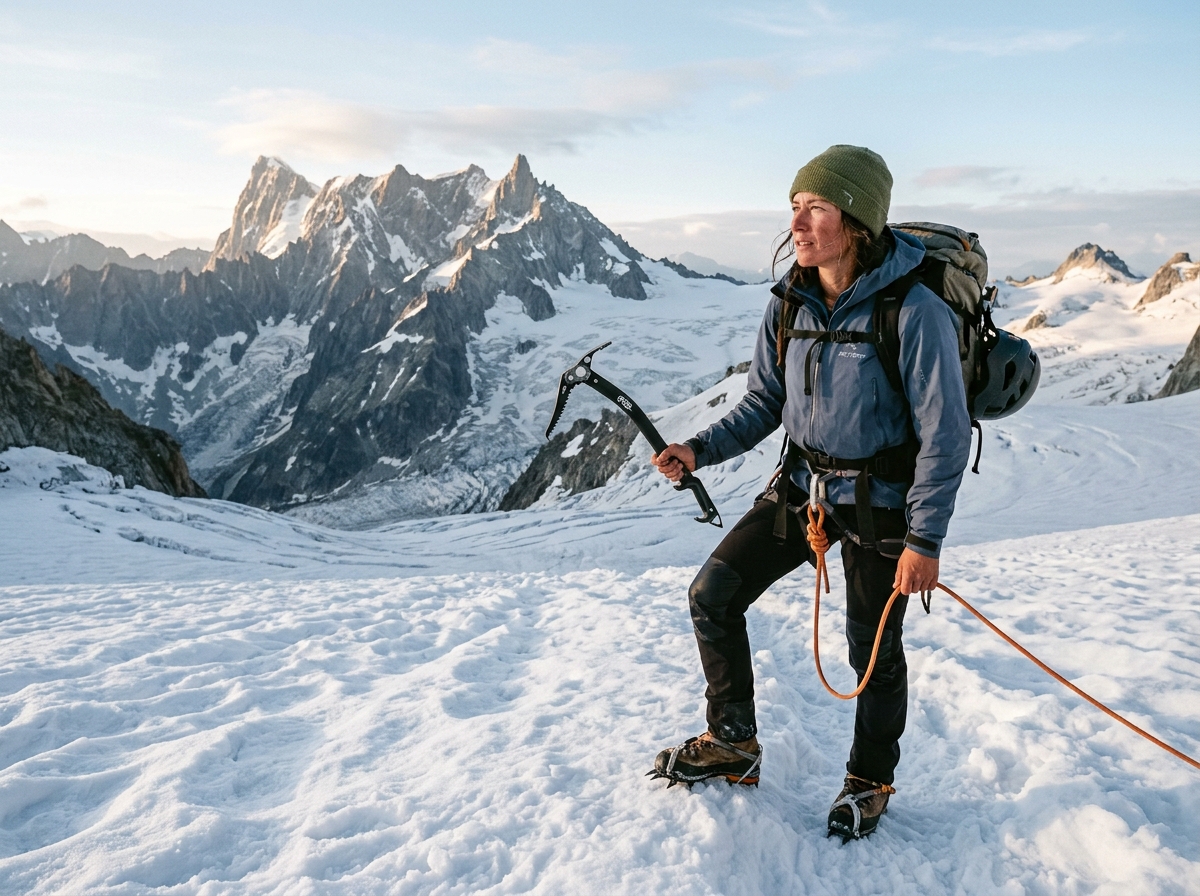
For the volcano routes, the glacier kit is non-negotiable: an ice axe, crampons, a harness, a glacier rope, and a crevasse-rescue kit of pulleys, prusiks, and locking carabiners. Every one of those has a job in a rescue, and a kit you cannot actually use under stress is just weight. Practice the systems before the trip, not on the lip of a slot.
Rock and Clean Protection
The rock objectives and the fixed-anchor moratorium drive the rest: cams, nuts, slings, and a helmet you actually wear. Because you cannot count on bolted anchors, your rack has to cover both climbing and building descents. Match it to the specific route, not to a generic “alpine rack” list.
What You Can Rent vs. Buy
The honest, anti-sell truth for a first glacier route is that you can rent most of the technical kit rather than buying it. Mountaineering boots, crampons, axe, and even a harness are all rentable in the gateway towns, which lets you learn what you actually like before you spend real money. Layer for the alpine-start cold and the afternoon slush, because you will feel both in a single day.
Vetting Your Rope Team Before You Commit
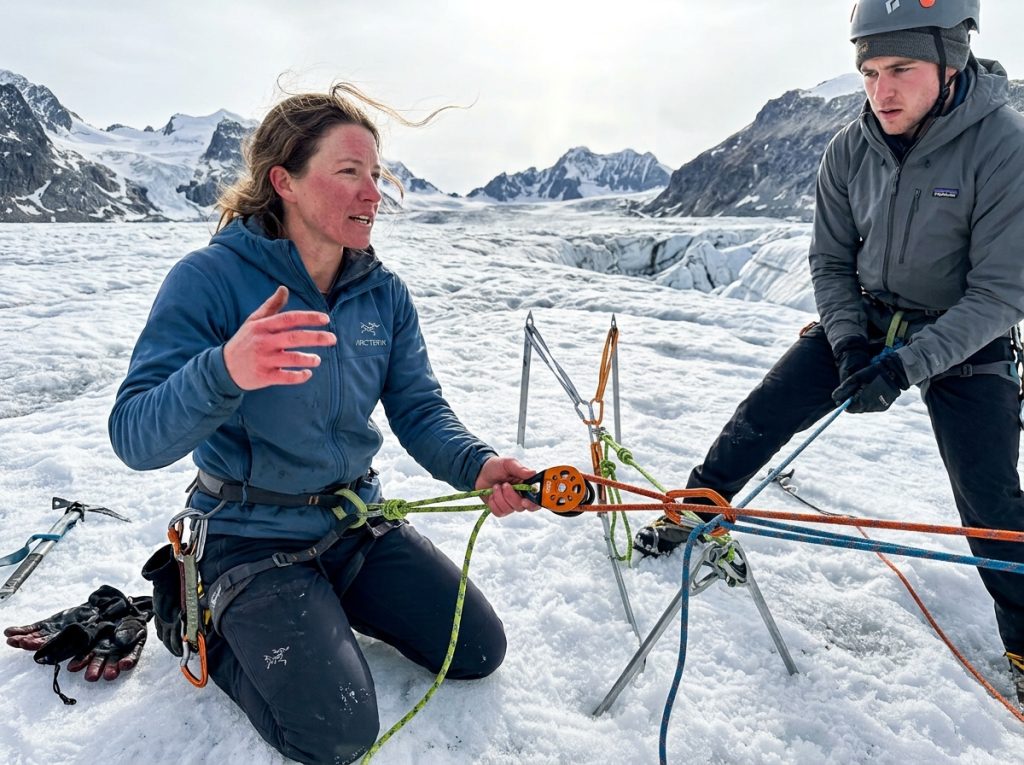
Guide services solve the competence problem by handing you a guide. Independent parties get zero guidance anywhere on how to actually vet the person you are about to trust in a crevasse-rescue scenario, and that gap is where a lot of near-misses start.
The Competency Conversation Nobody Has
Have the awkward conversation before you commit to a two-to-four-day objective. Ask your partner directly what crevasse-rescue systems they can build unaided, not whether they have “done glacier stuff.” The honest version of that talk saves trips, and occasionally lives, which is exactly why it is worth grounding your team in the glacier travel and crevasse-rescue skills every one of these objectives assumes.
Crevasse Rescue Is a Team Skill
Crevasse rescue is a team skill, not an individual certificate. One trained partner and one untrained partner on an approach glacier is a mismatch that only looks fine until someone goes in. If the person on the other end of the rope cannot get you out, the rope is decoration.
How Party Size Changes Your Margins
Party size quietly changes your margins. A two-person rope team has thinner rescue options than a three-person team on the glaciers below Forbidden, where a single rescuer may be hauling a full load alone. Agree on turnaround discipline before the climb, when it is an abstract rule, not in the moment when it is an argument.
Run a shared skills day on a low-consequence glacier before the real objective. Build a haul system, practice a self-rescue, watch how your partner moves when they are cold and tired. You learn more about a rope team in one honest practice session than in ten trip photos.
Guided or Independent, an Honest Cost Gut-Check
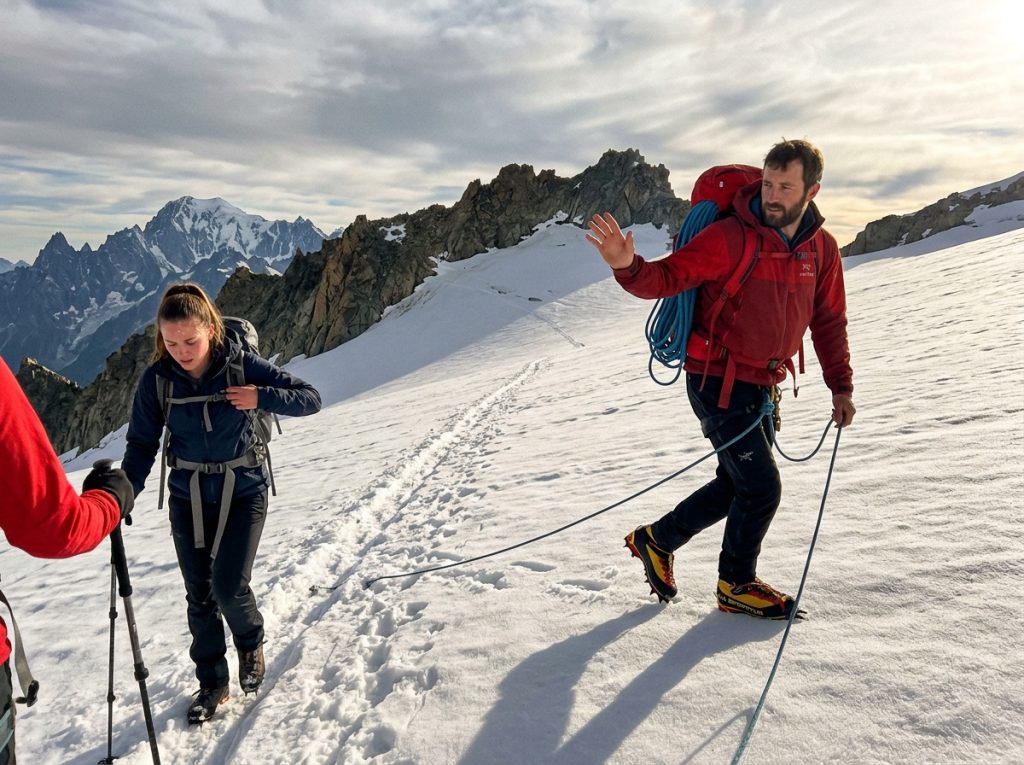
Here is the “what guides won’t tell you” section in one place. A guided trip is not a rip-off, and going independent is not automatically the purer choice. It is a real decision with honest math on both sides.
What a Guide Actually Buys You
A guide buys you three concrete things: permits handled, current-conditions knowledge for the specific objective, and a competent rescue partner who has done it before. On your first glaciated volcano, that is genuine safety margin, not hand-holding. Paying for judgment you do not yet have is a reasonable trade.
The Real Cost of Going Independent
Going independent is not free either. RMI’s posted pricing runs roughly $1,185 to $3,760 and up per trip depending on route and duration, and the independent path trades that money for the gear or rentals, the permit-lottery grind, and the months it takes to build the competence a guide already has. Cheaper on paper, more expensive in time and risk if your team is not ready.
When the Weather Decides Anyway
The humbling truth is that weather volatility turns back more summit bids than technical difficulty ever will. Budget for a weather day and a real chance of not topping out, because the Cascades cash that check often. If it is your first glaciated volcano and you lack a rescue-capable partner, lean toward guided. If you have a solid team and honest glacier competence, independent is a reasonable call.
The Bottom Line
Climb the glacier routes earlier than the guidebook says, and read current conditions instead of trusting a decade-old photo. Start your permit strategy in winter and keep a walk-up backup objective ready to go. Match the route and your rope team honestly, because this range punishes overreach far more than it rewards ambition.
Pick one objective that fits where your skills actually are right now, pull the current NPS conditions for it, and build the trip around that reality — not around the photo that sold you on the range in the first place.
Frequently Asked Questions
01What is the best beginner climb in the North Cascades?
Mount Baker’s Easton Glacier is the honest starting point, the most forgiving glaciated objective in the range. It still demands roped glacier travel, self-arrest, and crevasse-rescue basics, so beginner here means beginner alpinist, not beginner climber.
02Do you need a permit to climb in North Cascades National Park?
Yes, overnight climbs need a backcountry permit, and popular areas like Boston Basin run a competitive early-access lottery. About 60 percent of permits are reservable online and 40 percent are held for in-person walk-up at the Marblemount Wilderness Information Center.
03When is the best time to climb in the North Cascades?
Earlier than most guidebooks imply. Glacier routes are best late May through early July now, with alpine rock routes coming into shape mid-July through September. Glacier recession has shifted the practical window several weeks ahead of the traditional August dates.
04Is Forbidden Peak’s West Ridge really beginner-friendly at 5.6?
The 5.6 rating describes the rock, not the whole climb. You cross a glacier and a 40-to-50-degree snow couloir before the rock ridge starts, and the approach bergschrund can close the standard line late season. It is a serious alpine day, not a beginner sport route.
05Can you climb the North Cascades without a guide?
Yes, if your rope team has genuine glacier-travel and crevasse-rescue competence and you can handle permits and current-conditions research yourself. If it is your first glaciated volcano or you lack a rescue-capable partner, a guided trip buys real safety margin, not just convenience.
Safety Notice: Rock climbing and mountaineering are inherently high-risk
activities that can involve physical trauma or fatal incidents. The information on Rock Climbing Realms is for
educational and informational purposes only. Techniques and advice presented here are not a substitute
for professional, hands-on instruction. Conditions and risks vary by location. Always seek guidance
from a qualified instructor before attempting new techniques. By using this website, you agree that you
are solely responsible for your own safety. Any reliance you place on this information is strictly
at your own risk, and you assume all liability for your actions. Rock Climbing Realms and its authors
will not be held liable for any harm, damage, or loss sustained in connection with the use of this information.
Affiliate Disclosure: We are a participant in the Amazon Services LLC Associates Program, an
affiliate advertising program designed to provide a means for us to earn advertising fees by advertising and linking
to Amazon.com. As an Amazon Associate, we earn from qualifying purchases. We are also an official affiliate partner
of Black Diamond Equipment via the AvantLink network. If you click on a Black Diamond affiliate link and make a
purchase, we may earn a commission at no additional cost to you. We also participate in other affiliate programs.
Additional terms are found in the terms of service.