
In this article
You’re standing at the gear wall deciding between a plain tube device and a premium assisted-braking unit, and the assumption doing all the work in your head is that the expensive one is the safe one. That assumption costs you real money and buys you almost nothing in safety. The pattern shows up in gear threads constantly: someone buys the premium assisted-braking device for gym top-roping, then works out months later that a guide-mode tube would have covered nearly everything they actually do. This walks through every belay device type, which one fits how you genuinely climb, what wears out and when to retire it, and the mechanical reason each design fails when it fails.
Belay Device Types Explained (Tube, Active ABD, Passive ABD, Guide Mode)
Four devices hang on the shop peg. They all look like small aluminum objects with slots in them, and nothing on the packaging tells you which one belongs on your harness. Here’s what nobody at the counter says out loud: these aren’t four versions of the same thing. They’re three genuinely different braking mechanisms plus one orientation trick.
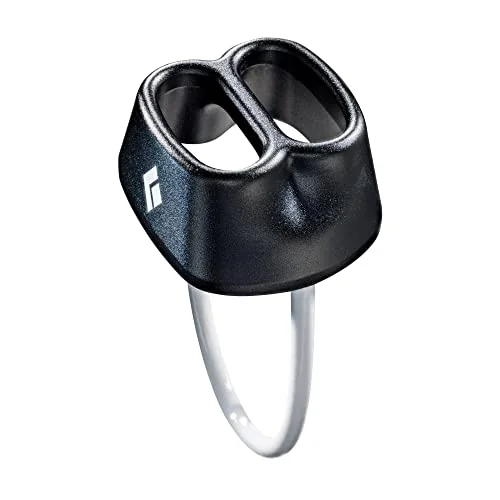
A tube-style device gives you zero mechanical assistance. The rope bends over a bar, that bend creates friction, and your brake hand supplies 100% of the stopping force. Nothing else in the system is holding your partner. The Black Diamond ATC is the baseline every gym and guide service teaches on first, rated for 7.7 to 11 mm ropes, and it is still the cheapest honest entry into belaying.
An active assisted-braking device adds a spring-loaded cam that pinches the rope when the rope starts moving fast. The Petzl GRIGRI is the reference design for the whole category, the Petzl NEOX swaps the plain cam for an integrated wheel, and the Trango Vergo is the alternative climbers keep raising because its handle geometry feels different in the hand. All three still need a brake hand. Every one of them.
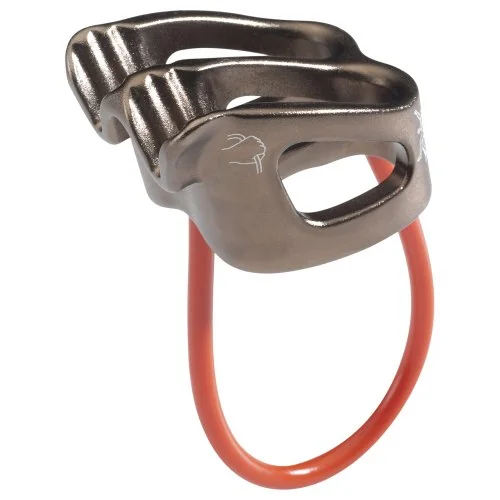
A passive assisted-braking device has no moving cam at all. The braking comes purely from geometry, the shape of the device pinching the rope against the carabiner when the rope loads. The Mammut Smart 2.0 is the cleanest example of the design, and the Black Diamond ATC Pilot works on the same principle. Cheaper and simpler than an active ABD, less forgiving than a GRIGRI.
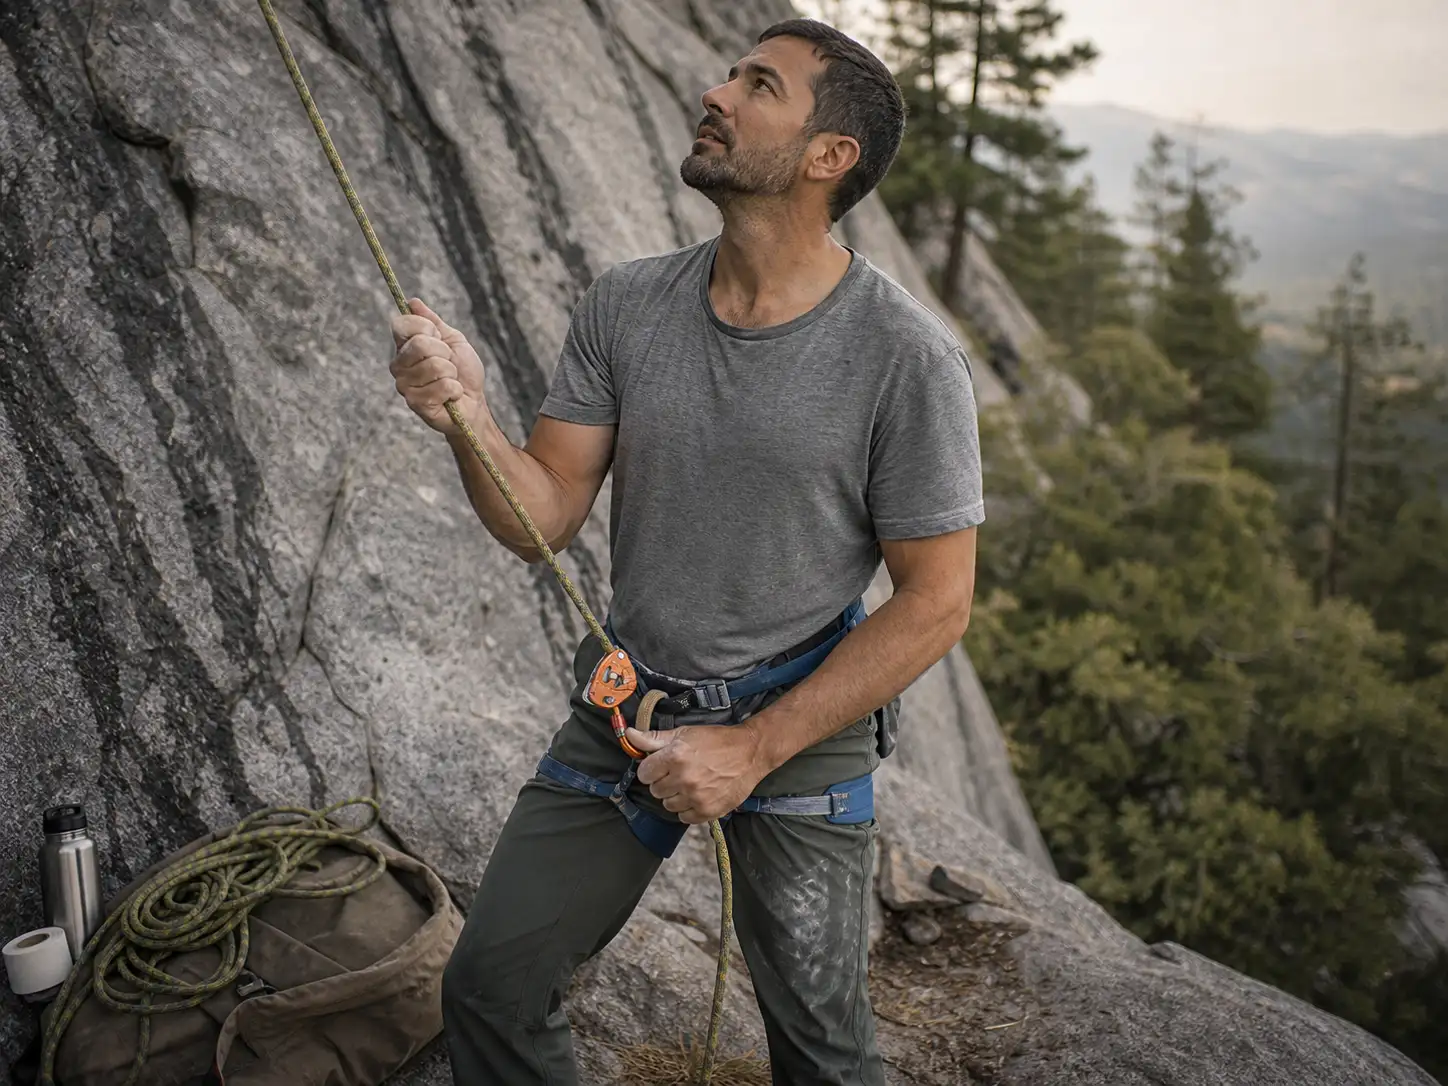
Then there’s guide mode, which trips people up because it isn’t a device category at all. It’s an orientation. Certain tube devices become an auto-blocking device when rigged off an anchor, so the second climber’s rope locks itself and the device holds the load instead of your hand.
The ATC-Guide, DMM Pivot and Petzl Reverso all do this. Worth defining plainly, because the term gets thrown around like everyone already knows it. Belaying off anchor this way is standard practice the moment you leave the ground for more than one pitch.
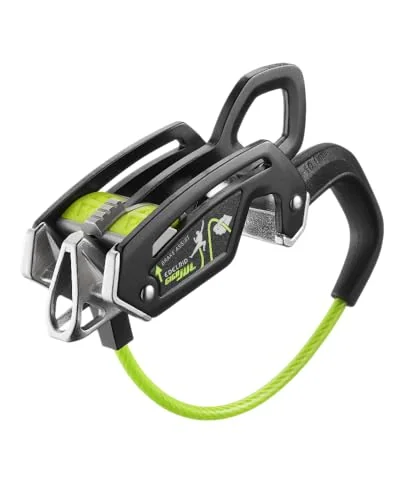
One device refuses to pick a side. The Edelrid Giga Jul slides a lever to convert between a plain tuber and an assisted-braking tuber, which means one piece of hardware covers two jobs.
Here’s the part that matters more than the categories. Whether you’re running active assisted braking or passive assisted braking, the device sounds like it does the work for you. It doesn’t.
It catches a fall you already have a hand on, and nothing more. If you want the technique-side deep dive on how each belay device type actually handles rope, that’s where the rope-path detail lives.
How to Match a Belay Device to Your Rope Diameter
Your first rope was a fat 10.2 mm gym line and everything gripped fine. Then you buy a 9.1 mm sport rope, thread it into the same device, and the first lower feels like the rope is actively trying to get away from you. Nothing broke. The friction envelope just changed underneath you.
Every device carries a rated rope diameter range, and that range isn’t marketing copy. It’s the tested friction window the manufacturer certified the device inside, and it assumes a dynamic rope rather than static line. Go under it and the rope runs faster than you expect. Go over it and the device jams up feeding slack.
Before you buy anything, check your rope’s actual diameter against the device’s range, because a compatibility mismatch invalidates every other preference you have.
The specific numbers, stated plainly: the ATC-XP runs 7.7 to 11 mm. The ATC-Guide takes 8.1 to 11 mm across single rope, half rope and twin rope. The GRIGRI is rated 8.5 to 11 mm single, optimized for 8.9 to 10.5 mm.
The ATC Pilot is narrower at 8.7 to 10.5 mm. The NEOX matches the GRIGRI’s 8.5 to 11 mm single. The DMM Pivot starts higher at 8.9 to 11 mm. Manufacturers publish these as weight in grams and millimeters rather than a vague size label, which makes cross-shopping easier than it looks.
Rope type matters as much as the millimeter figure, and it’s the spec people skip. An ATC-Guide swallows singles, halves and twins. A GRIGRI takes single rope only, full stop. That one line rules active ABDs out of a huge slice of trad and alpine climbing before the conversation about cam feel even starts.
Ropes get thinner as they age. The sheath compacts under load, and a rope that measured at the bottom edge of your device’s range when new is a different animal after two seasons of projecting. If a lower feels twitchier than it used to on the same setup, your rope changed, not your technique.
Then there’s the thin-rope case, which is where the high-friction mode earns its keep. The ATC-XP’s high-friction side delivers roughly three times the stopping power of its standard mode. That ratio exists precisely because a plain tube on a 7.7 mm cord runs faster than almost anyone anticipates the first time.
You feel a rope that’s too thin for the device long before you’d ever measure it. The lower goes from controlled to twitchy, and you catch yourself adding a second hand you never needed before on the same rope-and-device pairing. That’s the signal. Trust it.
Best Belay Device for Beginners
The gym belay test is the first real filter. Gym climbing is where nearly every belayer starts, so you need a device that passes that test, forgives the mistakes you will absolutely make across your first fifty catches, and doesn’t punish you for lowering someone a little too fast while you’re still learning what “a little too fast” feels like.
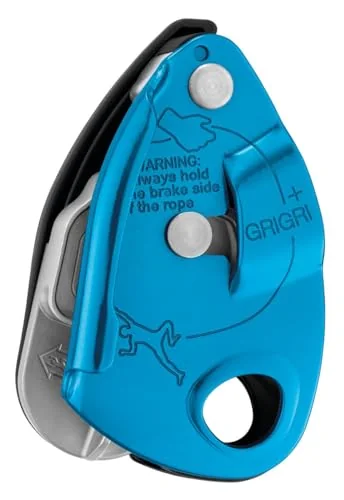
The GRIGRI is the beginner default for one honest reason, and it isn’t brand loyalty. It forgives the specific error beginners make most: a brake hand that drifts during a lower or while chatting. It doesn’t remove the need for that hand. It just buys you a margin when your attention wanders, and early on, your attention wanders.
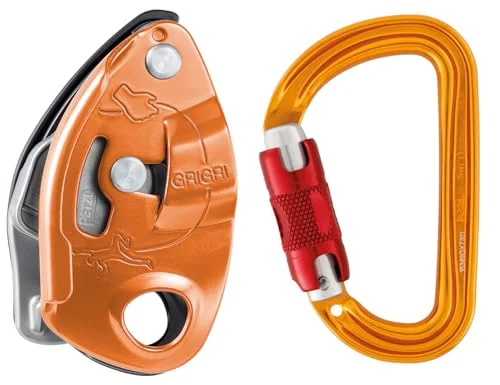
The GRIGRI+ adds the anti-panic handle, and that feature deserves a plain explanation because the name is vague. During a lower, a startled belayer’s instinct is to pull the lever harder, which on a standard device releases more rope at exactly the moment they wanted less. The anti-panic mechanism catches that: pull too far and it stops the lower dead. That’s the whole upcharge, and for a genuinely new belayer it’s a defensible one.
Now the counter-call, because this is where a lot of first purchases go sideways. If you’ll be on multi-pitch routes within the year, your beginner money is better spent on a guide-mode tube device you won’t outgrow. A GRIGRI is a great first device for someone whose next two years look like gym and sport crags. It’s a mediocre first device for someone who’ll be seconding pitches by October.
Gym requirements vary more than people assume. Some gyms mandate an assisted-braking device for lead belaying and still test on tube devices for top rope. Others go the other way. Look up what gyms actually test during a lead certification before you buy, not at the front desk on test day with a receipt in your pocket.
Practice lowering with any new assisted-braking device on a short, controlled top-rope pitch before you ever use it on a real multi-pitch lower. Every brand’s lever feel is different enough to bite you the first time, and finding that out forty feet up at a hanging belay is the wrong classroom.
The anti-panic handle announces itself the first time you trigger it. The lower stops dead, you feel briefly stupid, and that’s precisely the outcome it was engineered to produce.
Best Belay Device for Lead Belaying
The leader is stretching for a clip, rope pinched between their teeth, and the device won’t feed. From the ground it feels like the device is fighting you. From twenty feet up it reads as an unresponsive belayer. This is the single most-complained-about moment in assisted-braking belaying, and almost nobody explains what’s actually happening.
Here’s the mechanism. A GRIGRI’s cam engages on fast rope movement, full stop. That’s its trigger. A fast-clipping leader is, by definition, fast rope movement.
The device isn’t defective and it isn’t badly designed. It is doing the one thing it was built to do, at the worst possible moment for everyone involved. Every device carrying UIAA certification and CE certification is tested against the UIAA’s braking-device safety standard, and passing that test is about catching falls at a given fall factor, not about feeding slack gracefully.
The NEOX answers this directly by replacing the plain cam with an integrated wheel. Slack pays out faster to a clipping leader because the wheel keeps turning where a cam would bite. It also carries a 3:1 mechanical advantage on the lower, which matters a great deal when the climber outweighs the belayer and hand strength becomes the limiting factor.
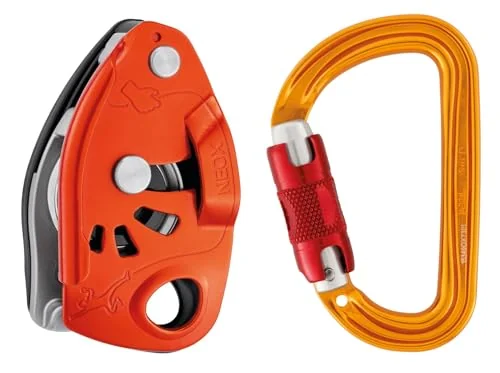
The ATC Pilot takes the opposite route to the same problem. No cam means nothing to stall. The braking comes from geometry pinching the rope against the carabiner, so feeding is smoother by design, and you give up the hard lock of an active device in exchange. Less money, less complexity, fewer moving parts to seize up.
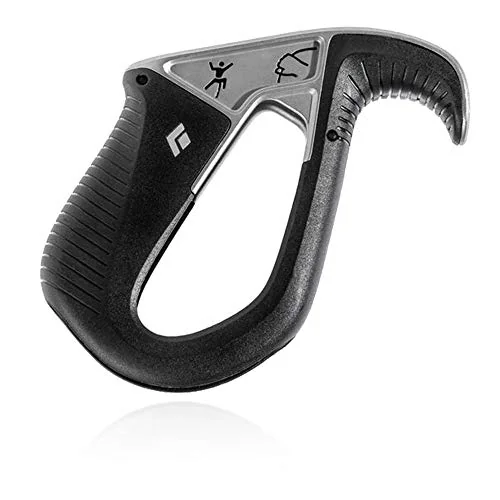
There’s a third answer that regulars keep raising in this exact conversation: the Trango Vergo, an active ABD rated 8.9 to 10.7 mm whose handle and cam geometry feel noticeably different from a GRIGRI. Some lead belayers prefer it outright once they’ve used both. It’s a hand-feel preference more than a spec argument, which is why it rarely wins comparison charts and keeps winning individual climbers.
Before you blame the hardware, sit with the uncomfortable version of this problem. Feeding slack too aggressively causes the cam to stall and lock right as the leader is trying to clip, and over-correcting the other way leaves you short-roping them into the next clip. The fix is a smooth, deliberate pull from the brake strand you dial in over a season, not a different device on your credit card. Working through the lead-belaying errors that cause most of these moments will do more for your leader’s confidence than any upgrade.
One more thing that belongs here. When there’s a significant weight difference and the leader outweighs the belayer, pick an assisted-braking device and rig a ground anchor for the belayer.
The failure mode people picture is rope slipping through the device. The actual failure mode is the belayer getting yanked off their feet and into the wall on a hard catch, which is a different problem and needs a different fix.
You can hear a stalled cam before you feel it. The rope stops with a small dull click, and both climbers know instantly what just happened.
Best Belay Device for Multi-Pitch and Guide Mode
You’re clipped to two bolts at a hanging belay. Your second is forty feet below. You need to bring them up while keeping enough hand free to manage the rack, stack rope, and get something into your mouth before the next pitch. That specific set of constraints is what guide mode solves and a GRIGRI does not.
Guide mode auto-blocks the second’s rope directly off the anchor, so the device holds the load rather than your hand does, assuming the anchor itself is bomber protection. That’s a separate conversation and a non-negotiable one. That single property is why tube devices still own multi-pitch climbing despite everything the ABD category has added in the last decade. It isn’t nostalgia. It’s the anchor doing the work.
It also matters for self-rescue: a guide-mode tube is the device you can escape a belay with, and an active ABD is not.
Rope versatility compounds the advantage. An ATC-Guide takes single, half and twin ropes across 8.1 to 11 mm. A GRIGRI takes single rope only, which rules it out of most half-rope trad and alpine days before you’ve even discussed technique.
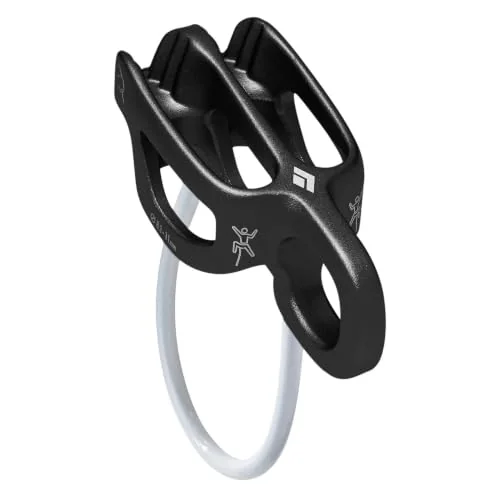
The DMM Pivot exists to fix one specific, genuinely awkward operation. Lowering a second out of guide mode on a plain tube device means redirecting the load through a carabiner while the device fights you the whole way. The Pivot’s cam geometry makes that lower noticeably smoother, which is why a lot of working guides switched to it. The trade-off is honest and worth knowing: higher friction feeding slack on takeoff.
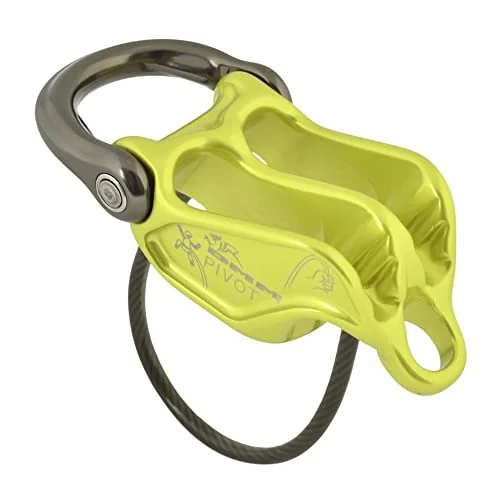
If you’d rather not own two devices at all, the Giga Jul from the section above is the honest middle path. One lever, two modes, one thing on your harness.
The first time you lower a second out of guide mode on a plain ATC-Guide, you understand instantly why the Pivot exists. The redirect fights you the entire way and you’re doing it one-handed at a hanging belay with your other hand on the brake. Learning lowering a second safely out of guide mode on the ground first is worth an afternoon.
The guide-mode auto-block is precisely why multi-pitch parties default to a tube device over a GRIGRI for hauling and seconding. Rigging a GRIGRI into an equivalent setup is clunkier at every single step, and clunky at a hanging belay compounds into slow, and slow is how parties get benighted.
The Honest Budget Call — When to Skip the Premium Device
The premium device is heavier in the hand. It feels engineered. Every detail about it says this is the serious one, and the person behind the counter isn’t lying to you when they say it’s better. What nobody says out loud is that “better” here means built for someone who lowers clients all day, and you climb on weekends.
So here’s the plain version. A guide-mode tube device covers roughly 90% of what a weekend trad or multi-pitch climber actually does, at a fraction of what a premium assisted-braking device costs. Not 90% of what the spec sheet lists. Ninety percent of what you do on an actual Saturday: belay a leader, catch a fall or two, bring up a second, rappel the route, go home.
Two use cases genuinely justify the premium spend, and they’re narrower than the marketing suggests. The first is working guides doing repeated client lowers, where the 3:1 mechanical advantage on a NEOX turns a physically taxing day into a manageable one. The second is climbers who lead belay constantly, where the difference between a cam that stalls and a wheel that rolls compounds across hundreds of clips.
Read those two descriptions again. Neither one is most readers, and that’s not an insult. It’s arithmetic.
What the extra money actually buys is specialization, not safety. This is the part every competing page dances around while listing MSRP and weight grams in a table.
A certified tube device and a certified assisted-braking device both meet the same standardized testing regime. Both are drop-tested. Both carry the same certification marks.
The premium price buys faster slack payout, an easier lower, an anti-panic lever, features that are real and useful and completely orthogonal to whether the device will hold a fall. There is no higher safety floor for sale. There’s a higher convenience ceiling.
The story that repeats in gear threads goes like this: someone buys the premium assisted-braking device because it seemed like the responsible choice, uses it for gym top-roping and the occasional sport route, and works out months later that a guide-mode tube would have covered nearly everything they do and left money for a rope. Nobody in those threads regrets owning a good device. They regret buying capability they never touch.
Before you spend, write down the last ten times you belayed and what each session actually was. Gym top rope, sport lead, multi-pitch second, rappel. If eight of those ten are gym and sport, a guide-mode tube plus a locking carabiner is the smarter purchase, and the difference is a rope or half a rack.
Now the honest counter-case, because “buy the cheap one” is lazy advice when it’s applied universally. Two situations genuinely warrant spending more, and both are about mismatch rather than prestige.
A brand-new belayer buying an anti-panic handle is buying insurance against a specific, well-documented error during their most error-prone period. And a belayer who is significantly lighter than their regular partner is managing a physics problem that no amount of good technique fully solves. In both cases the money is buying a fix for a real gap, not a general upgrade.
There’s a third scenario worth naming: if you already own a tube device and belay mostly in the gym, your next purchase probably shouldn’t be a belay device at all. Locking carabiners wear out, harnesses age, ropes get retired. Spend where the gap is.
The premium device isn’t overpriced. It’s priced for someone whose day involves twenty lowers. If your day involves two, you’re paying for the other eighteen.
That’s the whole calculation, and once you see it that way the gear wall gets a lot less intimidating. Worth thinking through how belay devices fit alongside carabiners and quickdraws in a first rack before you commit any of your budget, because the device is one line item in a system and the system is what keeps you on the rock.
Why Belay Devices Fail — The Mechanics Behind Each Mistake
Every failure below is something a competent person does on an ordinary day. Not a stunt, not negligence, not someone being careless in a way you’d never be.
That’s exactly why the mechanism matters. Knowing what physically happens inside the device is what makes the correction stick at 6 p.m. on a Sunday when you’re tired and your partner is on their last burn.
Tube devices: the brake hand IS the mechanism
A tube device supplies zero mechanical backup. There’s nothing to fail because there’s nothing there. One hundred percent of the stopping force comes from your hand holding the bend in the rope, and the bend only exists while your hand is below the device pulling the brake strand back.
Say the consequence out loud, because it gets softened constantly. Releasing the brake hand for one second removes all friction from the system. Not most of it. All of it.
There is no partial state where the device holds a little bit and you hold the rest. There’s no catch and bite the way an assisted device gives you. The rope runs free, it runs free immediately, and gravity has already done the math.
This is where the overwhelming majority of tube-device accidents happen, and it’s almost never during the scary part. It’s during a conversation. It’s while watching the climber work a sequence and forgetting the hand exists. The mistake isn’t dramatic, which is precisely why it keeps happening to experienced people who would never take a shortcut on an anchor.
Active ABDs: two specific mechanisms defeat the cam
Backward threading is the one that gets people, and it deserves the detailed explanation nobody gives it. Thread the rope backward through the device and the cam inside an active ABD stops working, because it only works in one rope orientation. It’s designed to rotate and pinch when the load side pulls in a specific direction. Load it backward and the cam physically cannot close on the rope. The geometry that makes it work is the same geometry that makes it useless reversed.
What makes this hazardous rather than simply wrong is that a backward-threaded device looks correctly rigged from a normal viewing angle. The rope goes in, the rope comes out, the carabiner is locked, the device is on the belay loop. Everything a glance would check passes. The mis-threading is only visible if you look at which side the rope enters from and know what you’re looking for, and it’s invisible entirely once you’re standing up and the device is against your hip.
Holding the cam open is the second mechanism and it’s a habit rather than an accident. During a jerky lower, pressing a thumb on the cam smooths everything out beautifully, because you’ve manually defeated the assisted braking and converted the device into a tube with no brake-hand discipline behind it. The ratchet feel you were fighting was the mechanism working. People develop this habit because it works, right up until the moment it needs to not be a habit. If a lower feels jerky, the fix is more brake-strand friction through your hand, not a thumb on the cam.
Both of these connect back to the same trigger. The cam engages on rope speed, which is why it stalls when you feed a fast leader and why nothing you do slowly will make it bite. Speed in, cam out. That’s the whole logic of the mechanism, and once you hold it in your head both failure modes stop being surprising.
The check that catches all of it
The cam test catches nearly everything above, takes two seconds, and almost nobody does it consistently. Before your partner leaves the ground, pull rope through fast on the brake strand and confirm the cam engages and locks. Every time. Not just with a new device, not just on outdoor days.
Pair it with the standard partner check: device rigged correctly on its HMS carabiner, that carabiner locked and oriented, and a knot in the rope ends so nothing can feed through. Running through the pre-climb checks people skip most turns this from a thing you remember into a thing you do without deciding to.
The reason the cam test matters more than any other check is specific: backward threading is caught almost exclusively by this test, because a mis-rigged device looks completely normal until the moment it’s loaded, and by then the information arrives too late to be useful.
A correctly threaded cam gives a short, definite bite when you snap the brake strand. It’s a distinct feeling, and once you’ve felt it a few dozen times a backward-loaded device feels obviously, unmistakably dead in your hand. That’s the whole test. Two seconds, and it’s the two seconds that catch the failure mode you can’t see.
Belay Device Comparison Table
After eight sections of context, here is every device in this guide on one screen you can scan or screenshot before you walk into the shop.
| Device | Type | Rope Diameter | Rope Types | Guide Mode | Best For |
|---|---|---|---|---|---|
| Black Diamond ATC | Tube | 7.7–11 mm | Single, half, twin | No | Learning to belay |
| Black Diamond ATC-XP | Tube, dual friction | 7.7–11 mm | Single, half, twin | No | Thin ropes |
| Black Diamond ATC-Guide | Tube, guide mode | 8.1–11 mm | Single, half, twin | Yes | Multi-pitch and trad |
| Black Diamond ATC Pilot | Passive ABD | 8.7–10.5 mm | Single | No | Sport lead belaying |
| Petzl GRIGRI | Active ABD | 8.5–11 mm | Single | No | Gym and sport |
| Petzl GRIGRI+ | Active ABD, anti-panic | 8.5–11 mm | Single | No | New belayers |
| Petzl NEOX | Active ABD, wheel | 8.5–11 mm | Single | No | Constant lead belaying |
| DMM Pivot | Tube, cam-assisted guide | 8.9–11 mm | Single, half, twin | Yes | Lowering a second |
| Edelrid Giga Jul | Convertible tube/ABD | Single and half | Single, half | Yes | Owning one device |
| Trango Vergo | Active ABD | 8.9–10.7 mm | Single | No | Alternative handle feel |
| Mammut Smart 2.0 | Passive ABD | Single | Single | No | Simple assisted braking |
A note on what isn’t here. Plenty of solid devices sat just outside this list (the Edelrid Pinch, the Mammut Nordwand alpine belay, the Camp Matik, the Wild Country Revo), and leaving them out is about category coverage, not a verdict on any of them.
Two rows deserve a second look. The ATC-Guide’s rope column is the widest in the table, and that breadth is doing more work than any single feature elsewhere on the chart. Scan the guide-mode column too: only the tube devices say yes. Every active assisted-braking device in this comparison says no, which is the entire multi-pitch argument compressed into one column.
What Wears Out and When to Actually Retire a Belay Device
The device has been on your harness for six years and looks perfectly serviceable. It’s aluminum. It has no batteries and no seals. Nothing about it says retire me, which is exactly the problem, because this is a trust-your-life piece of hardware with a wear pattern most climbers never actually inspect.
What actually wears
The primary wear point on every device type is the same: wear and tear cutting deep grooves into the braking slots as rope runs under load. Every lower, every rappel, every fall you catch drags loaded rope across the same few square millimeters of aluminum.
The metal loses. Slowly, invisibly, but it loses, and once those grooves develop sharp edges they work on your rope’s sheath in return. Devices built with a stainless steel wear plate at the contact point last considerably longer here than bare aluminum.
On active ABDs there’s a second wear path that has nothing to do with metal loss. Cams and moving parts get sticky as chalk and grit work into the pivot. People treat sticky as cosmetic, a thing to live with.
It isn’t. A cam that hesitates is a cam whose engagement timing has changed, and engagement timing is the entire mechanism.
Then there’s deformation from a drop or an impact, which is the sneakiest of the three because it can be subtle enough to pass a casual glance entirely. A device that took a bounce off a ledge and landed forty feet below might have a slightly tweaked frame, and slightly tweaked is enough to change how the rope sits in the slot.
The concrete retirement rule
Most manufacturers cap service life at five years of use even with no visible damage. That number isn’t arbitrary conservatism. Aluminum and plastic fatigue don’t announce themselves, and the tests behind the certification standard these devices are tested against are run on gear that hasn’t spent half a decade absorbing loads.
Beyond age, four triggers retire a device immediately regardless of how new it is: wear grooves deeper than 0.5 mm, any visible deformation, a drop from height of roughly six feet or more, or multiple hard catches. Any one of those, on its own, is enough.
Here’s the field version of the 0.5 mm threshold, because nobody carries calipers to the crag. Run a fingernail across the braking groove. If you can feel a distinct step where the groove starts, it’s done. That’s the whole test.
A smooth polished channel is normal wear from rope running through. A step you can catch a nail on means the aluminum has been cut away past where the manufacturer says it should be.
Apply the same inspection habit applied to your carabiners on the same day, because the two pieces of hardware live on the same belay loop and wear on the same schedule.
Care that actually extends life
Keep grit out of the cam, and do it the boring way. Rinse with clean water and dry the device fully rather than lubricating hinges, because most lubricants attract exactly the dust and chalk you’re trying to remove. You’ll fix the stickiness for a week and make it worse for a season.
Store it out of direct sun and well away from solvents. This sounds like fussy advice until you remember where most climbing gear actually lives: a car trunk in July, next to whatever leaked out of the camp stove fuel bottle. UV exposure and chemical contamination both degrade the plastic components, and neither leaves a mark you’d notice.
Retire on evidence, not on optimism. A device that fails the fingernail test at year three is retired at year three, and the five-year cap is a ceiling rather than a target. Treat the replacement timeline as a maximum, never a countdown you’re entitled to finish. The same logic covers how long a harness actually lasts, which is worth reading on the same afternoon you’re inspecting hardware, since the harness is the other half of the system and it ages faster.
You find the groove with a fingernail long before you’d ever see it. The metal looks uniform right up until the instant your nail catches on the step, and then you can’t unfeel it.
Belay Device Problems Nobody Warns You About
None of these are on a spec sheet. Each one is a real reason somebody ends up owning a second device six months after swearing the first one was perfect.
Start with the one almost nobody mentions before purchase: left-handed belaying. GRIGRI-family devices, including the GRIGRI, GRIGRI+ and NEOX, position the handle and cam release so that a left-handed belayer ends up in an awkward cross-body brake-hand motion. The story shows up occasionally in threads, always the same shape: a climber at the base of a route, mid-setup, working out that the handle is on the wrong side for how their hands work. It’s a genuine reason a left-handed climber ends up preferring a passive ABD or a plain tube, and it is almost never flagged at the point of sale.
The grabby feeling deserves an honest verdict rather than a dismissal. It’s the cam doing its job, correctly, exactly as designed. It is also a real ergonomic cost that some climbers never stop disliking, and pretending otherwise helps nobody. If the grabbiness bothers you after a season of practicing smooth feeds, that’s useful information about you, not a character flaw, and it points straight at the NEOX’s wheel or a passive design.
Rappelling constraints decide the question for a lot of people. Double-strand rappel works on tube devices and doesn’t work on most active ABDs. If your climbing involves rappelling on doubles, your device is chosen for you before you’ve considered anything else, and no amount of liking a GRIGRI’s catch changes that. Whatever you choose, it pairs with the locking carabiner your device is rated to pair with, and an HMS locker with the wrong basket shape changes how a passive device brakes.
Cold weather and gloves change everything about how an active ABD feels. Thin gloves alter the feel of every lever and every lower, and thick gloves make the anti-panic handle nearly impossible to modulate. Some climbers switch to a Munter hitch on genuinely cold days for exactly this reason, which sounds old-fashioned until you’ve tried to thumb a lever with numb hands at a windy belay.
Cross-body brake-hand belaying doesn’t feel unsafe on the ground. It feels slow. And slow is what you notice the first time your leader takes an unexpected fall and your hand has to travel further than it should to get where it needs to be.
Conclusion
Match the device to your rope first and to your use case second. A device outside your rope’s rated diameter range is the wrong device no matter how well it performs on paper or how much your partner loves theirs.
The expensive device buys specialization, not a higher safety floor. Buy the premium one when your climbing genuinely matches what it was built for, and skip it without guilt when it doesn’t.
Inspect on evidence, not on the calendar. The fingernail test across the braking groove tells you more in two seconds than counting years ever will.
Go get whatever device is on your harness right now. Run a cam test on it, drag a fingernail across the braking slot, and find out what you’re actually climbing on this weekend.
Frequently Asked Questions
01What is the difference between a tube-style and an assisted-braking belay device?
A tube device has no mechanical assistance, so your brake hand supplies all the stopping force. An assisted-braking device adds a cam or a pinching geometry that helps hold the rope when it moves fast. Both still require a hand on the brake strand at all times.
02Is a GriGri better than an ATC?
Neither is better outright, because they solve different problems. A GriGri is more forgiving for single-pitch belaying and lowering. An ATC-Guide handles half and twin ropes, rigs in guide mode for multi-pitch, and rappels on doubles.
03Can you rappel with an assisted-braking device?
On a single strand, most active assisted-braking devices work. On a standard double-strand rappel they generally do not, which is tube-device territory. Check your specific device’s manufacturer instructions before committing to any rappel setup.
04How do I know when to retire my belay device?
Run a fingernail across the braking groove, and if you feel a distinct step, retire it. Beyond wear, most manufacturers cap service life around five years of use, and any visible deformation or hard drop retires the device immediately.
05What belay device do climbing gyms require?
It varies by gym, and increasingly gyms require an assisted-braking device for lead belaying while still allowing tube devices on top rope. Check your gym’s policy before buying, since the belay test runs on their rules and not the device’s.
Safety Notice: Rock climbing and mountaineering are inherently high-risk
activities that can involve physical trauma or fatal incidents. The information on Rock Climbing Realms is for
educational and informational purposes only. Techniques and advice presented here are not a substitute
for professional, hands-on instruction. Conditions and risks vary by location. Always seek guidance
from a qualified instructor before attempting new techniques. By using this website, you agree that you
are solely responsible for your own safety. Any reliance you place on this information is strictly
at your own risk, and you assume all liability for your actions. Rock Climbing Realms and its authors
will not be held liable for any harm, damage, or loss sustained in connection with the use of this information.
Affiliate Disclosure: We are a participant in the Amazon Services LLC Associates Program, an
affiliate advertising program designed to provide a means for us to earn advertising fees by advertising and linking
to Amazon.com. As an Amazon Associate, we earn from qualifying purchases. We are also an official affiliate partner
of Black Diamond Equipment via the AvantLink network. If you click on a Black Diamond affiliate link and make a
purchase, we may earn a commission at no additional cost to you. We also participate in other affiliate programs.
Additional terms are found in the terms of service.