
In this article
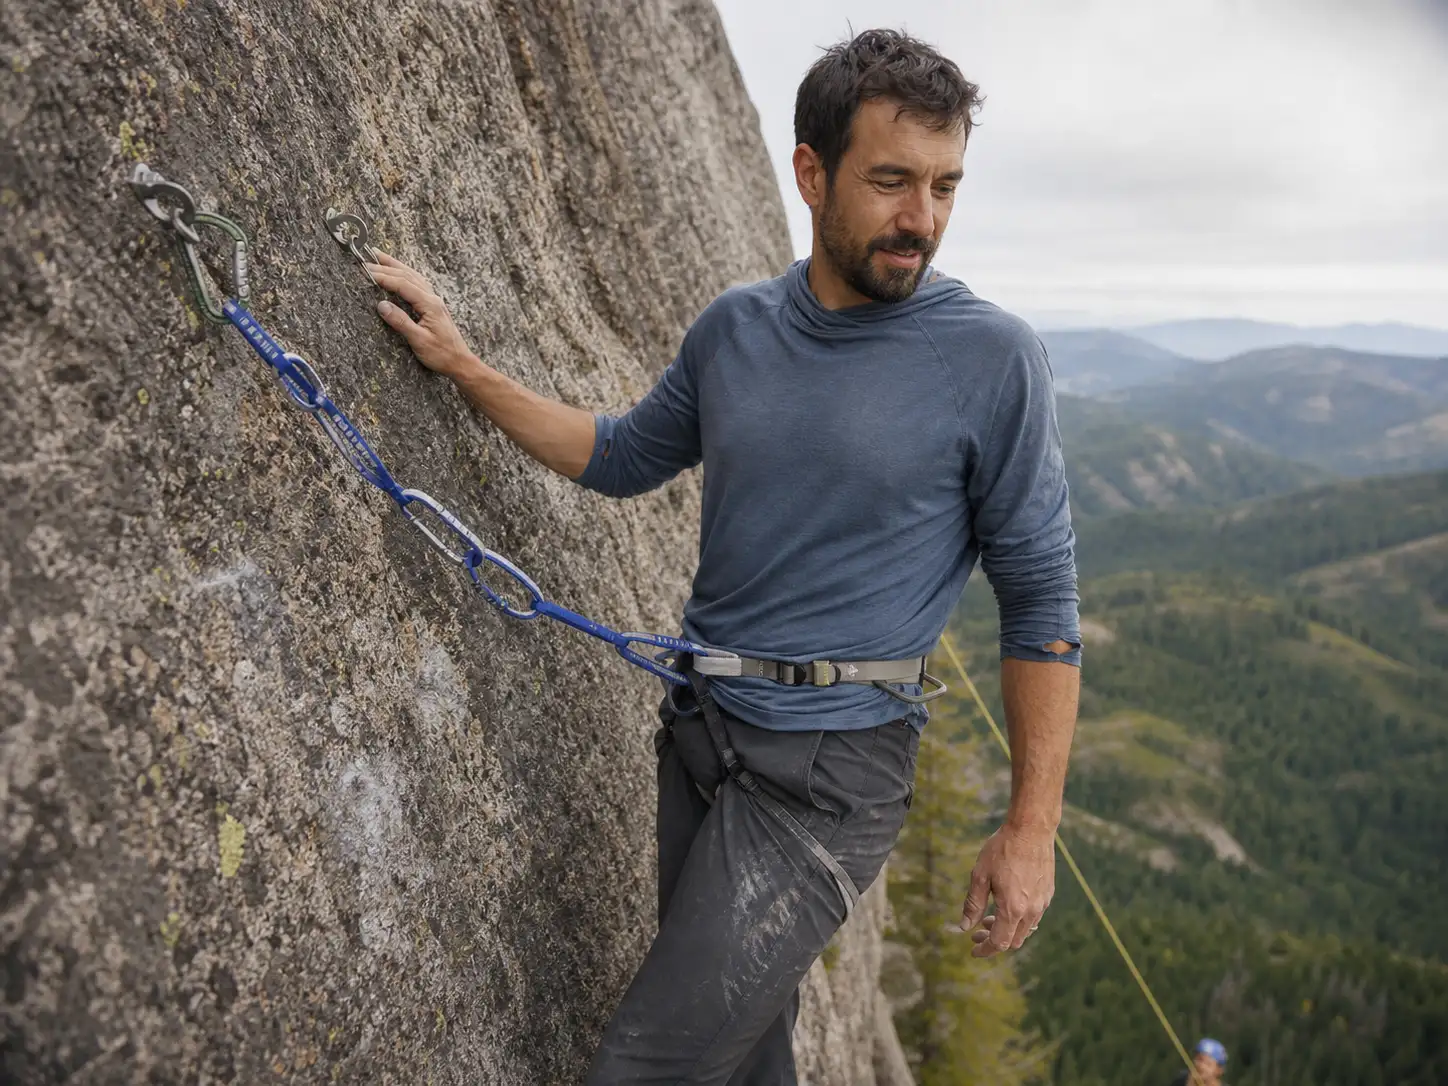
You’re standing at the anchor, forty feet up, and your partner unclips a loop of stitched webbing from their harness and holds it out. “Here, clip in with my daisy.”
It looks like a personal anchor system. It costs a fraction as much, and the stitching looks bomber. And one of the two words in that sentence describes gear that was never built to catch you.
Black Diamond prints the warning on their own daisy chains: body weight only, keep it out of your belay and protection system. Climbers who have watched the stitching let go in a test rig describe a carabiner ripping through bar tacks as looking like a rope magic trick, fast and quiet and over before anyone reacts. This breaks down what each tool actually is, the force where a daisy chain stops holding, the one mis-clip that cuts its rated strength to a fraction of what you think you have, how to read a certification tag instead of a marketing label, and when most working guides skip both and just use the rope.
Here is the whole comparison in one glance, before we get into why any of it matters.
| Feature | Daisy Chain | PAS (certified) |
|---|---|---|
| Built for | Aid climbing position control, body weight only | Attaching yourself to an anchor |
| Construction | One strap folded back and bar-tacked into sewn pockets | Individually sewn closed loops, or dynamic rope material |
| Rated strength | About 1-2kN across pocket stitching if clipped wrong | 10kN dynamic lanyard, up to 22kN static sling |
| Certification | None exists for the category | UIAA 109 / CEN 17520, or UIAA 104 / CEN 566 |
| Safe to fall on? | No, under any configuration | Only if the tag reads UIAA 109 / CEN 17520 |
| Safe as an anchor tether? | No | Yes, clipped to any loop |
What a Daisy Chain Actually Is (and What It Was Built For)
Nobody designed the daisy chain to be a personal anchor. It was built for big-wall aid climbing, where you spend the whole day hanging off gear, standing in aiders, and moving your weight up six inches at a time. What you need there is dozens of adjustment points between your harness and a fifi hook. What you don’t need is fall arrest, because the rope is already doing that job.
So the gear isn’t the problem. A tool got adopted for a job it never applied for, mostly because it hangs on the same pegboard as the thing that does that job.
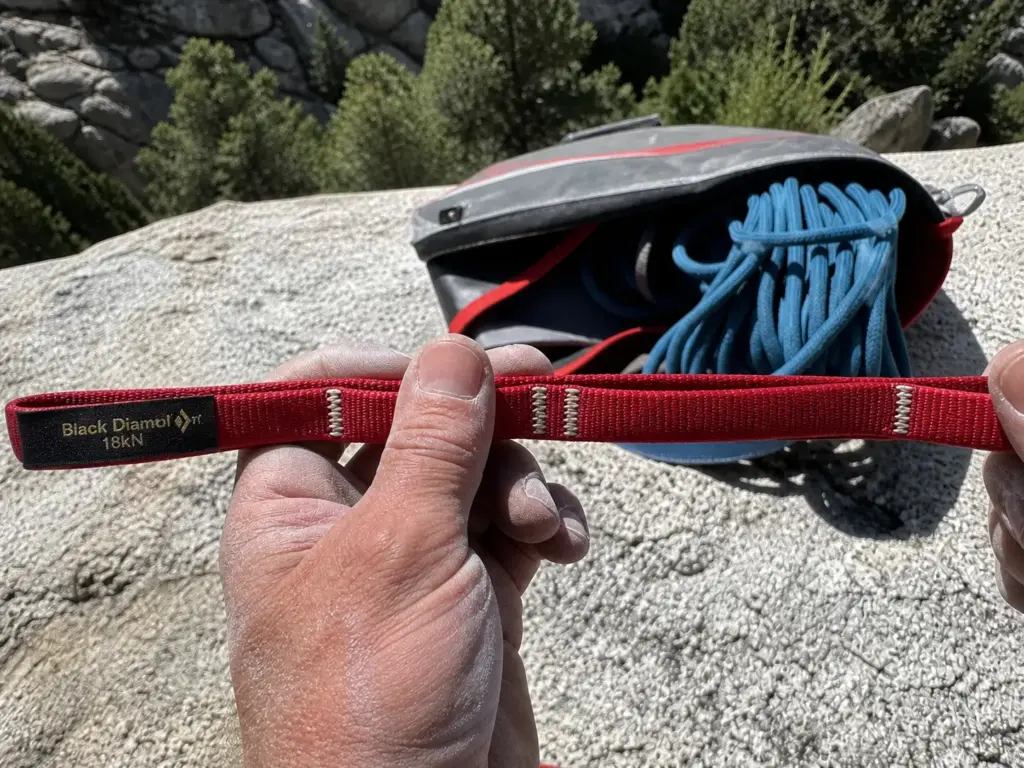
How a sewn-pocket daisy chain is built
Take one length of nylon webbing or Dyneema (UHMWPE, if you’re reading the spec sheet), fold it back on itself over and over, and sew each fold shut with a cluster of stitches. That stitch cluster is a bar tack. What you end up with is a strap with a row of pockets down its length, and every one of those pockets is held closed by nothing but thread. That’s the traditional daisy chain, and it’s worth naming precisely, because the adjustable kind further down this page is a different animal with the same first word.
That distinction matters more than anything else here. A bar tack is not a load-bearing terminal. It’s a divider, there to keep the pocket in shape while you shift your weight in an aider, specified for exactly that much force and no more.
As Black Diamond’s own QC Lab bulletin on daisy chain dangers puts it, these are built for aid climbing only, to support body weight only, with an explicit instruction not to use them in your belay or protection system. That’s the manufacturer, not a forum argument.
The Black Diamond Nylon Daisy Chain, 18mm, 115cm is the reference example for the category, worth naming precisely because it’s the one this article is telling you not to clip into an anchor. As an aid tool it’s fine. Burly nylon, plenty of pockets, does what it says on the tag. The tag just doesn’t say what a lot of people assume it says.
The job it was actually designed for
Picture a wall route where the climbing is all gear placement and body weight. Place a piece, clip your daisy to it, sit into the aider, stand up, place the next one. The daisy is a leash keeping you tied to the piece you’re standing on, length tuned instantly by grabbing a different pocket. A positioning device in the same sense a window-cleaner’s belt is one.
That’s a real job and daisy chains are good at it. If you’re getting into the big wall systems daisy chains were designed around, you’ll carry a pair and use them correctly, because in that context you’re never asking them to arrest anything.
Why “daisy” became a catch-all word at the crag
Language did the damage. At most crags, “daisy” gets used for any stitched webbing loop connecting a harness to an anchor. Someone says it, someone hands over gear, nobody looks at a tag. Two objects, one word, wildly different consequences.
There’s also no certification standard for a daisy chain at all. Not a weak one, not an old one. None. The absence of a UIAA number on the label isn’t sloppy paperwork, it’s the entire message: the category was never tested against a fall-arrest standard because it was never meant to arrest a fall.
What a Personal Anchor System Is
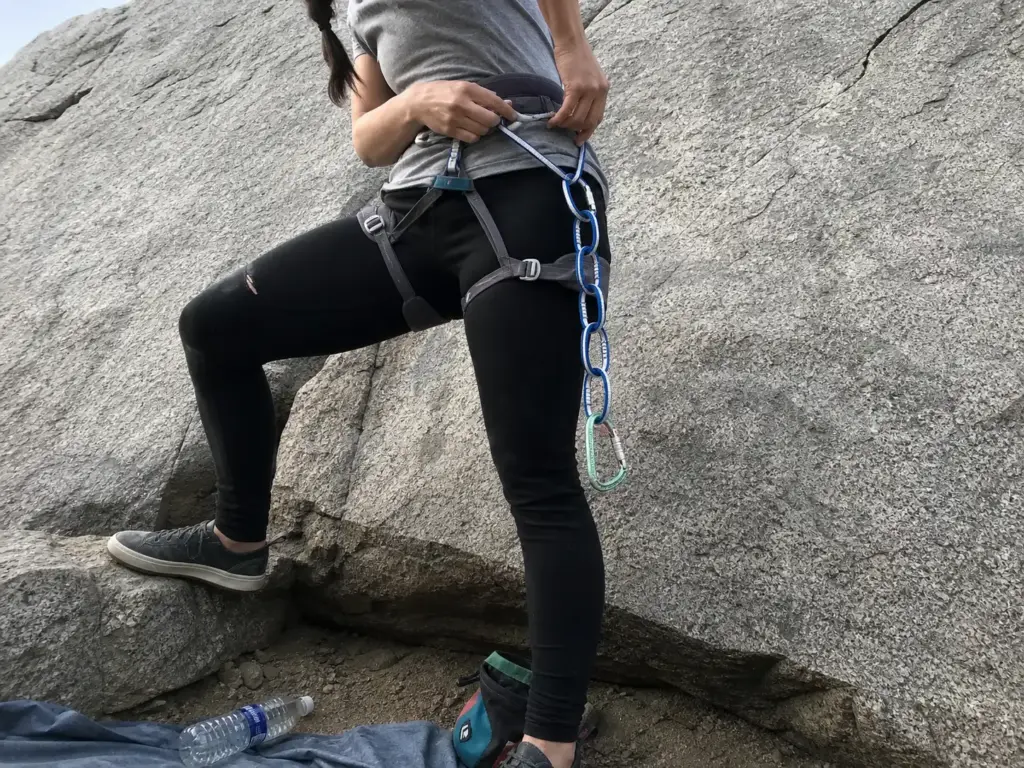
Hold a PAS in one hand and a daisy chain in the other and you’ll struggle to tell them apart across a room. Both are webbing, both have loops.
The structural difference is everything. On a PAS, every loop is a closed, full-strength ring.
Clip anywhere, clip two at once, clip a combination you invented on the spot, and you still have the full rated strength of the material. The failure mode that defines a daisy chain does not exist here. That’s the whole design brief.
Shake the thing out and hold it up to the sky. On a real chain-link PAS you can see daylight through every loop independently, because each one is a sewn closed ring. On a daisy chain the pockets collapse flat into one continuous strap the second there’s no tension on them. You can do this check from across the crag, and it takes two seconds.
The static chain-link PAS
This is the version most climbers picture. A run of static webbing sewn into a series of individual sewn loops, each one full strength, rated as a mountaineering sling under UIAA 104 / CEN 566. Strong, simple, light, and it does not stretch.
The Metolius PAS 22 Personal Anchor System is the canonical one, the product people mean when they say “just get a PAS.” It runs 22kN, 38 inches of chain-link webbing, certified as a sling. That 22kN is the number everyone quotes, and a big static number is not the same thing as a fall rating. More on that two sections down.
The dynamic rope lanyard
The other category called a PAS is built from actual dynamic rope material, usually around 9mm, with sewn or adjustable arms. It carries a different certification, UIAA 109 / CEN 17520, because it’s tested against a different question: not “how hard is this to break” but “can it catch a falling climber without wrecking the anchor.”
These stretch. That’s the point. A static sling passes the entire spike of a dynamic fall straight into your harness and the bolts, which is textbook shock loading; a dynamic lanyard eats a chunk of that fall force in the material instead.
How a PAS attaches to your harness
Girth hitch it through both tie-in points, the same two spots your rope goes through, unless the manufacturer’s instructions say to use the belay loop. Then put a locking carabiner on the anchor end.
Not a quickdraw. Not a fifi hook. Not a non-locking carabiner from the bottom of your pack. The same tether doubles as your rappel extension on descent, so the connection at that end is carrying real work all day.
Worth being picky about picking the right locking carabiner for the anchor end, because a tether is one of the few places where the carabiner is the entire connection with no backup behind it. Screwgate, auto-lock, whatever you trust. Just make sure it locks and that you can work it one-handed.
The 2kN Problem, or How a Daisy Chain Actually Fails
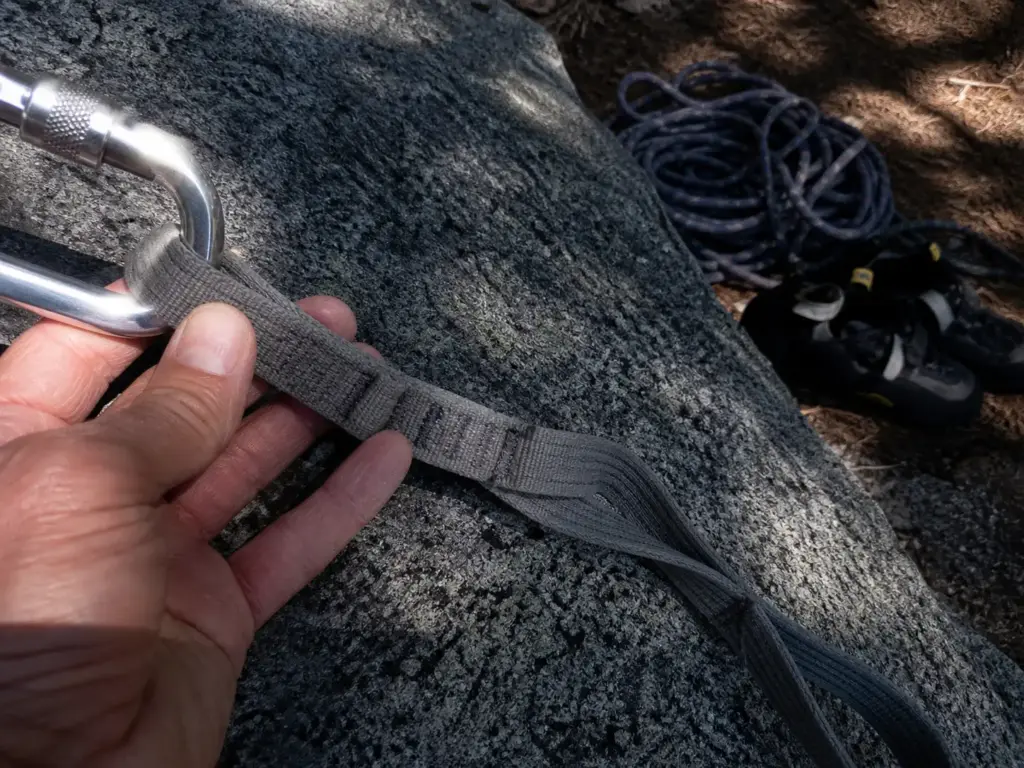
Every article on this topic tells you a daisy chain fails if you clip it wrong. Almost none walk you through what the webbing is doing during that half second. That gap is why people memorize the rule, forget it, and end up clipped into a pocket at a hanging stance three years later.
Once you can see the load path, you stop needing to remember the rule.
What 2kN actually feels like
The bar-tack stitching between pockets lets go somewhere around 1-2kN, and individual pocket tests have come in near 2.2kN, roughly 500 pounds. A climber standing still on a ledge generates about 0.7 to 0.8kN. So the margin between “holding me fine” and “gone” is a factor of two or three.
A factor of two sounds like a cushion until you remember what a short drop does. Lean back onto a tether with six inches of slack, add a loaded rack, and the margin is gone before you’ve moved a foot.
Which is why “it held my weight fine all day” is not evidence of anything. Of course it held. Holding your static weight is the one thing it was built to do.
If those numbers feel abstract, it’s worth understanding what a kN rating on a spine actually promises, because every rating in this article, on every piece of gear you own, is describing a single clean pull in a lab and not the messy thing a climber does at an anchor.
The “magic trick” mis-clip, step by step
Here is the sequence. One-handed, at a stance, in the wind, with your other hand on the anchor.
- You reach down, grab the daisy, and clip your locking carabiner toward the end of the chain.
- The gate closes across two adjacent pockets instead of passing through one. From arm’s length these look identical.
- You lean back and weight it.
- The load no longer travels the full length of the webbing. It travels through the two bar tacks sitting between those two pockets, and nothing else.
- Rated strength drops from the material’s full value to roughly 2kN.
- The stitching zippers, the carabiner walks straight off the end of the chain, and you are unattached. That’s pocket failure, and it’s a catastrophic failure in the literal sense: nothing behind it holds.
Steps two through five happen with no visible change, which is why climbers call it the magic trick. The American Alpine Institute’s breakdown of the daisy chain problem documents the same mechanism from a professional instruction angle rather than a gear blog.
A second version of the same error gets less attention. Shortening a daisy by clipping it back into itself, with the pocket oriented the wrong way, is a configuration Black Diamond’s QC Lab measured down around 500 pounds and called a roughly 50/50 failure risk from something as minor as a foot slip. Coin-flip odds, from a stumble, on a connection you thought you’d tightened up.
Why you can’t see the mistake after you’ve made it
You cannot inspect your way out of this. A correct clip and the mis-clip look identical from where your eyes are. No gate-open tell, no visible slack, no sound.
So the answer isn’t vigilance, which fails at hour six. It’s a habit with no failure mode: clip the end loop, always, and never use the pockets to set length at an anchor. If the length is wrong, fix it with the rope or different gear.
Watch out for the other webbing failure people forget: running a loaded rope across a Dyneema PAS or sling. That material handles friction heat badly and can lose serious strength fast, and unlike the mis-clip, this one leaves a mark you can find later. Any glazed, shiny, or hardened patch on webbing means it’s done. Retire it.
The Certification Numbers That Actually Matter
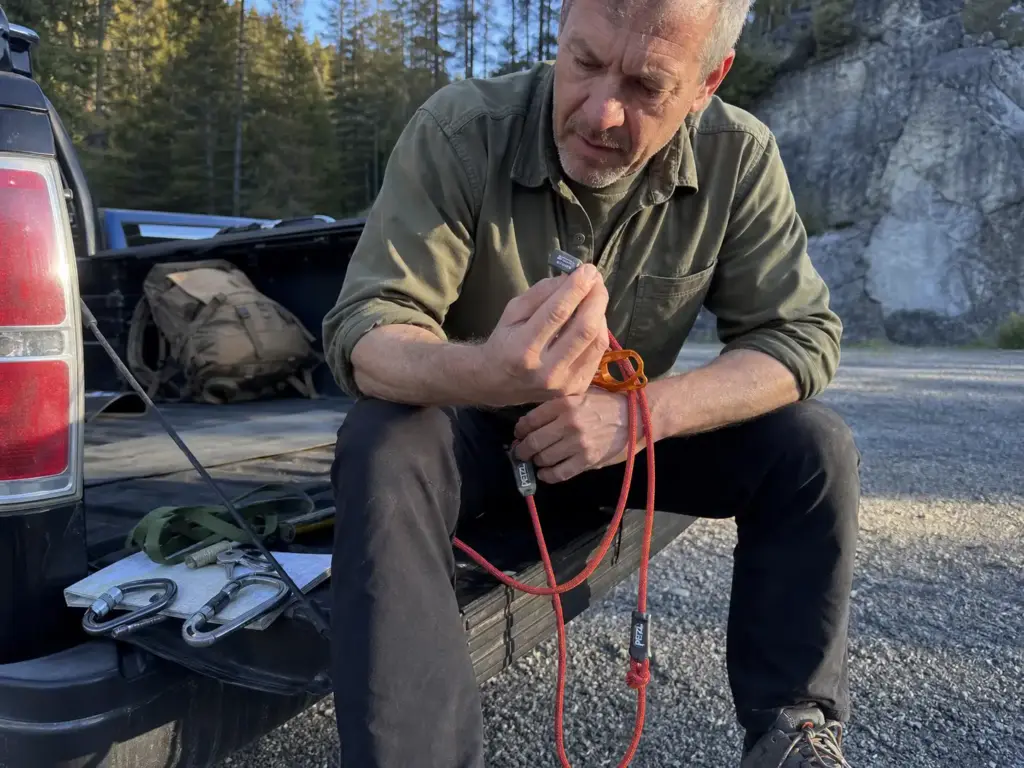
“CE certified” on a climbing product tells you close to nothing on its own, because a huge range of very different products carry a CE mark. The number after it is the entire message.
Two numbers matter here. Learn them and you can settle any gear-shop argument in ten seconds by turning a tag over.
UIAA 109 / CEN 17520, the Fall-Arrest Standard
This is the belay lanyard standard, and the only one that proves a product survives a real fall onto a tether. The test drops an 80kg load from above the anchor point and requires the lanyard to arrest it while transmitting no more than 10kN into the anchor.
The constraint is doing double duty: catch the load, and catch it gently enough that the anchor stays put. That’s the same UIAA testing philosophy behind the same UIAA testing that governs belay devices, if you want the wider picture of how climbing hardware gets certified.
The Petzl Dual Connect Adjust Lanyard is the clean example: 9.0mm dynamic rope construction, certified UIAA 109 / CEN 17520, one fixed 45cm arm plus an adjustable arm from 15 to 95cm. Honest framing, though. It’s the premium end of the category and it earns that on rappel-heavy days and awkward stances. If you climb single-pitch sport and clean bolted anchors, this is not a mandatory purchase, and anyone telling you otherwise is selling.
UIAA 104 / CEN 566, the Sling Standard
The sling standard is static, rated up to 22kN. Bigger number, completely different test. It proves the material won’t break. It says nothing about whether a fall onto it is survivable for you or the anchor.
A 22kN static sling transmits every bit of force it receives. It doesn’t break, and it doesn’t help either. Everything the fall generates arrives at your harness and the bolts.
Why the bigger kN number isn’t the safer one
The counterintuitive bit, stated flatly: for arresting a fall onto your tether, 10kN dynamic beats 22kN static. Every time.
The static number describes breaking strength. The dynamic number describes maximum transmitted force, which is a ceiling, not a capacity. One tells you how tough the material is; the other tells you how much impact you and the anchor absorb. Different questions, and the labels do a terrible job of making that obvious.
A daisy chain carries neither number, because neither test applies. No UIAA or CEN reference on the tag means you’re holding a positioning tool.
The “Adjustable Daisy” Trap
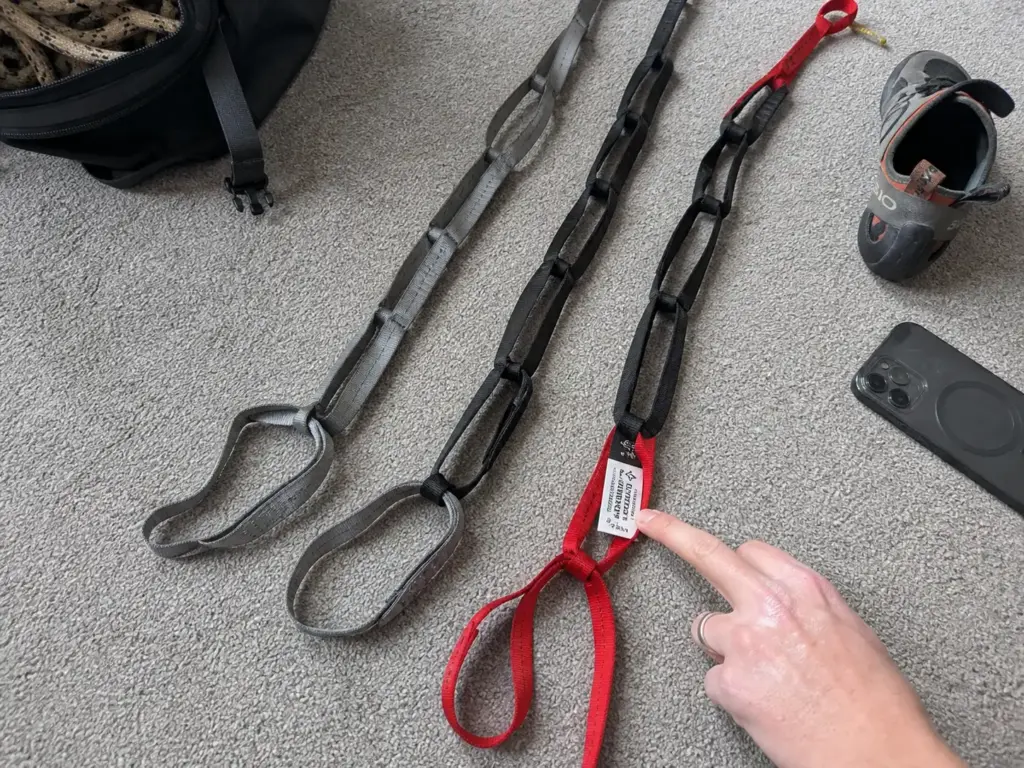
This is where the naming problem turns into a buying problem. “Adjustable” sounds like an upgrade, the better version of the same product, the way a car with adjustable seats is a better car.
It isn’t a safety spec at all. It describes a buckle. Two products can sit on the same shelf, both marketed as adjustable daisies, one rated to catch a factor-2 fall and one rated to hold you up while you stand in a ladder.
Why “adjustable” isn’t a safety spec
Adjustability and fall rating are unrelated. A buckle system or a cinching system changes how you set length. It doesn’t change what the webbing does when a load arrives suddenly, and it doesn’t add a certification the product never had.
Typical plain adjustable daisy chains run around 5kN and are neither full-strength nor fall-rated, despite marketing that parks them next to the personal anchors on the product page. 5kN beats 2kN. It’s still nowhere near a certified lanyard, and it still hasn’t been drop-tested with a human-sized mass.
The four-step tag check before you buy
Do this in the store, or on the product page before you click buy. It takes under a minute.
- Look for a UIAA or CEN number on the tag or the spec sheet. CE EN certification on its own means the product entered the personal protective equipment system, not that it passed the test you care about. No standard number anywhere, stop: it’s a positioning tool.
- Read which standard it is. 109 or 17520 means fall-rated. 104 or 566 means it’s a sling: strong, static, not tested for fall arrest.
- Hunt for disqualifying language. “Body weight only” or “aid climbing only” anywhere in the description is a hard stop, no matter how anchor-like the photos look.
- Check the material. Actual dynamic rope construction versus flat webbing tells you what the product is trying to be before you even find the tag. While you’re there, look at webbing wear: fuzzing is normal, but glazing means the abrasion resistance is spent.
This is the same habit of reading gear before you trust it that keeps a rack honest, and it’s the most portable skill in this article. You’ll use it on every piece of PPE you ever buy.
What a real fall-rated hybrid looks like
The category does contain genuine products, so the checklist deserves a positive example and not just warnings. The Sterling Chain Reactor is a dynamic hybrid designed to take three factor-2 drops. That’s a high bar, since a factor 2 is roughly the worst fall a climber can generate, and surviving three in a row is not something a bar-tacked pocket strap will do.
Now the anti-sell. Most climbers don’t need this category at all. The hybrid exists for people who genuinely want adjustability and fall rating in one piece of gear, a real but narrow group. If you’re cleaning bolted anchors on single-pitch sport, a plain certified PAS covers you completely, and so does the rope.
When Guides Skip Both and Just Use the Rope
Here’s the answer gear articles skip, because it doesn’t sell anything: for a lot of climbing, the best personal anchor is the rope already tied to your harness.
It’s free, it’s dynamic, and it adjusts to any length one-handed. American Alpine Institute’s instructors note that most working professionals skip both tools and tie in directly to the anchor with the rope. That’s not a budget hack. It’s what people who do this for a living do all day.
The clove hitch case
A clove hitch on a locking carabiner at the masterpoint gives you a connection you can lengthen or shorten without unclipping, using a rope that already carries a full dynamic rating and that you’re already tied into. No second product to inspect, retire, or forget on the tailgate.
Where the rope wins outright: multi-pitch trad, leading and following, swap leads at a belay station, anything needing big clove-hitch adjustment at the stance. If you’re building out a first trad rack where the rope does more of the work, the clove hitch is doing a job you’d otherwise be paying for and carrying.
Where a hardware tether genuinely earns its weight
The honest caveat is that the rope method ties up the rope. Fine at a belay. A real problem mid-descent, when the rope has to be free to pull and re-thread while you stay attached to the station.
That’s the gap a PAS fills, and it’s narrower than the marketing implies. Hardware earns its place on rappel-heavy descents, during a changeover to rappel at a poor stance where you need both hands free, and for fast anchor attachment at bolted sport climbing anchors where you’re cleaning gear and lowering off in one motion. Anyone who’s dealt with rappel transitions where a tether is doing real work knows the feeling of wanting a fixed connection that isn’t made of the rope you’re about to feed through a device.
Most experienced climbers run a mix: clip the PAS at a bolted anchor for speed during anchor cleaning, then equalize with a clove hitch on gear anchors when they’re trad climbing. Right tool per anchor type, not one tool everywhere.
Setting your tether length so you can’t get above the anchor
The tell that someone actually uses their system, rather than owning it, is the length they set.
Long enough to reach the anchor comfortably from a standing stance, short enough that you physically cannot climb above the attachment point. That second half is what people skip.
A tether you can get above turns a stumble into a factor-2 fall onto a static sling, and that’s the other way this gear hurts people. Not always the wrong product. Sometimes the right product at the wrong length.
Set your tether length standing on the ground at the base, not hanging at the anchor. Clip in, stand up straight, and if your hands can reach above the carabiner comfortably, it’s too long. Sorting this out once at the car beats guessing at it on a ledge with a rope over your shoulder.
Your Partner Just Handed You Their Daisy Chain
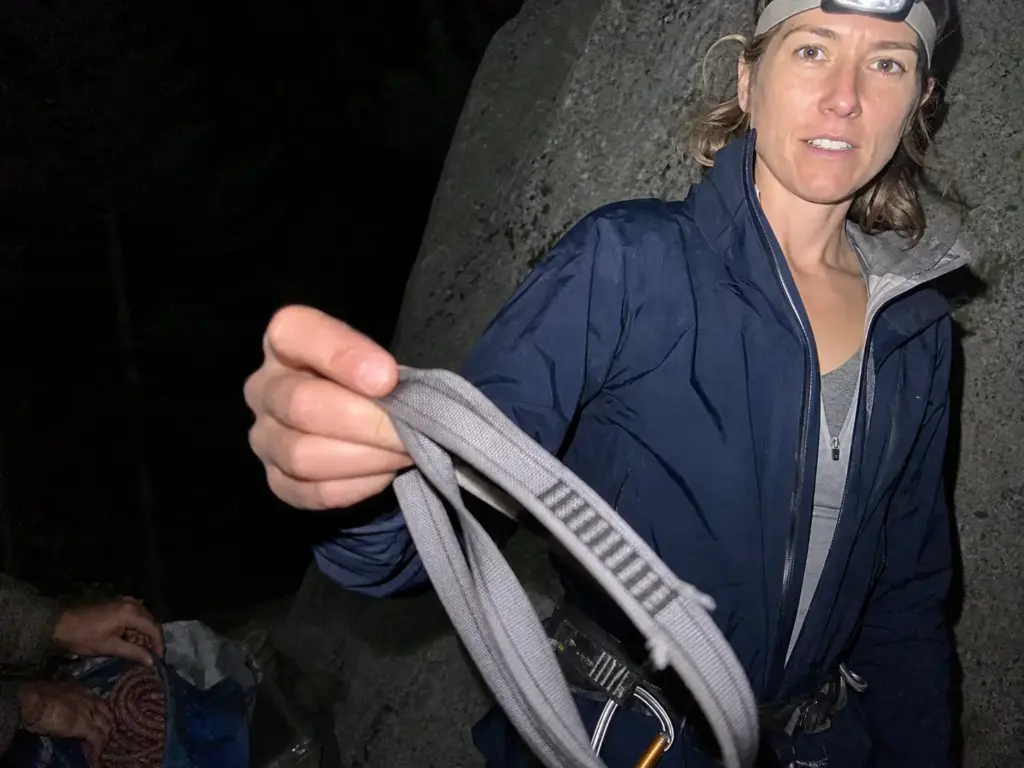
Everything above compresses into about thirty seconds of real life. You’re at the anchor, the wrong tool is in your hand, and there’s a social cost to saying no to a friend trying to help you.
Most articles stop talking right before this moment. It’s the only part that actually happens to people.
What to do in the next thirty seconds
If the rope is still in the system, use the rope. Clove hitch into the masterpoint on a locker and the entire problem is solved with gear you’re already wearing and no conversation at all. Hand the daisy back, say thanks, move on.
That covers most of these situations, because in most of them you’re still tied in. The daisy was offered as a convenience, and the convenience it offers is about fifteen seconds of rope handling. The exception is narrow: you’ve already pulled the rope, or you’re mid-changeover and it’s committed to the next rappel.
If the daisy is genuinely your only option
Sometimes the rope really is committed elsewhere. In that case: clip the end loop only, with a locking carabiner, and treat it as body-weight positioning while you get a real connection onto the anchor.
Never clip a pocket. Never clip across two. Never shorten it by clipping it back into itself.
And be clear with yourself about what “must” means here, because this is a stopgap that buys you thirty seconds of hands-free time while you rig something trustworthy. It is not a plan.
This is also why this is a locker moment, not a snapgate one: you’re already accepting one compromise in the system, so don’t stack a second one on top of it.
You don’t need a physics lecture at a hanging stance. “I’ll just clove in, it’s faster” does the whole job without making it a thing, and nobody’s ego gets involved forty feet up. Save the actual conversation for the walk back to the car, where your partner can look at the stitching in their hands while you explain it.
The two-second check that tells you which one you’re holding
The reason this scenario keeps happening is linguistic. At the crag, “daisy” gets used loosely to mean either a daisy chain or a PAS, depending entirely on who’s talking. When someone offers you “a daisy,” you genuinely don’t know which object is coming until you look at it.
So look at it. Shake it out and let it hang loose. If the loops collapse into one continuous strap, it’s a daisy chain. If each loop stays a discrete closed ring you can see through, it’s a chain-link PAS.
A dynamic lanyard gives itself away faster still, because it’s visibly rope rather than webbing: round cross-section, kernmantle sheath, usually a plastic keeper at the sewn end.
One last thing, because it’s what the whole scenario turns on. A daisy chain used correctly for years by someone competent looks exactly like one about to fail. No wear pattern, no history in the stitching. Your partner’s confidence is real and it’s also not evidence, because the gear has never been asked the question you’re about to ask it.
The Short Version
A daisy chain is a positioning tool with no fall-arrest certification and stitching that lets go somewhere around 1-2kN. A PAS is full strength at every loop. These are different categories of equipment, not different price tiers of the same one, and no amount of careful clipping converts one into the other.
Read the number, not the marketing. UIAA 109 / CEN 17520 means it was drop-tested to arrest a fall. UIAA 104 / CEN 566 means the material is strong but static. No number at all means the product was never tested for this job, and that’s the whole answer.
The rope you’re already tied into is a legitimate personal anchor and often the better one. Hardware earns its place on rappel-heavy descents and at stances where you need both hands, not everywhere.
Next time you’re at a bolted anchor with time to spare, tie a clove hitch into the masterpoint and set it so you can’t climb above it. Do it three times and it stops being a technique you have to remember and starts being something your hands just do.
Frequently Asked Questions
01Can I use a daisy chain as a PAS?
No. A daisy chain is not fall-rated and its pocket stitching can fail around 1-2kN, close to the force of your own weight landing on it. Manufacturers print body weight only on the product. If it is all you have, clip the end loop with a locking carabiner as a temporary stance.
02What are the differences between a personal anchor system and a daisy chain?
A PAS is full strength at every loop and carries a UIAA or CEN certification. A daisy chain has sewn pockets held shut by stitching and carries no anchoring certification at all. Clip a daisy across two pockets and you drop to about 2kN with no visible difference.
03What can I use instead of a PAS?
The climbing rope you are already tied into, secured to the anchor with a clove hitch. It is dynamic, adjusts to any length one-handed, and costs nothing. Working guides use it as the default and reserve a hardware tether for rappel-heavy descents.
04Is an adjustable daisy chain safe to use as a personal anchor?
Only if the tag reads UIAA 109 or CEN 17520. Adjustability describes a buckle, not a fall rating. Plain adjustable daisy chains are commonly rated around 5kN and are not fall-rated, even though marketing places them beside personal anchors on the shelf.
05How long should a PAS or personal tether be?
Long enough to reach the anchor comfortably from a standing stance, short enough that you can never climb above the attachment point. Getting above your tether turns a slip into a factor-2 fall onto a static sling, which is the second way this gear injures people.
Safety Notice: Rock climbing and mountaineering are inherently high-risk
activities that can involve physical trauma or fatal incidents. The information on Rock Climbing Realms is for
educational and informational purposes only. Techniques and advice presented here are not a substitute
for professional, hands-on instruction. Conditions and risks vary by location. Always seek guidance
from a qualified instructor before attempting new techniques. By using this website, you agree that you
are solely responsible for your own safety. Any reliance you place on this information is strictly
at your own risk, and you assume all liability for your actions. Rock Climbing Realms and its authors
will not be held liable for any harm, damage, or loss sustained in connection with the use of this information.
Affiliate Disclosure: We are a participant in the Amazon Services LLC Associates Program, an
affiliate advertising program designed to provide a means for us to earn advertising fees by advertising and linking
to Amazon.com. As an Amazon Associate, we earn from qualifying purchases. We are also an official affiliate partner
of Black Diamond Equipment via the AvantLink network. If you click on a Black Diamond affiliate link and make a
purchase, we may earn a commission at no additional cost to you. We also participate in other affiliate programs.
Additional terms are found in the terms of service.