

In this article
You’re two bolts above your last good rest, forearms filling up, and the draw you just grabbed won’t come off the hanger clean. The nose catches on the metal for half a second while your other hand does nothing but hold on. That half-second is the whole reason quickdraw shopping matters, and the American Alpine Club’s accident reporting has the incident log to prove it isn’t a theoretical annoyance. Most first racks get bought on color and price, then get climbed on for five years. Here’s what actually separates one quickdraw from another, how many you need for the climbing you do, and where the money is honestly worth spending.
Anatomy of a Quickdraw: Dogbone, Carabiner, Gate
A quickdraw is two carabiners and a sewn strap, which is exactly how most people describe it and exactly why most first racks get bought wrong. The three parts have three different jobs. The bolt-end carabiner hangs on steel, the dogbone connects them, and the rope-end carabiner is the only one your rope ever touches.
If you want the full picture of how carabiners, quickdraws and belay devices fit together as one system, that’s the parent guide. This section is about the draw itself.
The Three Parts and What Each One Does
The dogbone is the sewn sling in the middle, usually 10 to 25cm long, and it’s rated and load-bearing just like the metal on either end. It also determines how the draw hangs, how easy it is to grab, and how much leverage it puts on whatever you clipped into.
The bolt-end carabiner takes hard metal-on-metal contact. Steel hangers chew aluminum, and after a season of falls on the same route, that biner has a different wear pattern than anything else on your rack. A few draws built for permanent or high-traffic use answer this with a stainless steel insert pressed into the basket, trading a little weight for a surface the hanger can’t cut into. The rope-end carabiner takes rope friction instead, which cuts a smooth groove rather than a burr.
Then there’s the rubber keeper, the little band at the rope end that almost nobody understands. Its job is to stop the rope-end biner from rotating sideways and loading across its minor axis. It holds position. It holds nothing else.
A rubber keeper never belongs on an open sling, because on an open sling it can hold the carabiner in a position where it isn’t actually clipped to anything.
Why the Rope End and the Bolt End Aren’t Interchangeable
Look at a well-designed draw and you’ll see the ends aren’t the same shape. Standard layout puts a straight gate or a wiregate on the bolt end and a bent gate on the rope end. The bent gate creates a little funnel that catches the rope when you’re clipping one-handed with a pump building, which is the only moment that clip design actually gets tested.
The wear argument matters more than the shape argument. Bolt hangers leave sharp burrs on aluminum; rope leaves a polished groove. If you flip a draw and put a bolt-worn biner against your rope, you’ve just introduced a sharp edge to the one piece of gear that has to survive a fall without abrasion.
Never swap ends. Once a carabiner is your designated rope biner, it stays the rope biner for the life of the draw. That’s the whole reason a ten-second wear check tells you anything: predictable wear in a predictable place. Mix the ends up once and you’ve thrown away your own record.
What the kN Numbers on the Spine Mean
Every carabiner carries three numbers stamped on the spine with little pictograms next to them: major axis with the gate closed, major axis with the gate open, and minor axis. The UIAA floor for a non-locking carabiner is 20kN on the major axis and 7kN both gate-open and across the minor axis, and most sport draws ship comfortably above it, commonly around 22kN closed with gate-open and minor-axis numbers in the 7 to 10kN range. The gate-open number is the one that should get your attention, because it lands somewhere near a third of the closed rating.
That drop is the entire reason cross-loading and gate flutter get talked about at all. A carabiner loaded correctly with the gate shut is far stronger than anything you can generate in a fall. The same carabiner sideways, or with the gate vibrated open at the wrong instant, is operating in a completely different strength band. If you want the numbers broken down properly, we covered what those three kN numbers stamped on the spine actually mean in its own guide.
The dogbone carries its own rating and its own clock. Sewn slings are strength-rated independently of the metal, and they age on a schedule the aluminum doesn’t, which is why a sling and quickdraw retirement checklist built around UIAA guidance treats textile and metal as separate service-life questions. A draw with perfect carabiners and a sun-baked dogbone is a retired draw.
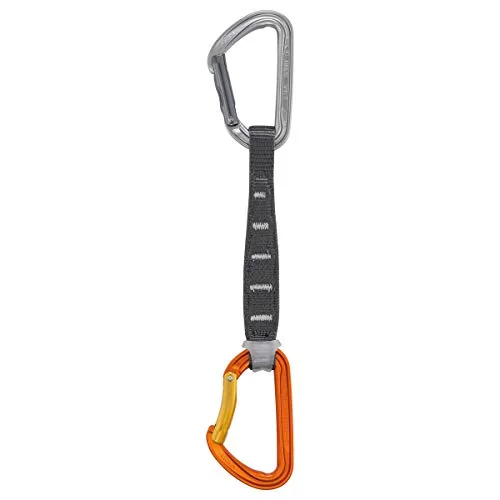
The Petzl Spirit Express shows up as the reference pick in nearly every competitor roundup for a reason, and the reason isn’t weight. It’s that the geometry is unfussy. The rope basket is deep, the gate opens where your finger already is, and the nose doesn’t catch anything. Whether it’s worth premium money for your first rack is a real question, and one this article answers honestly further down. As a benchmark for what “well made” looks like in this category, it’s the right yardstick.
Carabiner Gate Types Explained: Wiregate, Solid, and Keylock
Here’s where nearly everyone building a first rack goes wrong, and it costs real money. The mental model is “wiregate equals snag-free.” That model is broken.
Wiregate is a gate spec. Snag-free is a nose spec. They are two separate features, and you can absolutely pay premium for one while getting none of the other.
Wiregate vs. Solid Gate: What Actually Changes
A solid-gate carabiner uses a machined aluminum gate with a spring inside. A wiregate carabiner uses a loop of stainless wire that acts as its own spring. The wire version is lighter, has fewer moving parts to gum up, and doesn’t have an internal spring cavity that can pack with ice or grit.
The real advantage is gate flutter, and the physics are simple. A solid gate has mass. When a rope whips past during a fall, or wind vibrates the draw, that mass can carry enough momentum to bounce the gate open for a fraction of a second.
During that fraction, the carabiner is sitting at its gate-open rating instead of its closed rating. A wire gate has a fraction of the inertia, so it doesn’t get thrown open by the same vibration.
Cold is the other one. Solid gates freeze shut when moisture gets into the spring housing and turns to ice, and you find out about it at the worst possible moment with numb hands. Wiregates have nowhere for that ice to hide. If you climb in winter or you’re heading anywhere alpine, that alone settles the argument.
Solid gates aren’t obsolete. They have more surface area at the nose, they tend to feel more substantial in the hand, and a hot-forged solid gate on a sport draw will take years of hangdogging without complaint. Hot-forged aluminum is worth knowing as a spec in its own right: it packs the metal denser where the load runs, so a hot-forged biner hits the same strength as a cold-forged one at less weight.
The other number worth reading on a spec sheet is gate clearance, the width of the opening when the gate is pushed all the way back. Wider clearance means the biner drops onto a thick bolt hanger or a fat rope without you fighting it, which matters more than it sounds when you’re clipping one-handed. The choice comes down to what you’re doing, which is the same logic behind matching the carabiner shape to the job it does.
Keylock vs. Notched Nose (This Is the Spec That Matters)
Now the part nobody explains properly. Look at where the gate meets the nose on a cheap carabiner. You’ll see a small notch cut into the gate and a matching hook on the nose body, and those two pieces interlock.
That hook exists for a mechanical reason: when the carabiner is loaded and the gate is closed, force has to transfer across that junction, and the hook gives it a positive mechanical connection to transfer through. It isn’t a manufacturing shortcut. It’s doing a job.
A keylock carabiner solves the same problem with a different geometry: a shaped pin-and-socket interface with no protruding hook at all, so the nose is a smooth, hoodless surface. Same load transfer, nothing sticking out.
This is where the wiregate confusion comes from. Traditional wiregate designs use a hooked nose because the wire loop needs somewhere positive to seat. So a wiregate draw can absolutely have a notched, snag-prone nose, and plenty of them do.
There are keylock wiregates now, and they’re excellent, but you have to check the spec explicitly. The word “wiregate” on the packaging tells you nothing about snagging.
Check the nose with your thumbnail before you buy, not the spec sheet. Run a nail down the closed gate seam. A keylock is smooth all the way across. A notched nose catches your nail in the same place a bolt hanger will catch the carabiner. Ten seconds in the shop, five years of not fighting your gear.
What a Snagged Nose Actually Costs You Mid-Clip
The word most articles use for this is “annoying.” That undersells it in three separate ways.
The first cost is the fumbled clip. You reach for a draw, the nose hooks the gear loop stitching, and now you’re pulling harder than you meant to with one hand while the other one bleeds strength. On a route at your limit, that half-second is the difference between clipping from a stance and clipping from a shake-out you couldn’t afford.
The second cost is on the wall. A hooked nose catching on the lip of a bolt hanger while you’re trying to seat the draw means the biner sits proud of the hanger instead of dropping into place. You’ve got a draw that looks clipped and isn’t seated, and now you’re moving above it.
The third one is the documented one. The American Alpine Club’s own accident reporting documents quickdraws unclipping or snagging on bolt hangers, with three separate incidents logged in 2023 alone. Two of those broke a carabiner. That’s a recorded, recurring event on bolted routes, not a forum theory.
So the spec order for a first rack is: nose shape first, gate material second. If your budget only stretches to keylock on half your rack, put the keylock draws on the bolts you clip while pumped and the notched ones on the easy ground low down.
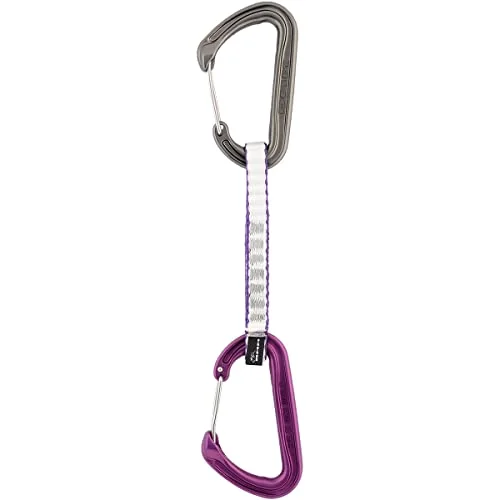
The reason to point at the DMM Chimera here isn’t that it’s the only good wiregate on the market. It’s that it settles the argument this section is making. You get the flutter resistance and the cold-weather behavior of a wire gate, plus the smooth nose that stops the hanger from grabbing you. Buyers who conflated the two specs and paid up for wiregate expecting snag immunity got half of what they thought they bought. This is the whole thing.
Dogbone Material and Length: Nylon, Dyneema, Short, Long
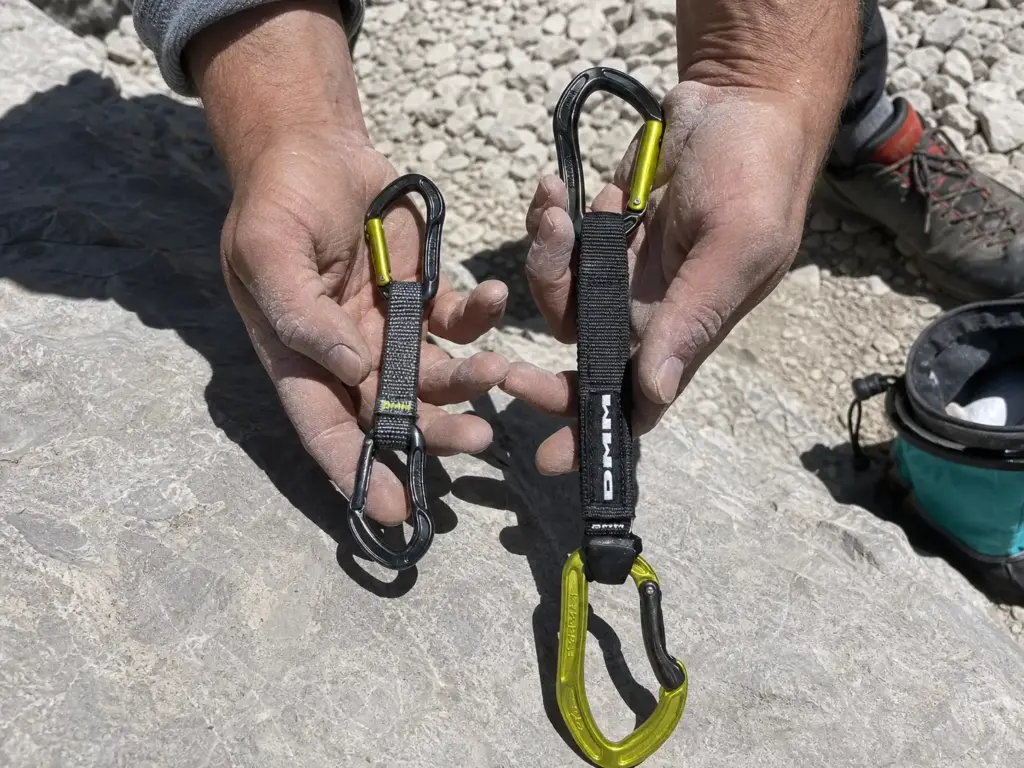
The dogbone is the part shoppers skip. People compare carabiners for an hour and treat the strap as packaging. Then they build a rack of eighteen identical 12cm draws and get shut down by rope drag on the first route with a diagonal bolt line, which is a purchase mistake, not a fitness one.
Nylon vs. Dyneema: What You Give Up Either Way
Nylon dogbones are thicker, cheaper, softer in the hand, and they stretch a little under load. Dyneema (also sold as Dynex) is a high-modulus polyethylene: thinner, lighter, dramatically stronger per gram, and almost completely non-stretch.
For a first rack, nylon has an advantage that gets ignored because it doesn’t sound technical. It’s easier to grab. A thick nylon dogbone gives your hand something to find without looking, and while you’re still learning to clip, that matters more than the 20 grams Dyneema saves. Pulling down on a draw to make a hard clip is a real move, and a fat nylon bone is a better handle than a thin slick one.
Dyneema’s downsides are worth knowing before you pay for it. It’s more sensitive to UV over time, it has a lower melting point than nylon, and it’s slipperier to grip with tired fingers. It also doesn’t age gracefully in ways you can see, which makes the calendar backstop discussed later in this article more relevant, not less.
The honest summary: if you’re clipping bolts on single-pitch sport routes, the material barely affects your day. If you’re carrying a full rack up ten pitches, Dyneema starts paying for itself in grams.
Stiff or Soft, and Why Sport and Trad Disagree
Stiffness is separate from material and it changes how the draw behaves more than the material does. A stiff dogbone, usually a thick nylon bone with a molded rubber keeper, holds the rope-end carabiner locked in one orientation. Reach down without looking and the biner is exactly where it was. That’s the entire point of a sport draw: repeatability under pressure.
A soft dogbone drapes. It hangs limp, moves with the rope, and applies less leverage to whatever it’s clipped into. That’s exactly what you want on a marginal nut placement, where a stiff draw acts like a lever arm and a rope tug can walk the piece out of the constriction.
Trad climbers want soft. Sport climbers want stiff. Both are right about their own discipline and wrong about the other one.
Tape width is an underrated spec. A 26mm wide dogbone is genuinely easier to pinch one-handed than a 16mm one when your forearms are done and your grip strength is gone. Nobody lists this as a buying criterion and it’s one of the first things you notice on a hard redpoint.
Short, Long, and Why You Want Both
Standard sport length is 10 to 12cm. It’s the default for a reason: on a straight vertical bolt line, short draws keep the rope tight to the wall and shave a few precious centimeters off every lead fall you take on them. Then there’s 17cm, the middle length that handles mild wandering and gives the rope a little room to find a straighter path. And then 25cm, which most first-rack buyers skip entirely and shouldn’t.
Two numbers on a spec sheet describe this part of the draw. Sling length is the dogbone measurement you’re already shopping by, quoted in centimeters end to end. Sling width is the tape measurement, usually somewhere between 10mm and 26mm, and it’s the one nobody reads. Narrow tape saves grams. Wide tape gives your fingers something to actually close around.
Here’s the advice that fixes more first racks than any other single purchase: buy a few long draws even for a pure sport rack. Not because you plan to climb wandering routes, but because you will, probably by accident, on a route that traverses left for two bolts before going back up. Six short draws cannot fix that rope path. One 25cm draw at the traverse can. It’s the single most repeated correction in community threads about first racks, and it’s the cheapest lesson available.
The physical evidence for the argument is something like the DMM Alpha Sport Quickdraw in the 25cm 6-pack, which pairs the long dogbone with 26mm wide tape and a deep rope basket. That combination is exactly what a long draw should be: a rope-drag tool you can still find and grab with tired hands. It isn’t a beginner essential and it isn’t the first thing to buy. Two or three of them mixed into an otherwise-short rack is the move, not six of them as your whole set.
Past 25cm you leave quickdraw territory entirely. That’s where extendable alpine draws take the same idea further, using a 60cm sling you can carry tripled-up and extend mid-pitch when the route tells you it’s going to wander.
Sport, Trad, or Alpine: Matching Draws to Your Discipline
A sport draw and an alpine draw are different tools that share a name. Buying a rack before you’ve decided what you’re actually climbing this year is how people end up with a set that’s slightly wrong for everything.
Sport Draws: Built for Clipping and Falling
Sport climbing is a specific set of demands: you clip bolts, you fall on them, you hang on them while you work the moves, and you lower off. Almost all of it happens while lead climbing, which is the detail that shapes the whole spec sheet, because every one of those demands lands on a draw you placed yourself while pumped. Weight is nearly irrelevant, because you’re carrying the rack up 25 meters, not 25 kilometers.
So the spec sheet flips. Stiff dogbones for repeatable clipping. Bent gate on the rope end. Solid or hot-forged gates that survive a season of redpoint attempts on the same six bolts. Durability over grams, every time. A rack of ultralight sport draws is a solution to a problem sport climbers don’t have.
Trad Draws: Mixed Lengths and Softer Bones
Trad flips two things. First, your quickdraws stop being protection and start being connectors between the protection and the rope, which means the soft dogbone matters because it stops the draw levering a marginal nut or a shallow cam out of its placement.
Second, weight suddenly counts, but not because of the draws. You’re already carrying a full set of cams and nuts, and every gram on the draws is a gram on top of a heavy rack. Twelve to fourteen draws in mixed 12cm and 17cm lengths, on lighter carabiners, is the standard shape. If you’re at the stage of putting that whole kit together, we’ve written about how quickdraws fit into a first trad rack alongside cams and nuts.
Alpine Draws: Fewer, Longer, Lighter
On long alpine routes and multi-pitch, the count goes down and the length goes up. Six to eight quickdraws plus a handful of extendable 60cm alpine draws covers terrain that wanders far more than any bolted line does. The constraint that actually bites is the approach, and weight there is real.
Wiregates dominate this end of the sport for a reason that isn’t obvious in a shop: they don’t freeze shut. A solid gate that ices up on a cold morning belay is a problem you can’t solve with cold fingers. Add the weight saving across a full rack and it stops being close.
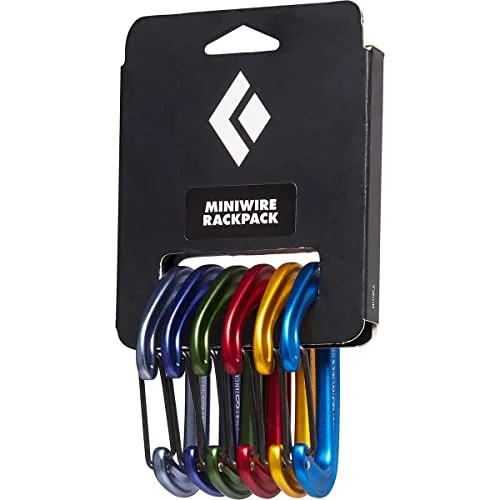
The Black Diamond MiniWire is genuinely excellent at what it does and genuinely wrong as a first purchase, and both statements need to be on the page. Ultralight draws are small in the hand, which is a fine trade when you’re a competent clipper counting grams on an approach. It’s a bad trade when you’re new and the thing you actually need is a draw that’s easy to find and easy to grab. Buy these when weight becomes your limiting factor, not before.
One term you’ll run into in gear threads is the quiver of one: a single model versatile enough to cover sport, trad-adjacent and light alpine without a separate rack per discipline. It’s a genuinely good goal for a first rack, since you don’t yet know which direction you’re heading. It’s also the first thing to abandon once you specialize, because a specialized rack beats a compromise rack at its own game every time.
How Many Quickdraws You Actually Need (Starter Rack Table)
Every guide gives you a number. Twelve minimum, twenty-four recommended, pick one. Then they stop, which is where the useful part would have started, because the number isn’t what determines whether your rack works. The mix is.
The Starter Rack Table by Discipline
| Discipline | Total draws | The mix | What it covers |
|---|---|---|---|
| Sport | 12 to 18 | 14 short (10–12cm) + 4 long (17cm+) | Single-pitch bolted routes, straight and wandering bolt lines |
| Trad | 12 to 14 | 8 short (12cm) + 6 long (17cm), plus alpine draws | Gear placements that need soft, non-levering connections |
| Alpine / multi-pitch | 6 to 8 + extendables | 4 small + 4 medium + 2 extendable 60cm | Long wandering pitches where drag beats fall distance |
Read that middle column as the shopping list. Sport climbers who buy eighteen identical short draws have a rack that’s excellent on half the routes at any crag and mediocre on the other half. Swap four of those short ones for 17cm and up and the rack covers both, at exactly the same cost.
The trad row assumes your alpine draws live separately, because they do a different job. If you’re working out the broader purchase order, the wider question of what to buy first when you’re building a trad rack is worth settling before you spend anything, since draws are rarely the biggest line item on that receipt.
The alpine row is the one people over-buy. Six to eight draws feels alarmingly thin until you realize that the extendables cover the wandering sections and your cams are carrying most of the protection load.
Why Twelve Is the Floor, Not the Target
Twelve isn’t a random number. Most single-pitch sport routes run 8 to 14 bolts plus the anchor. Twelve draws covers the common case with nothing left over, which sounds fine right up until the day you find a draw stuck on a route above your reach, or you get on a pitch that turned out to have three more bolts than the guidebook implied.
That’s the argument for eighteen: not that you need eighteen on a route, but that a rack of eighteen means one hung draw doesn’t end your day. And the reserve matters more, not less, when you’re new, because you’re the person most likely to get a draw stuck.
The route-length check is free and nobody does it. Open the guidebook for your home crag before you buy and count the bolts on the routes at your grade. A crag of short eight-bolt sport routes doesn’t need eighteen draws. A crag of 30-meter pitches absolutely does. That five-minute check is more useful than any general recommendation, including this one.
Matched Set or Build It Up Over Time
Buying draws one at a time as budget allows feels sensible and produces a rack that fights you. Five different models means five different gate actions, five different nose shapes, five different amounts of resistance when you push a rope through. Your hand can’t build one motion out of that.
Consistent hand-feel is a real performance factor, not a preference. Clipping one-handed with a pump building is muscle memory, and muscle memory needs the same input every time. One or two models across the whole rack, with the length variation coming from different sizes of the same model, is how you get there.
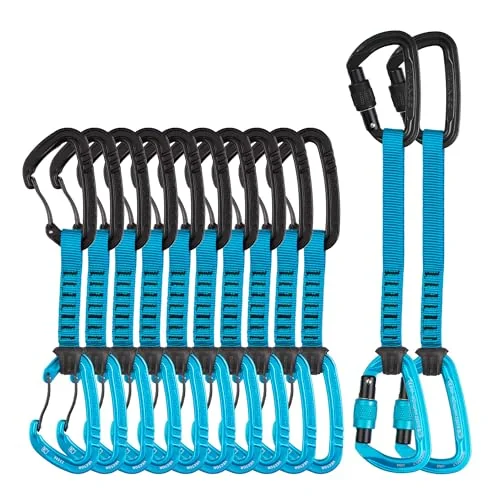
A pre-assembled pack like the Trango Vector 12-pack solves the consistency problem by default, which is most of its value. You’re not just buying twelve draws, you’re buying twelve draws that behave identically. The one thing it doesn’t solve is the length mix, so treat it as the base layer and buy two or three 17cm or 25cm draws on top of it. That’s a complete sport rack for the price of a set plus a few singles.
Buy your first rack from one or two models, not five. Mixed racks look like a seasoned climber’s kit and clip like a rental. The consistent gate action across twelve identical draws does more for your clipping under pressure than any single spec upgrade you can buy.
Budget vs. Premium: Where to Save and Where Not To
A first rack is a real chunk of money, and the industry’s answer to that is to sell you the mid-tier version of everything. The honest answer is more specific: some of the premium spend does nothing at all for a climber who’s still learning to clip, and one particular piece of cheaping out costs you on every single route for the life of the rack.
Where Cheap Is Genuinely Fine
Dogbone material. If you’re a gym-to-crag climber on single-pitch sport routes, nylon is fine and arguably better than Dyneema while you’re learning, for the grip reasons covered earlier. Paying up for Dyneema on a sport rack buys weight savings you cannot feel.
Exotic weight reduction. Every gram-shaving feature on a sport draw is solving a problem you don’t have on a 25-meter route. The ultralight tier exists for alpine climbers and it prices accordingly.
Matched colorways and finishes. Color-coding your rack by length is genuinely useful. Paying extra for an anodized finish is not, and the finish wears off the contact surfaces first anyway.
Brand loyalty across the whole rack. Petzl, Black Diamond, DMM, Trango, Wild Country and CAMP all make UIAA rating-compliant gear that will hold anything you can fall on. The differences are ergonomic, not structural.
Where Cheap Costs You Every Session
Gate quality and nose design on the draws you clip most. That’s it. That’s the list.
A hooked nose is not a one-time compromise, it’s a tax you pay on every clip for as long as you own the rack. Five years of catching on hangers and gear-loop stitching, on exactly the routes where you had no attention to spare. The cheapest draws on the shelf are almost always cheap because of the nose, and that’s the one place the savings show up in your climbing.
Gate action is the second half of it. A gate that opens stiff, or springs back sluggishly, or has a gritty feel out of the box gets worse with dust and time. You want a gate that snaps shut with authority, because the snap is what tells you it closed without needing to look.
The specific failure a beginner hits is a fumbled clip, not an equipment failure. Every quickdraw on the market from a reputable brand is strong enough. None of them are equally easy to clip when you’re pumped. Spend there.
If you’re budgeting the whole first kit rather than just the draws, the next question is usually where locking carabiners belong in the same rack, because that’s the other line item people either over-buy or forget entirely.
The Weight-Versus-Durability Trade, Honestly
The lightest draws are the least durable. That isn’t a manufacturing failure, it’s physics: less aluminum in the basket means the rope groove develops sooner, and thinner gate hardware means less material between you and a worn-out gate. Manufacturers are open about this, and every gram-counting model is a deliberate trade.
Now think about who a beginner actually is. You’re falling repeatedly on the same six draws while you work a route, hangdogging on them, lowering through them. That’s a high-wear pattern, and it’s the exact use case the ultralight tier is worst at. A beginner with an ultralight rack is the wrong customer for the product.
Which produces the conclusion that annoys the spec-sheet crowd: a well-made budget wiregate draw beats a premium ultralight draw for a first rack. Not because the budget one is better gear, but because it’s better gear for this job.
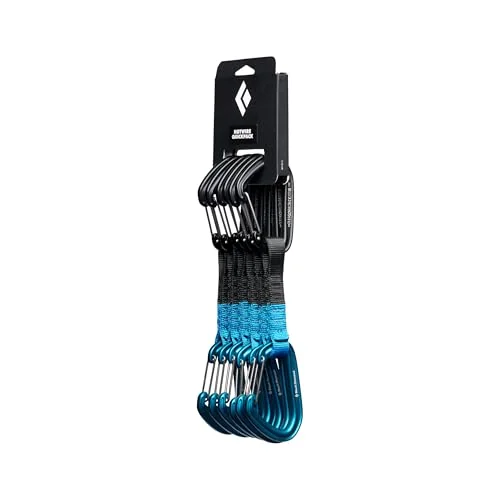
The Black Diamond HotWire 6-pack is the pick that makes this section’s argument concrete. You get the flutter resistance and the cold-weather behavior that made wiregate worth having, on a hot-forged body built to take repeated falls, at the bottom of the price range. What you don’t get is keylock on every end, which is the honest trade at this tier. If your budget forces a choice, this is a rack you’ll still be climbing on in five years rather than one you’ll quietly replace.
Racking, Gate-Facing, and Setting Up Your Harness
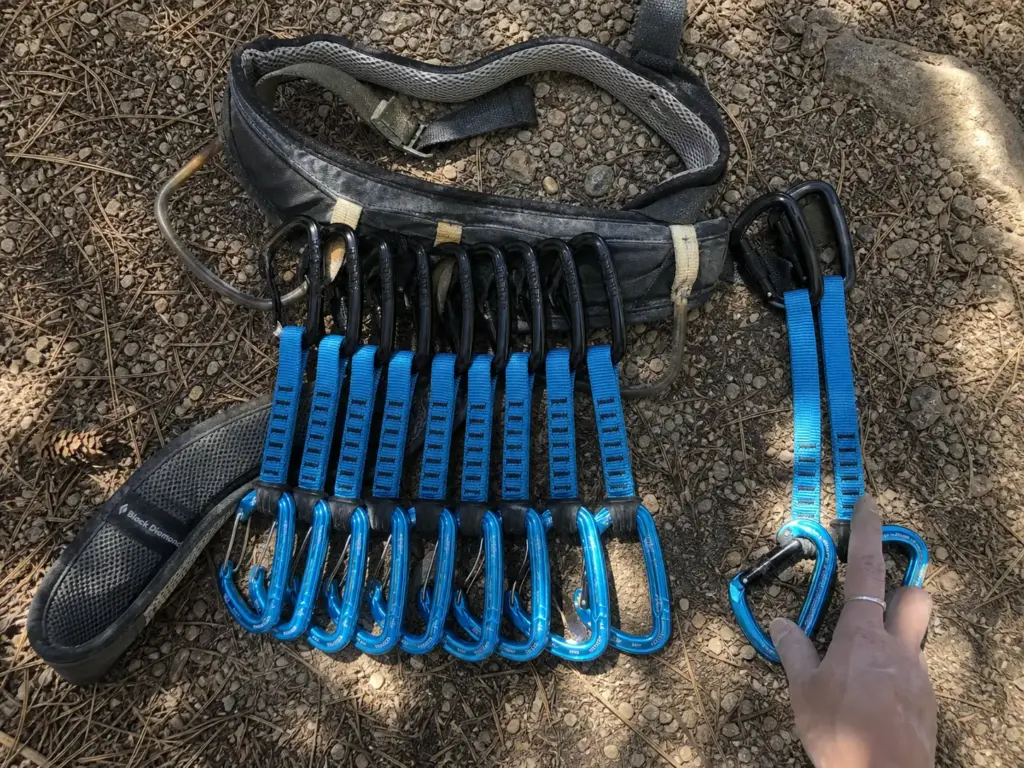
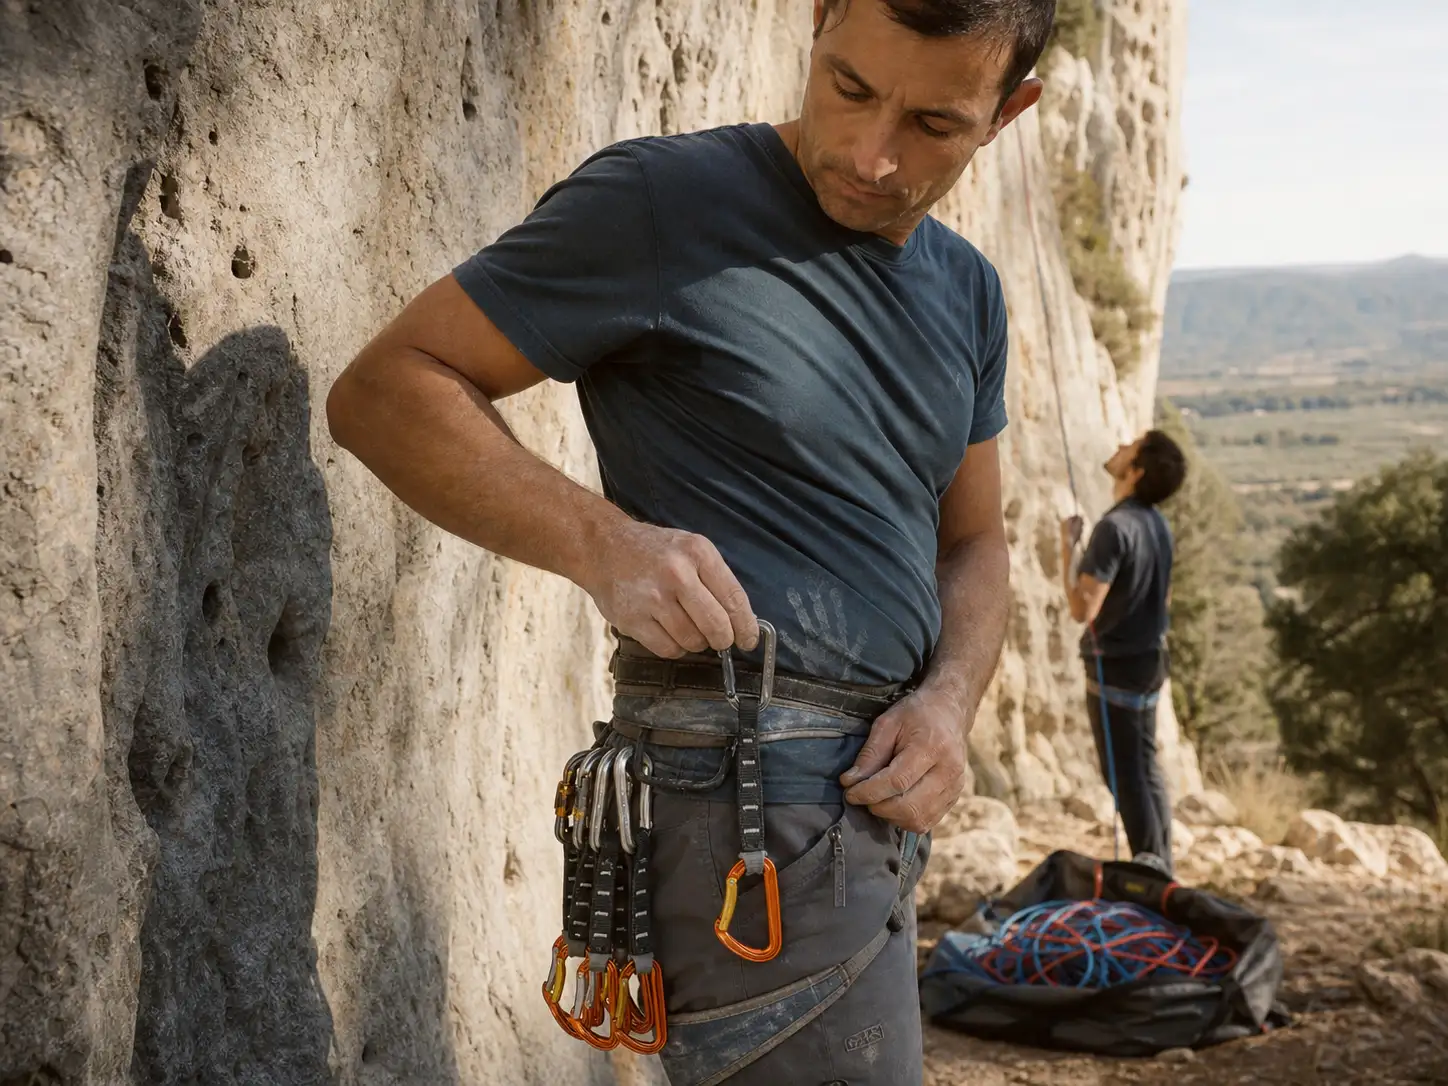
This is the part most climbers learn by accident over a season, usually after fumbling a clip because a draw came off the gear loop backwards and they had to flip it mid-move. Ten minutes at the kitchen table fixes it permanently, and almost nobody spends those ten minutes.
Face Every Gate the Same Way
Rack every draw with the gates facing the same direction. Which direction is genuinely up to you: all gates facing out from your body, or all facing your dominant side, both work. What matters is that it’s the same on every single draw, on every gear loop, every time you rack up.
The reason is that clipping is a blind motion. Your hand goes to the loop, closes on a draw, comes off with the gate already oriented correctly, and the clip happens in one continuous movement. If half your rack is reversed, one draw in two arrives in your hand backwards and you have to spend a beat rotating it. That beat is when you were supposed to be clipping.
Gate-facing consistency also has a quiet safety benefit. When every draw comes off the same way, the rope-end biner is always presented in the same orientation, which means the rope goes in the correct side of the gate rather than back over itself. Back-clipping is a technique error, but a chaotic rack makes it more likely.
Where Each Length Lives on Your Harness
The bolt-end carabiner is the one that clips to your gear loop. Rope end hangs free. This isn’t arbitrary: it keeps the rope biner off your harness webbing, where it would pick up grit, and it preserves the designated-end discipline that makes wear checks meaningful.
Distribution by length is the part nobody writes down. Short draws go forward on your dominant side, on the loop your hand reaches without a thought. Long draws go further back on the same side or on the off-side loop, because you reach for them deliberately, when you can see a traverse coming. Alpine draws go over the shoulder or on the rear loops, since they’re the ones you’re least likely to need urgently.
Check the rubber keeper while you’re at it. It should be seated so the rope biner sits square, not rotated. A cracked or missing keeper lets that carabiner spin into a cross-loading orientation, and a rotated biner at the moment of a fall is loading its minor axis, which is the weakest number on the spine.
Building the Habit So You Stop Looking
You know your racking system works when you stop looking at your harness to grab a draw. That’s the whole test. It takes a few sessions of doing it identically, and it’s probably the cheapest performance gain available in sport climbing, since it costs nothing and buys you attention exactly where you’re shortest of it.
Racking up is also the natural moment to run a gear check, because you’re already handling every draw one at a time. Gate snaps shut? Keeper seated? Nothing frayed? That’s three seconds per draw while you’re standing on flat ground with both hands free, which is not a description of anywhere on the route. Building it into the racking motion instead of treating it as a separate chore is what makes it survive past the first month, and it sits naturally alongside the pre-climb checks worth running before you leave the ground.
Inspection, Wear, and When to Retire a Quickdraw
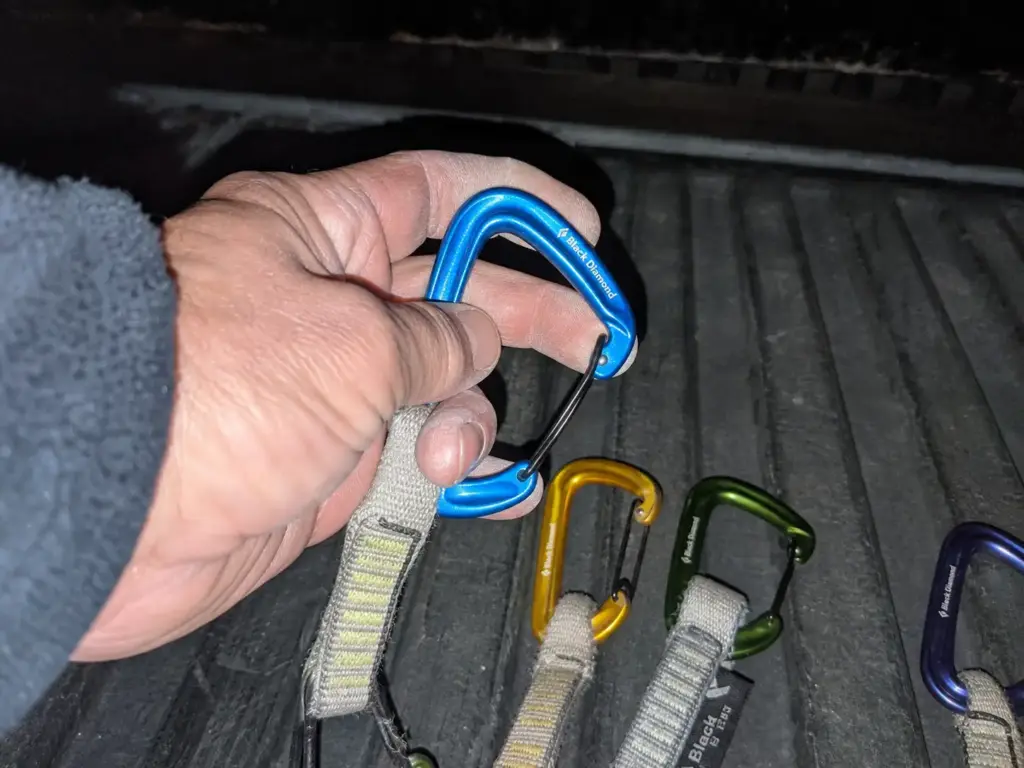
“Check your gear for wear” is advice that sounds responsible and teaches nothing. Check it how? Looking for what? The actual test is tactile, takes ten seconds per draw, and most climbers have never been shown it.
The Fingernail Test on the Rope-End Basket
Run a bare finger along the inside of the rope-end carabiner’s basket, the curved section where the rope sits under load. You’re not looking, you’re feeling. A healthy basket is smooth all the way around. A worn one has a defined groove, and a finished one has a groove with a discernible edge at its border.
If you can feel a sharp edge or a defined groove, that draw is done. Not “monitor it.” Done. That edge is aluminum that’s been polished into a ridge by rope under tension, and a sharp aluminum edge against a loaded rope is exactly the interaction you spend your whole gear budget avoiding.
The reason the fingertip beats the eye is resolution. Skin detects surface changes far finer than the ones your eye picks out in flat crag light, so you feel a developing groove weeks or months before it looks like anything. This is the single most useful gear-check habit in climbing and it requires no tools.
The story that comes up again and again in gear threads is the same one: someone’s partner ran a finger over a carabiner that looked completely fine and found a groove with an edge on it. The gap between looks okay and is okay is the entire reason this test exists. Do it while you rack, not after something feels wrong.
The Full Pre-Season Checklist
Once a season, go through the whole rack properly. It starts the same way as a full carabiner inspection checklist covering gate play and wear, and adds the dogbone items a quickdraw has and a bare carabiner doesn’t.
- Rope-end basket: run the fingernail test on every draw, both a visual and a tactile pass.
- Bolt-end basket: look for burrs, gouges and flat spots from steel hangers rather than a smooth groove.
- Gate action: it should snap fully shut on its own, every time, with no hesitation at the end of travel. A gate that hangs is often fixable before it’s a retirement call, so clean it before you bin it.
- Gate and nose: check the gate seats fully against the nose with no visible gap or side-to-side play.
- Dogbone: look for fraying, fuzzing along the edges, cuts, or a stitching pattern with broken threads.
- Sling condition: UV exposure stiffens webbing and fades color. A dogbone that feels board-stiff or has gone noticeably pale has been in the sun long enough to matter.
- Rubber keeper: cracked, split or missing means replace the keeper, not the draw, but do it before the next session.
Retire-Now Signs vs. the Calendar Backstop
There are two independent retirement tracks and confusing them is why people keep gear too long.
Track one is damage. A sharp groove you can feel, a gate that doesn’t snap fully closed, visible dogbone damage or broken stitching. Any single one of these retires the draw immediately regardless of its age. A six-month-old draw with a failed gate is a retired draw.
Track two is the calendar, and it applies to gear showing nothing at all. Manufacturer and standards-body guidance converges on 5 to 7 years of consistent use as the service-life expectation for the sewn dogbone, and a sling and quickdraw retirement checklist built around UIAA guidance lays out the reasoning: textile ages from UV, humidity and load cycling in ways that don’t announce themselves visually. The aluminum can outlive the strap by a wide margin, which is exactly the trap.
Fixed draws on sport routes are this problem at its worst. A permadraw at a popular crag sees rope traffic all season from climbers who didn’t put it there and won’t inspect it, so the rope groove develops faster than anything on your own rack ever will. Treat every fixed draw as unknown gear. Lower off your own draws where you can, and if you’re clipping a permadraw, look at the rope-end biner before you weight it.
The wear pattern is also the closing argument for never swapping ends. Bolt hangers gouge the bolt-end biner; the rope polishes a groove in the rope-end biner. Two completely different failure modes on the two halves of the same tool. Keep them designated and every check you run means something. Mix them up and you’re inspecting a draw with no history.
Putting It Together
The nose shape beats the gate material. Keylock is the spec that stops the snag; wiregate buys you weight savings and flutter resistance, not snag immunity, and confusing the two is the most expensive mistake on this page.
Buy the mix, not the number. Fourteen short draws and four long ones beats eighteen identical ones on any route that wanders, and it costs the same.
Run the fingernail test on the rope-end basket. Ten seconds, no tools, and it catches wear that a visual check misses for months.
Before your next session, rack your draws with every gate facing the same direction and run a finger through each rope-end basket while you do it. Two habits, one racking session, and you’ll clip cleaner for the rest of the year.
Frequently Asked Questions
01How many quickdraws do I need for sport climbing?
Twelve is the working floor and 18 covers most single-pitch crags comfortably. Aim for a mix rather than one length: roughly 14 short draws (10 to 12cm) plus 4 longer ones (17cm and up) handles both straight bolt lines and wandering routes that would otherwise pile on rope drag.
02What is the difference between a quickdraw and an alpine draw?
A quickdraw has a fixed-length sewn dogbone, usually 10 to 25cm, with a carabiner at each end. An alpine draw uses a 60cm sling you carry tripled-up and extend to full length mid-pitch, which is how you manage rope drag on wandering trad and alpine terrain.
03Should I buy wiregate or solid gate quickdraws?
For most climbers, wiregate: it is lighter, resists gate flutter under rope whip, and will not freeze shut in cold conditions. But the spec that actually stops snagging is the keylock nose, not the gate material, so check for keylock independently of whether the gate is wire or solid.
04When should I replace my quickdraws?
Immediately if you can feel a sharp edge or defined groove inside the rope-end basket, if the gate does not snap fully closed, or if the dogbone is frayed or cut. Even with no visible damage, 5 to 7 years of consistent use is the accepted service-life backstop for the sewn dogbone.
05Can I use the same carabiner on the rope end and the bolt end?
Physically yes, but do not. The bolt end takes metal-on-metal wear from steel hangers and the rope end develops a friction groove, so each carabiner wears in a completely different pattern. Keeping them designated is what makes a fingernail check mean anything at all.
Safety Notice: Rock climbing and mountaineering are inherently high-risk
activities that can involve physical trauma or fatal incidents. The information on Rock Climbing Realms is for
educational and informational purposes only. Techniques and advice presented here are not a substitute
for professional, hands-on instruction. Conditions and risks vary by location. Always seek guidance
from a qualified instructor before attempting new techniques. By using this website, you agree that you
are solely responsible for your own safety. Any reliance you place on this information is strictly
at your own risk, and you assume all liability for your actions. Rock Climbing Realms and its authors
will not be held liable for any harm, damage, or loss sustained in connection with the use of this information.
Affiliate Disclosure: We are a participant in the Amazon Services LLC Associates Program, an
affiliate advertising program designed to provide a means for us to earn advertising fees by advertising and linking
to Amazon.com. As an Amazon Associate, we earn from qualifying purchases. We are also an official affiliate partner
of Black Diamond Equipment via the AvantLink network. If you click on a Black Diamond affiliate link and make a
purchase, we may earn a commission at no additional cost to you. We also participate in other affiliate programs.
Additional terms are found in the terms of service.