In this article
Most people train for Mount Rainier like it’s one mountain. It isn’t. There are four standard ways up, and the gap between the easiest and the hardest is the gap between a guided glacier walk-up and a technical alpine climb that turns back most of the few who try it. The honest version, the one guides give at the ranger station instead of in the brochure, is that picking the right route for your actual skills matters more than another month in the gym. Here’s how to match a route to who you really are, then handle the permits, cost, gear, and timing to make it happen.
Here’s how the four standard routes stack up before you pick one.
| Route | Difficulty & gain | Rough success odds | Best for |
|---|---|---|---|
| Disappointment Cleaver | Standard glacier, ~9,000 ft over ~18 mi | About 1 in 2 top out | First-timers with fitness and a guide or strong team |
| Emmons-Winthrop | Standard glacier, ~10,000 ft over ~11 mi | Similar tier to DC, quieter and less tracked | Fit, self-reliant climbers who want solitude |
| Kautz Glacier | Technical, 40–60° ice pitch near 12,000 ft | Under 1 in 3 top out | Climbers with real ice-tool and front-pointing experience |
| Liberty Ridge | Expert alpine, sustained steep ice and rock | Expert-only, outsized share of the mountain’s fatalities | Seasoned alpinists who accept unmitigable hazard |
How to Choose Your Mount Rainier Route

When a friend says they want to climb Rainier, the first question back is never how fit they are. It’s whether they’ve traveled roped on a glacier, thrown a self-arrest that actually held, and, for the harder lines, front-pointed on real ice. Route choice is the decision that decides your trip, and most people make it backwards. They pick the line that looks best in photos, then try to become the climber that line needs in the eight weeks before their permit date.
The four standard routes split cleanly into two tiers. Disappointment Cleaver and Emmons-Winthrop are standard glacier routes: no vertical ice, no second tool, just fitness, glacier skills, and the willingness to start at midnight. Kautz Glacier and Liberty Ridge are technical routes that ask for ice technique and, on Liberty Ridge, a tolerance for hazard that no amount of skill fully erases. Naming the tiers up front is half the decision, because it tells you which question you’re actually answering. Rainier is one of the classic North American glaciated peaks, and it rewards the same honesty the famous standard routes on the world’s big peaks all demand: know the route’s real bar before you commit to it.
Crowds versus solitude is the other real tradeoff, and it’s not a footnote. The DC is the highway, with rope teams and guides stacked up on summit morning. Emmons trades that company for self-reliance, which sounds romantic until you’re the only team that can dig your partner out of a slot. Whichever tier you’re in, the baseline never changes: roped glacier travel and crevasse rescue are the skill floor for all four routes, and if that phrase means nothing to you yet, that’s your starting point, not the summit.
The most common way climbers get this wrong is picking a route by aesthetics and showing up for Kautz or Liberty Ridge with zero prior ice-pitch experience. You don’t find out you’re over your head on summit day. You find out weeks earlier, the first time you read the gear list and don’t recognize half of it. That feeling is information. Listen to it.

The Standard Glacier Routes, Disappointment Cleaver and Emmons
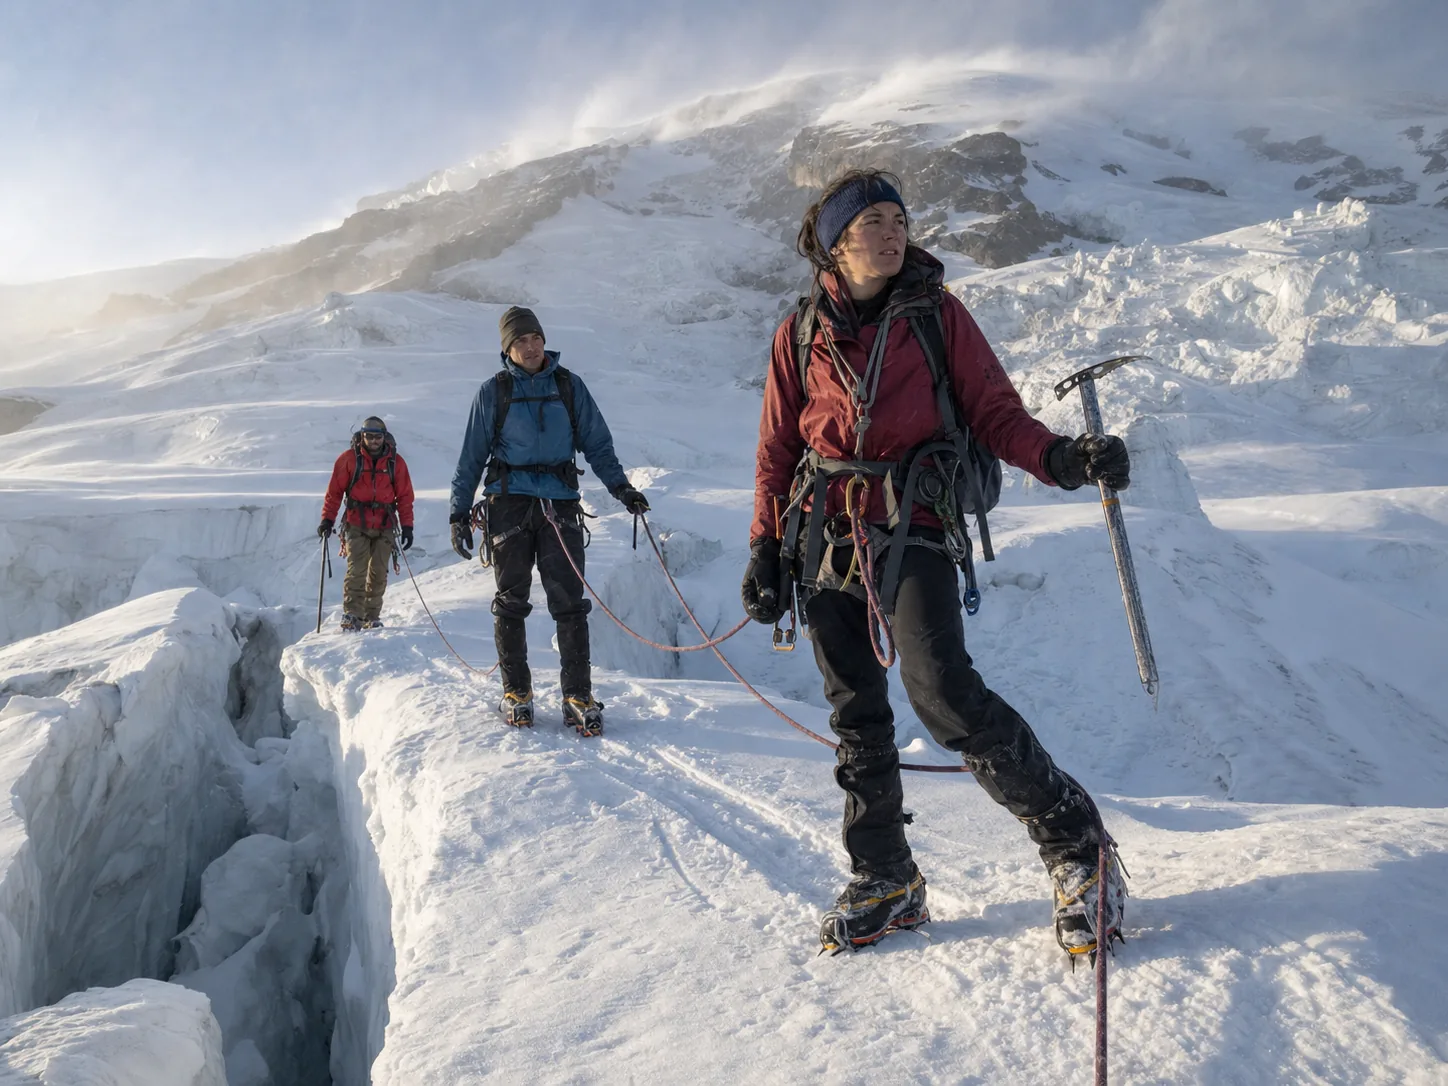
These are the two routes where fitness and glacier basics get you up. No ice tools, no vertical ice, no technical rock. But non-technical doesn’t mean easy, and the difference between the crowded highway and the quiet route matters more than most first-timers expect.
Disappointment Cleaver (the DC)
The DC covers roughly 9,000 feet of gain over about 18 miles round trip, and it’s the line that around three of every four Rainier climbers choose. It’s the shortest, most-traveled way to the top, which is exactly why it’s the right call for a first glacier summit. The crux is the Cleaver itself, the rock rib that gives the route its name, where the trail leaves the glacier for a stretch of loose, exposed scrambling. Above and below it, the real work is timing: the Ingraham Glacier throws icefall and rockfall exposure that only an early start lets you slip past.
That’s why the alpine start, leaving high camp somewhere between midnight and 3 a.m., isn’t tradition or machismo. It’s a hazard deadline. You want to be climbing frozen, stable snow on the way up and off the glacier before the afternoon sun turns snow bridges to mush. Best fit for the DC: a first-timer with solid fitness and either a guide or an experienced rope team who’s done this before. If you want the full pitch-by-pitch reality of this line, our breakdown of the Disappointment Cleaver route goes deeper than this overview can.
Emmons-Winthrop
Emmons-Winthrop runs about 11 miles from the White River side with roughly 10,000 feet of elevation gain, climbing the Emmons Glacier, the largest glacier on the mountain. It sits in the same difficulty tier as the DC, but it feels like a different climb. The approach is longer and more remote, the crowds thin out, and the self-reliance bar jumps. Route-finding, crevasse rescue, and belay systems are on your team, not on the dozen other rope teams you’d be sharing the DC with.
That tradeoff is the whole story of Emmons. You get solitude and a wilder feel, and in exchange you give up the safety-in-numbers cushion that makes the DC forgiving for beginners. Best fit: a fit climber with real glacier skills who wants quiet over crowd management, and who’s honestly comfortable being the most experienced team on the mountain that morning.
Treat the descent as the crux, not the summit. On both standard routes, afternoon snow-bridge softening is when most crevasse incidents happen. Your turnaround clock protects the way down, not the way up.
The Technical Routes, Kautz Glacier and Liberty Ridge
This is where “just a grade harder” stops being true. Kautz and Liberty Ridge aren’t fitter versions of the DC. They’re different climbs that ask for ice technique and, on Liberty Ridge, a tolerance for objective hazard that skill alone can’t cancel out.
Kautz Glacier
The Kautz is the honest step-up. It puts you on 40 to 60 degree ice with a technical ice pitch near 12,000 feet, and its success rate runs below 30 percent against Rainier’s roughly 50 percent overall. What changes here is the skill requirement: real front-pointing and ice-tool work, the kind you need to already own before you rope up, not learn on the pitch. The NPS’s own Kautz Glacier route brief spells out the grade and the technical section plainly, and it’s worth reading before you decide this is your year for it.
Best fit for the Kautz: a climber who already has front-pointing and ice-tool experience from a smaller peak, who’s placed snow pickets and knows how a snow anchor holds in different snow. If you’re planning to learn those skills on Rainier, you’ve picked the wrong route.
Liberty Ridge
Liberty Ridge is attempted by fewer than 2 percent of Rainier climbers, yet it accounts for a wildly disproportionate share of the mountain’s fatalities. That gap between how rarely it’s climbed and how often it turns tragic is the whole point, and “just a grade harder than the DC” undersells it badly. The reason is a specific, unmitigable hazard: active, unpredictable serac fall from the Liberty Cap ice cliff hanging above the route.
Unlike the DC’s rockfall, which a well-timed alpine start lets you dodge, Liberty Ridge’s main hazard has no safe-window workaround. You’re under it or you’re not. Standing below that serac field on a 2 a.m. push, headlamp beam catching ice debris scattered across the glacier, is the moment “objective hazard” stops being guidebook language and becomes something you feel in your chest. Best fit: only climbers with prior technical alpine multi-pitch experience who go in clear-eyed that this is a route where doing everything right still isn’t a guarantee.
What Actually Turns Climbers Back on Each Route
Every route has a specific place and reason people turn around, and it’s rarely the summit ridge. Generic “the weather can change fast” is true everywhere and useful nowhere. Knowing where your route tends to end climbs is how you plan not to be a statistic.
On the DC, it’s the Ingraham Glacier icefall exposure window, timing-dependent and mitigated but never erased by the alpine start. On the Kautz, it’s the technical ice pitch near 12,000 feet in whiteout or poor route-finding, and turnarounds tend to cluster in the 12,000 to 13,000 foot band right where the climbing gets real. On Liberty Ridge, it’s the Liberty Cap serac activity that drives its outsized risk, the one failure point no schedule can outsmart. On Emmons, it’s the icy Inter Glacier approach late in the season plus crevasse hazard on a route that’s less traveled and less patrolled, so problems are yours to solve alone. There’s no single clean success percentage published for Emmons the way there is for the DC and Kautz, so treat it as a similar tier to the DC with lower traffic, not a number to bet on.
The most human failure point cuts across all four routes: pushing through exhaustion instead of turning around. Some unguided pushes stretch to 27 hours and end with climbers crawling into camp borderline needing rescue, having summited on willpower and nothing left. The fix is unglamorous. Turnaround time is a pre-committed clock number you decide before the climb, not a feeling you negotiate at 13,000 feet when the summit looks close. The objective hazards that decide alpine climbs reward that kind of discipline more than they reward strength, and the American Alpine Club’s accident-pattern analysis of Rainier reads like a catalog of good climbers who ran their clock too long.
The Gear That Changes From Route to Route
The gear list is where the tier jump gets real. Bring your DC kit to Kautz and you’re under-geared at the worst possible moment. Here’s what actually changes as the routes get technical, and what you can leave home.
For the DC and Emmons, the standard kit is a single straight-shaft mountaineering axe, crampons that only need to be glacier-adequate, and standard rope and pickets. The Black Diamond Raven Ice Axe with Grip is the classic single-axe answer here, and on these two routes you genuinely don’t need a second tool. If you’re weighing which axe to buy for a first glacier season, our guide to choosing a mountaineering ice axe walks through length and head shape without the marketing.
Kautz and Liberty Ridge add real hardware. You want steel semi-technical crampons for the 40 to 60 degree ice, something like the Black Diamond Sabretooth Clip Crampons with proper steel front-points rather than the aluminum that suffices on a glacier walk-up. You add ice screws for the technical pitches, and the Petzl Laser Speed Light Ice Screw is a light, fast-placing option for protecting the steep sections. You also add snow pickets and a second ice tool. On the second tool, the Petzl Quark is the category-defining choice climbers reach for beyond the single-axe DC kit, though it moves in and out of stock and can be hard to buy at any given moment, so plan ahead rather than counting on grabbing one the week before.
One piece matters more the farther you get from the crowd, on any route. On Emmons, Kautz, and Liberty Ridge, where cell coverage is a fantasy, a Garmin inReach Mini 2 two-way satellite communicator is the item you hope to never use and are very glad to have. It’s not route-specific skill, it’s the thin margin between an incident and an evacuation.
Dial in crampon fit and your ice-axe carry at home, never on summit day. One climber burned 20 minutes at altitude fumbling with unfamiliar crampons while the whole rope team waited in the wind. Margin gone before the real climbing even started.
Permits, Fees, and Reservations
The paperwork trips up more first-timers than the glacier does. It’s not complicated, but the stacked fees and the reservation timing surprise people who budgeted for gear and forgot the park wants its cut too.
The core number is the climbing cost recovery fee, which as of 2026 runs $82 per person per climb, all ages. This climbing permit is required for anyone traveling above 10,000 feet or on the glaciers, which means every one of the four routes. On top of it sit the park entrance fee and, for most climbers, a wilderness camping permit for your high camp, whether that’s Camp Muir on the DC side or Camp Schurman over on Emmons. Reservations run through Recreation.gov, and the timing is what catches people out: the popular summer weekends go fast when the window opens. Most parties stage out of Paradise, the DC trailhead, where rangers check permits before you head up. Solo climbing is possible but needs separate NPS authorization, so it’s not something you decide at the trailhead. The National Park Service’s official Mount Rainier climbing page is the source of record for the required Ten Essentials kit and current Leave No Trace rules, and the NPS climbing fee FAQ confirms the exact fee before you budget.
None of this is expensive relative to the trip, but it adds up, and it’s worth folding into the total budget alongside travel, gear, and any guide fee before you commit.
Book your reservation the day the window opens for your dates, not the month before your trip. The popular weekends are the first to disappear, and a climb you trained six months for shouldn’t hinge on a walk-up permit that never materializes.
Guided vs Independent, What You’re Really Paying For
The guided-versus-independent question isn’t about money or ego. It’s about who carries the route-finding, the crevasse rescue, and the weather call. Pay the guide fee and you’re buying a safety margin. Go independent and that margin becomes your rope team’s job.
Guided three-day DC programs with RMI, IMG, and Alpine Ascents run roughly $2,250 to $2,995 in 2026, and that money buys more than company. It buys a professional rope team, route-finding, group gear like tents and stoves, and crevasse-rescue backup from someone who does this for a living. Going independent, you pay only the $82 registration plus the park entrance fee and a wilderness permit, but your party supplies 100 percent of the route-finding, rescue capability, and weather judgment. The honest trade is expertise and a safety net, not convenience. If your team can’t self-rescue on a glacier, the guide fee isn’t a luxury, it’s the number that matters.
Route reality shifts the math too. The harder the line, the more “independent” demands a genuinely expert partner rather than a willing one, because on Kautz or Liberty Ridge there’s no crowd to bail you out. The same guided-versus-independent call plays out across the region, and our take on the guided-versus-independent decision on Mount Shasta frames the self-rescue gate that really decides it.
Training and Timing Your Climb
Once you’ve picked a route, prep comes down to two things: being fit enough to carry a mountaineering load uphill for hours, and showing up in the window when your route is in shape. Both are simpler than the internet makes them, and both punish people who wing it.
The fitness reality is that Rainier is a load-carrying endurance climb, not a gym-strength test. You’re moving sustained uphill at 1,000 to 2,500 feet per hour with a real pack, so the training that transfers is stairs and hills with weight on your back, not flat miles or heavy singles. Our mountaineering training plan builds the specific engine the mountain asks for, and how the fitness demand really breaks down is worth reading if you’re gauging whether you’re ready. Acclimatization is a minor factor here compared to the big peaks, though altitude sickness can still catch a poorly-prepared climber, and summit-day thin air punishes anyone who cut the uphill training short.
Timing follows the route. The general window runs roughly May through September, with the most consolidated snow and best odds mid-season, while the technical routes hold narrower windows. Late-season melt-out changes the Emmons approach and opens crevasses, and the alpine-start hazard math shifts with conditions. If you’re eyeing peak summer, what a peak-season July climb trades off lays out the crowds-versus-conditions bargain honestly.
Train with the pack, not just your legs. Weight uphill is the entire game on summit day, and a climber who did all their prep on flat trails finds that out somewhere around Camp Muir with a lot of climbing still above them.
The Honest Bottom Line
Pick the route to your real skills, not the summit photo. The tier jump from the DC and Emmons to Kautz and Liberty Ridge is about ice technique and hazard tolerance, not just another gear or two of fitness. And the permits, the gear delta, and the timing all follow from the route, so decide that first and let the rest fall into place.
The most useful move you can make today is honest: name the one skill your chosen route demands that you haven’t practiced yet, and go work on that. If it’s front-pointing, find ice. If it’s crevasse rescue, drill it with your partner in a park before you need it on a glacier at first light. The mountain will still be there when you’re actually ready for the line you picked.
Frequently Asked Questions
01How hard is it to climb Mount Rainier?
It depends entirely on the route. The standard Disappointment Cleaver is a strenuous glacier climb where about half of climbers summit, while the technical Kautz Glacier tops out under a third and Liberty Ridge is expert-only.
02Do you need a guide to climb Mount Rainier?
No, but you need what a guide provides. Independent climbing is legal on all four routes, provided your rope team can handle glacier travel, crevasse rescue, and weather calls on its own. If it can’t, hire a guide.
03How much does it cost to climb Mount Rainier?
Independent climbers pay an $82 climbing fee plus a park entrance fee and wilderness permit, as of 2026. A three-day guided Disappointment Cleaver program runs roughly $2,250 to $2,995 and includes rope team, group gear, and rescue backup.
04What is the best Mount Rainier route for a first-timer?
The Disappointment Cleaver, with a guide or an experienced rope team. It’s the most-traveled route, the shortest, and the one with the most support on summit morning, which makes it the safest place to learn glacier climbing.
05When is the best time of year to climb Mount Rainier?
Mid-season, roughly June through August, offers the most consolidated snow and best summit odds. The technical routes like Kautz and Liberty Ridge hold narrower windows, and late-season melt opens crevasses on Emmons.
Safety Notice: Rock climbing and mountaineering are inherently high-risk
activities that can involve physical trauma or fatal incidents. The information on Rock Climbing Realms is for
educational and informational purposes only. Techniques and advice presented here are not a substitute
for professional, hands-on instruction. Conditions and risks vary by location. Always seek guidance
from a qualified instructor before attempting new techniques. By using this website, you agree that you
are solely responsible for your own safety. Any reliance you place on this information is strictly
at your own risk, and you assume all liability for your actions. Rock Climbing Realms and its authors
will not be held liable for any harm, damage, or loss sustained in connection with the use of this information.
Affiliate Disclosure: We are a participant in the Amazon Services LLC Associates Program, an
affiliate advertising program designed to provide a means for us to earn advertising fees by advertising and linking
to Amazon.com. As an Amazon Associate, we earn from qualifying purchases. We are also an official affiliate partner
of Black Diamond Equipment via the AvantLink network. If you click on a Black Diamond affiliate link and make a
purchase, we may earn a commission at no additional cost to you. We also participate in other affiliate programs.
Additional terms are found in the terms of service.