
In this article
Most people planning Everest start with two numbers: the permit fee and the total price tag. That part sorts itself out. The thing that actually decides whether you stand on the summit, or whether you have any business being up there, is the climbing résumé behind your name and the discipline to turn around when the clock says so. Ask any veteran Himalayan guide and you’ll hear the same thing, and as of 2025 Nepal’s law agrees with them. This guide walks every real prerequisite for climbing Mount Everest in order, with current 2025-26 numbers, so you finish knowing whether to book a stepping-stone peak this season or let the dream wait a while longer.
The Real Everest Prerequisite — A Qualifying Climbing Résumé
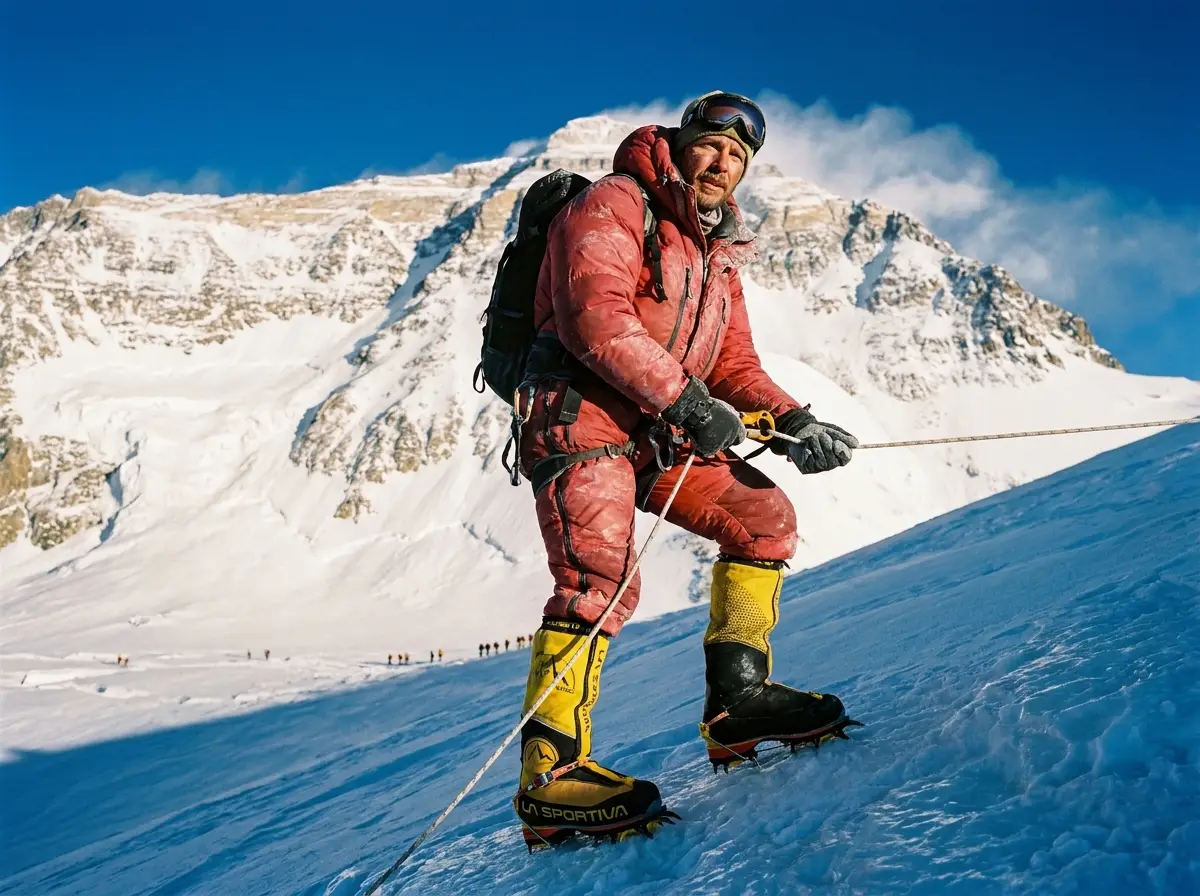
Here’s where most Everest dreams quietly fall apart, and it isn’t at the bank. The money clears. The permit gets stamped. What stops people is the line on the application that asks what you’ve actually climbed, because that line now carries the force of law.
What the New Law Actually Counts (a 7,000 m Peak in Nepal)
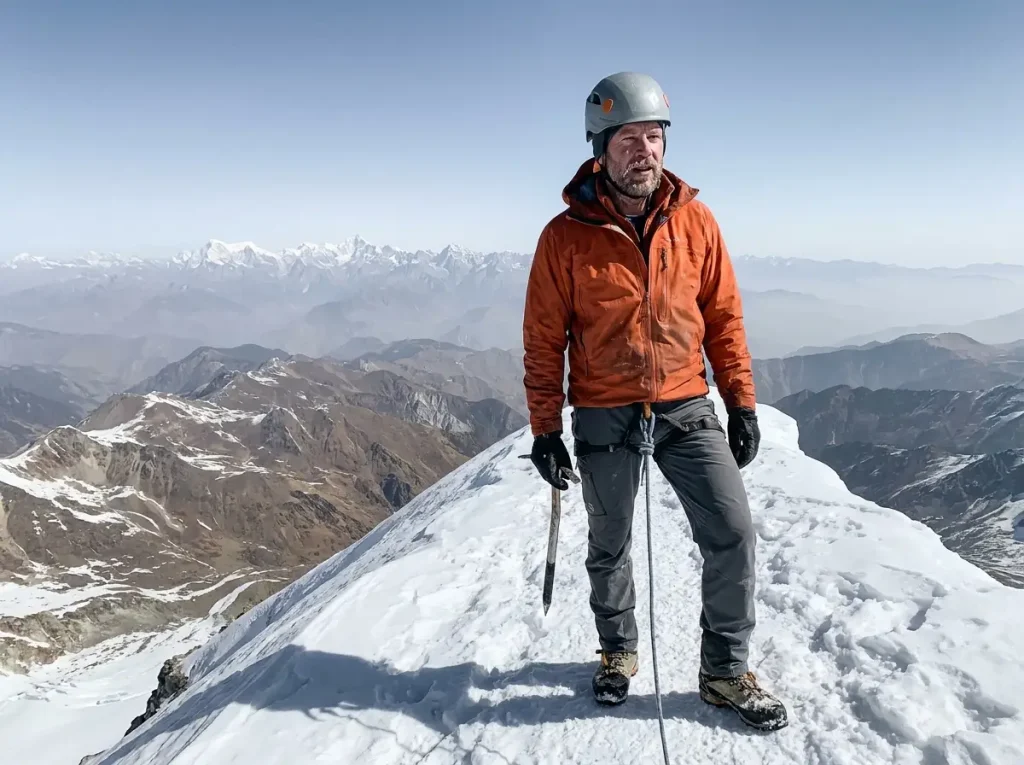
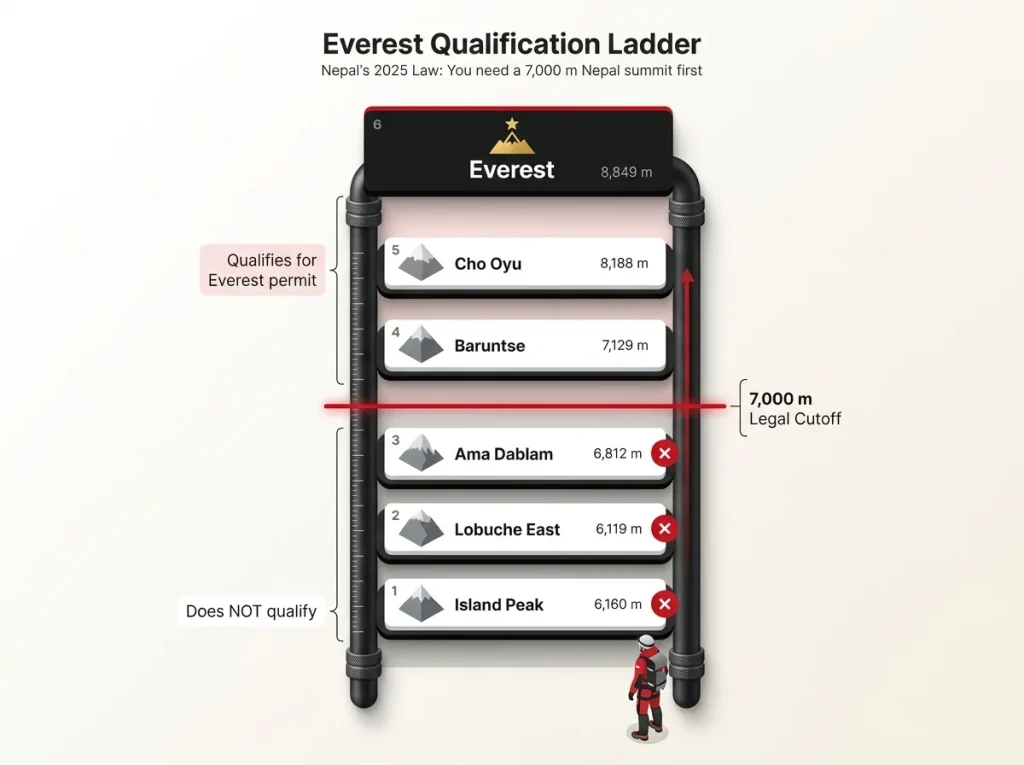
Nepal’s 2025 Tourism Bill moved the gate. To be issued an Everest permit, you have to prove you’ve summited a 7,000 meter peak inside Nepal first. A 6,500 m peak used to satisfy the requirement, and it no longer does. The qualifying summit also has to sit on Nepalese soil, which catches more climbers off guard than you’d think.
This is exactly where people get it wrong. Denali (6,190 m) and Aconcagua (6,961 m) are big, serious mountains, and neither one ticks the box. Aconcagua misses the height by 39 meters and sits on the wrong continent besides. Plenty of climbers show up with a résumé they assumed was bulletproof and learn it legally counts for nothing toward Everest.
When ExplorersWeb and the team at Climbing the Seven Summits broke the rule down, the same warning ran through both writeups: the obvious training peaks people already own often don’t qualify.
The Stepping-Stone Ladder, in Order
There’s a sequence to this, and skipping rungs is how people get hurt. The ladder most guides point you toward climbs through the Himalaya’s famous mountain routes and peaks, starting small and technical and finishing high and thin.
It usually runs like this. You start on a peak like Island Peak, the classic first Himalayan objective, known locally as Imja Tse, at 6,160 m, where you learn to move on crampons, run a jumar up a fixed line, and live through your first real acclimatization cycle. Lobuche East (6,119 m) often comes next as a warm-up. Then Ama Dablam (6,812 m) teaches you steep ice and fixed-line confidence.
Ama Dablam is technical and humbling, but look at the number again: it still sits below the 7,000 m legal bar. To actually qualify, you need a true 7,000er like Baruntse (7,129 m), or an 8,000 m peak like Manaslu or Cho Oyu at 8,188 m.
Stack Lobuche East and Ama Dablam in the same season. Guides routinely use Lobuche East as the warm-up and acclimatization peak for Ama Dablam, so you bank two rungs of the ladder on one trip instead of paying for two separate Himalayan expeditions.
Why the Money and the Permit Are the Easy Part
The reframe that matters is simple. The permit is paperwork and the money is a spreadsheet problem, and both are solvable in an afternoon if you have the funds. The résumé takes years. You cannot wire-transfer your way past a 7,000 m summit, and you cannot fast-track the judgment that keeps you alive up high.
Picture the two climbers everyone in the guiding world has met. One has the budget and no record. The other has the record and no budget. The mountain has always sided with the record, and now Nepal’s law does too.
Everest Permits and the 2025–26 Rules You Have to Meet
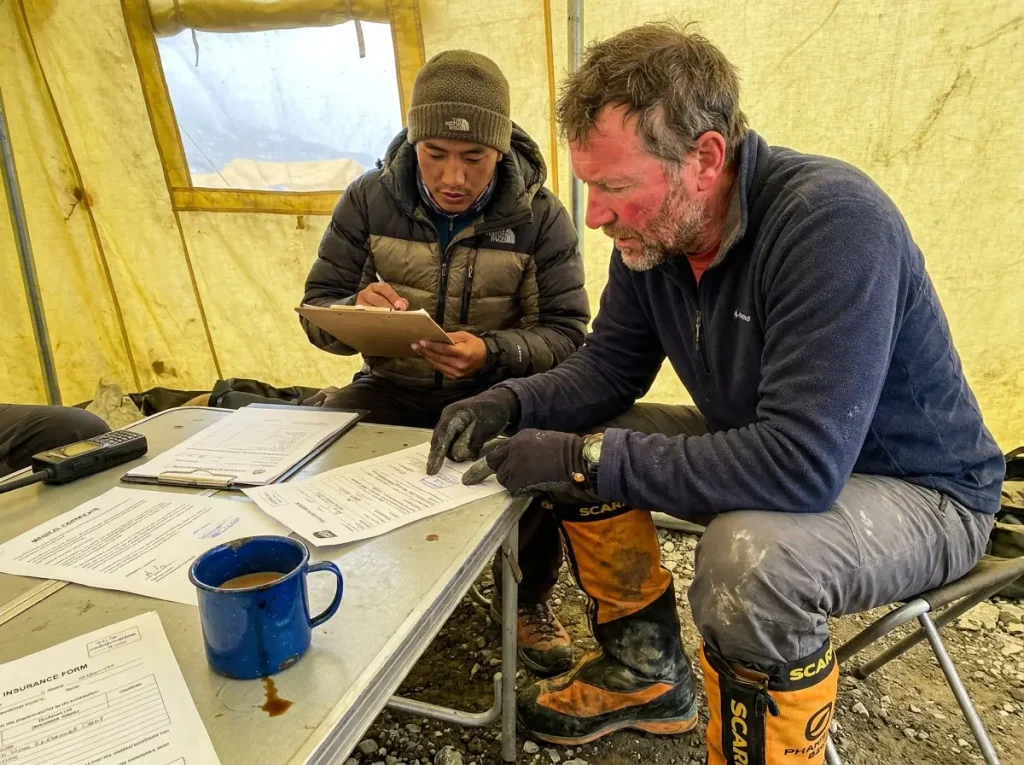
You do need a permit, you cannot get one on your own, and the price went up. Older guides are full of numbers that are now wrong, so this is the part worth reading slowly.
The 2025 Permit Fee Hike, Season by Season
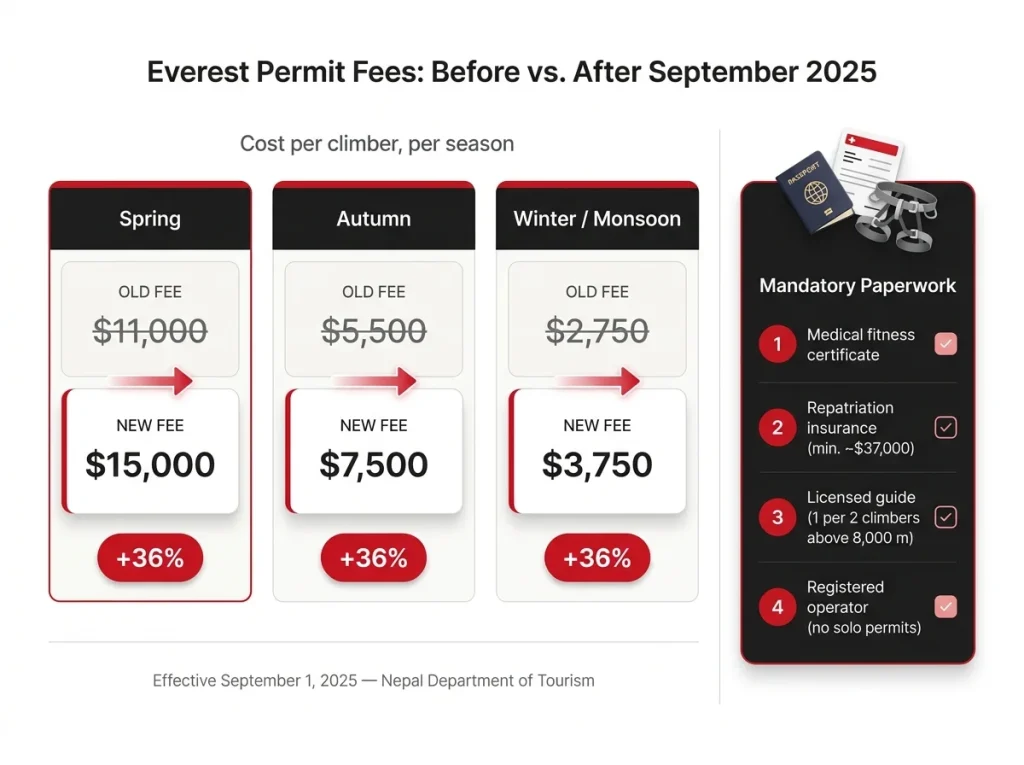
If you’ve been quoting the old figures, scrub them. Nepal’s Department of Tourism raised the spring permit fee to $15,000 in September 2025, up from $11,000 per person for the March-to-May window, roughly a 36% jump overnight. That single government line item is now your largest fixed fee before you hire a soul.
The off-season fees rose too. Autumn went from $5,500 to $7,500, and winter and monsoon climbed from $2,750 to $3,750. The quieter seasons shave the permit cost and hand the savings straight back in worse weather, which is why the season you choose changes both the permit fee and the weather you’ll face. Spring is expensive because spring is when the mountain is most climbable.
The Paperwork You Can’t Skip (Medical, Insurance, Guide)
The permit is one document in a stack. Nepal also requires a recent medical fitness certificate from a government-approved institution, repatriation insurance with coverage of at least roughly $37,000 (the policy that pays to bring a climber home), and separate helicopter-evacuation cover. You climb with a licensed guide, and above 8,000 m the rule is one guide for every two climbers. Nepal also sets age limits, currently 18 at the youngest and 76 at the oldest.
None of this is optional, and none of it is the kind of thing you sort out at base camp. The medical certificate in particular has turned away climbers who assumed a clean bill of health back home would travel.
Why You Can’t Just Apply Solo
Solo expeditions are banned outright. You cannot apply as an independent climber at all. A registered operator files the paperwork on your behalf, holds the permit, and is legally on the hook for your support chain. That single rule quietly shapes everything downstream, because the operator you pick is now the difference between a well-stocked, well-guided climb and a thin one.
The Fitness Bar — What Everest Actually Demands
Fitness is the prerequisite people most love to overestimate. Being a strong weekend climber is not the same as being ready, and the gap is bigger than it looks from the couch.
The Benchmark to Hit Before You Commit
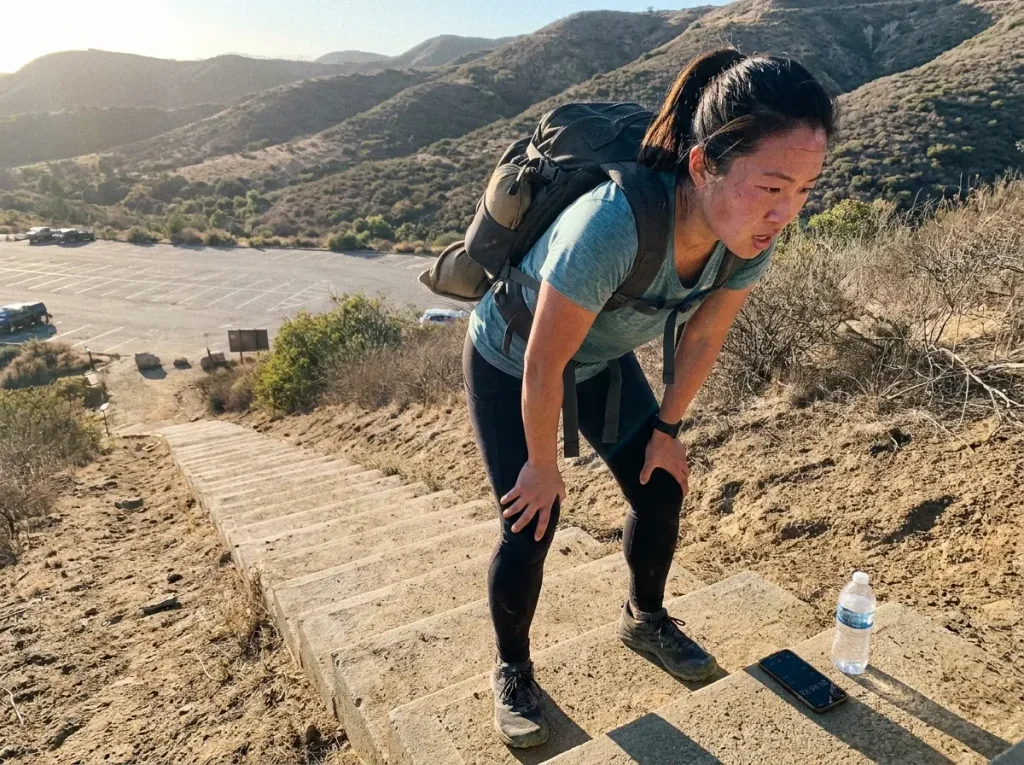
Here’s a clean way to test yourself. Guides at outfits like Alpine Ascents and trainers at the Mountain Tactical Institute point to the same rough benchmark: you should be comfortable hiking around 1,500 vertical feet per hour carrying a 20 lb pack, and able to gain roughly 4,000 feet on back-to-back days while carrying 50 to 60 lb. If you can’t hold that pace with a light pack today, you aren’t months from the summit. You’re months from the start line.
A 9–12 Month Training Arc
Plan on 9 to 12 months of dedicated training for the expedition itself, and build it in the right order. Aerobic base comes first, the unglamorous months of long, slow volume that grow the engine. Strength and power-endurance get layered on top of that base, not instead of it. Climbers who chase the fun stuff first tend to peak too early and arrive cooked.
Strength, Carries, and the Weighted Pack
The training that actually transfers is specific and boring. Weighted step-ups, stair repeats, and long hill carries with a loaded pack build the exact muscles that the Lhotse Face will tax. Recovery matters as much as the cardio, and so does arriving lean, because the climb itself strips weight off you fast at altitude. The benchmark above is the entry ticket, not the finish line, and treating it as the finish line is how people gas out at Camp 3.
The Technical Skills You Must Own Before You Go
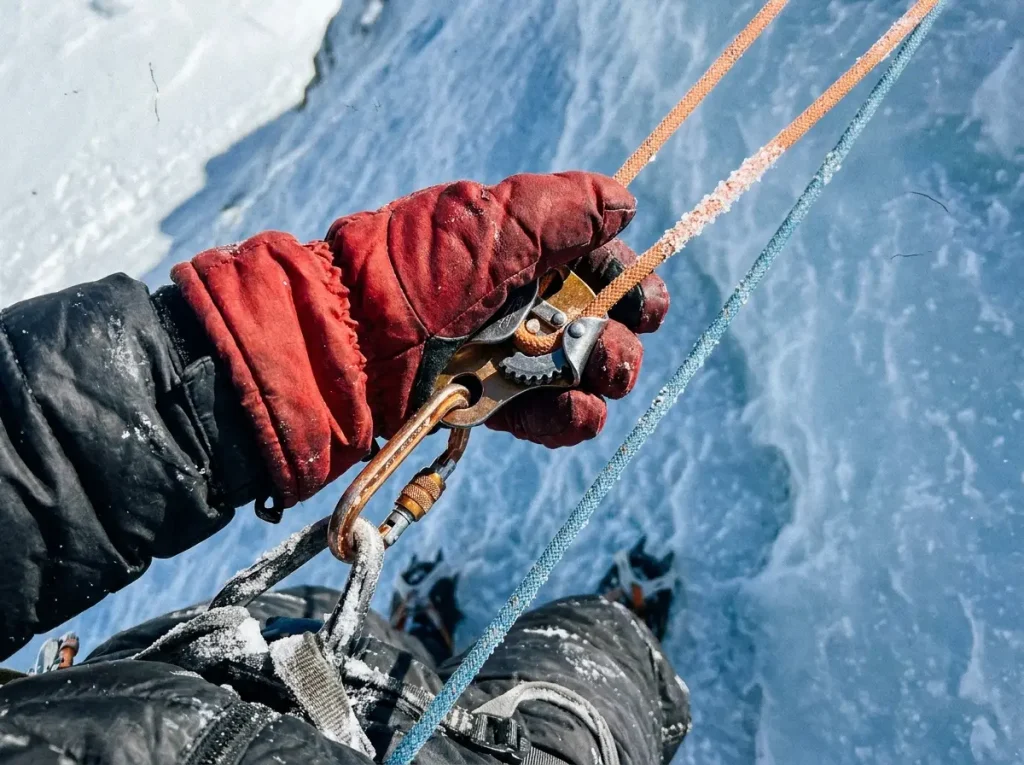
The Lhotse Face at 7,500 m is not where you learn to rappel in mittens. These are muscle-memory skills you bring with you, and the climbers who lean on fixed ropes and Sherpas to paper over weak fundamentals are the ones who get exposed when something breaks the chain.
Fixed Lines — Jumar Up, Rappel Down
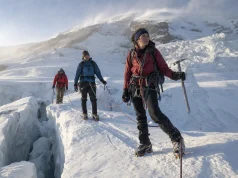
Most of Everest is climbed on fixed ropes that the Sherpa rope-fixing teams install ahead of the season. You jumar up them with an ascender and rappel down them, and you do it hundreds of times. The motion has to be automatic, including the part everyone fumbles: passing an anchor, where you briefly unclip and re-clip while the wind is trying to take your gloves. This is the same steep ice and fixed-line work that guides actually require on Ama Dablam, which is exactly why that peak sits where it does on the ladder.
Crampons, Ice Axe, and Self-Arrest
Crampon and ice axe technique has to be second nature, and that includes the recovery skills you hope to never use. A reliable self-arrest is non-negotiable, because a slip on hard blue ice gives you about a second to react before momentum makes the decision for you. Glacier travel and basic crevasse rescue round out the kit.
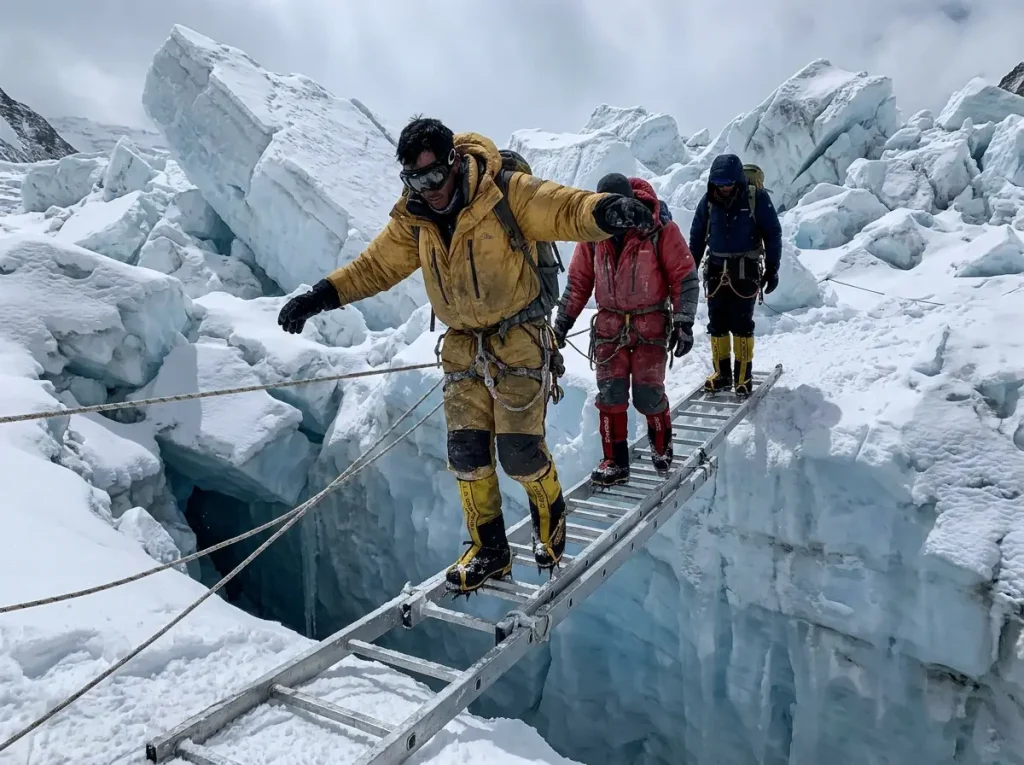
Ladders, Crevasses, and the Khumbu Icefall
The Khumbu Icefall is its own skill set: aluminum ladders lashed together over crevasses, sometimes flexing under your front points, sometimes at an angle nobody warned you about. You cross them in crampons, roped up, in the cold dark of an alpine start. The first crossing rattles almost everyone.
Practice clipping and unclipping fixed lines with thick mittens on, in the cold, before you ever leave home. At minus 20 with a fogged-up mask, fine motor skills vanish, and the climbers who only ever drilled rope work bare-handed in a gym discover it the hard way at an anchor in the wind.
Acclimatization and Why Altitude Is the Real Gatekeeper
You can be fit, skilled, and permitted, and altitude can still send you home. This is the prerequisite written into your physiology, not your application, and it’s the real reason that 7,000 m summit matters so much.
How Acclimatization Rotations Actually Work
Everest is climbed in rotations, not in one long push. You climb high, sleep low, drop back to base camp to recover, and repeat, letting your system build the extra oxygen-carrying red cells before the summit bid. Rushing this is how people end up with HAPE or HACE, so a disciplined acclimatization protocol is woven into every credible itinerary. The schedule looks slow on paper and feels slow on the mountain, and that’s the point.
The Death Zone and What Happens to You Up There
Above 8,000 m you enter the Death Zone, and the name is literal rather than dramatic. Up there your oxygen saturation drops to somewhere around 50 to 60 percent, against the 95 to 100 percent you live at near sea level. You cannot acclimatize at that altitude. You can only decline.
Every hour you spend above the South Col is borrowed time, which is why the summit window and your turnaround clock become survival math instead of preference.
Pre-Acclimatization Options (and Their Limits)
Some climbers arrive partly pre-acclimatized using hypoxic tents at home or by climbing a high peak just beforehand. These tools genuinely help, and they’re a fair way to shorten time on the mountain. They are not a substitute for the real thing, though, and this is the deeper reason the law wants a genuine 7,000 m summit on your record. A simulated altitude proves your physiology can adapt. It doesn’t prove you can think, clip, and keep moving when the air is actually that thin.
The True Cost — A Multi-Year, All-In Everest Budget
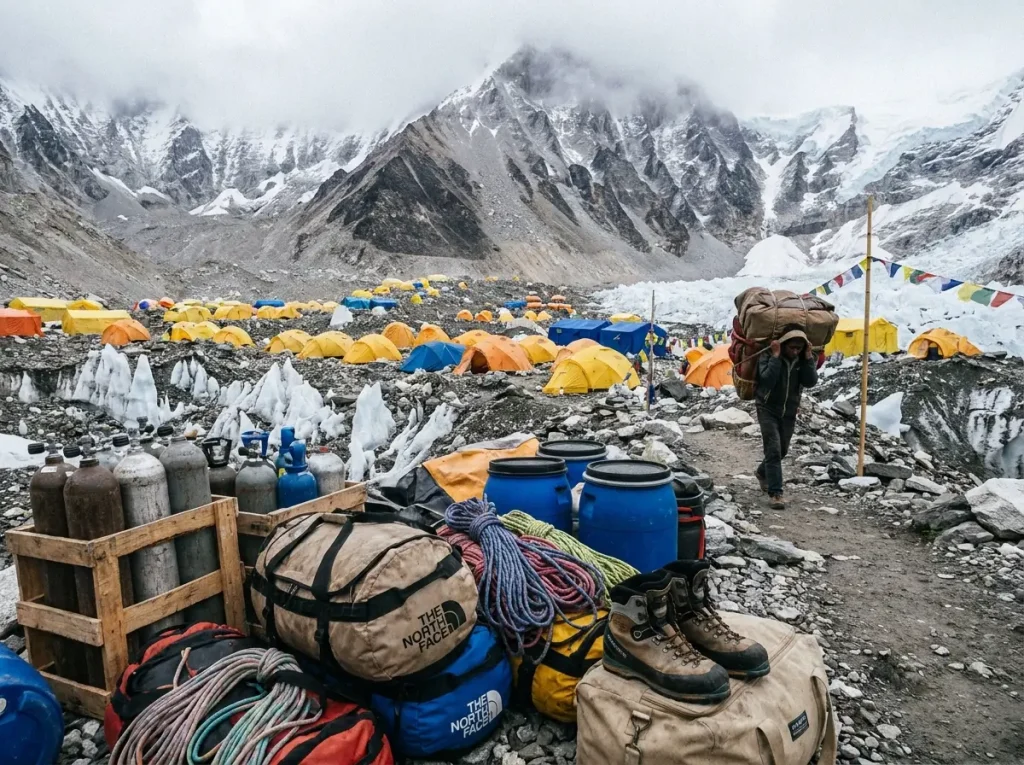
Almost every guide online quotes you either a permit number or an expedition range, and then stops. Nobody builds the honest multi-year total, which is the number that actually decides whether this is real for you. If you want the broader picture too, the full Everest expedition picture of routes, cost, and success odds is its own conversation, but the budget below is the one that surprises people.
The Fees That Hit Before You Even Start
Before you pay a single guide, the government and team fees stack up fast. Expect an agency fee around $3,500 per team, a refundable trash deposit of about $4,000 per team, and a liaison officer fee near $5,000 per team. That’s roughly $12,500 in fixed team costs landing before the $15,000 per-person permit even enters the math. You’re tens of thousands of dollars committed before a yak is loaded.
Operator Tiers — What the Price Gap Really Buys
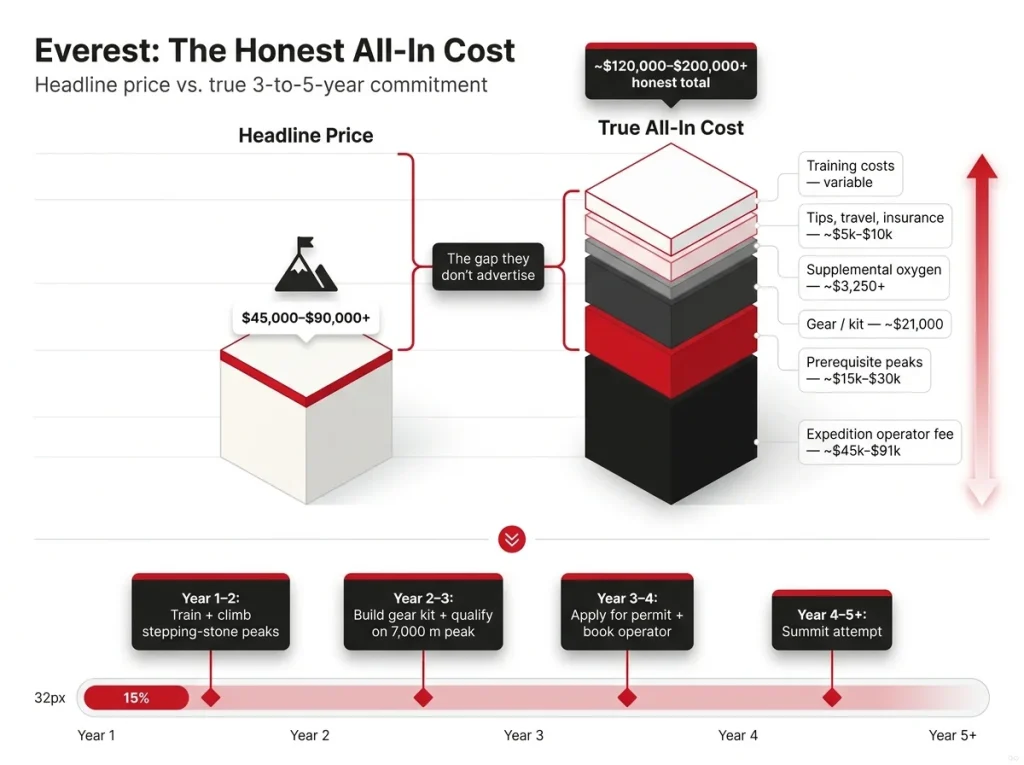
The all-in price spread is wide, and it isn’t arbitrary. By veteran Everest chronicler Alan Arnette’s 2026 analysis, Nepali operators run a median near $45,250, Western operators on the South side around $76,000, and the Tibet side near $90,800. The gap between the cheap end and the expensive end is a support gap. The lower number usually means fewer Sherpas, a thinner oxygen allotment, and a weaker rescue plan.
You are quite literally buying margin for error.
The Honest 3–5 Year, All-In Number
Now add everything the brochures leave out. The qualifying ladder is multiple expeditions, each a multi-thousand-dollar trip of its own. Building a kit from scratch runs around $21,000, and you’ll face that bill whether you rent or buy your Everest gear. Then layer in supplemental oxygen (often $3,250 and up), tips for your Sherpa team, travel, and insurance.
A disciplined budgeting framework keeps this honest, and the honest version is a 3-to-5-year financial commitment, not a single line on a permit.
Insurance, Real Risk, and Why Prepared Climbers Still Don’t Make It Down
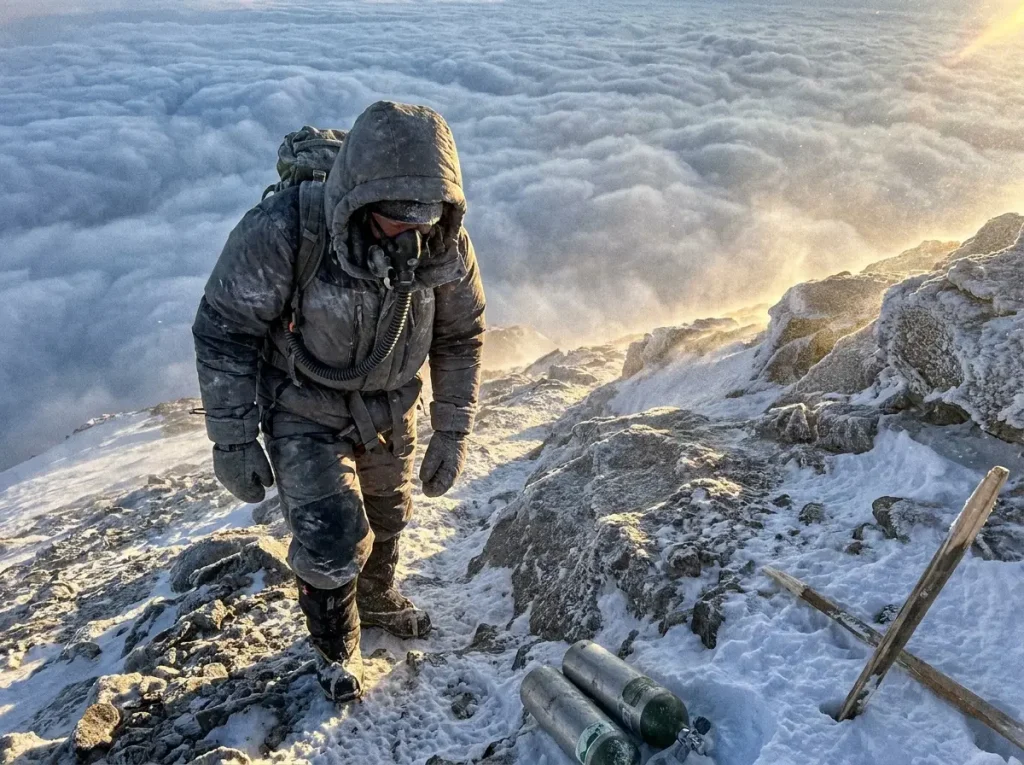
This is the part the sales pages skip, and it’s the part that should sober you the most. Climbers who check every box on the prerequisite list still get caught out, and they rarely get caught out by freak storms. They get caught by thin support and broken discipline.
The Insurance You’re Legally Required to Carry
The repatriation and helicopter-evacuation cover Nepal mandates isn’t bureaucratic box-ticking. Read the actual policy and know what it pays for, because a rescue off the Western Cwm can run to five figures and a repatriation costs more. Climbers and families have been blindsided by coverage gaps at the worst possible moment, after the emergency, when the bill arrives.
Why Cheap Expeditions Cost More Than Money
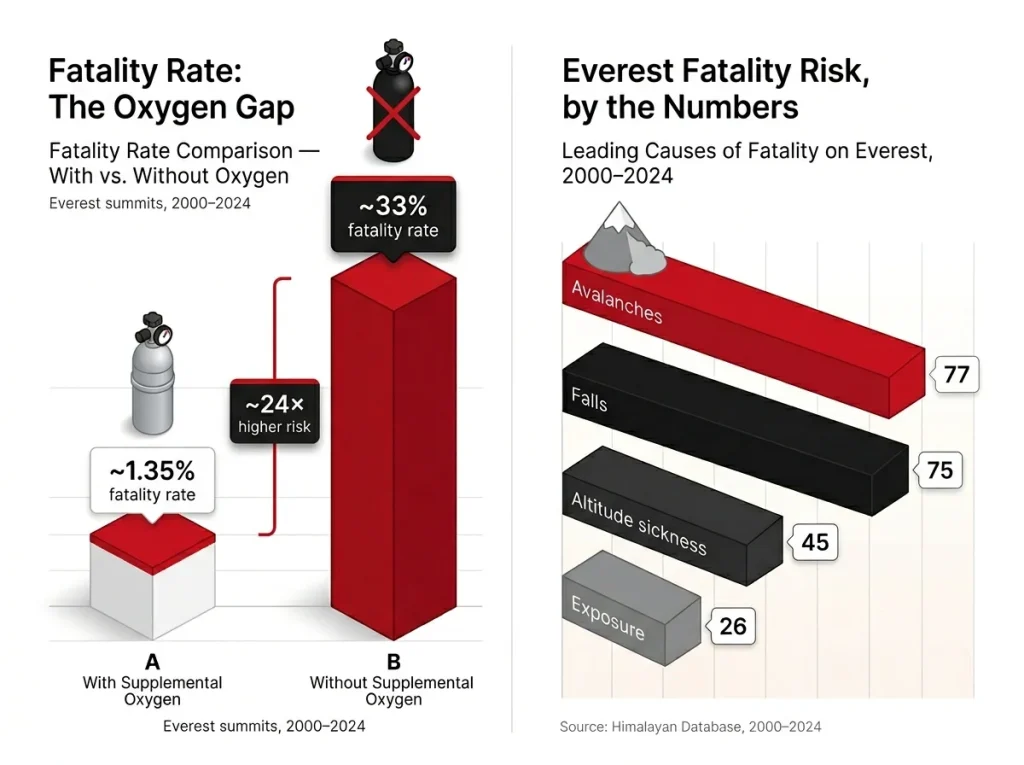
Here’s the statistic that should reframe how you shop. Of the 26 climbers lost on Everest across 2023 and 2024, 23 were on expeditions priced below the median. Cheap, in this context, buys thin oxygen, fewer Sherpas, and a slower rescue. The risk math on oxygen alone is stark: climbing without supplemental oxygen has carried roughly a 33% mortality rate against about 1.35% with it over 2000 to 2024, which is to say going without makes you on the order of 24 times more likely not to come down.
It helps to know what actually catches people, too. Across 2000 to 2024 the leading causes were avalanches (77), falls (75), altitude sickness (45), and exposure (26), and most of those trace back to support and judgment rather than freak luck. This is also a useful gut-check on ego, and a reminder that Everest isn’t actually the hardest mountain to climb. It’s the one where the support system, more than the terrain, decides outcomes.
Going without bottled oxygen is not a budget cut, it’s an elite stunt. If your money is tight, the right move is a cheaper flight or fewer prerequisite frills, never skipping oxygen or picking the bargain operator. The thing you economize on should never be the thing keeping you breathing.
The 2 o’Clock Rule and Summit Fever
The most repeated fatal decision on Everest is pushing past the turnaround time because the top looks close. Many teams run a 2 o’clock rule: if you’re not on the summit by then, you turn around, no matter what. Summit fever, the oxygen-starved compulsion to top out anyway, is exactly what that rule exists to override, because willpower can’t be trusted when your brain is running on half its oxygen. Rob Hall’s 1996 ordeal, waiting with a client well past the safe turnaround, is the textbook cost of breaking it.
Crowding has since made the math worse: on May 20, 2025, more than 270 climbers summited in a single day with 300-plus on the route at once, and a bottleneck near the Hillary Step burns oxygen and daylight while you stand still in the worst place to stand still. The South Col at Camp 4, the gateway to the Death Zone, is where all of this comes due at once.
Choosing an Operator and the Ethics of Climbing Everest
The last prerequisite is partly a buying decision and partly a moral one. You’re choosing who keeps you alive, and you’re deciding whether you belong on the mountain at all. Both deserve more honesty than the marketing gives them.
How to Vet an Operator (and the Red Flags)
Vet an operator like your life depends on it, because it does. Ask the questions that actually predict survival: the Sherpa-to-climber ratio, the per-climber oxygen allotment, the rescue plan, the guides’ credentials, and the safety record. The biggest red flag is a price well below the median, which almost always signals thinner support somewhere you can’t see until you need it.
Compare operators on oxygen bottles per climber and Sherpa ratio before you ever compare them on price. A quote that beats the others by a wide margin is telling you where the support was cut, and on Everest the support is the safety.
The Sherpa Risk Nobody Puts on the Brochure
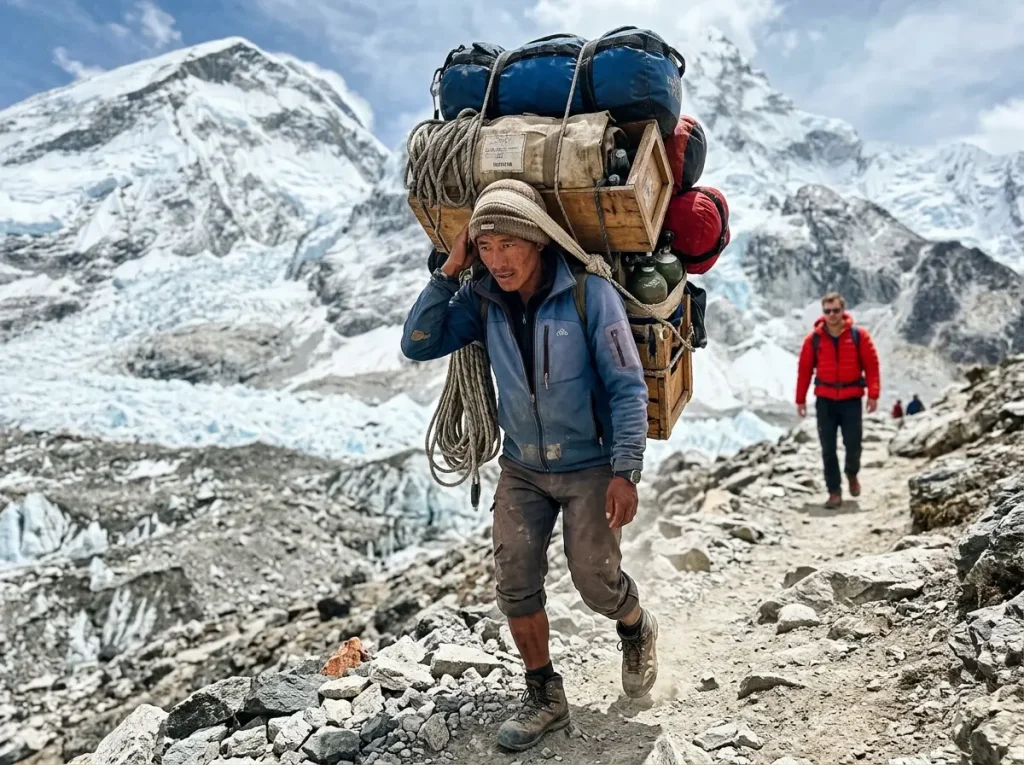
The summit photo rarely shows who carried the load to make it possible. The most hazardous work, fixing rope through the icefall and ferrying gear high, falls on Sherpas, and with 400-plus permits a season the relationship has grown more transactional than the romance suggests. This is the heart of the ethical reckoning over Sherpa risk and commercialization on Everest, and it’s worth sitting with before you sign anything. A climber who understands what their summit costs other people climbs differently.
Crowding, Waste, and Whether You Belong Up There
Nepal issued 517 permits in 2025, and the crowding that follows is now its own hazard, both to you and to everyone queued behind you. The waste rules have teeth to match: every climber past base camp must carry out at least 8 kg of trash and use WAG bags for human waste, or forfeit the deposit, with compliance still hovering near 70 percent in 2024. Leave No Trace is law here now, not etiquette. All of which leads to the honest question under Everest as the crown of the Seven Summits: not just whether you can climb it, but whether you should add your boots to the line this particular season.
Conclusion
Strip it all down and three things hold. The permit and the money are the easy part, while a qualifying 7,000 m Nepalese summit and genuinely owned technical skills are the real gate. The 2025-26 rules and the true all-in cost mean a realistic 3-to-5-year roadmap, not a single dramatic season. And support plus discipline, not luck, are what bring prepared climbers home, which is why the cheapest operator is the worst place to economize.
So run the honest test. If the ladder excites you more than it scares you, book a stepping-stone peak this season and start building the record. If the honest math says not yet, that isn’t failure. That’s the prerequisite doing its job.
Frequently Asked Questions
01Do you need to climb a 7,000 m peak before Everest now?
Yes. Under Nepal’s 2025 Tourism Bill, you must have summited a 7,000 meter peak in Nepal before an Everest permit is issued. A 6,500 m peak no longer counts, and the qualifying summit has to be on Nepalese soil.
02Do Denali or Aconcagua count toward the Everest experience requirement?
No. Both are explicitly excluded, because the qualifying peak has to sit in Nepal and reach at least 7,000 m. Denali (6,190 m) and Aconcagua (6,961 m) build real experience but don’t tick the legal box.
03How much does it cost to climb Everest in 2026?
All-in, expect roughly $45,000 with a budget Nepali operator up to $90,000 or more on the Tibet side. And that’s before the prerequisite peaks, gear, and training years, so the headline expedition price is only part of the true number.
04How long does it take to train for Everest?
Plan on 9 to 12 months of dedicated training for the expedition itself, on top of the multiple seasons it takes to climb the qualifying ladder. Realistically that’s a 3-to-5-year arc, not a single year.
05Can a beginner climb Everest?
Not legally or safely. Beyond the new 7,000 m requirement, you need owned technical rope, crampon, and ice-axe skills plus elite fitness. Everest is the top of a long ladder, not an entry point.
Safety Notice: Rock climbing and mountaineering are inherently high-risk
activities that can involve physical trauma or fatal incidents. The information on Rock Climbing Realms is for
educational and informational purposes only. Techniques and advice presented here are not a substitute
for professional, hands-on instruction. Conditions and risks vary by location. Always seek guidance
from a qualified instructor before attempting new techniques. By using this website, you agree that you
are solely responsible for your own safety. Any reliance you place on this information is strictly
at your own risk, and you assume all liability for your actions. Rock Climbing Realms and its authors
will not be held liable for any harm, damage, or loss sustained in connection with the use of this information.
Affiliate Disclosure: We are a participant in the Amazon Services LLC Associates Program, an
affiliate advertising program designed to provide a means for us to earn advertising fees by advertising and linking
to Amazon.com. As an Amazon Associate, we earn from qualifying purchases. We are also an official affiliate partner
of Black Diamond Equipment via the AvantLink network. If you click on a Black Diamond affiliate link and make a
purchase, we may earn a commission at no additional cost to you. We also participate in other affiliate programs.
Additional terms are found in the terms of service.