In this article
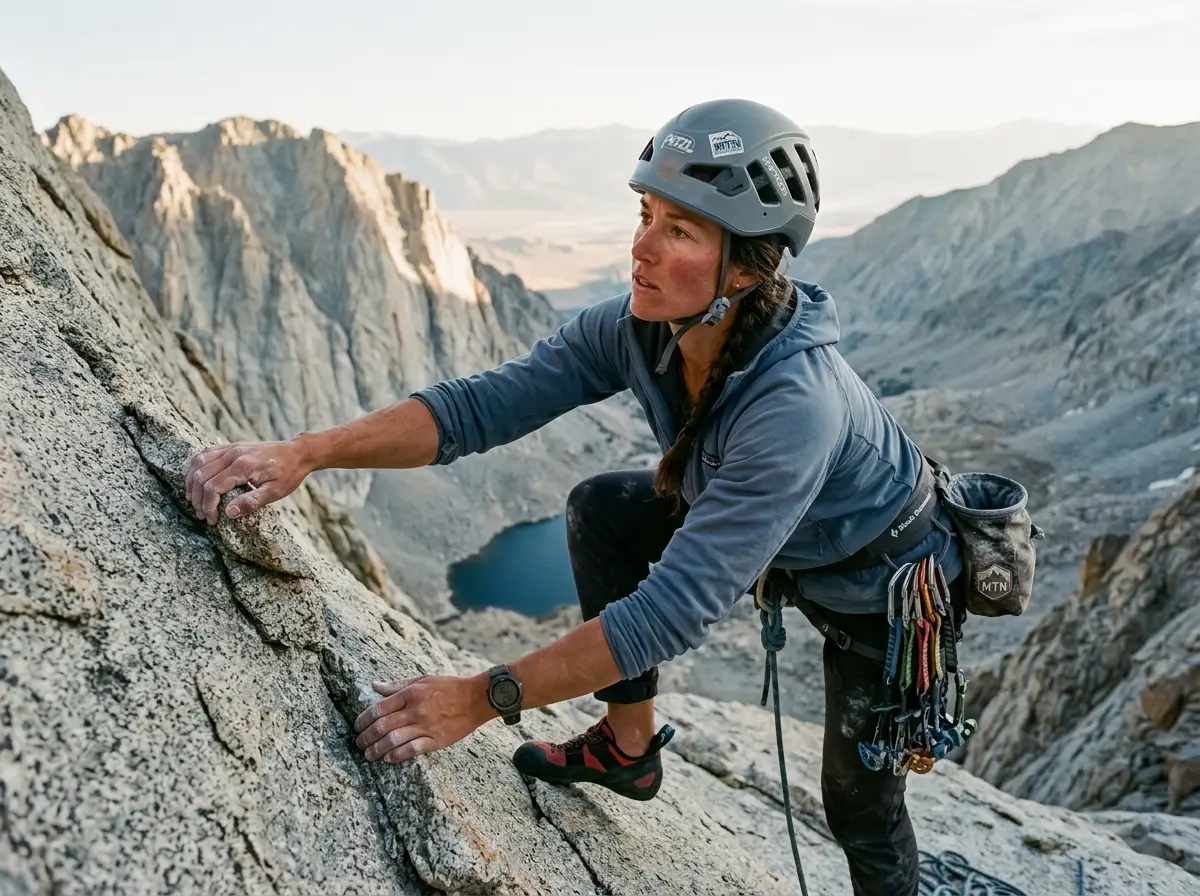
The guidebook says 5.6, maybe 5.7. That is a number plenty of gym-strong climbers shrug at on a Tuesday night. Then the East Face of Mt Whitney quietly turns a real chunk of them around, somewhere above the Tower Traverse, with eight hundred feet of air under their heels and a grade that suddenly feels like a lie. Ask anyone who has racked up at Iceberg Lake: the printed number is the least useful thing you carry up this route.
This guide decodes what the grade actually asks, walks the line pitch by pitch, sorts the East Face against the East Buttress and the Mountaineer’s Route, and lays out the permit, rack, and retreat reality before you commit.
Why the East Face Climbs Harder Than 5.7

Start with the thing that gets people in over their heads: the grade. Grab four guidebooks and you get four different answers. Steve Roper called it Class 5. Secor lists it at 5.6. SuperTopo says 5.7. Moynier and Fiddler put it at 5.8. Nobody is wrong, exactly. They climbed it in different decades, sometimes by different variations, and they came up through a California rating culture that has a long reputation for sandbagging.
Four Guidebooks, Four Grades
The spread is not random. All four are using the same Yosemite Decimal System (YDS), and they still disagree. Ratings from the 1930s through the 1960s were calibrated by climbers in stiff boots on hemp ropes, and a move they shrugged off gets handed down as a friendly number long after the gear changed. The variation you pick changes it too, since the Fresh Air Traverse and the Shaky Leg Crack are graded differently and sit on the same route. The printed number is a snapshot of one person’s day, not a fixed property of the rock.
What Comfortable at 5.8 to 5.9 Actually Means
Here is the honest floor, the one guides use instead of the guidebook: you want to lead 5.8 to 5.9 trad comfortably before you tie in for the East Face. Not your hardest redpoint. Comfortably. The reason is that the raw move grade is only part of the load.
Add fourteen thousand feet of thin air, a pack on your back, run-out gear on moderate terrain, and exposure that does not let your heart rate settle, and a “5.6” move starts spending like a 5.8. The number on the page assumes none of that. The mountain charges for all of it.
A Quick Honest Self-Check
“Experienced climbers only” is true but useless as advice, so make it concrete. Can you lead exposed 5.7 trad at altitude without your technique falling apart? Can you place solid protection fast, simul-climb easy ground while managing rope, and stay calm with big air under a small foothold? If three of those are a clear yes, the East Face is a reasonable objective. If any one is a maybe, the grade is not your problem, and the right move is reading the rest of this guide to pick a better day. The same posted-grade-undersells-the-real-ask trap shows up on bigger peaks too, which is exactly why our honest breakdown of climbing the Matterhorn leads with the gap between the AD grade and what the route actually demands.
Don’t calibrate your readiness on the gym or the sport crag. The East Face rewards the climber who is bored by moderate trad, not the one who is barely hanging on at it. If 5.8 still feels like a project, the route will feel like a fight at altitude.
East Face, East Buttress, or Mountaineer’s Route
Three of Whitney’s classic technical lines leave from the same Iceberg Lake camp, and choosing the wrong one is the most common mistake on the whole mountain. The East Face is one classic line among the world’s famous mountain routes and peaks, but famous does not mean right for you. The climbing is where these three split, and the split is bigger than the map suggests.
Same Camp, Three Very Different Days
All three share the cross-country North Fork approach to Iceberg Lake, so your approach effort is identical no matter which you eventually climb. After that, they could not be more different. One is a Class 3 scramble. One is sustained roped rock. One is the exposed historic testpiece you came here reading about. Picking by reputation instead of by skill is how climbers end up committed past their comfort with no clean way down.
East Face vs the East Buttress
The East Buttress is the route many experienced climbers quietly prefer. It is more sustained and more aesthetic, holds less loose rock, and, crucially, it bails. From high on the East Buttress you can make two or three rappels into the Mountaineer’s Route gully and walk off. The East Face is the historic classic, with more exposure, looser sections, and a retreat that gets genuinely complicated once you are above the Tower Traverse. If you want the named-feature experience with a friendlier exit, the East Buttress is worth a hard look, the same way the named-feature line on the Grand Teton’s Owen-Spalding route rewards a climber who wants moderate alpine rock with a known descent.
When the Mountaineer’s Route Is the Right Call
If the self-check above turned up a maybe, this is your route. The Mountaineer’s Route is Class 3 for most of its length, with no roped climbing required by competent scramblers, and it tops out the same summit. There is no shame in it. Half the strong alpinists on the mountain are headed there on purpose. We cover its deceptively serious side, including the spot where the Class 3 grade bites back, in our full guide to the Mountaineer’s Route and its Class 3 trap. Send the wrong-fit version of yourself there, and save the East Face for the season the grade feels easy.
The Pitch-by-Pitch Line Up the East Face
Knowing the features in order is half the battle on a route like this, because route-finding errors cost time, and time is what afternoon weather takes from you. The first ascent went to Robert Underhill, Francis Farquhar, Jules Eichorn, Glen Dawson, and Norman Clyde on August 16, 1931, and the line has been a Sierra testpiece ever since. Here is the line the way a partner would brief you the night before, feature by feature, from the lake to the summit blocks.
Iceberg Lake to the First Tower
From the Iceberg Lake high camp at roughly 12,600 feet, the route gains a system of ledges and gullies to reach the notch above the First Tower. This is the warm-up, mostly third and easy fifth class, but it is also where you settle into the altitude and the exposure starts building. Move efficiently here. The clock you are racing started at the lake.
The Tower Traverse and the Washboard
The Tower Traverse is the move everyone remembers. It is a narrow ledge crossing the south side of the Second Tower, rated as low as 5.3, with roughly eight hundred feet of clean air below it. This is the section that teaches the lesson of the whole route: grade and consequence are two separate questions.
The holds are not hard. A fall would almost certainly be fatal. Treat the easy rating and the exposure as completely different problems, because your nervous system will. Past the traverse, the Washboard offers easier, broken ground and a chance to breathe before the crux.
The Grand Staircase to the Summit Blocks
The Grand Staircase is the heart of the climb, three pitches of mostly moderate ground with a buried 5.5 move two-thirds of the way up and a short offwidth section that touches 5.7. Then the route eases into the Summit Blocks, commonly simul-climbed over fourth and easy fifth class straight to the summit plateau. That last stretch is one of the few alpine rock routes in the country where the final moves put you on the highest point in the Lower 48, hikers and all, milling around a few feet away.
This clip is East Buttress footage, the route immediately south of the East Face on the same wall, included for an honest sense of the granite texture, the exposure, and what high-altitude trad on Whitney actually feels like. No equally good East-Face-specific clip exists, so read it as the rock, not the exact line.
On the Summit Blocks, be quick, efficient, and careful of your rope. Manage drag with long slings on the simul sections and keep your transitions smooth. This is as much about beating the afternoon clock as it is about security, and a fall while simul-climbing here pulls your partner too.
Fresh Air Traverse or Shaky Leg Crack
Partway up, the route gives you a choice, and most climbers treat it as “pick the easier number.” That is the wrong frame. These two variations reward different strengths, and the smart call is made at camp, knowing yourself, not mid-route under pressure.
The Fresh Air Traverse (5.4 to 5.5)
The Fresh Air Traverse is the classic line, a committing step-across with a long reach and a smooth face move, graded only 5.4 to 5.5. The crux here is not strength. It is your willingness to commit over big exposure on moderate holds. Climbers with slab confidence and a steady head find it straightforward. Climbers who tighten up over air find it humbling regardless of the number.
The Shaky Leg Crack (5.8)
The Shaky Leg Crack is the harder way around, a roughly fifty-foot vertical crack rated 5.8 with an awkward overhung belay stance that can ask for a shoulder-stand. It is more strenuous and more technical, but it skips the exposed traverse. If you are stronger in cracks and offwidth than you are comfortable stepping across air, this is your variation, and it is a legitimate choice, not a cop-out.
How to Choose Before You’re There
Match the variation to your honest strengths. Strong on exposed slab and balance, the Fresh Air Traverse is your line. Stronger pulling on cracks than committing to exposure, take the Shaky Leg Crack. Decide at the lake, talk it through with your partner, and do not leave it to a tense conversation on a ledge.
The Approach and Iceberg Lake High Camp
The approach is half the work and most of the fatigue, and it is identical for all three technical routes. This is off-trail travel, so plan it like a climb of its own, not a hike to the base.
Leaving the Trail at the North Fork
The standard approach starts at the Whitney Portal trailhead, branches off the main Mount Whitney Trail, and follows the North Fork of Lone Pine Creek cross-country, past Lower and Upper Boy Scout Lakes. There is a use trail in places and route-finding in others, including the well-known Ebersbacher Ledges. It is steep, loaded with talus, and it goes faster with a partner who has done it before or a good track to follow.
Iceberg Lake at Roughly 12,600 Feet
Iceberg Lake is the shared high camp for the East Face, the East Buttress, and the Mountaineer’s Route. At about 12,600 feet, it puts you close enough to start climbing early and high enough that the altitude is already working on you. Camp here under the Whitney Zone rules laid out by the Forest Service, and budget a night to sleep at altitude before you climb if your schedule allows.
Footwear for the Approach
The cross-country miles over talus and slab reward a real approach shoe with sticky rubber and a climbing-capable toe. The Five Ten Guide Tennie (men’s · women’s) is the long-standing pick here, with Stealth C4 rubber and a beveled edge that smears on the approach slabs and still handles the easy scrambling near camp. Summer parties often climb the route in them and skip carrying boots entirely.
Permits for the North Fork Entry
This is the section that trips people up before they ever touch rock, because the East Face does not use the permit everyone has heard of. Get this wrong and you do not climb.
The North Fork Entry Is Not the Main Lottery
The famous Whitney Trail lottery is for hikers on the main trail. East Face climbers enter through the North Fork of Lone Pine Creek, a completely separate Inyo National Forest quota with its own reservation. Do not burn your energy on the main lottery and show up without the entry you actually need. You reserve your North Fork of Lone Pine Creek entry through Recreation.gov, and it is reservable up to six months out.
Fees, Windows, and the 40% Late Release
The Whitney Zone fee runs $15 per person plus a $6 reservation fee. The quota releases in two stages: about 60% of slots open six months before your entry date, and the remaining 40% are added two weeks out. If you miss the six-month window, do not give up, because a real chunk of permits drops back in fourteen days before the date. Rules and dates shift year to year, so check the current wilderness permit rules on the Inyo National Forest site before you build your trip around them.
The Rack and Gear You Actually Carry
Competitors scatter the gear list across five pages. Here is the whole thing in one place, the way you would lay it out on a slab at camp the night before. Keep it light. At altitude, every pound you carry is a pound you drag up twelve pitches. Our full breakdown of the alpinism gear you actually need versus what you can skip goes deeper on the philosophy, but this is the route-specific kit.
Harness, Helmet, and Belay Device
For an alpine objective like this, a minimalist harness beats a padded sport-climbing rig you will never hang in. The Black Diamond Alpine Bod harness is the lightweight, budget-friendly standard, with quick-release leg loops and almost no bulk. If you want a lighter, more adjustable option, the Petzl Altitude is the premium step up. A helmet is not optional on this loose face, full stop. The Petzl Meteor is the standard pick, light enough that you forget it is on. For belaying and rappelling, the Black Diamond ATC Guide (or a Petzl Reverso) covers you, and its guide mode lets you bring up a second on the multi-pitch sections.
The Rock Rack
You do not need a heavy rack. A single set of cams plus one to two sets of nuts handles the protection on the named features. The Black Diamond Camalot C4 set is the trusted standard for the cracks on the Tower Traverse, the Fresh Air Traverse, and the Grand Staircase. Add a Black Diamond Stopper set, because small wired nuts protect the thin cracks on the Tower Traverse better than anything else you can carry, and they weigh almost nothing.
Rope and Rappel Hardware
A single 60-meter dynamic rope matches the multi-pitch line and lets you make full-length rappels if you need to retreat. The Black Diamond 9.4mm dry-treated rope is a reasonable all-around choice, light enough for the approach and dry-treated for early-season snow. Carry a locking pear-shaped carabiner for rappel and Munter use; the Black Diamond RockLock is the standard, and the HMS shape is what you want for a Munter if you drop your device.
The helmet earns its place twice. It protects you from rockfall, and wearing it keeps you honest about not climbing directly under another party. On a loose face like this, the courtesy of route spacing matters as much as anything in your pack.
Season and Early-Season Snow
When you go changes what you carry, and the East Face has two distinct personalities depending on the calendar.
The Summer Window
The standard season runs roughly from June or July through October, when the rock is dry and the approach is snow-free. This is when most parties climb the route in approach shoes with a light rack and no snow gear. Late season has a catch: some climbers call the loose, dry scree of October more hazardous than the firm snow of June, because rockfall potential climbs as the freeze-thaw loosens the face.
Early-Season Snow and the Axe-and-Crampons Call
Earlier in the year, snow lingers in the approach gullies, and the day changes character. Now you want a crampon-compatible mountaineering boot, an ice axe, and solid self-arrest skills before the rock even starts. The La Sportiva Trango Tech GTX (women’s) is a proven boot for these snow approaches, paired with Grivel G12 New Matic crampons for firm morning snow and a Grivel Air Tech Evo ice axe for the gullies. The same firm-morning, soft-afternoon snow timing that decides a Mount Shasta climb applies here: start early, move while the snow is supportive, and be off the steep stuff before it turns to slush.
Hazards and the Retreat You Can’t Rush
This is the honest part, the one nobody likes to dwell on. The East Face is not the most technically hard route on the mountain, but it punishes a bad decision more than most, and the reason is the retreat. The full rundown of alpine climbing hazards and how to beat each one covers the broad strokes; here is what bites specifically on this face.
Exposure, Rockfall, and Parties Above
The Tower Traverse exposure is the obvious hazard, but the quieter one is rockfall. Loose rock and stones knocked down by parties above are a recurring, named problem on this face, which is why helmets and route spacing matter so much. Do not climb directly below another team if you can help it, and call out anything you knock loose.
The Retreat Problem
Here is the detail competitors mention and never explain. Once you are committed above the Tower Traverse, the East Face has no quick rappel line down the face itself. Unlike the East Buttress, which raps cleanly into the Mountaineer’s Route gully, your practical options on the East Face are to finish the climb or to commit to a slow, complicated multi-rappel retreat. That is a go/no-go fact, not a footnote. Decide whether you trust your partner and the weather before you step onto the Tower Traverse, not after. The same lesson runs through serious alpine routes everywhere, including the Emperor Face on Mount Robson, where the descent, not the climbing, is the real crux.
Weather, Altitude, and the Afternoon Clock
The summit sits at 14,505 feet above the Owens Valley, and afternoon thunderstorms are a Sierra Nevada fact of life. Altitude slows you down exactly when you need speed, and a storm catching you on the Summit Blocks turns a manageable day serious in minutes. Start in the dark, move with purpose, and treat an early turnaround time as a hard rule, not a suggestion.
Set your turnaround time at camp and write it on the back of your hand. The retreat off this face is slow, so the decision you make at noon is really a decision about whether you get caught in the afternoon weather with no fast way down.
The Bottom Line on the East Face
Trust the comfort floor, not the printed number. The East Face is rated 5.6 to 5.7, but it asks for a climber who leads 5.8 to 5.9 trad without thinking about it, at altitude, with a pack. Pick the right Whitney line for the climber you are today, because choosing the Mountaineer’s Route or the East Buttress is a smart call, not a failure. And settle the retreat question before you step onto the Tower Traverse, since that single decision is the one the mountain will hold you to.
If the honest self-check said “not yet,” that is good information. Point yourself at the Mountaineer’s Route this season, close the gap on your trad leading and your altitude fitness, and come back for the East Face the year 5.8 at 14,000 feet feels like an ordinary day.
Frequently Asked Questions
01What is the difference between the East Face and the East Buttress on Mt Whitney?
The East Buttress is more sustained and aesthetic with less loose rock and an easier rappel bail into the Mountaineer’s Route gully. The East Face is the historic, more exposed classic with a harder retreat. Both share the Iceberg Lake camp.
02How hard is the East Face of Mt Whitney really?
It is rated 5.6 to 5.7, but the real skill bar is leading 5.8 to 5.9 trad comfortably at altitude. The grade undersells the exposure, the thin air, and the pack weight, which is why guidebooks disagree on the number.
03Do you need a permit to climb the East Face of Mt Whitney?
Yes. You need the North Fork of Lone Pine Creek entry permit, a separate quota from the main Whitney Trail lottery, reserved through Recreation.gov. The Whitney Zone fee is $15 per person plus a $6 reservation fee.
04What gear do you need to climb the East Face of Mt Whitney?
A harness, helmet, and belay device, a light single rack of cams plus one to two sets of nuts, a 60-meter rope, and approach shoes. Early-season ascents add a mountaineering boot, crampons, and an ice axe for snow in the approach gullies.
05Can you climb the East Face of Mt Whitney without a guide?
Yes, if you lead exposed 5.7 trad confidently at altitude, place gear fast, and manage simul-climbing and a complicated retreat. If any of that is a stretch, hire a guide service or choose the Class 3 Mountaineer’s Route instead.
Safety Notice: Rock climbing and mountaineering are inherently high-risk
activities that can involve physical trauma or fatal incidents. The information on Rock Climbing Realms is for
educational and informational purposes only. Techniques and advice presented here are not a substitute
for professional, hands-on instruction. Conditions and risks vary by location. Always seek guidance
from a qualified instructor before attempting new techniques. By using this website, you agree that you
are solely responsible for your own safety. Any reliance you place on this information is strictly
at your own risk, and you assume all liability for your actions. Rock Climbing Realms and its authors
will not be held liable for any harm, damage, or loss sustained in connection with the use of this information.
Affiliate Disclosure: We are a participant in the Amazon Services LLC Associates Program, an
affiliate advertising program designed to provide a means for us to earn advertising fees by advertising and linking
to Amazon.com. As an Amazon Associate, we earn from qualifying purchases. We are also an official affiliate partner
of Black Diamond Equipment via the AvantLink network. If you click on a Black Diamond affiliate link and make a
purchase, we may earn a commission at no additional cost to you. We also participate in other affiliate programs.
Additional terms are found in the terms of service.