
In this article
A lot of people typing “climbing Half Dome” into a search bar are reading about the wrong objective for who they actually are. Two completely different days hide under that phrase, and picking the wrong one is how people end up frozen on a steel cable or in over their head on a slab they had no business roping up for. The honest version of this guide is a decision, not a checklist, and the call is simpler than the route databases make it look. So before you spend a permit, a season, or a 16-mile day on it, let’s split Half Dome the way it should be split.
Which Half Dome Climb Is Actually Yours
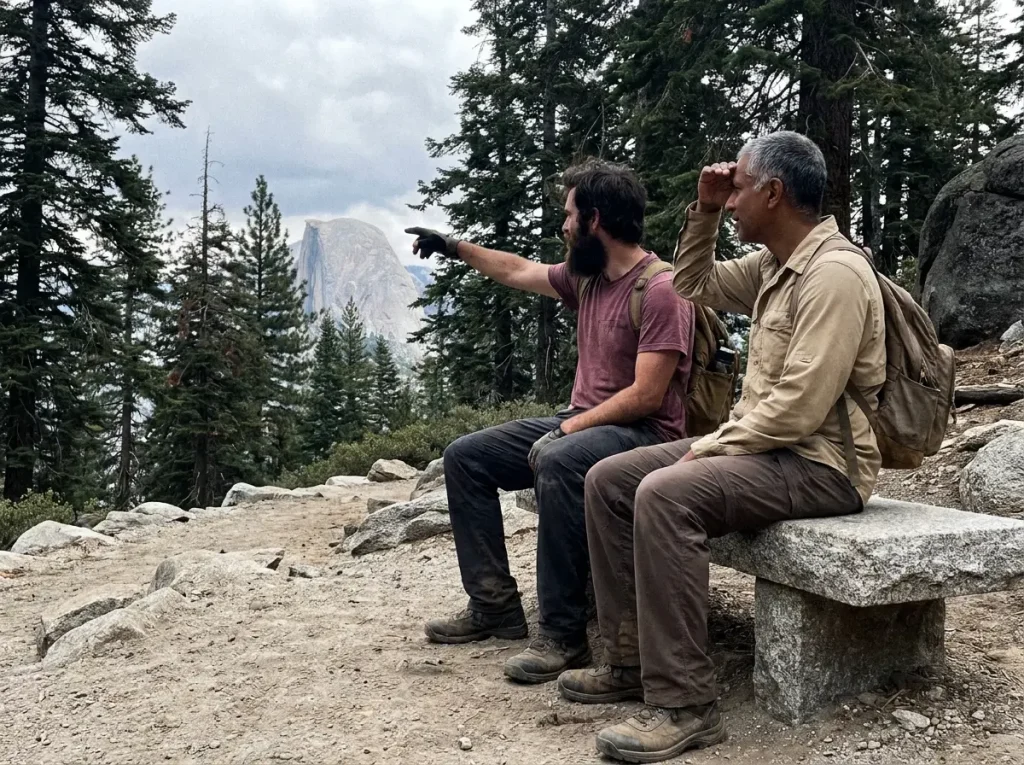
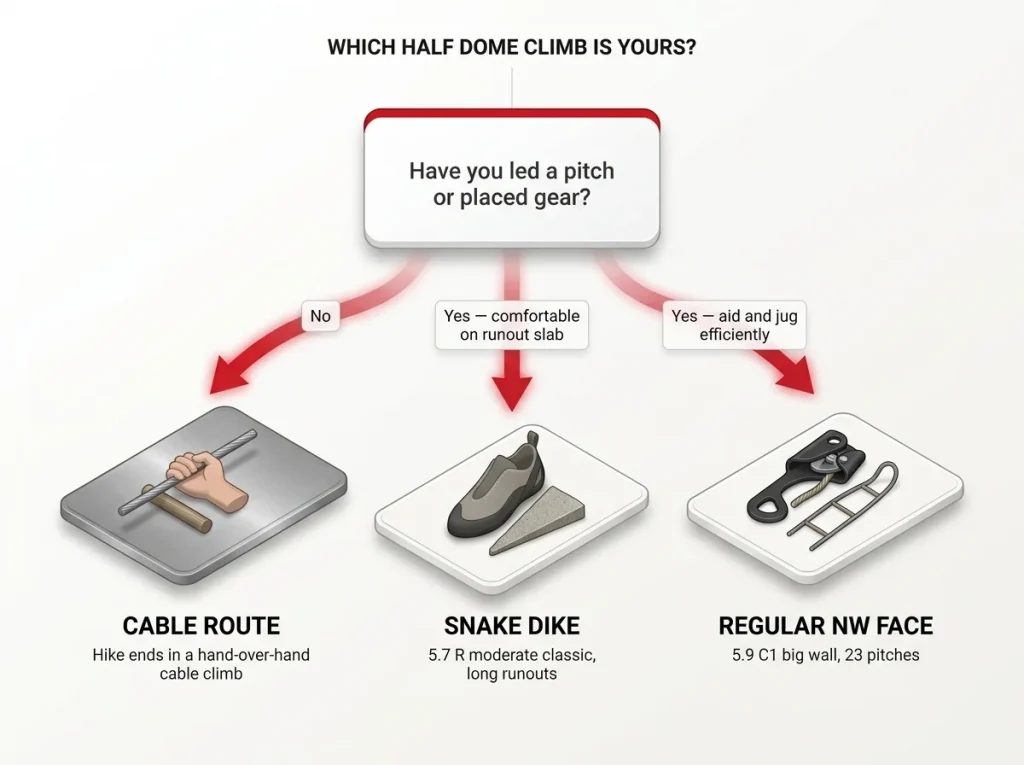
Here’s where everyone gets it wrong. They treat the cable route and the rock routes as the “easy” and “hard” versions of one climb. They share a summit and almost nothing else.
There are really three doors. The cable route is a hike that ends in a climb, with no gear placement and no rope for most people. Snake Dike is the moderate technical classic, the route aspiring rock climbers dream about, but its grade carries a sting we’ll get to. And the Regular Northwest Face is an expert-only big wall, a 23-pitch aid-and-free objective that assumes you already know how to do all of it. The summit at 8,844 feet is the same. The day getting there is not.
So the blunt rule first. If you have never placed protection or led a pitch, the cables are your route. Full stop. The story that keeps coming up in climbing forums is the same one every time: someone reads “5.7,” gets on Snake Dike with no slab-runout experience, and freezes 60 feet above a bolt with nothing to do but keep moving. That’s not a beginner’s bad day. That’s a predictable outcome of picking the wrong door.
This grade-versus-reality gap isn’t unique to Half Dome. The same distance between the number on paper and what the day actually demands shows up on the famous peaks worth climbing, where the rating tells you how hard the moves are and says nothing about how serious the position is. Half Dome is just one of the iconic US summits people put on a list, and like all of them, the honest planning starts with knowing which version you’re signing up for.
The Cable Route — The Hike That Becomes a Climb
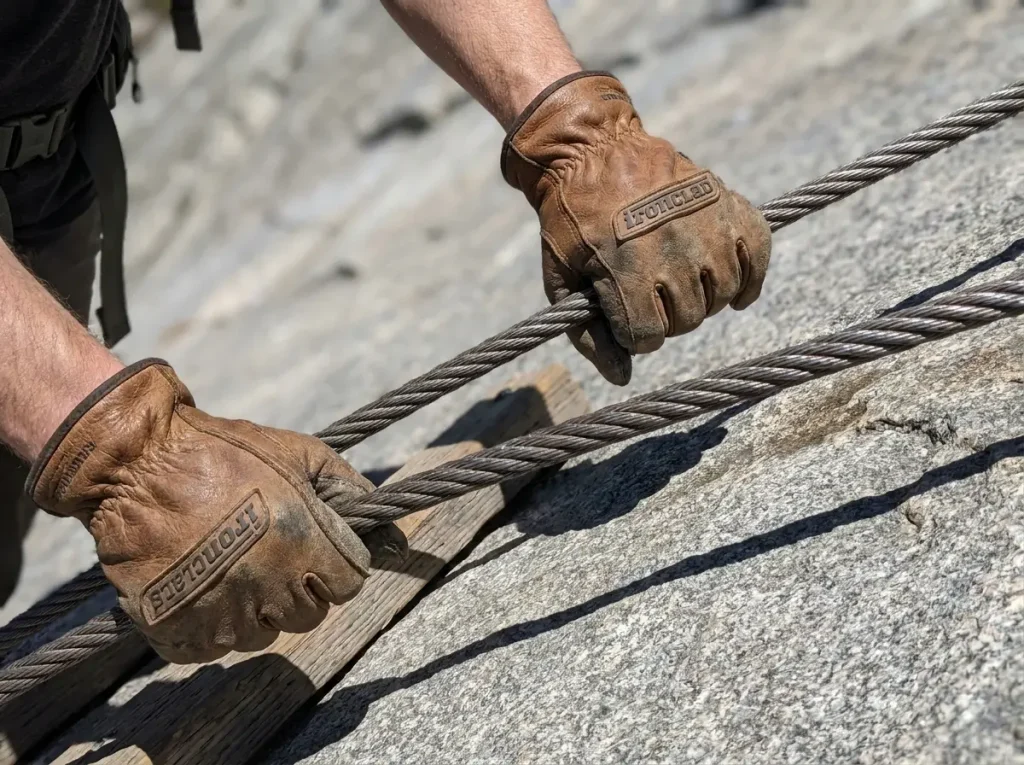
Most people who say they’re “climbing Half Dome” mean this. And it earns the word climb at the very end.
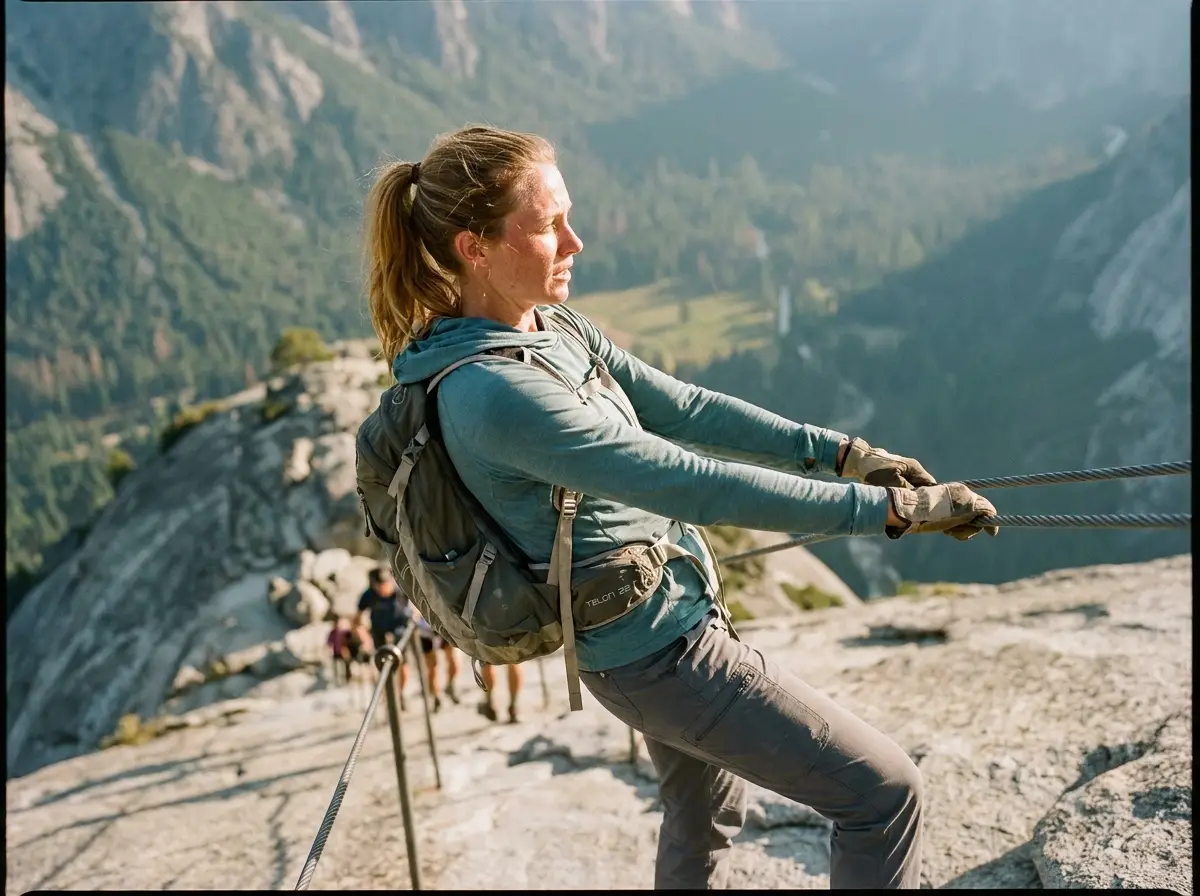
The numbers set the tone. You’re looking at roughly 14 to 16 miles round trip with about 4,800 feet of elevation gain. That’s a 10-to-14-hour marathon day, not a casual stroll, and the math matters because the hard part comes after your legs are already cooked. The final 400 feet up the cables is a roughly 45-degree slab of bare granite strung between two steel cables, with wood 2×4 rungs about every ten feet. You haul yourself up hand over hand, leaning back on the cables, with a few hundred feet of polished granite under your heels. That’s the moment a first-timer looks up and realizes the hike just became a climb.
The kit for this day is simple, but a couple of pieces decide whether the cables feel manageable or terrifying. Grippy full-grain leather gloves are the community’s number-one fix, and not a small one. The Ironclad Ranchworx leather work gloves give you a palm that actually sticks to hot steel instead of sliding on it, which is the difference between confidence and panic when your forearms start to go. For the day itself, a right-sized 20-to-22-liter daypack with a hydration reservoir sleeve rides better than a bloated overnight bag, and the Osprey Talon 22 (men’s) and Tempest 20 (women’s) hit that sweet spot with a real gendered fit, not just a different color. Because the day starts in the dark and often ends in it, a bright, reliable headlamp like the Black Diamond Spot 400 is non-negotiable, not a maybe. Throw in easy on-the-move calories, the kind of GU Energy Stroopwafel you can eat without stopping, and a satellite messenger, since there is no cell signal out there and a Garmin inReach Mini 2 is the honest safety call for a remote day this long.
This hiker-to-climber jump is the same one you hit on Mount Whitney’s Mountaineers Route, where the trail quietly hands you over to terrain that wants your hands. The cables are friendlier than that, but the mental shift is identical.
Bring your own gloves. There’s a discard pile at the base of the cables, but that’s a stranger’s worn, sweat-stiffened pair, and you don’t want to gamble your grip on it. A 2×4 rung is also missing here and there, so plan for a longer unrested stretch between rests than the photos suggest.
Getting a Permit — The Lottery Nobody Explains Honestly
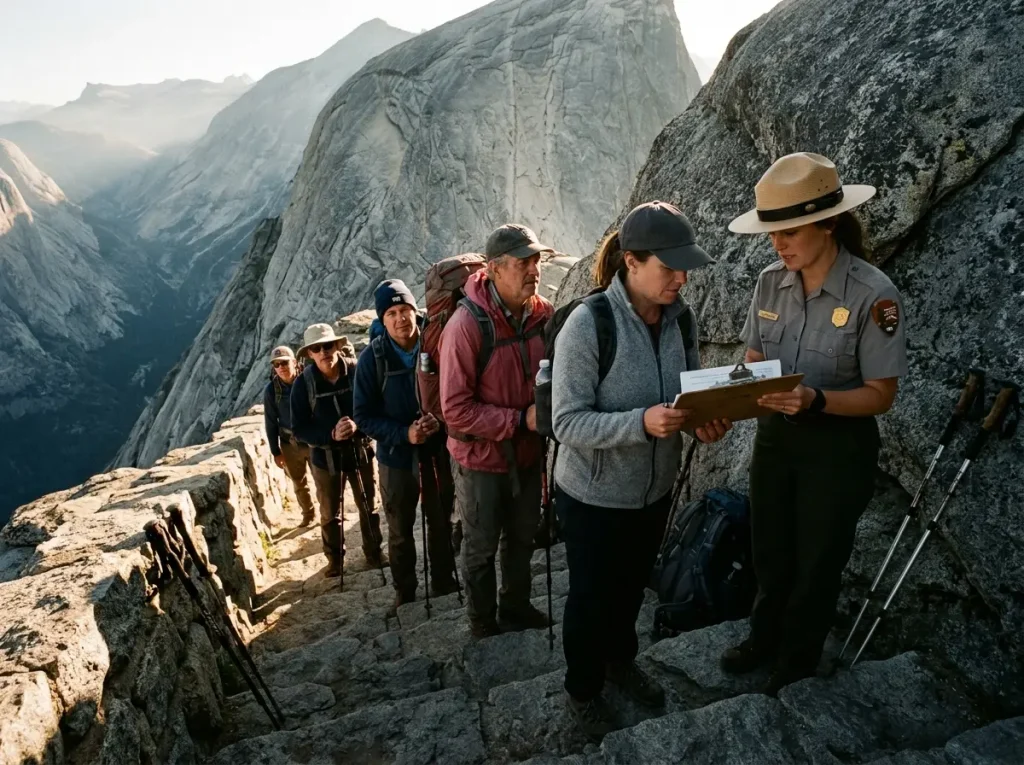
The cables are the famous part. The Half Dome permit is the part that actually stops most people, and the numbers get quietly oversold.
The park issues 300 permits per day for the cables, split into 225 day-hikers and 75 backpackers. You’ll see the headline odds quoted as roughly 22 percent for the preseason lottery and about 19 percent for the daily one. Those numbers are technically true and practically misleading. Because applicants list many possible dates, your specific Saturday in July is closer to one percent. The real strategy isn’t luck. It’s flexibility, building your trip around the date the park gives you instead of forcing one weekend.
There are two separate shots at it. The preseason lottery runs March 1 to 31 with results around April 11. Miss that and the daily lottery opens two days before your hike, with applications due by 4:00 p.m. Pacific. It costs ten dollars to apply, plus ten dollars per person if you’re awarded a spot, and the National Park Service runs the Half Dome cable permits through a preseason and daily lottery so you’re not gaming a private vendor.
Now the part roped climbers trip over. The cable lottery is not the permit you need to sleep on the wall. A separate Wilderness Climbing Permit is required to bivouac on the wall, and parties show up to start the Regular Northwest Face without it all the time. If your plan involves an overnight on the rock, you’re also signing up for the Leave No Trace rules that come with any overnight wall permit, which on a granite face are less optional and more logistically involved than people expect.
Apply preseason for a range of midweek dates, not one fixed weekend. Tuesday and Wednesday permits draw far fewer applicants, the cables are less jammed, and you trade a little vacation-planning friction for a real shot at actually getting up there.
When to Go — Season Windows and Cables Down
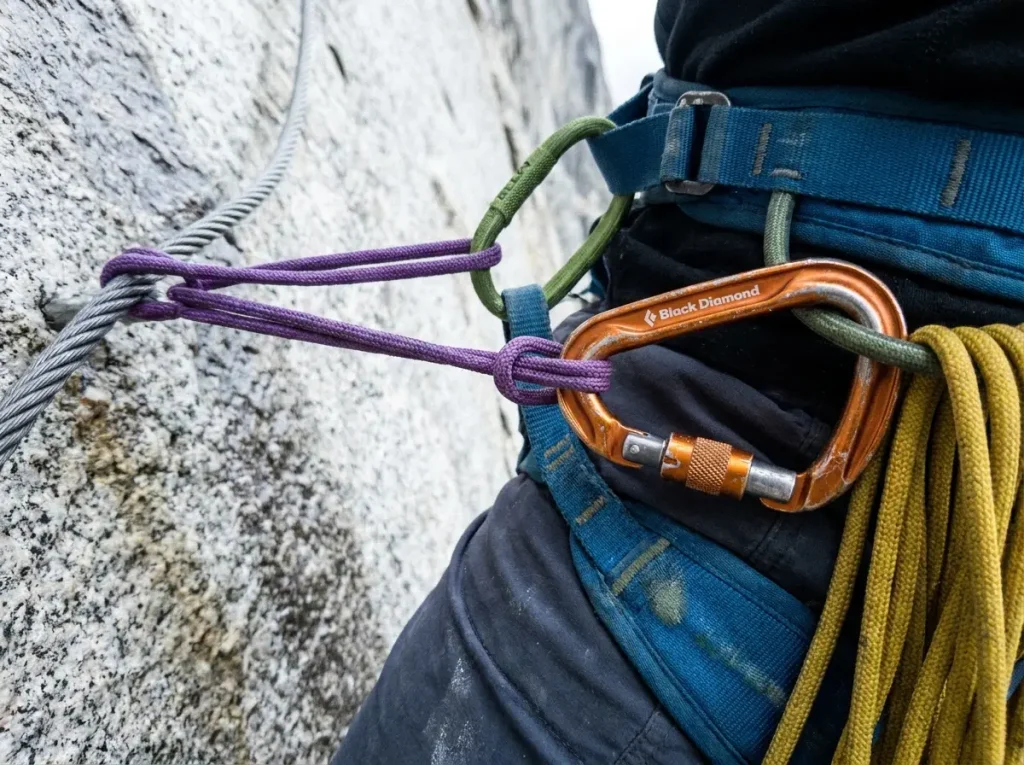
“Cables up or cables down” decides whether this is a hike or a technical objective. Most people don’t even know the cables come down.
The park installs them the Friday before Memorial Day, targeting May 22 in 2026, and pulls them around Columbus Day, targeting October 13. A heavy snow year pushes that install date weeks later. Inside that window, the cable route is the hike described above. Outside it, the cables lie flat against the granite, and Half Dome turns into a different animal.
When the cables are down, getting up that slab requires a rock-climbing system, not boots and bravado. The common rig is a lightweight harness like the Petzl Altitude, a prusik hitch tied from a loop of Sterling 6mm accessory cord, and two locking carabiners such as the Black Diamond RockLock screwgates, whose wide gates still work with gloves on. You slide the prusik up the single cable, weight it, and move. Seeing it beats reading it, so here’s the system in motion:
Here’s the honest take, because the how-to videos rarely give it. The Park Service strongly discourages using the cables when they’re down. The system is legitimate only for skilled parties who can self-rescue and won’t freeze the single lane for everyone stacking up behind them. If you need a video to learn the prusik, the cables-down route is not your objective this season. There’s no shame in that. It’s just the wrong door, again.
Two more season notes. In the shoulder season, early and late in the year, the subdome granite ices over, and a slip on that low-angle rock has nothing to stop it. A pair of Kahtoola MICROspikes is cheap insurance for that stretch. And from March 1 through July 15, Yosemite’s annual peregrine falcon closures shut several Half Dome routes on the South Face for nesting peregrine falcons, so check before you commit to a technical line in spring. This is the same can-I-go-right-now season call you make on Mount Shasta, where the calendar, not your fitness, often makes the decision.
The Technical Routes — Snake Dike to the Northwest Face
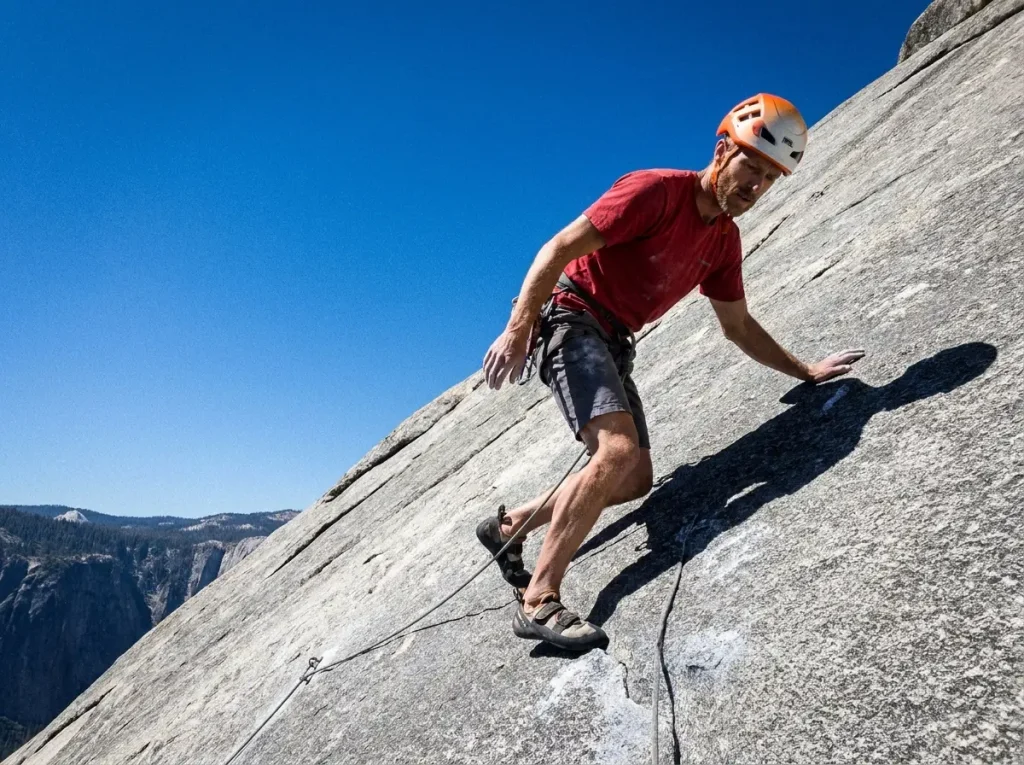
If you’ve earned your way to the base with rope skills, the menu is short, and really only two routes matter to most climbers who get this far. It helps to know where these routes fit in the broader Yosemite climbing scene before you pick one.
Snake Dike is the famous one: 5.7 R, eight roped pitches, plus about 1,000 feet of third- and fourth-class slab you scramble to the summit. It’s the moderate classic, but treat it as a full multi-pitch alpine-rock day rather than a quick tick. You climb it in soft rock shoes that smear on the granite, and the rack is almost comically small. Many parties carry just three cams; others bring four to six medium pieces. You’ll see why in the next section.
The Regular Northwest Face (RNWF) is a different sport entirely: 5.9 C1 at 23 pitches and roughly 2,200 feet, with the named features climbers talk about for years afterward, the Robbins Traverse, the Zig-Zags, and the airy Thank God Ledge. It’s a one-to-two-day aid-and-free objective that assumes you already aid and jug efficiently. The C1 means clean aid, and if that grade is unfamiliar, that alone is your answer about whether you’re ready. It’s worth understanding what the C1 aid rating on the Northwest Face actually asks of you before you rope up under it.
For protection on either route, you want a lightweight harness, a foam climbing helmet against rockfall and leader falls like the Petzl Sirocco, and the standard kit of cams, slings, and fixed anchors. The Northwest Face also raises the same hire-a-guide question climbers weigh on El Capitan’s Nose, and for most people stepping up to a route like this, the honest answer is yes. There’s history in the rock, too. George G. Anderson first reached the summit via the cables line back in 1875, and the Northwest Face carries the Royal Robbins lineage that gave the Robbins Traverse its name.
Why Snake Dike’s 5.7 Lies
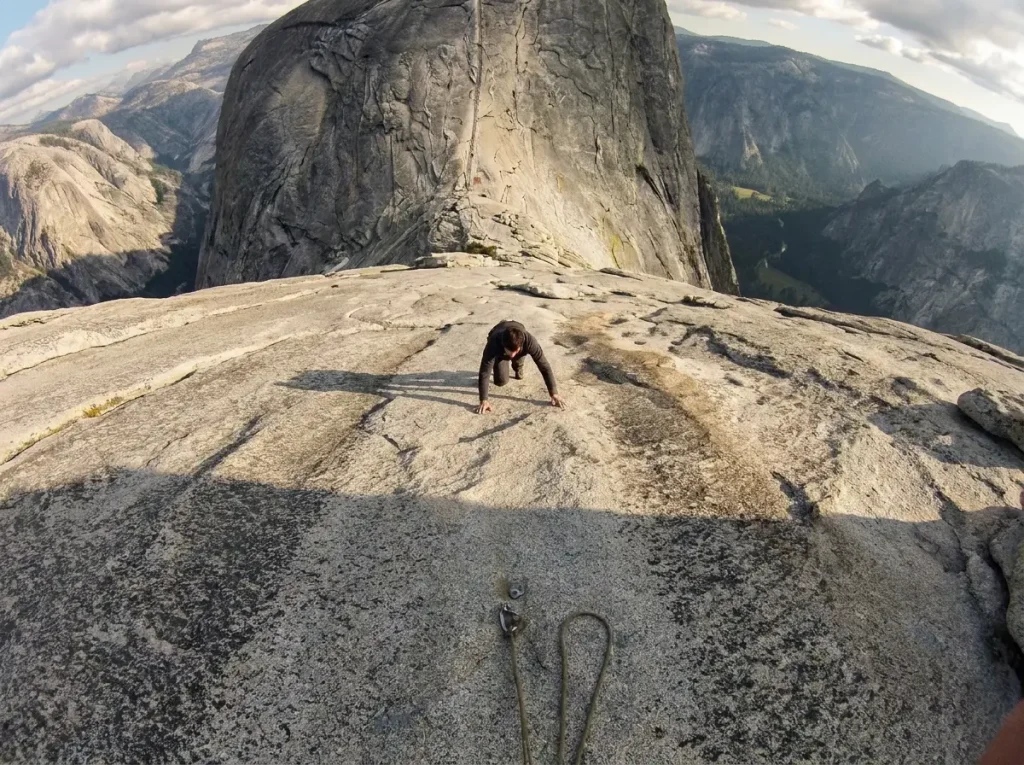
This is the section that saves the most skin, so read it twice. The 5.7 on Snake Dike is honest about the moves and silent about the consequence, and the consequence is the whole story.
Protection on Snake Dike averages roughly one bolt, anchor, or cam every 75 to 100 feet. Most of the climbing is low-angle 5.4 friction, with the occasional 5.7 crux placed conveniently just off a bolt. So the grade isn’t lying about difficulty. It’s lying by omission. A grade measures how hard the moves are. It tells you nothing about what happens if you blow one.
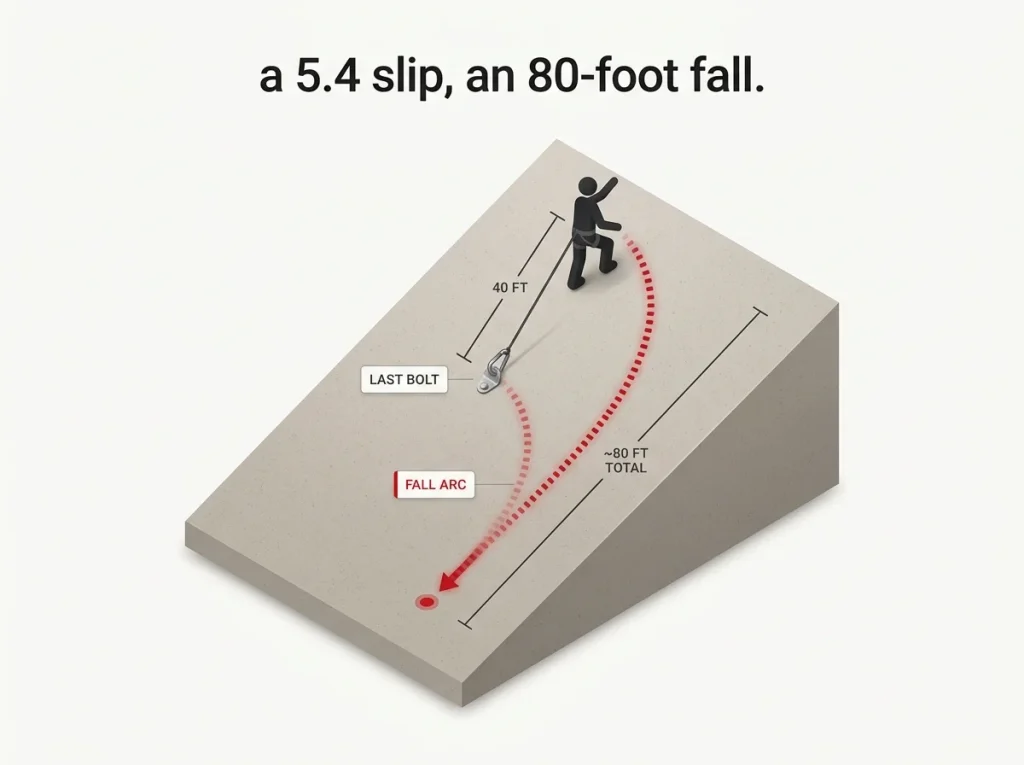
Run the math, because the math is what people skip. If you’re 40 feet above your last bolt and your foot greases off on the slab, you don’t fall 40 feet. You fall that distance to the bolt, then the same distance again past it, plus rope stretch. A routine 5.4 slip becomes an 80-plus-foot runout fall on a friction slab. The hazard was never the move. It was the position, and the position is baked into the route.
Here’s the part the databases won’t tell you plainly: you can’t protect friction slab. There are no cracks to plug on the open rock between bolts, which is exactly why the rack is tiny. Those three cams aren’t real fall protection. They’re psychological comfort for the few features that take them. Climbers call a route like this sandbagged: it feels far more serious than its number admits, because the real test is the exposure under your feet, not the moves. The honest read is that Snake Dike is a head-game route wearing a beginner grade, and the climbers who get hurt on it are the ones who read “5.7” and expected a bolted sport pitch where falling is fine.
This is the same trap as the Grand Teton’s Owen-Spalding “easy” 5.4, where a friendly number hides a commitment grade. The pattern is always the same. The mountains that hurt confident people aren’t the ones with scary grades. They’re the ones with gentle grades and serious positions.
Here’s the honest self-test for Snake Dike: have you climbed runout slab where a fall meant real distance, and stayed calm enough to keep your feet precise? If you’ve only run it out on a gym wall with a bolt at your waist, this isn’t the place to find out. Build the head for runout on lower-stakes friction first.
The Approaches and Getting Down
Nobody photographs this part, and it’s where half the suffering lives. Both the climbing and the descent run on terrain that quietly wrecks people who didn’t plan for it.
For the cable route and Snake Dike, the approach runs Happy Isles to the Mist Trail past Vernal and Nevada Falls, into Little Yosemite Valley, up the Liberty Cap climber’s trail toward Lost Lake, then out onto the slabs. The Northwest Face goes a different, meaner way: Mirror Lake up the infamous Death Slabs, a brutal cross-country grind to the base that earns its nickname. Either way you spend real time on polished granite, and that changes your footwear math.
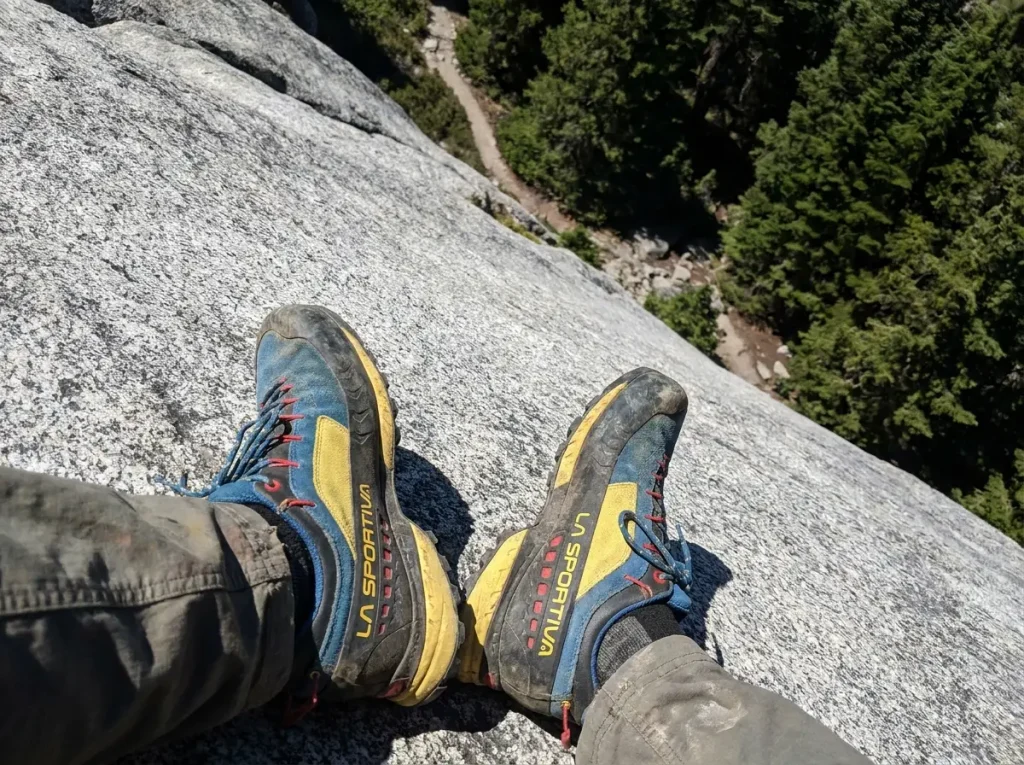
This is where sticky approach shoes pull their weight. The polished slabs both paths cross reward the soft, grippy rubber of the La Sportiva TX4 (men’s · women’s) over a hard trail runner that skates on friction rock. On the subdome and the lower slabs, traction is the whole game, and a shoe that smears confidently buys you a calmer descent. That same long-approach-plus-permits reality is what defines Mount Whitney’s East Face, another Sierra objective where the walk in and out is half the work.
The descent off the cables is its own hazard. It jams up two ways on a single lane, with people going down meeting people coming up, and a frozen hiker can stall the whole line. Go early to beat it, and pack trekking poles for the long, knee-grinding hike back down the Mist Trail once the granite is behind you. And have your partner descend first so they can spot you, or physically support you, if your legs cramp or your nerve wobbles on that 45-degree drop. Budget the full 10-to-14-hour day for the cable route, and on the technical routes, remember the descent stacks on top of the climb, not into it.
The Bottom Line
Three things decide your Half Dome day. Pick your objective honestly first: the cables if you’ve never placed gear, Snake Dike only if runout slab doesn’t rattle you, and the Northwest Face only if you already know it’s yours. The permit and the season set your window, and the lottery rewards date flexibility far more than luck. And remember that the grade on paper is never the whole story, because on the cables the test is fear, and on Snake Dike it’s the runout.
Get the door right and everything downstream gets easier to plan. Build the permit and the season around the climb you’ve honestly chosen, not the other way around, and Half Dome stops being a gamble and starts being a trip you can actually train for.
Frequently Asked Questions
01Do you need a permit to climb Half Dome?
Yes. The cable route requires a Half Dome lottery permit, awarded through a preseason or daily lottery. Roped climbers who bivouac on the wall need a separate Wilderness Climbing Permit, which is not the same thing and trips up a lot of parties.
02How hard is Snake Dike, and what does the 5.7 R grade mean?
The moves are mostly easy 5.4 friction with short 5.7 cruxes. The R means runout: long stretches between protection, sometimes 75 to 100 feet. So the real difficulty is the fall distance and the head-game, not the climbing itself.
03Can a beginner climb Half Dome?
A fit beginner can hike the cable route, given training for a long 14-to-16-mile day. A beginner climber should not get on Snake Dike, whose runout turns the 5.7 into a serious commitment grade rather than a friendly intro route.
04When are the Half Dome cables up and down?
Roughly the Friday before Memorial Day through Columbus Day, so late May to mid-October. Heavy snow years delay the install. Outside that window the cables lie flat and ascending becomes a technical objective the Park Service discourages.
05How long does it take to hike the Half Dome cable route?
Most hikers take 10 to 14 hours round trip for the full 14-to-16-mile day. Start before dawn, both to beat the afternoon heat on the exposed granite and to reach the cables before the two-way traffic jam forms.
Safety Notice: Rock climbing and mountaineering are inherently high-risk
activities that can involve physical trauma or fatal incidents. The information on Rock Climbing Realms is for
educational and informational purposes only. Techniques and advice presented here are not a substitute
for professional, hands-on instruction. Conditions and risks vary by location. Always seek guidance
from a qualified instructor before attempting new techniques. By using this website, you agree that you
are solely responsible for your own safety. Any reliance you place on this information is strictly
at your own risk, and you assume all liability for your actions. Rock Climbing Realms and its authors
will not be held liable for any harm, damage, or loss sustained in connection with the use of this information.
Affiliate Disclosure: We are a participant in the Amazon Services LLC Associates Program, an
affiliate advertising program designed to provide a means for us to earn advertising fees by advertising and linking
to Amazon.com. As an Amazon Associate, we earn from qualifying purchases. We are also an official affiliate partner
of Black Diamond Equipment via the AvantLink network. If you click on a Black Diamond affiliate link and make a
purchase, we may earn a commission at no additional cost to you. We also participate in other affiliate programs.
Additional terms are found in the terms of service.