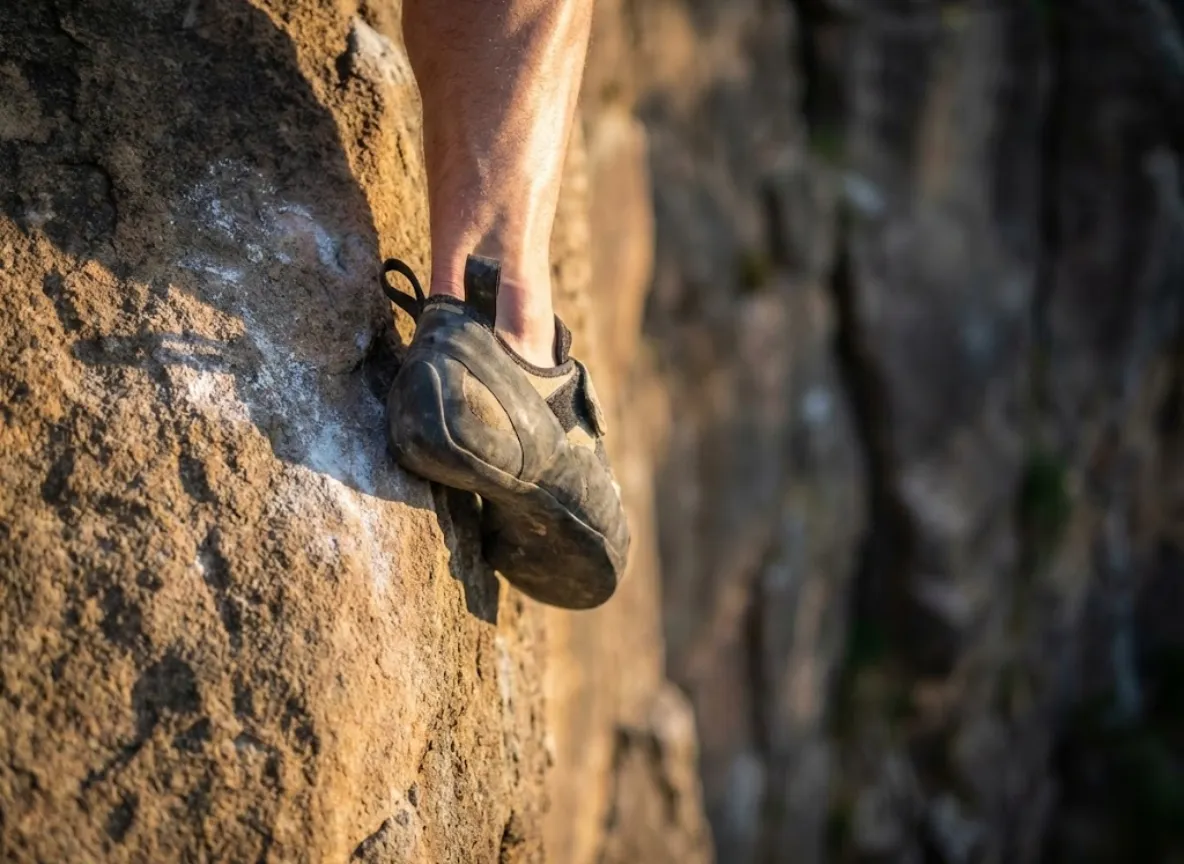
You are 80 feet off the deck, your calves screaming, and your entire send depends on a 4mm edge of dolomite limestone. At this moment, your shoe is not clothing; it is a rigid lever transferring every ounce of posterior chain force into the rock. If the midsole collapses or the rubber rolls, you fall.
This isn’t about brand loyalty or colorways. As a certified guide who has spent decades analyzing gear mechanics from Yosemite granite to sandstone cracks, I know that gravity doesn’t negotiate.
This guide strips away marketing fluff to evaluate performance footwear on biomechanics, rubber hysteresis, and structural tension. We prioritize precision over pain, moving beyond vague notions of “comfort” to engineer the perfect interface between your foot and the vertical terrain. Whether you are a trad lifer or a gym crusher, this is your blueprint.
How to Choose the Right Climbing Shoe: An Expert’s Framework
Most climbers buy shoes based on size. You should be buying based on physics. To make a smart choice, we must shift focus from simple fit to mechanical function.
Why Does Rubber Hardness (Shore A) Dictate Performance?
Rubber hardness dictates performance by controlling how much the material deforms against the rock surface to generate friction. Soft shoes with rubbers like Vibram XS Grip 2 or FriXion RS grip smooth surfaces exceptionally well because they conform to the texture (hysteresis), but they suffer on sharp edges because they “roll” under load.
Your body weight plays a massive role here. Heavier climbers deform rubber more easily, often requiring harder compounds like Vibram XS Edge, Stealth C4, or Trax SAS to prevent the shoe from feeling “mushy.”
Lighter climbers, conversely, need softer rubber to engage that necessary friction. We break this down further in our comprehensive data on climbing shoe rubber compounds, but the rule of thumb is simple: Soft for smearing, hard for edging power. We explore this stickiness vs durability dynamic to help you find the right tool.
Pro-Tip: If you are climbing in hot weather, your rubber will soften. A “hard” rubber shoe might perform like a soft one on a sun-baked south face. Account for ambient temperature when selecting your rubber compound.
Understanding these material properties is crucial for injury prevention as well. Research on shoe design and biomechanics suggests that improper support on small holds forces the toes into dangerous positions, increasing the risk of chronic joint issues.
How Do Tension Systems Affect Power Transfer?
Tension systems affect power transfer by acting as a mechanical lever, moving force from the heel to the toes to reduce calf fatigue. Stiff shoes utilizing systems like the P3 tension system or Bi-Tension create this structural integrity, transferring power directly to the big toe.
There is a trade-off. Structural support reduces sensitivity. A stiff shoe protects your foot but deadens proprioception—you can’t feel the hold.
An aggressive profile acts like a loaded spring on overhangs, pulling you into the wall, but becomes a hindrance on flat slabs where you need maximum surface contact. A moderate profile offers a middle ground, while a neutral profile is best for all-day jamming.
Lace vs. Velcro: Does Closure Impact Technique?
Yes, the closure system impacts technique by determining how securely the foot stays planted during complex movements. Laces offer superior volume management, allowing for micro-adjustments down to the toe. This is essential for odd foot shapes—like Morton’s toe or a wide Egyptian toe—or all-day comfort in trad climbing where feet swell.
Velcro (or hook-and-loop) dominates bouldering for efficiency. When projecting at your limit, you need to remove shoes between burns to manage swelling and pain. A slip-on or slipper style offers even faster transitions but often lacks heel tension.
We prioritize biomechanics and material science over hype. We do not accept paid placements for rank. Every climbing shoe listed here was scored against six metrics: Edging Precision, Smearing/Friction, Sensitivity, Hooking Security, Crack Capability, and Fit Tension.
We analyzed expert consensus, longitudinal field reports from platforms like OutdoorGearLab, Switchback Travel, and Climbing.com, and material specifications. We curated distinct lists for three specific climber archetypes because a shoe that wins gold in the Olympics is often terrible for a granite trad route. While we may earn a commission if you buy through our links, this never influences our scoring—our reputation depends on your successful send.
The Best Climbing Shoes of 2026: Our Top Recommendations for Every Need
Our Top Picks for The Kinetic Comp Specialist
(These climbers prioritize sensitivity and friction for steep indoor/outdoor bouldering.)
La Sportiva Mandala
$$$$
The Mandala is the evolution of La Sportiva’s “No-Edge” philosophy, engineered to bridge the gap between the ultra-soft Theory and the supportive Solution. It is a specialized tool for modern competition climbing, maximizing surface area contact on large volumes while retaining enough structure for complex movements. While the sensitivity is unparalleled, allowing you to feel even the texture of the plastic, the No-Edge design is unforgiving on sharp micro-crystals and lacks the bite needed for traditional face climbing. It demands precise footwork; sloppy placement will have you sliding off instantly.
Overall
Edging Precision
Smearing & Friction
Sensitivity
Hooking Security
Fit Tension
LastPD 85 (Aggressive/Downturned)
RubberVibram XS Grip 2 (3mm)
MidsoleAnatomical Hytrel Arch Support
UpperMicrofiber / Suede Leather Hybrid
You Should Buy This If…
You climb primarily on gym volumes or steep, featureless rock.
You prioritize sensitivity and “feeling” the texture of the hold.
You need a secure heel for aggressive hooking sequences.
You Should Reconsider If…
You primarily climb vertical face routes with micro-crystals (No-Edge lacks bite).
You are a beginner; the durability and learning curve of No-Edge are challenging.
Often described as a “rubber sock,” the Scarpa Drago is the gold standard for sensitivity. It offers minimal resistance, allowing the foot to grab and pull on holds like a second skin, making it ideal for steep overhangs and coordination moves. The extended toe rubber makes it a beast for hooking, and the soft chassis conforms beautifully to volumes. However, this performance comes at a cost: durability. The soft rubber and thin materials wear out faster than almost any other shoe on this list, and on vertical terrain, your calves will burn out rapidly due to the lack of midsole support.
Overall
Edging Precision
Smearing & Friction
Sensitivity
Hooking Security
Fit Tension
LastFZ (Highly Aggressive)
RubberVibram XS Grip 2 (3.5mm)
MidsoleFlexan 1.0mm insert (Forefoot only)
UpperMicrofiber (Synthetic)
You Should Buy This If…
You want maximum sensitivity and feedback from the rock.
You have narrow heels (specifically the LV version).
Your climbing style involves heavy toe-hooking and steep angles.
You Should Reconsider If…
You need durability; soft rubber and construction wear out quickly.
You climb vertical terrain where lack of support leads to foot cramping.
The Skwama balances the softness of a slipper with the P3 platform’s structure. Its split-sole design allows lateral spread for smearing while maintaining enough longitudinal tension for overhangs, making it a versatile “quiver of one” for boulderers. The S-Heel construction is rigid, preventing the heel cup from collapsing during intense hooks. A known drawback, however, is the unlined leather upper; it stretches significantly—sometimes up to a full size. If you don’t size down aggressively at the start, you’ll end up with a sloppy fit after a month of use.
Overall
Edging Precision
Smearing & Friction
Sensitivity
Hooking Security
Fit Tension
LastPD 75 (Aggressive)
RubberVibram XS Grip 2 (3.5mm)
Midsole0.8mm LaspoFlex with P3 System
UpperLeather / Microfiber Hybrid
You Should Buy This If…
You want a single shoe for both gym bouldering and steep sport climbing.
You need a rigid heel cup that won’t collapse under torque (S-Heel).
You prefer the custom mold of leather (expect stretch).
You Should Reconsider If…
You have very narrow heels; the heel cup is high-volume and can feel baggy.
You are frustrated by potential toe patch peeling issues (common QC report).
A direct competitor to the Solution/Drago, these shoes utilize proprietary RH rubber for a unique friction balance. The Qubit offers a stiffer toe box for better edging on steep limestone, while maintaining high friction. The toe patch is massive and sticky, perfect for the bicycle moves common in modern setting. The main issue users face is the high-cut heel cup; for those with sensitive Achilles tendons, the rigid rand can dig in painfully, requiring modification or a painful break-in period.
Overall
Edging Precision
Smearing & Friction
Sensitivity
Hooking Security
Fit Tension
LastAggressive Downturn
RubberUnparallel RH (Real Honor)
MidsoleStiff Toe Board
UpperSynthetic (Lined)
You Should Buy This If…
You climb steep limestone with sharp edges and need more support than a Drago.
You prefer the stickiness of RH rubber over Vibram.
You need a powerful heel rand to drive toes forward.
You Should Reconsider If…
You have sensitive heels; the high heel cup can cut into the Achilles.
You are concerned about inconsistent build quality/glue issues.
(These climbers need lateral rigidity for cracks and support for all-day vertical edging.)
La Sportiva TC Pro
$$$$
The undisputed king of big walls, designed with Tommy Caldwell. A high-top, stiff board-lasted shoe that protects ankles in wide cracks and provides a rigid platform for standing on dimes for thousands of vertical feet. The stiff XS Edge rubber and P3 platform mean your calves won’t blow out on pitch 15 of El Cap. The downside is the break-in; out of the box, they feel like wooden clogs. You will lose almost all sensitivity, making friction slabs feel terrifyingly insecure until you learn to trust the stiffness.
Overall
Edging Precision
Smearing & Friction
Sensitivity
Hooking Security
Crack Climbing
LastPD 55 (Flat/Neutral)
RubberVibram XS Edge (4mm)
Midsole1.1mm LaspoFlex (Full Length)
UpperECO Leather (Unlined under foot)
You Should Buy This If…
You climb granite cracks or multi-pitch trad routes.
You need maximum ankle protection and support to save calf strength.
You want a shoe that can be resoled multiple times without losing shape.
You Should Reconsider If…
You have wide feet; the toe box is narrow and low volume.
You rely on smearing; the hard XS Edge rubber feels glassy on slick rock.
Scarpa’s answer to the TC Pro, offering a similar high-top design but on a higher-volume last. It uses the Tri-Tension system for support and is widely considered more comfortable out of the box for wider feet due to plush ankle padding. The ECO suede upper is robust, and the full-length midsole provides excellent edging power. However, the toe box is notably bulkier than its La Sportiva rival. If you frequently jam into thin finger cracks, you will find the Generator difficult to insert, limiting its utility on narrower splitters.
Overall
Edging Precision
Smearing & Friction
Sensitivity
Hooking Security
Crack Climbing
LastFlat / Moderate
RubberVibram XS Edge (4mm)
MidsoleFull-length support
UpperECO Suede
You Should Buy This If…
You find the TC Pro too narrow or uncomfortable.
You prioritize comfort and padding for wide crack climbing.
You need a stiff edging platform for vertical routes.
You Should Reconsider If…
You need to jam thin finger cracks; the toe box is bulky/tall.
You have narrow heels; the heel cup can feel baggy and insecure.
The technical all-rounder. Bridging the gap between sport and trad, it offers the stiffness needed for edging with a lower profile than the TC Pro, making it superior for thin cracks. The P3 platform ensures it keeps its shape for years, and the laces allow for a precision fit. The main compromise is the heel cup; it is a basic, low-tension design that lacks the security of modern bouldering shoes. If your route involves aggressive heel hooking or camming, you may find the heel slipping off at critical moments.
Overall
Edging Precision
Smearing & Friction
Sensitivity
Hooking Security
Crack Climbing
LastPD 55 (Slightly Downturned)
RubberVibram XS Edge (Men) / XS Grip 2 (Women)
Midsole1.1mm LaspoFlex with P3
UpperLeather / Microfiber Combo
You Should Buy This If…
You climb technical vertical faces and thin cracks.
You want a shoe that edges like a sport shoe but comforts like a trad shoe.
You need precise volume management via laces.
You Should Reconsider If…
You do aggressive bouldering; the heel is low-tension and basic.
You are on a budget; it is one of the priciest shoes on the market.
(These climbers operate on millimeters, requiring a rigid lever arm and high asymmetry.)
Tenaya Indalo
$$$$
The “Comfortable Sender.” Tenaya is famous for high performance without pain, and the Indalo delivers. It sits between the Mastia and Iati, offering aggressive precision with a highly adjustable Draxtor closure that mimics laces. It edges beautifully and smears with confidence. However, the materials used in the closure system are delicate; abrasive crack climbing can fray the thin straps quickly. Additionally, the toe shape is quite pointed, which can be excruciating for climbers with a square “Roman” foot shape.
Overall
Edging Precision
Smearing & Friction
Sensitivity
Hooking Security
Fit Tension
LastAggressive
RubberVibram XS Grip 2 (3.5mm)
MidsoleMedium Stiffness
UpperMicrofiber (Vegan)
You Should Buy This If…
You want high performance but refuse to endure crippling foot pain.
You need a highly adjustable fit (Draxtor system).
You climb varied sport routes involving both edging and smearing.
You Should Reconsider If…
You engage in abrasive crack climbing; the thin straps can fray.
You have a “Roman” (square) foot shape; the pointed toe may be too narrow.
The hybrid powerhouse. Featuring a stiff midsole and XS Edge rubber, it excels at sport climbing for heavier climbers or on sharp rock where softer shoes deform. The Bi-Tension rand drives power into the toe without crushing it, and the heel cup is arguably the best in the industry. The primary complaint is the break-in period for the toe patch; the large rubber cover presses down hard on the big toe knuckle. Until that rubber softens, you can expect significant hot spots and potential blistering on the dorsal side of your toes.
Overall
Edging Precision
Smearing & Friction
Sensitivity
Hooking Security
Fit Tension
LastFV (Moderately Downturned)
RubberVibram XS Edge (3.5mm)
MidsoleFlexan 1.0mm
UpperMicrosuede / Leather
You Should Buy This If…
You are a heavier climber needing support on small holds.
You have a wide forefoot but a narrow heel.
You need a shoe that can handle both steep bouldering and vertical faces.
You Should Reconsider If…
You climb on slick gym volumes; the hard rubber will slide.
You are sensitive to toe knuckle pain; the rubber patch break-in is intense.
Choosing climbing shoes is an exercise in honest self-assessment. Weight matters; lighter climbers need softer rubber to engage friction, while heavier climbers require the structural support of harder compounds. Structural rigidity saves energy on vertical faces, but softness is required to grab features on overhangs.
Fit is king. Dead space is lost power. Remember that synthetic upper shoes like the Instinct VS won’t stretch, while unlined leather shoes like the Mythos Eco or Skwama will bag out significantly. Identify your primary terrain—gym volumes, granite cracks, or limestone edges—and invest in the precision tool engineered for that specific vertical reality.
FAQ – Frequently Asked Questions
How much should I downsize my climbing shoes?
Painful downsizing is largely a relic of the past; modern synthetic shoes should fit snugly with toes curled but not painfully crushed to perform well. Performance fit varies by material: size leather shoes 0.5-1.0 sizes down to account for stretch, but buy synthetic shoes (like the Scarpa Drago) close to your street shoes size or just 0.5 down to avoid fit anxiety.
Which rubber is stickier: Vibram XS Grip 2 or XS Edge?
XS Grip 2 is softer and stickier on smooth textures due to higher hysteresis, making it ideal for smearing and light climbers. XS Edge is harder and resists deformation, making it better for standing on tiny edges without rolling, especially for heavier climbers or in hot conditions.
Why do my climbing shoes hurt my big toe knuckle?
This is often due to the break-in period of the rubber toe patch found on shoes like the Scarpa Instinct VS, which presses down on the dorsal knuckle. To mitigate this, tape the knuckle during the first 5-10 sessions or choose a shoe with a less aggressive toe patch like the Tenaya Indalo.
Are expensive climbing shoes worth it for beginners?
No, beginners should avoid soft, ultra-performance climbing shoes like the Drago because poor footwork (dragging toes against the wall) will destroy the expensive, thin rubber in weeks. Start with a durable, supportive shoe like the La Sportiva Tarantulace, Evolv Defy, or La Sportiva Finale to build foot strength and technique before upgrading.
Safety Notice: Rock climbing and mountaineering are inherently high-risk
activities that can involve physical trauma or fatal incidents. The information on Rock Climbing Realms is for
educational and informational purposes only. Techniques and advice presented here are not a substitute
for professional, hands-on instruction. Conditions and risks vary by location. Always seek guidance
from a qualified instructor before attempting new techniques. By using this website, you agree that you
are solely responsible for your own safety. Any reliance you place on this information is strictly
at your own risk, and you assume all liability for your actions. Rock Climbing Realms and its authors
will not be held liable for any harm, damage, or loss sustained in connection with the use of this information.
Affiliate Disclosure: We are a participant in the Amazon Services LLC Associates Program, an
affiliate advertising program designed to provide a means for us to earn advertising fees by advertising and linking
to Amazon.com. As an Amazon Associate, we earn from qualifying purchases. We are also an official affiliate partner
of Black Diamond Equipment via the AvantLink network. If you click on a Black Diamond affiliate link and make a
purchase, we may earn a commission at no additional cost to you. We also participate in other affiliate programs.
Additional terms are found in the terms of service.