
In this article
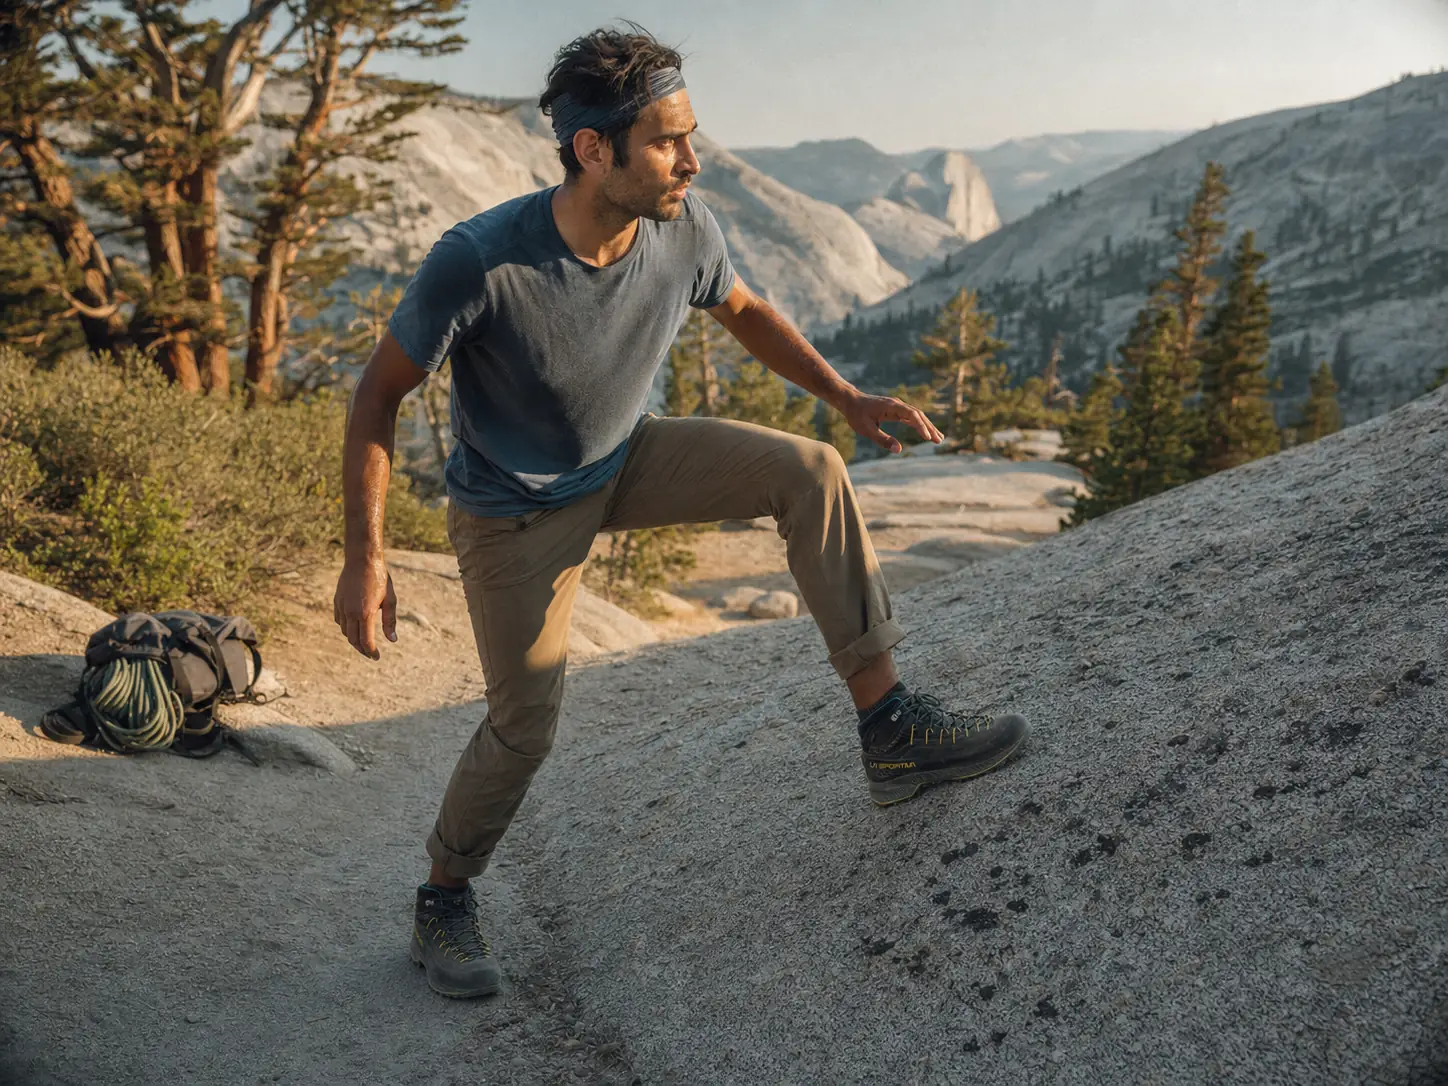
You’ve been walking fine for an hour. Then the dirt runs out, the ground tilts up into bare granite, and your feet start sliding out from under you on rock that the person ahead of you just strolled straight up in flat rubber shoes. Climbers have a word for that feeling: skating.
The reason it happens has nothing to do with your boots being cheap, and everything to do with a hiking vs climbing shoes comparison almost nobody bothers to explain properly. Here’s what each of the three footwear categories physically does, which ones you actually need, and what the tight-shoe habit is quietly costing your feet.
| Category | Rubber & grip | Stiffness | Fit | Best for |
|---|---|---|---|---|
| Hiking boots & shoes | Hard compound, deep lugs | Stiff shank to very stiff | Roomy, half size up | Distance, load, loose ground |
| Approach shoes | Sticky mid compound, split outsole | Moderate | Snug, true to size | Talus, scrambling, walk-offs |
| Climbing shoes | Ultra-soft, smooth, no tread | Soft and sensitive | Tight, 1 to 2 sizes down | The route, and nothing else |
What Hiking Footwear Is Actually Built For
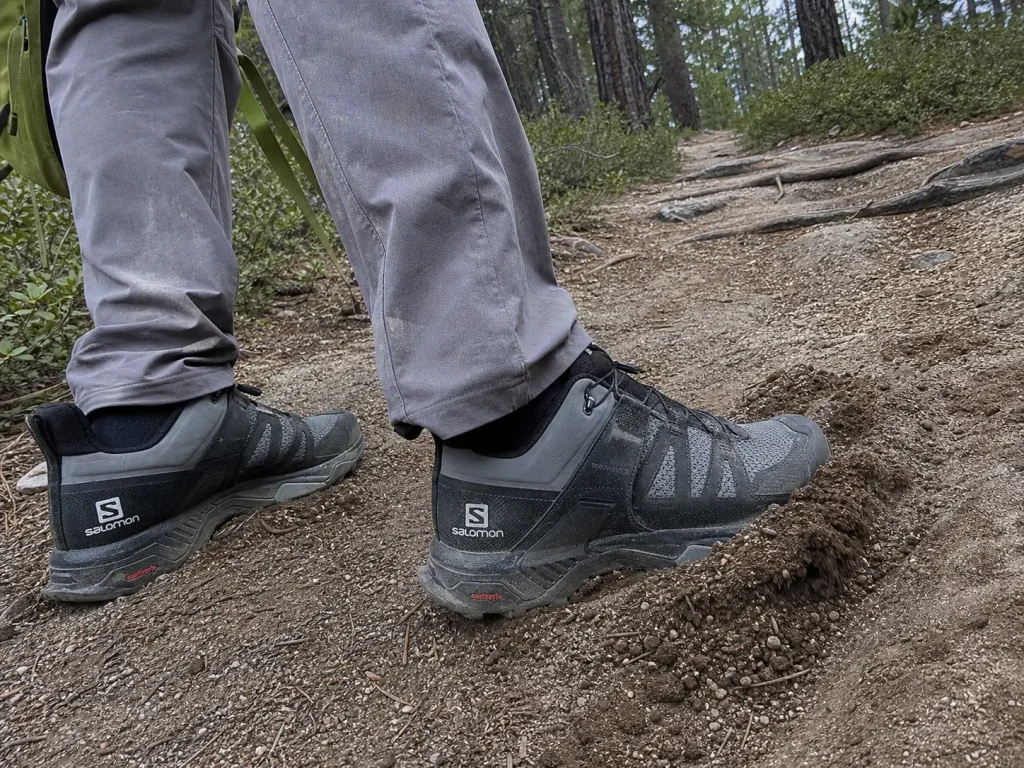
Start with what this category does well, because the rest of this article is going to be hard on it. Hiking footwear is optimized for one job: moving a loaded human over distance, comfortably, for years. Every design decision follows from that, and none of them are about standing on a quarter-inch edge.
The Spectrum From Trail Runners to Mountaineering Boots
There is no single thing called a hiking shoe. There is a spectrum, and where you sit on it changes four variables at once.
- Trail runners — lightest, most flexible, no ankle support, zero break-in
- Hiking shoes — low cut, moderate cushioning, often a GORE-TEX membrane
- Day-hiking boots — mid or high cut, partial shank, some torsional rigidity
- Backpacking boots — full shank, stiff midsole, built to carry weight
- Mountaineering boots — rigid, insulated, crampon-compatible
Move up that list and you gain support and lose ground feel. That is the whole trade.
Midsole material sits underneath all of it. An EVA midsole is lighter and softer underfoot but packs out and loses its rebound sooner, while a polyurethane midsole is heavier, firmer and lasts considerably longer. Most modern hiking shoes use EVA because the weight saving sells; heavy-duty backpacking boots still use polyurethane because the support has to survive.
Deep Lugs, Hard Rubber, and Why That’s the Right Call on Dirt
A deep lug pattern works by penetration. Mud, scree, loose duff and wet dirt are soft, so a tall aggressive lug sinks in and bites. Hard rubber compound is the second half of the equation: it survives hundreds of miles of gravel without turning to paste.
Both choices are correct for the terrain they were designed around. Both become liabilities the moment the ground gets hard and smooth, which is the point the next section takes apart.
Where the Modern Lightweight End Sits
The interesting movement in hiking footwear over the last decade has been downward, toward shoes that weigh less and need no break-in at all. The Salomon X Ultra 4 GTX is the standard version of that idea: a trail-running chassis with a Contagrip MA outsole and a waterproof membrane, low cut, out of the box ready.
Push further and you get trail runners doing full hiking duty. The Hoka Speedgoat 5 Mid GTX in the women’s version stacks a maximum-cushioning midsole under a Vibram Megagrip outsole and adds a mid collar, which is about as far as you can go without becoming a boot. At the opposite end of the philosophy sits the zero-drop camp: the Altra Lone Peak 8 (men’s · women’s) runs a flat heel-to-toe platform and a genuinely wide toe box, which some feet love immediately and others need a month to adapt to.
What Climbing Shoes Are Actually Built For
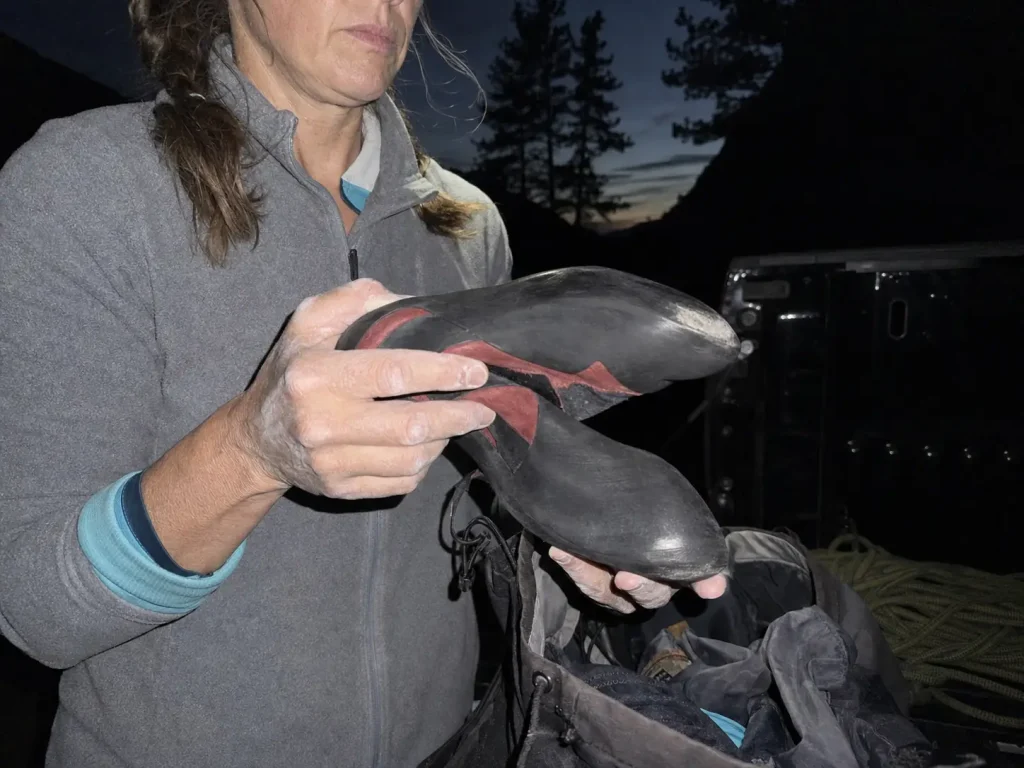
Now the mirror image. A climbing shoe is not a shoe in the everyday sense. It is a tool you put on for twenty minutes, use hard, and take off. Once you frame it that way, the sizing and foot-health sections later stop sounding extreme.
Neutral, Moderate, Aggressive: What Downturn Actually Does
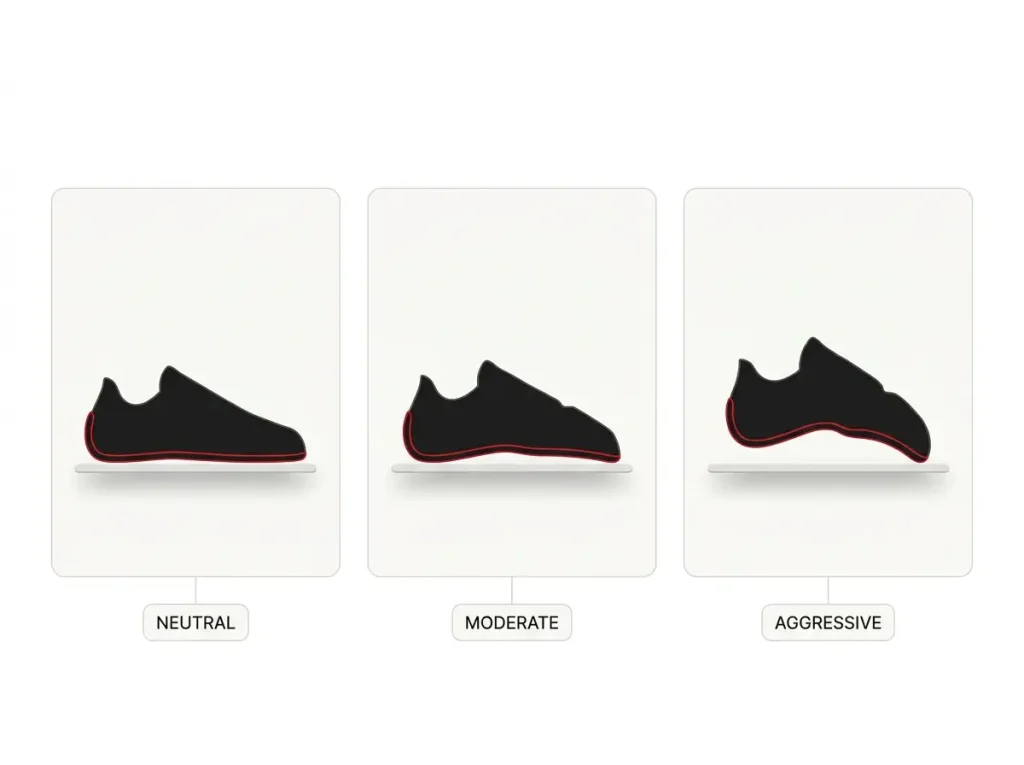
The single biggest performance variable in a climbing shoe is the shape of its sole.
A neutral shoe sits flat, keeps your foot in a relaxed position, and is what you want for long routes, jamming in cracks, and any day where you’re wearing them for a while. A moderate shoe adds a gentle camber and a slight asymmetric last that starts pushing power toward the big toe. An aggressive shoe takes that to its conclusion: a pronounced downturn that curls the toes into a claw so you can pull on steep terrain, and a shape that becomes painful within minutes on anything else.
If you want the full breakdown of which profile suits your climbing, this article’s parent guide covers how to pick climbing shoes for how you actually climb in detail, and there’s a separate piece on when an aggressive downturn is actually worth it.
Smooth, Tread-Less, Ultra-Soft Rubber
Turn a climbing shoe over and there is nothing there. No lugs, no tread, no pattern. Just a flat sheet of soft rubber compound with a rubber toe rand wrapping up over the front for hooking and crack work.
That blankness is the entire design. Compounds like Vibram XS Grip2 are tuned for maximum friction and minimum durability; Vibram XS Edge trades a little stick for a firmer platform that holds a small edge. Construction runs from board-lasted (stiffer, better for edging, less sensitive) to slip-lasted (softer, better for smearing, you feel everything).
Why They’re Deliberately Uncomfortable
No cushioning. No arch support. A heel cup that grips like a vice. Every one of those is a choice, and every one has a cost that shows up two sections from now.
Most people reading this do not need an aggressive shoe. The ones who buy one as their first pair regret it twice over, in performance and in pain, and that’s not a hedge.
Approach Shoes, the Hybrid Nobody Explains Well
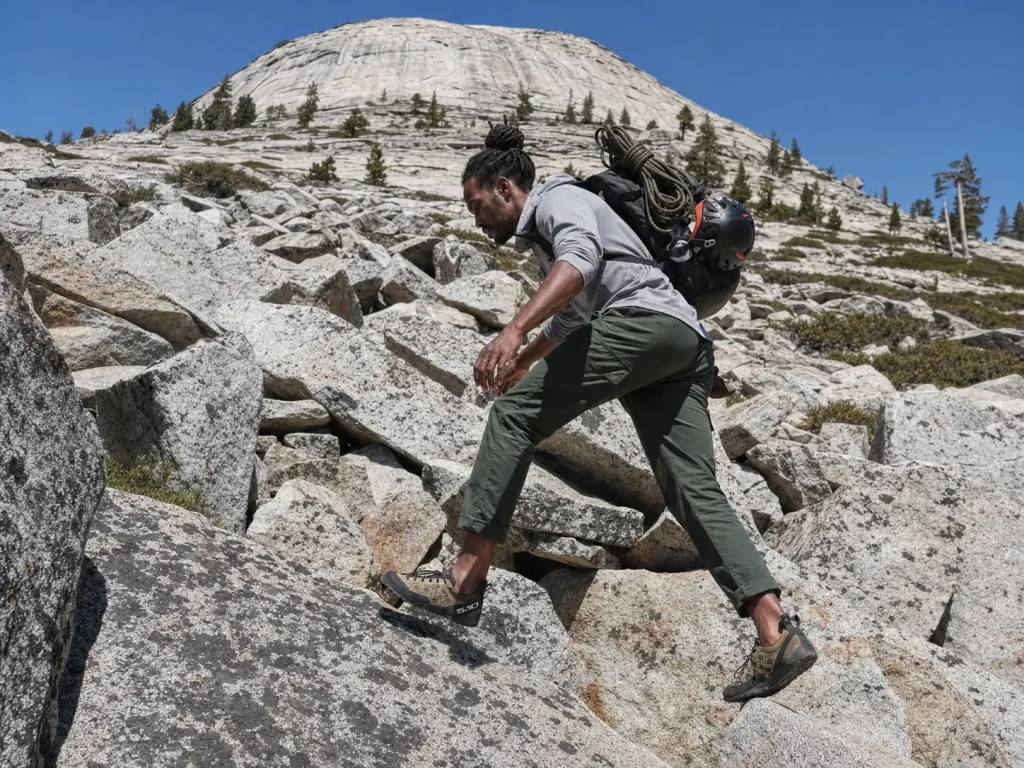
The third category is the one people either over-buy or skip for the wrong reason. It exists because the walk to the rock is a real problem, not a marketing invention.
Hiking-Zone Lugs Plus a Climbing-Zone Flat Patch
An approach shoe splits its outsole into two jobs, as the approach shoe category itself is defined. Under the heel and arch you get real lugs for dirt and gravel. Under the toe you get a smooth sticky patch, the climbing zone, flat enough to edge and smear on rock. A full rubber toe rand wraps the front, and the technical models lace all the way to the toe so you can cinch the forefoot down for precision.
The rubber itself is a genuine middle compound. Megagrip and the Stealth family are stickier than boot rubber and harder than climbing-shoe rubber, which is exactly what a hybrid lug pattern needs.
The Four to Six Hour Comfort Window
Here’s the number that actually defines the compromise: approach shoes stay comfortable for roughly four to six hours of hiking. Past that you start wishing you were in hiking shoes. Under that, they cover the walk-in and the rock with one pair.
Who Genuinely Needs a Pair, and Who Doesn’t
Yes, if your days involve long or technical walk-ins, class 3 scramble or class 4 scramble terrain, talus, scree, boulder field crossings, via ferrata, or multi-pitch routes with a rocky walk-off.
No, if your approach is a ten-minute flat trail to a sport climbing crag. Your trail runners are fine. A lot of climbers buy approach shoes because the internet told them to, then hike in trail runners anyway and leave the approach shoes in the car for two seasons.
The line worth drawing is roughly where fifth-class climbing starts. Below that, an approach shoe can genuinely be your quiver-of-one for the whole day. Above it, you’re putting climbing shoes on regardless, and the approach shoe goes back to being the thing that gets you there and back.
Before you buy approach shoes, count your walk-offs, not your approaches. Walking in is usually a trail. Walking off a multi-pitch route is often loose, downhill and rocky, with tired legs, and that is where the sticky toe patch earns its money.
Why Hard Rubber Skates on Rock
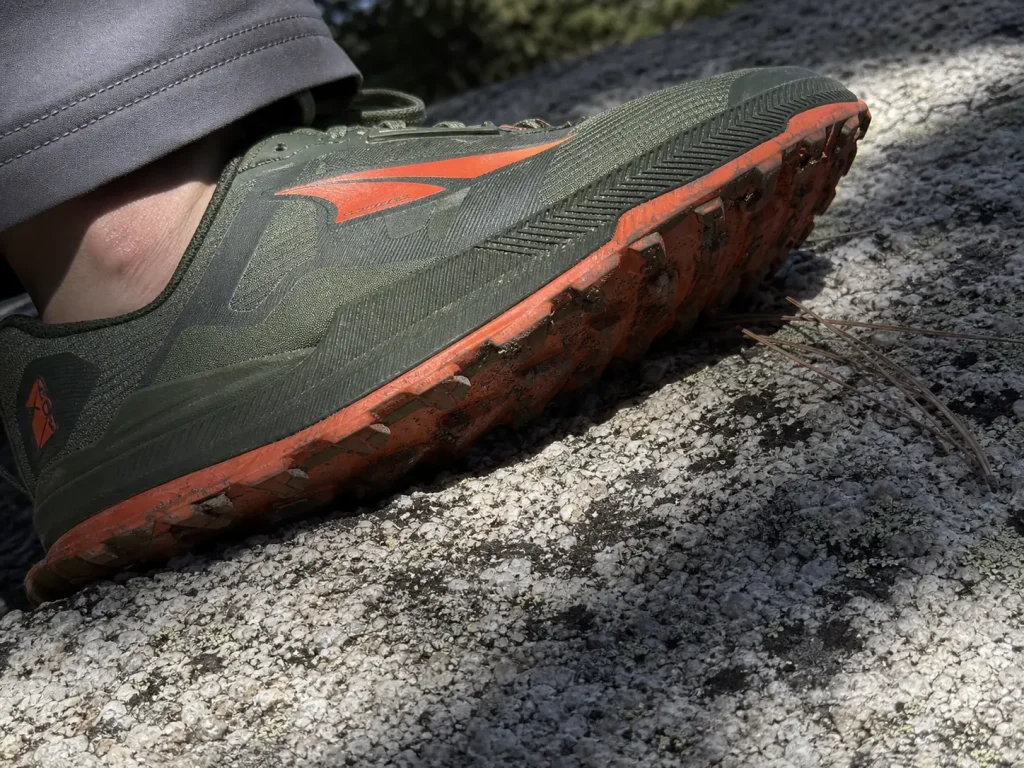
Every competitor article states the outcome. Hiking boots lack precision and grip. Fine. Nobody explains the mechanism, and the mechanism is the part that makes the rest of this obvious.
Contact Area Is the Whole Game
Rock is not smooth. Get your eye close to a granite slab and it’s a field of crystals, ridges and pits, all at a scale of a millimeter or less.
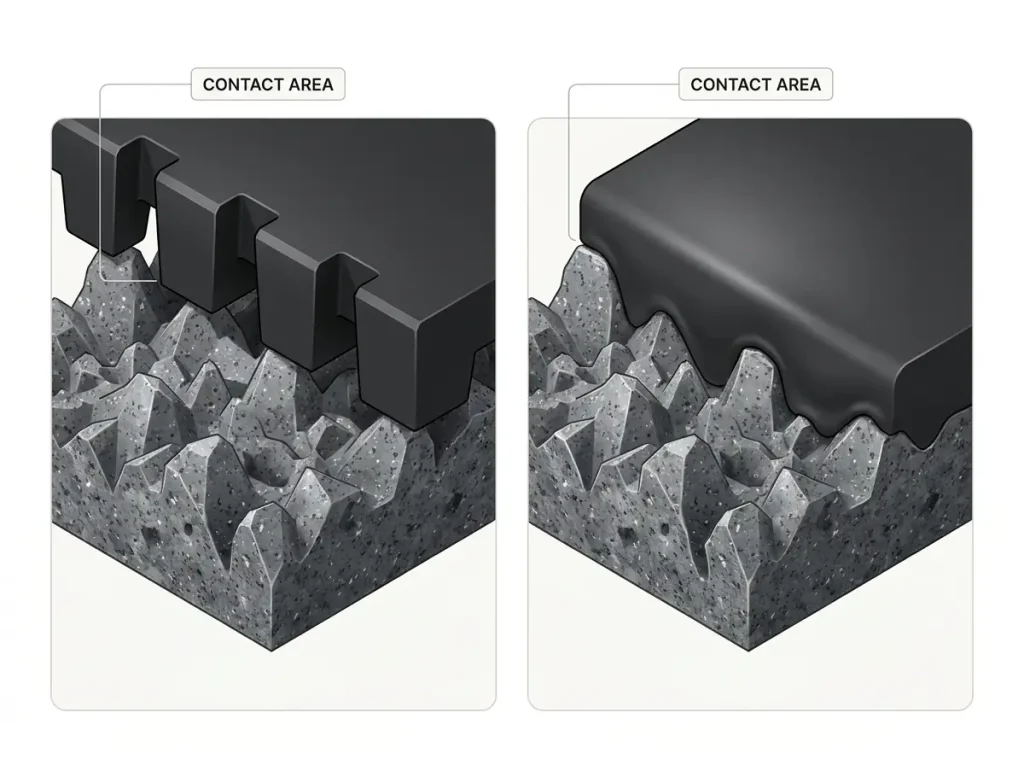
Sticky rubber that is soft enough to deform will settle down into that texture. It flows into the pits, wraps around the crystals, and the real contact area becomes enormous relative to the size of your foot. Friction scales with that contact, so the shoe holds.
Hard rubber with tall lugs does the opposite. The lug tips are stiff, so they sit on top of the high points of the texture and bridge across everything between them. Your actual contact patch shrinks to a handful of small, hard points. Same foot, same rock, a fraction of the friction. That’s the skating, and it gets worse the smoother the rock is, which is why slab feels so much more hostile in boots than a boulder field does.
There’s a nasty second-order effect too: deep lugs physically lift you off the surface. The feature that helps in mud actively removes you from the rock.
The Stiffness Half: Your Foot Can’t Feel or Load the Edge
Grip is only half the failure. The other half is that a stiff boot won’t let you use what grip you have.
Standing on a small foothold means concentrating your weight through a narrow strip of the big-toe edge and feeling, in real time, whether it’s biting or slipping. A shank-supported sole does the exact opposite by design: it spreads load evenly across the whole footprint so your arch doesn’t fatigue over twenty miles. It also blocks your ankle from rolling far enough to bring the sole flush against an angled hold.
So you get less friction, less ability to concentrate what’s left, and no feedback about either. Three failures, one shoe, none of them a defect.
The Trade-Off Cuts Both Ways
Soft rubber grips because it deforms. Rubber that deforms also abrades. Those are the same property viewed from two sides, which is why your climbing shoes look finished after a season while a pair of hiking boots outlasts three resoles.
Worth knowing before you go shopping for the softest thing on the shelf: stickier rubber isn’t automatically better rubber, because the softest compounds also roll off small edges instead of holding them.
Fit and Sizing, With Actual Numbers
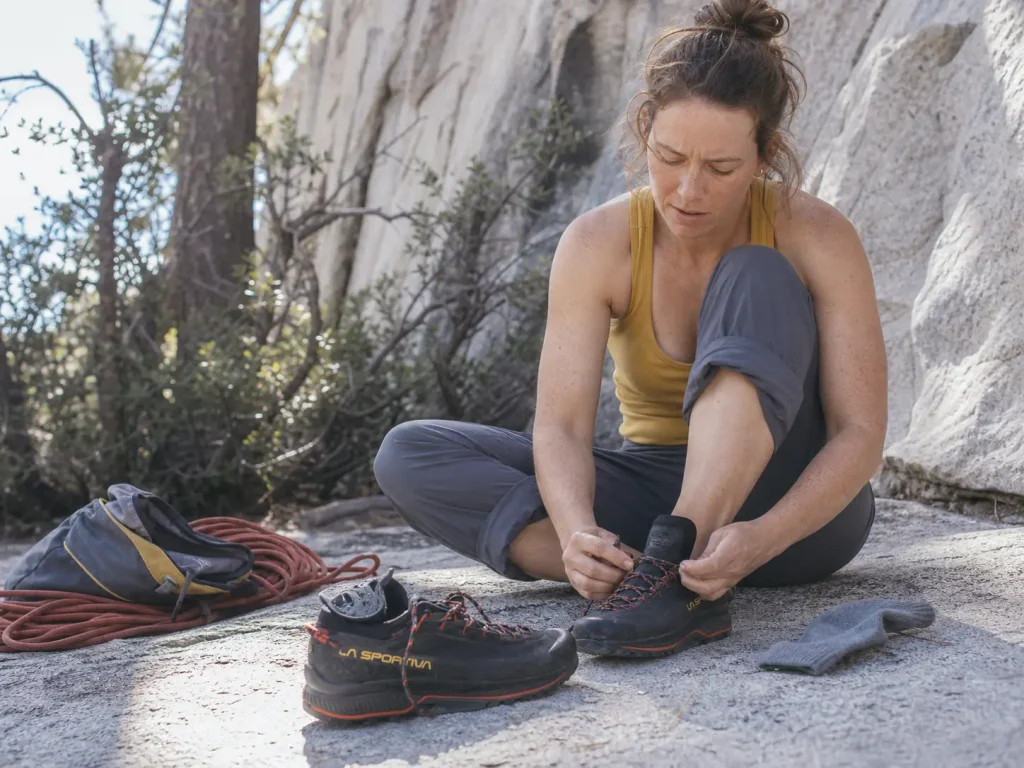
Everyone says snug. Everyone says roomy. Almost nobody gives you a number you can apply to your own street-shoe size, which is the only thing you actually asked for.
The Three Numbers
Climbing shoes: one to two full sizes down from your street shoe for a performance fit. Approach shoes: true to size, or a half size down if you want them tight enough to edge in. Hiking boots: often a half size up, because feet swell over distance and thick socks need somewhere to live.
Treat those as starting points tied to the shape of the last, not as laws. The classic beginner story in every climbing forum is the same: someone went a full size down on their first pair because that’s what the internet said, then spent the entire first session in visible pain and quit early.
Sizing down is a spectrum, and it interacts with the shoe’s shape far more than most people expect. Podiatrists who treat climbers routinely warn against the tightest tolerable fit for exactly that reason. If you want the fit itself explained rather than the number, there’s a full piece on why most climbers end up buying their shoes too tight.
Break-In: How Long Until It Stops Hurting
Real timelines, not “wear them around the house.”
- Hiking boots: one to four weeks depending on stiffness and how rough the terrain is
- Lightweight hiking shoes and trail runners: effectively none
- Climbing shoes with a leather upper: they pack out and mold to your foot over weeks
- Climbing shoes with a synthetic upper: barely stretch at all
That last pair of bullets is the one people get wrong. A synthetic upper that feels tight but tolerable in the shop stays exactly that tight forever. A leather upper or suede upper genuinely gives, sometimes close to a half size, so you can buy it tighter on purpose.
Sock thickness is a real variable in the same calculation, not a rounding error. And if you already made the mistake, there are safe ways to stretch a pair that’s already too tight.
What a Correct Fit Feels Like in Each Category
In a climbing shoe you want heel lock with no dead space behind your heel and no air in the toe. Your toes should be curled or flat depending on the shape, but never floating.
In a hiking boot you want a roomy fit: a thumb’s width in front of your longest toe when you’re standing, and a heel that doesn’t lift when you walk uphill. In an approach shoe you want a snug fit through the midfoot with a usable toe box, because you need precision on rock and circulation on the walk.
Try climbing shoes on at the end of the day, on bare feet, after you’ve been walking. Feet are measurably bigger by evening. A shoe that fits perfectly at 10am in a cold shop is the shoe that turns into a problem at 4pm on a warm crag.
What Tight Climbing Shoes Do to Your Feet
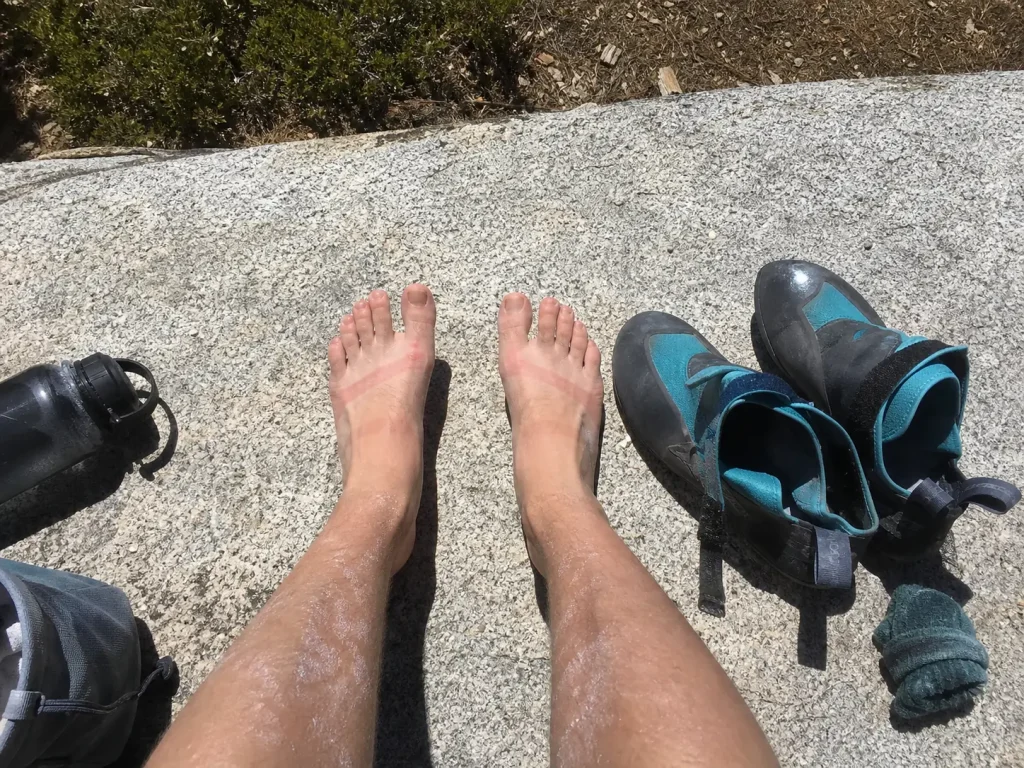
This is the part nobody writes about, and Google’s own People Also Ask box is running two questions on it right now. Nobody is quitting climbing over what follows. But the shrug of “my feet just hurt, that’s climbing” is worth interrupting.
How Common This Actually Is
In a clinical review of foot injuries in rock climbers, a study of 104 climbers found that 81% reported acute or chronic foot or ankle pain or pathology during or after climbing, attributed to the biomechanics of small, tight shoes.
Four out of five. This is not a fringe complaint from people with unusual feet. It’s close to the default experience, and it’s largely a fit-and-wear-time problem rather than an unavoidable cost of the sport.
The Plantar Fasciitis Connection
Plantar fasciitis shows up in climbers for reasons that stack. Repeated high-stress landings off boulder problems load the fascia hard. Twisting and torquing on small holds loads it in directions it isn’t built for. And a downturned shoe holds the arch under sustained compression for the whole time it’s on.
If your heel or arch hurts on the first steps out of bed the morning after a session, that has a mechanism behind it. It isn’t just generic overuse.
What Podiatrists Actually Recommend
The professional advice is boring and concrete, which is usually a sign it works.
- Fit for a balance of support and flexibility, not for the tightest size you can tolerate
- Keep aggressive shoes off your feet outside the moments you need them
- Take your shoes off between routes and while belaying
- Do basic foot health maintenance: toe and arch strengthening, calf and fascia stretching
On the hiking half of the same question, the recommendation is the low-drama one. A properly fitted hiking shoe with genuine arch support is what podiatrists point people toward for everything that isn’t the route itself.
The fix here is mostly behavioral rather than a purchase. That said, if you’re starting out and want a pair that doesn’t tax your feet from day one, there’s a guide to beginner shoes that don’t cost you your feet.
Head to Head: Which Shoes You Actually Need
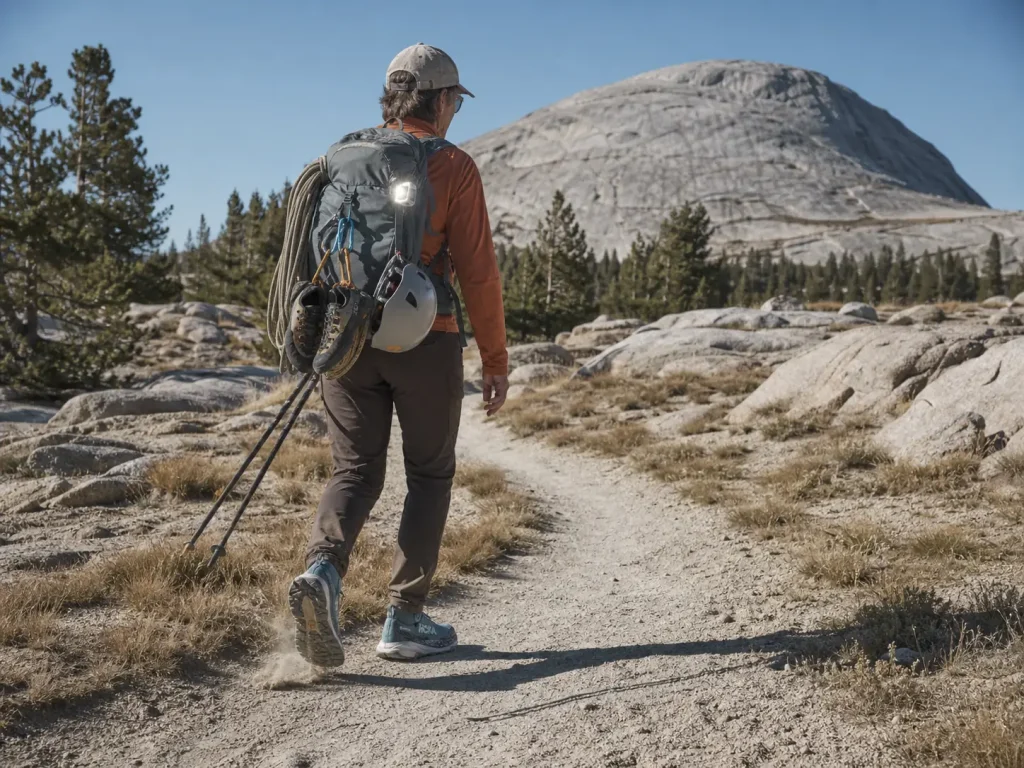
Enough mechanism. Here’s the decision.
The Full Comparison, Side by Side
| Attribute | Hiking boots | Hiking shoes & trail runners | Approach shoes | Climbing shoes |
|---|---|---|---|---|
| Rubber compound | Hard, durable | Hard to medium | Sticky mid compound | Ultra-soft, ultra-sticky |
| Lug pattern | Deep, aggressive | Moderate | Split: lugs plus flat toe | None, fully smooth |
| Sole stiffness | Full shank, rigid | Flexible | Moderate | Soft to firm, always sensitive |
| Ankle support | Mid or high cut | Low cut | Low or mid cut | None |
| Fit philosophy | Roomy, swell room | Roomy to neutral | Snug and precise | Tight, performance fit |
| Sizing vs street shoe | Half size up | True to size | True to half down | One to two sizes down |
| All-day comfort | All day, loaded | All day | Four to six hours | Minutes |
| Durability | Highest | High | Medium | Lowest by design |
| Resoleable | Some models | Rarely | Usually | Yes, and expected |
Pick Your Scenario
Gym climber heading outside for the first time. Climbing shoes, plus whatever you already hike in. Skip approach shoes entirely for now. If you’re still renting, a neutral first pair is the right next stop, not an aggressive one.
Sport climber at a roadside crag. Climbing shoes and trail runners. A two-shoe system, permanently. Spend the approach-shoe money on matching the shoe to the route angle instead.
Trad climbing and multi-pitch days. Climbing shoes and approach shoes. The walk-off is the real argument here, not the walk-in, and the descent often includes a downclimb you’d rather not do in smooth rubber.
Scrambler and peak-bagger. Approach shoes as your primary shoe, and no climbing shoes at all. This is the one group for whom the hybrid is the main event.
Backpacker who climbs on the trip. Hiking boots for the load, climbing shoes for the route, and the approach shoe is the luxury you leave home.
Thru-hiker. Trail runners. Almost none of this article applies to you, and that’s fine.
The Season and Rock-Type Wrinkle Nobody Mentions
Cold rubber goes glassy. On a near-freezing morning the sticky advantage narrows sharply, which is why people warm their shoes inside their jacket before a hard attempt and why a cold slab feels so much worse than the same slab in the afternoon. Wet granite costs you grip in both categories, but it costs the sticky compounds proportionally more, so the gap closes there too.
Hot sandstone runs the other direction and eats rubber mileage fast. And a snowy or alpine approach pushes you straight back up the stiffness spectrum toward a crampon-compatible boot, no matter how gentle the climbing itself turns out to be.
The Approach Shoes Worth the Money
Two picks. Approach shoes only, because this is the single category where naming a specific model changes the reader’s outcome. Hiking footwear you probably already own, and climbing shoes are a fit problem before they’re a product problem.
Expect the category to run roughly $120 to $300 depending on how technical the build is.
La Sportiva TX4 Evo Mid GTX, the Technical All-Rounder
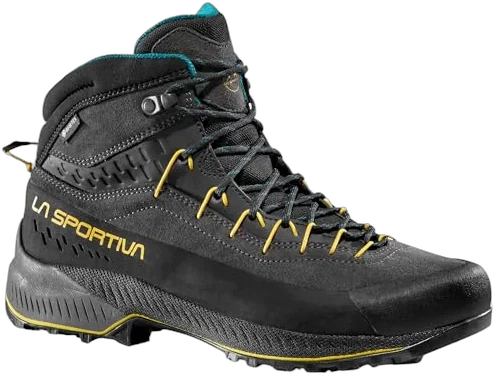
The La Sportiva TX4 Evo Mid GTX (women’s) sits at the technical end of the category. Megagrip is the middle compound described earlier: stickier than any boot rubber, tougher than anything on a climbing shoe, and it holds up on the mixed dirt-and-rock ground where approach shoes live.
The mid height is a terrain call rather than a quality upgrade. On loose talus and side-hilling scree, ankle coverage keeps grit out and gives you a little support when a rock rolls. On a clean trail approach it’s unnecessary weight, and the low version is the better buy.
The honest trade-off is breathability. A waterproof membrane in a mid-cut shoe runs warm on a summer approach, and you will notice it on the walk in. If your climbing is mostly dry-season and the walk-ins are short, that membrane is buying you very little. Readers shopping the brand more broadly can also see how La Sportiva’s climbing line breaks down by discipline.
Five Ten Guide Tennie, the One That’s Been Right for Decades
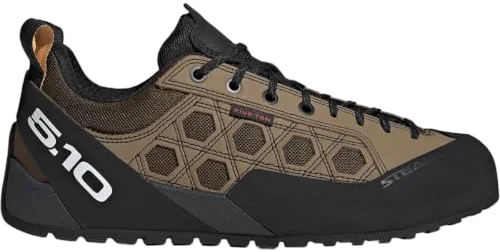
The Five Ten Guide Tennie (women’s) is the shoe the category was more or less built around, and it’s still the default reference point when anyone describes what an approach shoe is supposed to feel like. The Stealth C4 Dotty outsole is grippier on rock than a Megagrip sole and gives up some durability on dirt for it, which is a fair trade if your approaches are short and rocky rather than long and loose.
It’s also the lower-profile option. Less stack, less structure, more feel. On a scrambling approach where you’re actually using your feet on rock, that translates directly into confidence.
Where it loses to the TX4 Evo is under a heavy pack on a long descent. There’s less shoe there, and your feet will tell you about it after a few miles. The leather upper is the other thing to plan around: it genuinely gives over the first few weeks, so a pair that feels correct in the shop will end up loose.
The Crag-Day Shoe Swap, and Whether It’s Worth the Hassle
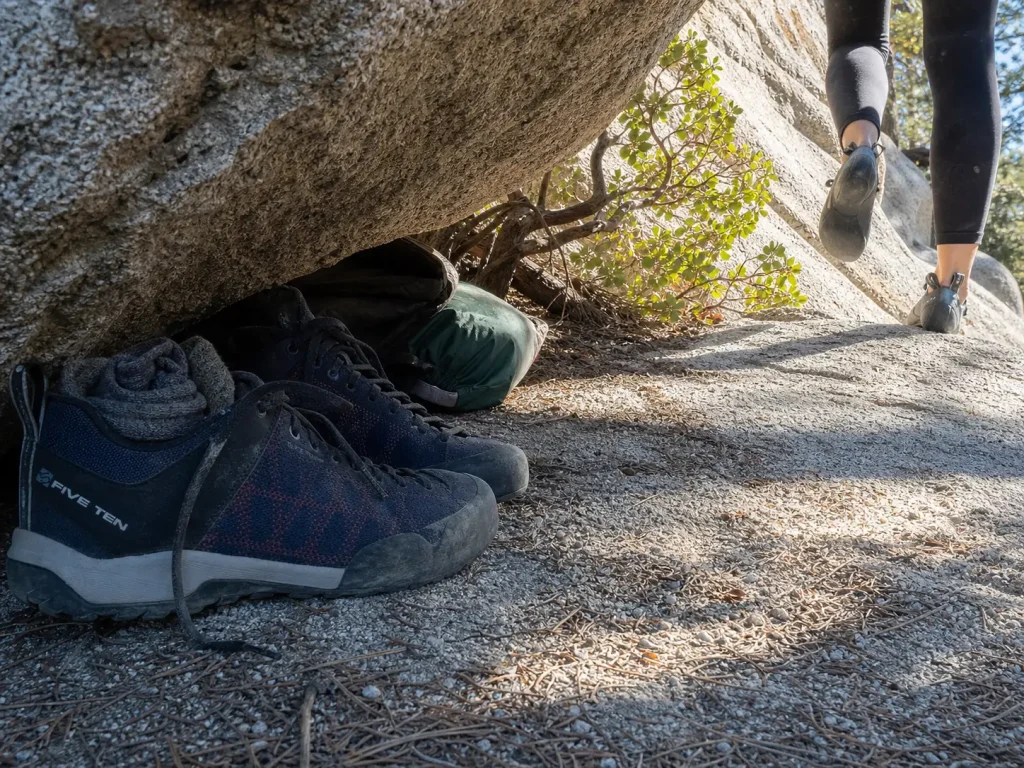
Categories are abstract. A day at the crag is not. Here’s how the shoes actually get used in sequence.
The Three-Shoe System, in Sequence
Hiking boots or trail runners for the walk-in. Approach shoes once the terrain turns to scrambling. Climbing shoes on route. Approach shoes again for the walk-off.
That last one is the step people forget. Walking off a route is a separate footwear decision from walking in, it usually happens on tired legs, and it’s frequently on looser, steeper ground than the approach was. Note also that the shoe you climbed in matters here: an aggressive downturned pair is the worst possible choice for an all-day route, because you’ll be in them for hours, not for a four-minute burn.
Caching: Where, and What You’re Risking
Shoe caching at the base of a route is a real technique with real failure modes.
- Pick a spot obvious to you and invisible from the trail
- Weather matters: an afternoon storm on an unprotected stash means wet shoes for the walk out
- Animals will investigate anything that smells like feet or food
- Popular crags have theft, and shoes left in plain sight go missing
- Multi-pitch routes that top out somewhere else break the whole plan
That last one breaks the strategy more often than theft does. If you’re not coming back to the base, your stash is in the wrong place by definition.
If you stash shoes, stash them upside down inside a stuff sack and wedge them under an overhang rather than behind a bush. Upside down keeps rain and grit out, the sack keeps curious animals uninterested, and an overhang is findable in the dark when the walk-off takes two hours longer than planned.
The Honest Verdict on When It’s Overkill
Two hours of technical approach: carry the extra pair, stash them, no question. Ten minutes on a flat trail: absolutely not. The third pair costs you pack weight and faff for a benefit that doesn’t exist on easy ground.
The two-shoe system covers most climbers on most days. The three-shoe system is a real thing that real people run, but it earns its place on a specific kind of day rather than by default.
Budget Reality and the Resole Math
Three categories of footwear sounds expensive because it is, right up until you look at how the money actually works.
What Each Category Actually Costs
Rough category bands, useful for planning rather than shopping: hiking boots run about $200 to $400, approach shoes about $120 to $300, and climbing shoes about $110 to $250. The spread inside each band is mostly about how technical the construction is, not about how well the shoe grips.
Resoling Changes the Math
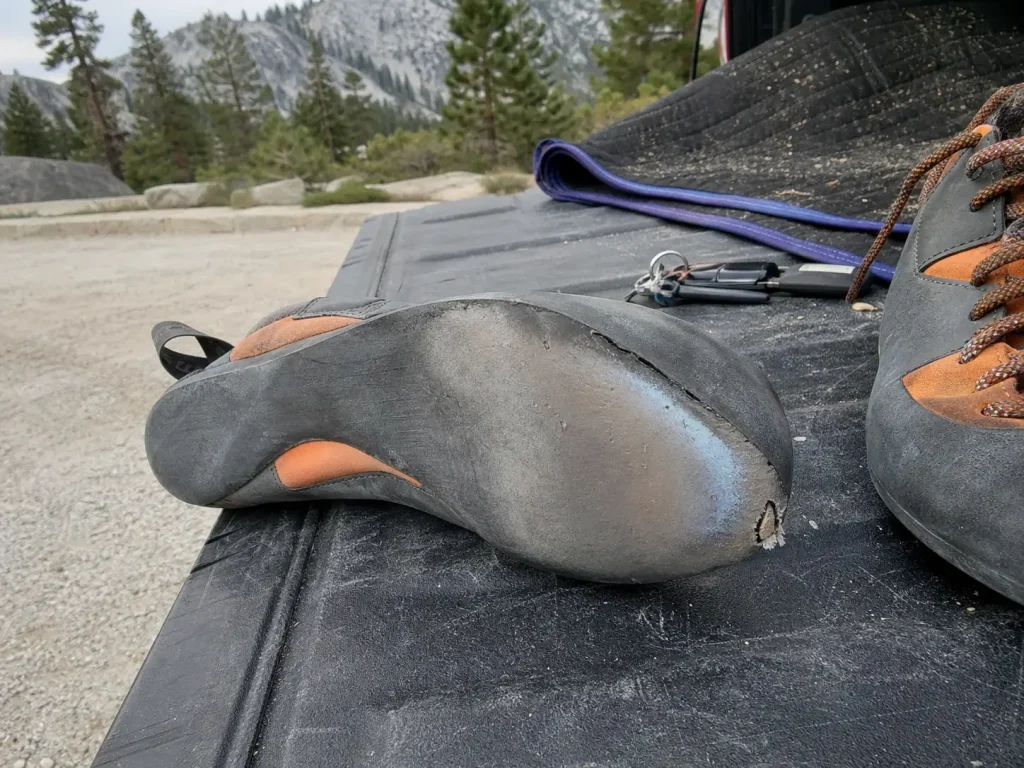
Soft rubber wears fast by design, which sounds like a recurring cost until you factor in resoling. A resole restores the grip surface for a fraction of what a new pair costs, and it applies to both climbing shoes and most quality approach shoes.
The catch is timing. Send them out while the sole is thin but intact and you get a straightforward rubber swap. Wait until you’ve worn through into the rubber toe rand underneath and the job becomes a rand repair, which costs more and never quite restores the original shape. Knowing the exact moment to send a pair out for resoling is the difference between a cheap habit and an expensive one.
Check the toe of your climbing shoes under a bright light every few sessions. When you can see the rand’s edge starting to show through the sole rubber at the tip, that’s your window. Two more weekends past that point and you’ve turned a cheap resole into a rand repair.
Where to Spend and Where Not To
If the budget only stretches to one good purchase, it goes to the shoe you’ll stand on rock in. That’s the one where the fit and the compound change what you can climb.
Hiking footwear you already own is almost certainly fine. Approach shoes are the last purchase to make, not the first, and plenty of climbers never make it at all.
The Short Version
Hiking boots don’t fail on rock because they’re bad. Hard, lugged, stiff soles bridge over rock texture instead of settling into it, and a shank blocks you from loading the edge you do have. Different tool, different job.
Most climbers need two pairs, not three. Climbing shoes, plus something comfortable for the walk. The approach shoe earns its place when the walk-off is genuinely rocky, and not before.
Size each category on its own scale. Down for climbing, true for approach, up for hiking. Then take the climbing shoes off between routes, because four in five climbers deal with foot pain and most of it is fit and wear time.
Next time you’re out, take your climbing shoes off between routes and pay attention to how the last hour of the day feels. Costs nothing, and it’s the single change that fixes the most feet.
Frequently Asked Questions
01Are hiking boots good for rock climbing?
No. Hard, deeply lugged soles bridge across rock texture instead of settling into it, so the real contact area is a fraction of what smooth sticky rubber achieves. A stiff shank also stops you loading the toe edge. Excellent on trail, genuinely poor on slab.
02Can climbing cause plantar fasciitis?
It can contribute to it. Repeated high-stress landings, twisting on small holds and sustained pressure from a downturned shoe all load the plantar fascia. In a study of 104 climbers, 81% reported foot or ankle pain tied to climbing-shoe biomechanics.
03What do podiatrists say about hiking footwear?
Fit for a balance of support and flexibility rather than the tightest tolerable size, leave room for feet to swell over distance, and keep tight performance shoes off your feet outside the moments you need them. A properly fitted hiking shoe with real arch support is the standard recommendation.
04Can hiking shoes be used for daily use?
Yes, and lightweight hiking shoes and trail runners are among the most comfortable daily shoes available. They need essentially no break-in period. The trade-offs are that deep lugs wear down faster on pavement and a waterproof membrane runs hot in warm weather.
05How does climbing shoe sizing compare to hiking shoe sizing?
They run in opposite directions from your street-shoe size. Climbing shoes go one to two full sizes down for a performance fit, approach shoes sit true to size or a half down, and hiking boots often go a half size up. Treat those as starting points, since last shape matters as much as the number.
Safety Notice: Rock climbing and mountaineering are inherently high-risk
activities that can involve physical trauma or fatal incidents. The information on Rock Climbing Realms is for
educational and informational purposes only. Techniques and advice presented here are not a substitute
for professional, hands-on instruction. Conditions and risks vary by location. Always seek guidance
from a qualified instructor before attempting new techniques. By using this website, you agree that you
are solely responsible for your own safety. Any reliance you place on this information is strictly
at your own risk, and you assume all liability for your actions. Rock Climbing Realms and its authors
will not be held liable for any harm, damage, or loss sustained in connection with the use of this information.
Affiliate Disclosure: We are a participant in the Amazon Services LLC Associates Program, an
affiliate advertising program designed to provide a means for us to earn advertising fees by advertising and linking
to Amazon.com. As an Amazon Associate, we earn from qualifying purchases. We are also an official affiliate partner
of Black Diamond Equipment via the AvantLink network. If you click on a Black Diamond affiliate link and make a
purchase, we may earn a commission at no additional cost to you. We also participate in other affiliate programs.
Additional terms are found in the terms of service.