In this article
The connection you have with the rock or climbing wall is fundamentally through your climbing shoes. They are the primary interface, translating your body’s movements into precise actions. Yet, many climbers grapple with frustrations and widespread misinformation when it comes to how should a climbing shoe fit. This guide aims to cut through the confusion, empowering you to make informed choices about your footwear. We will explore everything from foundational fitting principles for any climbing shoe to advanced considerations tailored for various climbing disciplines and foot morphologies, helping you find that perfect fit for peak performance and enjoyment.
The Core Principles: Understanding How a Climbing Shoe Should Fit

Grasping the fundamental goals of a proper climbing shoe fit is the first step. This involves a delicate balance: the shoe must be snug enough for high performance, yet offer a level of comfort appropriate for its intended use. “Good fit” is about precision and enabling your best climbing, not enduring unnecessary foot pain. Let’s explore what this truly means for your feet.
Achieving the “Snug but Not Painful” Standard
A “snug” climbing shoe should envelop your foot securely, almost like a second skin, but without causing debilitating pain, creating hot spots, or restricting circulation; indeed, climbing shoes should fit like a second skin. There’s a difference between productive pressure that aids performance and destructive pain that actively hinders it and can lead to injury. Finding the right climbing shoe fit is about this balance. One of the primary objectives is to eliminate all “dead space” or air pockets within the shoe, especially around your toes, heel, and arch. Dead space diminishes sensitivity, compromises your ability to transfer power to small holds, and allows your foot to move within the shoe, reducing precision.
Distinguishing between the initial stiffness of a new rock shoe that will break in (particularly leather climbing shoes) and the acute, persistent pain from a shoe that is fundamentally too small or the wrong shape for your foot is a practiced skill. While some discomfort, perhaps a slight toe pinch, might be anticipated in many high-performance shoes with an aggressive design, it should never be so severe that it prevents you from weighting your feet or causes numbness. The aim is a glove-like, tight fit that allows your foot to operate as an agile, responsive tool. For further guidance on rock shoe fit, many resources are available, and understanding how to choose footwear is key to avoiding painful climbing shoes.
Critical Fit Zones: Toes, Heel, and Volume
When assessing shoe fit, several areas demand close attention. Your toes should generally reach the very end of the toebox (or toe box). The degree of curl will vary: in neutral climbing shoes, toes might be flat or only slightly bent, whereas aggressive shoes require a more pronounced curl to power small holds. Your knuckles shouldn’t be painfully crammed or forced into unnatural positions, avoiding what some call toe crunchers. The heel cup needs to be secure and snug, preventing any lifting or slipping, which is particularly important during heel hooks or when standing on minute edges. A sloppy heel wastes energy and makes a crucial heel hook less secure. However, it shouldn’t dig into or put undue pressure on your Achilles tendon.
The concept of foot volume—the overall space your foot occupies—is also significant. A volume shoe should match your foot’s volume; too high a volume shoe for your foot leads to dead space, while too low a volume causes excessive pressure. Many brands offer low-volume (LV) versions of their rock shoes, designed for narrower, low-volume feet. Remember, these zones must work in harmony. A perfect toe fit means little if the heel is loose. The climbing shoe should feel like a precise extension of your foot, with no internal movement. Knowing about key components like the outsole rubber and midsole stiffness can help you appreciate these fit dynamics.
Impact of Fit on Climbing Performance
A precise shoe fit directly translates to superior edging capability. This allows you to confidently stand on the tiniest of footholds.to because a snug toebox and appropriate shoe stiffness enable efficient power transfer through your toes. Sensitivity, or the ability to “feel” the rock, is markedly enhanced by a close fit with minimal material between your foot and the climbing surface. This improved feedback allows for subtle adjustments and greater trust in your foot placements, especially on friction-dependent smears, improving your footwork technique.
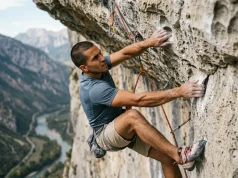
Furthermore, a secure fit is indispensable for executing advanced techniques such as heel hooking and toe hooking, including gnarly heel hooks. A well-fitted heel cup and a toe box that allows for effective toe engagement are crucial for these moves and for making necessary foot crimps during technical climbing. Ultimately, optimal shoe fit isn’t merely about avoiding discomfort; it’s a fundamental component of efficient movement, power generation, and overall climbing ability. A shoe that transforms the shoe into an extension of the foot is what you’re aiming for. A poorly fitting shoe can significantly limit your progress.
Shoe Types and Materials: How Construction Dictates Fit
The design of a climbing shoe, from its profile to its shoe uppers material, inherently influences the desired fit and how it will adapt over time. Neutral, moderate, and aggressive climbing shoe designs each have different fitting objectives, as do shoes made from leather versus synthetic materials. Comprehending these distinctions in shoe construction is vital for selecting a rock shoe that aligns with your climbing needs and foot shape.
Neutral, Moderate, vs. Aggressive: Fitting Different Profiles
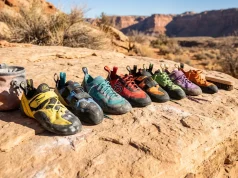
Neutral shoes feature a relatively flat shoe profile, often with thicker soles, and are designed for a more relaxed, comfortable fit. This makes them ideal for the beginner climber, all-day comfort in trad or multi-pitch climbing (making them a good all-day shoe), and for crack climbing. In these, your toes will typically lie flat or be only slightly bent. The fit should be comfortably snug without an aggressive toe curl. Moderate shoes, like some moderate shoes like La Sportiva Katana Lace, introduce a slight downturn and often increased asymmetry, offering a balance between comfort and performance suitable for a variety of climbing styles. Here, toes will likely have a noticeable but not extreme curl, providing more power.
Aggressive shoes are characterized by their significant downturn (downturned shoe) and high asymmetry, engineered for steep sport climbing and bouldering. The fit is typically very snug, a tight-fitting shoe, with toes actively curled to maximize power on small holds and overhangs. These are performance-focused and less comfortable for extended wear. It’s important to realize that the shoe’s intended profile dictates the expected toe position and overall tightness. When choosing climbing shoes by downturn and asymmetry, trying to fit an aggressive shoe like a comfort shoe, or vice-versa, will lead to poor performance. There are good guides on fitting neutral, moderate, and aggressive shoes available from various shoe manufacturers.
Leather vs. Synthetic Uppers: Impact on Stretch and Sizing
The material of the shoe’s uppers significantly affects how it will stretch and conform to your foot. Unlined leather shoes are known for their capacity to stretch substantially, sometimes up to a whole shoe size or even more. This means they should be sized very snugly when new, anticipating that the leather shoes will mold to your foot over time. They also offer good breathability and can be very comfortable once broken in. Lined leather uppers, which have an internal lining (often synthetic), will stretch less, typically about a half shoe size. This offers a middle ground, retaining some of leather’s molding properties while providing more consistent sizing for the all-leather shoe.
Synthetic shoes, conversely, exhibit minimal to no stretch. This ensures a more consistent fit from the first wear, meaning the initial fit is what you’ll largely have throughout the shoe’s life. They are often used for aggressive shoes to help maintain their precise shape. Your choice of material should directly influence your initial shoe sizing decisions; for instance, you might downsize more in unlined leather than in a synthetic shoe of the same apparent initial tightness. When looking at Scarpa climbing shoes, detailing their technology, fit, and model options, you’ll see these material differences in play. For more on differences in leather and synthetic climbing shoe materials, resources are available, as is information on how shoe materials affect fit and stretch.
Understanding Lasts, Rands, and Closure Systems
Several shoe construction elements contribute to a climbing shoe’s fit and feel. The last is the three-dimensional foot-shaped model a shoe is built around; it determines the shoe’s internal shape, volume, and degree of asymmetry. Different brands and even different model shoe options within the same brand use various lasts, leading to significant variations in fit even if the nominal shoe size is the same. For instance, when you examine a La Sportiva climbing shoe by understanding their unique sizing system, the last is a primary factor. The rubber rand that wraps around the shoe, particularly the tension rand (like a slingshot rand or heel tension system), also plays a critical role.
Rand design and tension contribute significantly by pulling the foot forward into the toebox and supporting the arch, directly impacting performance and how the shoe feels. Closure systems—laces, Velcro straps, or slippers (like slip-on shoes) —also influence fit. A lace-up shoe offers the most adjustability for a precise, customized fit. Velcro straps provide convenience for quick on-and-off, popular for bouldering and gym climbing. Slippers offer maximum sensitivity but typically less support and adjustability. You can find detailed explanations of climbing shoe rand technology and tension systems and more about understanding climbing shoe lasts and construction from specialized retailers and rock shoe companies. Some advanced designs even include no-edge shoes for a different feel.
The Practical Fitting Process: How to Find Your Perfect Pair
Finding the ideal climbing shoe involves more than just knowing theory; it requires a practical approach to trying on and selecting shoes. This section offers actionable fit tips, from the best time to try on rock shoes to understanding the break-in period, equipping you with a strategy for a successful purchase. How do you ensure you walk away with the right shoe or even a perfect-fitting pair?
Tips for Trying On Climbing Shoes
To get the most accurate sense of fit, try on climbing shoes at the end of the day or after some physical activity. Your feet tend to be slightly swollen at these times, mimicking their state during a climbing session. The “socks vs. no socks” question is common; generally, climbing shoes are worn without a sock for a closer fit and enhanced sensitivity. However, some beginners or those climbing in very cold conditions might opt for thin socks, which should be worn during the fitting process if that’s how you intend to use them. Attending shoe demo days at your local climbing gym can be a great way to try many shoes.
Crucially, try on multiple brands and models. Shoe sizing and last shapes vary significantly among difference shoe brands, so don’t assume your street shoes size or your shoe size in one climbing shoe brand will directly translate to another. When testing the fit in-store, use any available testing edges or even a stair edge. Stand on small holds, weight your toes, and check for heel lift by standing on tiptoes or mimicking heel hooking motions. Ensure there’s no painful pressure on your toe knuckles against the top of the shoe. Some indoor climbing articles mention specific models like snug climbing shoes like the Scarpa Origin, which can be good starting points for what to try. For general expert tips for trying on climbing shoes or specifics on when and how to try on climbing shoes, many resources exist, sometimes offering free expert shoe advice.
Deciphering Climbing Shoe Sizing
Climbing shoe sizes rarely align directly with your street shoe size. “Downsizing” is a common practice, but it’s highly variable and not a universal rule to be followed blindly. The objective isn’t to cram your foot into the smallest possible shoe, but to achieve that “snug but not painful” standard. How much one might downsize differs by brand, the shoe type (an aggressive shoe is often fitted tighter), and the material (unlined leather allows for more aggressive downsizing due to stretch).
Use brand-specific shoe charts as a preliminary guide, but always prioritize the actual fit and feel over the numbers on the box. Be aware of different shoe sizing systems (US, UK, EU) and the potential for confusion. Perhaps most importantly, avoid relying solely on online reviews or friends’ recommendations for shoe sizing. Because foot shapes and pain tolerance vary so widely, personal trial is paramount. For women, Proper sizing and fit are essential and often involve women-specific models. Information on climbing shoe sizing conversion and brand differences can be helpful, as can advice on how much to downsize climbing shoes from manufacturers.
The Break-In Period: What to Expect
Most climbing shoes, particularly those made of leather, will require a break-in period to fully conform to your foot’s unique shape and reach their optimal level of fit and comfort. Common break-in methods include wearing your new shoes around the house for short intervals or using them for light climbing sessions at the gym, initially avoiding intense or powerful moves. Some suggest gently warming synthetic shoes with a hairdryer (with extreme caution to avoid damage) to help them mold slightly. It’s wise to discourage potentially harmful methods like showering in new climbing shoes.
Setting realistic expectations for how much a shoe will stretch is important; unlined leather shoes stretch the most, while synthetic shoes change very little. This understanding helps in making informed initial shoe sizing choices. It’s also important to distinguish between normal break-in discomfort—general tightness and stiffness—and signs that a shoe is fundamentally too small or ill-fitting, such as sharp, localized pain, numbness, or an inability to weight your feet. There are many discussions about methods for breaking in new climbing shoes and how long climbing shoes take to break in.
Tailoring Fit: Experience Level, Climbing Style, and Foot Shape
The ideal climbing shoe fit is not a universal concept; it’s deeply personal. Optimal shoe fit preferences adapt based on your climbing experience, your preferred disciplines (bouldering, sport climbing, trad), and the unique anatomy of your feet, including toe dimensions. Understanding these nuances will guide you to a shoe that truly supports your climbing and footwork.
Beginner vs. Advanced Climber Fit Needs
For those new to climbing, prioritizing comfort and a less aggressive fit is generally advised. This approach encourages proper footwork development and overall enjoyment of the sport. Neutral climbing shoes or slightly moderate shoes with a flatter toe profile are usually best for a beginner shoe, allowing beginners to focus on learning to trust their feet without the distraction of excessive pain. Starting at a local climbing gym is ideal for beginners and a good place to get initial advice. As skills progress, an intermediate climber might transition to more performance-oriented shoes, possibly with a moderate downturn. The fit can become snugger to enhance precision, but still needs to balance performance with reasonable comfort.
Experienced climbers tackling difficult routes often opt for a very tight shoe, an aggressive fit, to extract maximum performance on specific projects. They typically understand the trade-offs between extreme performance and comfort and often possess multiple pairs of shoes, each suited for different shoes for different needs. Shoe fit preferences naturally evolve with experience and changing climbing goals. What works well for a newbie climber will likely not be ideal for an expert, and vice-versa. There’s good information available on climbing shoe fit for beginner climbers and the differences in beginner and advanced climbing shoe needs.
Fitting Shoes for Bouldering, Sport, Trad, and Gym
Different climbing disciplines often call for different shoe characteristics and shoe-fits. Bouldering frequently favors soft shoes, more sensitive, and aggressively downturned shoes. These shoe features aid powerful moves on steep terrain, and Velcro closures are common for easy on/off between attempts at the bouldering gym; the fit is usually very snug. Sport climbing (or sport climbs) has similar demands, often requiring performance-oriented, downturned shoes for precision on challenging routes, seeking a balance of stiffness for edging and sensitivity.
Conversely, Trad climbing is a transformative style of rock climbing and multi-pitch climbing (common in mountains climbing) prioritizes all-day comfort and support. Flatter, often stiffer shoes (sometimes called rock boots) are common, frequently with lace-up closures for adjustability as feet swell during long days. Toes are typically less curled to allow for comfortable jamming in crack climbs and standing on ledges for extended periods. A good trad shoe is invaluable. Gym climbing demands versatility and durability. Softer shoes can be beneficial for conforming to large volumes, while more durable rubber withstands frequent use. Fit can range from comfort-focused for day training shoes to performance-focused for sending hard gym projects. Resources detailing choosing shoes for different climbing disciplines and offering shoe recommendations for bouldering versus sport climbing can be very helpful.
Addressing Unique Foot Shapes: Wide/Narrow Feet, Bunions, Etc.
Climbers with wide or narrow feet, or those with high or low insteps/volume, often face extra challenges. The advice here is to look for brands or specific models known to cater to these particular foot shape variations. For example, some brands generally produce wider shoes, while others are known for narrower lasts. Many manufacturers also offer Low Volume (LV) versions of popular models, ideal for low-volume feet. Your specific toe configuration—such as having an Egyptian foot (longest big toe or large toe), a Greek foot (longest second toe, or Morton’s toe), or a Roman foot (several toes of similar length)—can also affect comfort in different toebox shapes, potentially requiring a wider toe box or a specific foot box shape.
For those dealing with bunions (hallux valgus), strategies include choosing shoes with softer, more forgiving shoe uppers, seeking out wider toeboxes, or considering models specifically designed to accommodate them, always avoiding excessive pressure on the bunion. Patience is key for climbers with “problem feet.” Try on many different shoes and potentially consult with experienced climbing shop staff. Sometimes slight modifications or specific break-in techniques can make a significant difference to how a single shoe feels on your right foot versus your left foot. There’s community advice on fitting climbing shoes for wide or narrow feet and information regarding the impact of toe shape on climbing shoe selection.
Special Considerations: Women’s and Children’s Fit
Women-specific climbing shoe models often feature narrower heels, lower overall volume, and sometimes a slightly different last shape. These design choices aim to better accommodate common characteristics of female feet. However, it’s important to stress that fit is highly individual; some women may find that “men’s” or unisex shoes fit them better, and conversely, some men with lower volume feet might prefer a women’s model. The key is always the individual fit for the entire foot, not the label.
Fitting children’s climbing shoes presents unique challenges, primarily due to growing feet. The priority should be comfort, avoiding overly tight shoes that could potentially harm development or create a negative early experience with climbing. Look for adjustable shoe features, like Velcro straps, and consider shoes specifically designed to allow some room for growth without compromising safety or basic performance. A children’s climbing wall is an excellent addition to a home, and proper footwear is part of that. The fundamental principles of good fit—snug, no dead space, appropriate for use—still apply, but with these added considerations for toes/feet. You can find information on women’s specific climbing shoe design from brands and advice on fitting children’s climbing shoes from retailers.
Avoiding Pitfalls: Common Mistakes and Long-Term Foot Health
Choosing the right climbing shoes is not just about performance; it’s also about avoiding common mistakes and safeguarding your long-term foot health. A poorly fitting shoe can lead to immediate frustration and, over time, more serious issues like foot nasties. Understanding these pitfalls is key to a sustainable and enjoyable climbing journey.
Recognizing Signs of a Poorly Fitting Shoe
Several tell-tale signs indicate your climbing shoes are too large. These include your foot moving inside the shoe during use, your heel lifting (especially noticeable during heel hooks), material bunching up, or even audible air expulsion – the dreaded “shoe farts.” Such a fit compromises performance and can lead to blisters from friction; sometimes shoes reduces grip if movement is excessive. Conversely, shoes that are too small (or super tight shoes) will cause excessive and debilitating pain that goes beyond normal break-in discomfort, making your feet wince. You might find yourself unable to weight footholds properly, experience numbness or tingling in your toes (a sign of nerve compression), or need extreme measures like using plastic bags just to get the shoe on.
It’s vital to listen to your body. Persistent foot pain is a clear indicator that something is fundamentally wrong with the fit, regardless of what fellow climbers might say or what shoe size the shoe is labeled. Sometimes, a shoe might technically be the “right shoe size” in terms of length but still be the wrong shape for your foot, leading to localized pressure points. Discussions about signs your climbing shoes are too tight or loose and common climbing shoe fit problems are common in climbing communities. If the shoe isnt working, don’t force it.
Long-Term Foot Health and Injury Prevention
Chronically ill-fitting or overly aggressive climbing shoes can contribute to a range of long-term foot health problems. Conditions such as bunions (hallux valgus), hammertoes, painful calluses, nerve compression syndromes, and persistent toenail issues can arise from consistently wearing shoes that are too-tight-shoes or that deform the foot. While many high-performance shoes are designed to be snug, it’s important to understand that shoes causing significant, ongoing pain can lead to lasting damage. Even your ankle can be affected by altered biomechanics from bad footwear.
A balanced approach is often best. This might mean using appropriately aggressive shoes for your hardest climbs but having more comfortable shoes (perhaps all-purpose shoes or even some well-fitting approach shoes for easier terrain) for warming up, easier routes, or extended wear during long training sessions. Simply taking your shoes off between climbs can provide significant relief and benefit your foot health. Prioritizing your long-term ability to enjoy climbing involves making sensible footwear choices. Understanding how climbing footwear affects foot health and being aware of common foot conditions related to climbing shoes is part of being a knowledgeable climber.
Common Myths and Misconceptions Debunked
Several myths and misconceptions cloud the topic of climbing shoe fit. One common fallacy is that “pain equals performance.” While a performance fit is indeed snug, excruciating pain is counterproductive. It hinders technique, distracts focus, and significantly increases the risk of injury. Modern shoe technology in shoes today allows for high performance without crippling discomfort. Another persistent myth is the idea that “you MUST downsize X number of shoe sizes.” Downsizing is highly individual and heavily dependent on the brand, specific model, and material of the shoe. There’s no universal rule; the focus should always be on achieving the correct fit for your foot, not an arbitrary shoe size number.
You might also hear that “Brand X always fits wide/narrow/etc.” While brands may have general tendencies in their last shapes, individual models within a brand can vary significantly. Always try shoes on rather than relying on generalizations. Lastly, the notion that “synthetic shoes don’t break in at all” isn’t entirely accurate. While they don’t stretch like leather shoes, most synthetic shoes will soften slightly and conform a little to the foot with use, often improving comfort over the initial wears. The climbing shoe pain myth has been discussed by reputable organizations, and forums often debate common mistakes in choosing climbing shoes.
Conclusion: Finding Your Ultimate Climbing Shoe Fit
The journey to finding the perfect climbing shoe fit is one of balancing snugness for optimal performance with sufficient comfort for your intended use. A critical goal throughout this process is the elimination of “dead space” within the shoe, ensuring your foot and shoe work as one, achieving a suction fit. Remember, fit—even a professional climbing shoe fit—is deeply personal; it hinges on your unique foot shape, your experience level, your preferred climbing style, and the specific design and materials of the individual shoe itself.
We encourage you to use the knowledge gained from this guide to experiment confidently. Trust your own feet—they are your best guide. Be patient in your search for the right shoes, as it may take trying on many shoes to find the ideal match. A couple of practical tips: take your shoes off between climbs to give your feet a rest, and consider having multiple pairs (e.g., all-day shoes vs. tighter shoes for performance) if you engage in different types of climbing. And importantly, don’t hesitate to retire shoes that are causing persistent pain or are clearly worn out. A well-fitting shoe is a key investment in your climbing progression, safety, and, most importantly, your long-term enjoyment of this incredible sport. This aligns with our mission to support dedicated climbers at all levels.
Frequently Asked Questions about Climbing Shoe Fit
How tight should my first pair of climbing shoes be? >
Should I wear socks with my climbing shoes? >
How much will my leather climbing shoes stretch? >
Is it normal for new climbing shoes to hurt my feet? >
Safety Notice: Rock climbing and mountaineering are inherently high-risk
activities that can involve physical trauma or fatal incidents. The information on Rock Climbing Realms is for
educational and informational purposes only. Techniques and advice presented here are not a substitute
for professional, hands-on instruction. Conditions and risks vary by location. Always seek guidance
from a qualified instructor before attempting new techniques. By using this website, you agree that you
are solely responsible for your own safety. Any reliance you place on this information is strictly
at your own risk, and you assume all liability for your actions. Rock Climbing Realms and its authors
will not be held liable for any harm, damage, or loss sustained in connection with the use of this information.
Affiliate Disclosure: We are a participant in the Amazon Services LLC Associates Program, an
affiliate advertising program designed to provide a means for us to earn advertising fees by advertising and linking
to Amazon.com. As an Amazon Associate, we earn from qualifying purchases. We are also an official affiliate partner
of Black Diamond Equipment via the AvantLink network. If you click on a Black Diamond affiliate link and make a
purchase, we may earn a commission at no additional cost to you. We also participate in other affiliate programs.
Additional terms are found in the terms of service.