
In this article
Imagine the sharp crack of rope pulling tight, the sudden weight of your partner in the air, a silent trust placed entirely in your hands. In that moment, the metal belay hardware on your harness is more than just gear; it’s the fulcrum of safety. But here’s the most important lesson you’ll ever learn about climbing safety and belaying systems: the device doesn’t catch the fall—you do, with the device as your force-multiplying tool. This guide decodes the engineering, standards, and proven practices behind modern belay devices, transforming your knowledge of this critical system into the instinct required to be that unwavering, trustworthy partner.
We’ll journey through the core mechanics that separate the major families of belay device types, from simple tube-style belay devices to those with active, cam-assisted braking. We will decipher the official UIAA 129 certifications that define a device’s true capabilities and learn from real-world accident reports to build robust, life-saving habits. By the end, you will move beyond mere brand names to a scenario-based approach, ready to confidently select the right device for any climb and reaffirm the most fundamental truth: no technology can ever replace an attentive belayer, and your brake hand is, and always will be, the ultimate safety feature.
What Are the Three Families of Belay Devices? (The Core Mechanics)

Before you can choose the right tool, you must understand how the different tools in the box work. Every belay device operates on a principle of friction, but how they generate that friction defines their character, their best use, and their inherent limitations. We’ll start with the elegant simplicity of the original design—a direct descendant of the historic Sticht Plate—and move toward modern, mechanically-assisted systems that have redefined safety expectations at the crag and in the gym.
How Do Simple Tubular Devices Work? (The Versatile Workhorse)
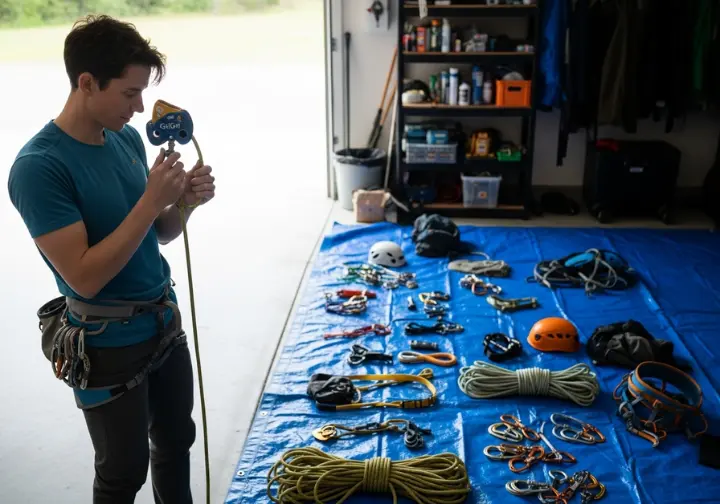
The soul of a simple tubular belay device lies in its magnificent lack of complexity. There are no moving parts, no hidden mechanisms. It is a pure, friction-based mechanical rope brake. To use one, you create a bight of rope, push it through one of the device’s dual slots, and clip a locking carabiner through both the rope bight and the device’s keeper loop. A fall forces that rope into a sharp, S-shaped bend around the spine of the carabiner, generating the friction needed for excellent rope control and to arrest the fall. The classic Black Diamond ATC (short for Air Traffic Controller) is the archetypal example, a simple tube of forged aluminum that has been trusted on climbs for decades.
Engineers soon added V-shaped grooves to create a “high-friction” side, like in the ATC-XP, giving belayers more stopping power. The design evolved further into plaquette-style or plate style devices like the Petzl Reverso or Black Diamond ATC-Guide, which added a second, robust attachment point for a revolutionary function we’ll explore later called “guide mode.” The enduring appeal of these tube devices is their raw versatility. They are lightweight, simple, and boast excellent compatibility with versatile rope diameters for both single and double rope techniques. This simplicity, however, is also their greatest demand. They offer absolutely zero braking assistance, meaning the belayer’s brake hand and grip strength are the only things stopping the climber. Holding a partner who is hanging on the rope can become intensely fatiguing, a critical factor to consider when choosing your first set of belay equipment. Their design philosophy is foundational to The UIAA’s first-ever safety standard for braking devices, cementing their place in climbing history.
What Makes an Assisted Braking Device (ABD) “Assisted”?
The search for more security and less belayer fatigue led to one of the most significant innovations in climbing: the assisted braking device, or ABD. The core of understanding how assisted braking devices work is dispelling a critical myth: “assisted” is not “automatic” or “hands-free.” The belayer’s brake hand must, without exception, remain on the brake strand of the rope. The “assistance” is a mechanical helper, not a replacement for your skill and attention.
This assistance comes in two main flavors. The first are Passive ABDs, sometimes called geometry-assisted or passive assist belay devices. These passive belay devices still have no moving parts. Instead, their clever design uses the force of a fall to cause an orientation change that blocks the rope, pinching it between the device itself and the locking carabiner. Models like the Edelrid Jul series or the Black Diamond ATC Pilot rely on this geometric shift to help arrest a fall. Because the carabiner is an active part of the braking mechanism, its shape and size can significantly influence the device’s performance, which is a powerful reminder of how locking carabiners are crucial for safety.
Pro-Tip: Every ABD has a unique “feel” for paying out slack and lowering. Don’t just practice with a generic device; master your specific model. Spend time on the ground with a partner, practicing feeding slack quickly and smoothly lowering, until the motions are second nature. This muscle memory is what prevents short-roping your leader on a critical clip.
The second and more powerful category is Active ABDs, which are mechanical or cam-assisted. In these devices, an internal, spring-loaded camming mechanism is the star of the show. When the rope is pulled through slowly, the cam remains disengaged, allowing for smooth slack management and good feeding ease. But under the sudden load of a fall, the camming mechanism pivots instantly and aggressively, pinching the rope against the inner wall of the device to assist in holding rope. The Petzl GriGri is the undisputed icon of this category, though newer devices like the Edelrid Pinch from brands like Edelrid or DMM operate on similar principles and provide smoother control. Active ABDs offer the highest degree of braking assistance, making them exceptional for the top-rope or lead belaying use case in single-pitch sport climbing. Both passive and active devices, however, introduce a learning curve due to a potential lock-up tendency when paying out slack quickly.
Why Are Figure 8s Primarily for Rappelling?
While most modern devices are designed for both belaying and rappelling, one classic design has found its niche almost exclusively on the descent: the figure-eight descender. As its name implies, it’s a simple figure-eight-shaped piece of metal. A bight of rope wraps around the device’s “neck” and through the larger loop, creating a smooth path with significantly less friction than a tubular device.
This low friction is precisely why its primary rappel function is to excel at dissipating the immense heat generated on long rappels. Its simple, open design can also handle a very wide range of rope diameters, including icy or muddy ropes that might cause issues in more complex devices. However, these same characteristics make it a poor and generally unrecommended choice for belaying. The minimal friction requires enormous grip strength from the belayer to arrest a fall, offering far less security than any modern alternative. But its most infamous drawback is a strong tendency to put tight twists and kinks in the rope, which can lead to a nightmare of rope management at the bottom of a rappel. For this reason, the Figure 8 remains a specialized tool for rappelling and canyoneering, largely superseded by more versatile devices for everyday climbing.
How Do Advanced Features and Official Standards Inform Real-World Safety?

Owning the gear isn’t enough; true competence means understanding its advanced functions, its hidden risks, and the language of its safety certification. This is where we move beyond pure mechanics and build the “instinct” part of the safety equation. We’ll decode the powerful “guide mode” feature and learn how to interpret the official standards that separate marketing hype from certified performance.
What is “Guide Mode” and What Are Its Hidden Risks?
“Guide mode” is a feature found on plaquette-style tubular devices like the Black Diamond ATC-Guide or Petzl Reverso, which have a hinged guide-mode loop. It’s a method for belaying one or two seconding climbers directly from a master point anchor, rather than from your harness. The device is clipped to the anchor via its extra loop, and the rope(s) are rigged in a specific orientation that creates an “auto-blocking” function. When the seconding climber weights the rope, the device cinches down and locks, holding their weight without requiring constant grip strength from the belayer, a huge benefit in sketchy belay stances.
The primary advantage is immense: it transfers the climber’s full weight to the anchor, freeing the belayer to manage ropes, eat, or prepare for the next pitch. It’s a cornerstone of efficiency in mastering multi-pitch systems and safety. However, this convenience hides a critical risk: The Lowering Problem. Once the device is locked under a climber’s full weight, it is extremely difficult and unintuitive to release it to lower them, even a few feet. Safely unlocking a weighted guide mode requires a specific, practiced, and non-obvious technique that can be nearly impossible to figure out in a stressful situation. This feature is a classic “beginner trap,” feeling simple in setup but demanding expert knowledge to manage in an emergency, a point underscored by The American Alpine Club’s gold standard belay curriculum.
What Do the UIAA 129 Safety Standards Actually Mean?
Amidst confusing marketing terms like “auto-locking” and “brake-assist,” there is an objective language of safety. This language is written by the UIAA (International Climbing and Mountaineering Federation), the gold standard for climbing gear certification. The relevant standard for our discussion is UIAA 129, which classifies belay devices based on their tested performance. Understanding this standard helps you cut through the noise and know exactly what your device is certified to do.
The standard defines several types, but the most important distinction for a user is between a Type 2 “Manual Braking Device” and a Type 6 “Locking Assisted Braking Device.” A Type 2 device, like an ATC or even a passive ABD like the Edelrid Mega Jul, passed tests certifying its function as a manual brake—it relies on the user’s hand. A Type 6 device, like a Petzl GriGri, had to pass much more rigorous tests, including its ability to lock onto the rope and hold a load with no hand on the brake strand. This isn’t a license for hands-free belaying; it’s a certification of a higher level of assistance. This profound difference in certified performance is the single most important piece of information you can have, far more valuable than any marketing copy. You can explore all the official UIAA Safety Standards on their website, which is a crucial part of understanding UIAA and CE safety standards for all your gear.
What Can We Learn from Real-World Belay Accidents?
The standards give us the theory. Now, we turn to the harsh lessons from the real world to understand where systems actually fail. The American Alpine Club’s annual publication, Accidents in North American Climbing (ANAC), is an invaluable, if sobering, resource for every serious climber. Year after year, the data reveals a consistent and critical truth: most belaying and lowering accidents are not caused by gear failure, but by the potential dangers of preventable human error.
The most common mistakes are tragically simple: lowering a climber off the end of the rope (a mistake entirely preventable by always tying a stopper knot), breakdowns in communication, and simple inattention. This is where forum phrases like “the deadly ATC” originate—not because the device is inherently flawed, but because a manual device offers no backup if the belayer’s braking technique fails. The data from a detailed analysis of rappelling fatalities documented by the AAC reinforces how critical procedural diligence is. Yet, these reports also contain stories of saves. The 2021 ANAC includes a powerful account of a belayer who was knocked unconscious by rockfall. His lead climber fell, but was saved from a certain ground fall because the assisted braking mechanism of his GriGri engaged automatically, holding the fall when the belayer was incapacitated. This isn’t fear-mongering; it’s a vital reminder that building robust, redundant habits and choosing gear that provides a margin for the unexpected are crucial steps in mitigating the sport’s inherent risks, which we cover in our guide to the Top 10 Climbing Dangers & Life-Saving Prevention.
How Do You Choose and Maintain the Right Device? (The Practical Toolkit)
Armed with a deep understanding of mechanics, risks, and standards, you are now ready to make an informed choice. This is your practical belay device selection toolkit. You can move beyond simple pros and cons to build actionable decision trees for selecting a device and embracing the lifelong responsibility of caring for your gear like a professional.
Which Belay Device is Best for Your Climbing Style?
The most common question I get is, “What’s the best belay device?” The answer is that it’s the wrong question. The right question is, “What is the best belay device for the job I’m doing today?” Your choice should be mission-driven, based on the specific scenario from gym vs. outdoor climbing.
For climbers spending most of their time in gym climbing or at a single-pitch sport crag (outdoor climbing), the fatigue reduction and added safety features of an active ABD like a GriGri are hard to beat. When top-rope belaying or lead belaying a partner through dozens of falls as they project a hard route, the device does the heavy lifting, saving your energy for a safe catch. For the multi-pitch climbing or multi-pitch alpine climber, priorities shift. Here, the low weight, simplicity, and all-weather reliability of a guide-mode tubular device (ATC-Guide) often wins. It handles two ropes for leading and its rappel function is second to none. This is a key consideration when transitioning from gym to crag. Many serious climbers adopt a two-device system: a GriGri for sport climbing and an ATC-Guide for everything else. While hybrid devices like the Edelrid Giga Jul attempt to be the “one device to rule them all,” the specialized performance of a dedicated tool is often preferred.
Choosing a Belay Device
A guide to the right device for your climbing style, from the gym to the mountains.
Primary Recommendation
Active or Passive ABD
Secondary/Backup
N/A
Rationale & Key Considerations
ABDs provide a significant safety margin and reduce belayer fatigue during long sessions. Many gyms now require their use.
Primary Recommendation
Active ABD (e.g., GriGri, Neox)
Secondary/Backup
Passive ABD (e.g., Pilot)
Rationale & Key Considerations
Active ABDs excel at catching frequent lead falls and holding a hanging climber. Smooth slack payout is a key skill to master. Passive ABDs are a lighter, simpler alternative.
Primary Recommendation
Active or Passive ABD
Secondary/Backup
Tubular Device
Rationale & Key Considerations
Similar to gym climbing, but with the added consideration of anchor cleaning. If rappelling is required, a simple tubular device is a necessary backup.
Primary Recommendation
Tubular w/ Guide Mode (e.g., ATC-Guide, Reverso)
Secondary/Backup
Active ABD (optional)
Rationale & Key Considerations
Versatility, light weight, and reliability with two ropes for rappelling are paramount. Performs well on wet or icy ropes where cams may not. Guide mode is a key feature for anchor belays.
Primary Recommendation
Tubular w/ Guide Mode
Secondary/Backup
N/A
Rationale & Key Considerations
Simplicity and reliability are critical. Tubular devices are less likely to freeze or jam with icy ropes. High-friction modes are essential for handling frozen, stiff ropes.
Beyond the common belay devices, other specialized tools exist for different scenarios. The Wild Country Revo, for example, has a unique panic-proof centrifugal braking mechanism, different from the cam-based locking mechanism of a GriGri. For solo climbing, climbers rely on dedicated self-belay devices designed for an automatic lock on fall, which are entirely different systems from the auto-belay devices with hydraulic or magnetic braking seen on climbing walls for training. The best choice always depends on the use case, balancing factors like price, durability, and the learning curve.
How and When Should You Retire Your Belay Device?
Your device’s life is in your hands, both during a catch and during inspection. Unlike soft goods, metal hardware doesn’t have a fixed expiration date. Its retirement is based entirely on its condition and durability, and the cardinal rule is simple: when in doubt, retire it. A new device is a small price to pay for peace of mind.
Pro-Tip: Don’t just inspect for wear, inspect for compatibility. When you get a new rope, especially if its diameter is much thinner than your last one, take the time to test it with your belay device in a safe, low-consequence setting. Ensure your device provides adequate friction and that your ABD locks reliably on the new rope diameter compatibility.
A proper inspection should be a regular ritual. Look for any signs of cracking, especially around the high-stress attachment points. Check for any deformation or bending, which could indicate it was damaged in a significant drop or a massive fall. The most common sign of wear is grooving from the rope. Run your fingernail across the rope-bearing surfaces. If the grooves are deep enough to feel sharp or catch your nail, the device is developing a knife-edge that can damage your rope’s sheath. For devices with moving parts like a GriGri, ensure the cam moves smoothly and engages crisply, and that the handle’s action is not loose or sloppy. When you do retire a piece of hardware, destroy it with a hammer or take it to a metal recycler. This prevents any possibility of it being accidentally found and dangerously reused. This principle of diligent inspection is the same one we apply when inspecting, caring for, and retiring your rope.
Conclusion
We’ve journeyed from the simple friction of a tubular device to the certified mechanics of an assisted-braking tool. But the final lesson returns us to where we began: in your hands. A belay device is a force-multiplying tool, entirely dependent on the skill, practice, and unwavering attention of the belayer; your brake hand is, and always will be, the ultimate safety system. Devices fall into three major families—Tubular, Assisted Braking (Passive & Active), and the specialized Figure 8—each with a distinct mechanical principle and ideal use case. Remember that official standards like UIAA 129 provide an objective measure of certified performance, a language more trustworthy than marketing. And finally, take the lessons from accident analyses to heart: human error is the most common point of failure, making procedural discipline your most powerful defense.
Your journey to becoming a master of safety is a continuous one. It’s built on a foundation of knowledge, reinforced by constant practice, and honed by a deep respect for the risks involved. Explore our full library of Skills & Safety guides to deepen your expertise and build the instincts of a truly reliable partner.
Frequently Asked Questions about Belay Devices
What is the main difference between an ATC and a GriGri?
The main difference is their braking mechanism. An ATC is a manual tubular device that creates friction by bending the rope; it relies entirely on the belayer’s brake hand and grip strength to stop a fall. A GriGri is an active assisted braking device (ABD) that has an internal cam that pivots under load to pinch the rope, providing significant mechanical help to arrest a fall. The ATC is simpler, lighter, and more versatile for double-rope rappels, while the GriGri offers a major advantage for catching and holding falls, making it ideal for sport climbing.
Can you rappel on a single rope with a GriGri?
Yes, you can absolutely rappel on a single rope with a GriGri. It offers excellent control and is a very common technique for cleaning a sport route. However, a GriGri cannot be used for a standard two-strand (double rope) rappel where both ends of the rope are thrown down, which is the standard method for multi-pitch descents. This is why many multi-pitch climbers carry a separate tubular device even if they lead with a GriGri.
What is an “anti-panic” function on a belay device?
An anti-panic function is an advanced safety feature found on some assisted braking devices, like the Petzl GriGri+ or the Edelrid Eddy. If a belayer becomes panicked while lowering and pulls the release handle too hard or too fast, the anti-panic feature will automatically re-engage the brake to stop the uncontrolled descent. It is specifically designed to prevent a catastrophic loss of control, offering an extra layer of safety, especially for less experienced belayers.
Which is better for a beginner, an ATC or a GriGri?
This is a topic of healthy debate among instructors. Both are excellent tools, but they teach different habits. Many guides prefer to teach a beginner climber on a manual tubular device like an ATC. This forces the student to master the fundamental principles of brake hand technique without any reliance on mechanical assistance. However, the added safety margin of an ABD like a GriGri is undeniable, and for this reason, many climbing gyms now require them for top-roping and lead climbing. The best choice ultimately depends on the instructor’s philosophy, the learning environment, and whether the climber is a true beginner or an intermediate climber looking to expand their skills.
Risk Disclaimer: Rock climbing, mountaineering, and all related activities are inherently dangerous sports that can result in serious injury or death. The information provided on Rock Climbing Realms is for educational and informational purposes only. While we strive for accuracy, the information, techniques, and advice presented on this website are not a substitute for professional, hands-on instruction or your own best judgment. Conditions and risks can vary. Never attempt a new technique based solely on information read here. Always seek guidance from a qualified instructor. By using this website, you agree that you are solely responsible for your own safety. Any reliance you place on this information is therefore strictly at your own risk, and you assume all liability for your actions. Rock Climbing Realms and its authors will not be held liable for any injury, damage, or loss sustained in connection with the use of the information contained herein.
Affiliate Disclosure: We are a participant in the Amazon Services LLC Associates Program, an affiliate advertising program designed to provide a means for us to earn advertising fees by advertising and linking to Amazon.com. As an Amazon Associate, we earn from qualifying purchases. We also participate in other affiliate programs. Additional terms are found in the terms of service.


