
In this article
Imagine wedging a simple pebble into a crack on a windswept Welsh cliff in 1926, your life depending on its grip. Now picture a modern, computer-designed, anodized aluminum nut settling perfectly into the solid granite of a SW Colorado cliff. The tool has evolved, but the core skill—reading the rock and trusting your judgment—remains the soul of trad climbing. This guide, grounded in the principles of the American Mountain Guides Association (AMGA), is your blueprint for transforming that initial anxiety into the confidence-building readiness needed to place bomber nuts on your first trad leads.
True outdoor competence comes from turning theoretical knowledge into practical, confident action. Mastering passive protection isn’t about memorizing rules from guidebooks; it’s about building a robust, repeatable system for judgment. In this guide, we’ll build that framework together. You’ll learn to trust the physics that make a simple wedge incredibly strong and demystify the kilonewton (kN) ratings stamped on its side. We’ll help you build your toolkit wisely, understanding the crucial differences between standard nuts, offset nuts, and even more specialized gear like Hexes and Tricams. Most importantly, you’ll internalize the Five Pillars of Placement—a simple checklist for placement evaluation to ensure its security. Finally, we’ll lay out a plan to practice with purpose, building the skill and muscle memory you need when you’re on the sharp end of a 60 m rope.
Why Should I Trust a Simple Wedge with My Life?
This is the fundamental question every new trad climber asks, and it’s the right one to ask. Before you can trust your placements, you must first build an intellectual trust in the equipment itself. This section is about understanding the simple, elegant physics that make a nut work and putting its impressive strength ratings into a real-world context.
What is the critical difference between passive and active protection?
At first glance, a trad rack can look like a confusing jumble of metal. The most important distinction to make is between passive and active protection. Passive protection, which includes gear like nuts (also called stoppers, tapers, chocks, or simply wires), is brilliantly simple: it’s a solid piece of metal with no moving parts. Its security comes entirely from being wedged into a narrowing or crack constriction. Think of it as a custom-fit key for a specific keyhole.
Active protection, on the other hand, consists of devices like cams (or SLCDs), which have moving, spring-loaded parts. These lobes expand to actively push against the sides of a parallel crack, generating their own holding power. The key force dynamic is what separates them: wedge-shaped nuts exert minimal outward pressure on the rock, making them the preferred tool for delicate flakes or features, even in softer sandstone. Cams exert significant constant outward pressure, which is fantastic for parallel-sided cracks but can potentially damage certain brittle rock types. This core concept of placing your own gear, instead of relying on fixed protection like bolts or the occasional old piton, defines what is trad climbing.
How does a nut actually hold a fall?
A nut’s incredible strength comes from the simple Wedge Principle. When you fall, your weight directs force downward on the nut. In a tapered crack, this downward pull drives the nut deeper into the narrowest part of the constriction. This action massively increases the friction and mechanical force holding the nut against the rock, effectively wedging it tighter the harder you pull on it.
Modern nuts are far more sophisticated than simple wedges. Their faces are subtly curved and their sides have complex tapers. This crack geometry isn’t for show; it’s designed to create at least three points of contact with the rock, which dramatically increases stability and surface contact area. This elegant design is a direct descendant of the “clean climbing” revolution of the 1970s. Climbers sought ways to protect routes where thousands of first ascents were done without the damaging effect of hammering pitons, and the humble nut became the symbol of this new, conservation-focused ethos. By learning these trad techniques, you’re not just learning a safety skill; you’re participating in a rich history of mastering the art of placing protection while preserving the rock for future generations.
What do the kilonewton (kN) ratings on nuts really mean?
Every certified nut has a strength rating stamped on its side, measured in kilonewtons (kN). This can seem abstract, so let’s make it simple: one kilonewton (1 kN) is roughly equal to the force exerted by a 100 kg (about 225 lb) mass sitting still.
Your standard, medium-to-large nuts are typically rated to hold between 10 and 14 kN. Smaller micro nuts, designed for tiny cracks, might be rated as low as 3 to 7 kN. Now, let’s contextualize that against a fall. A typical, soft-catch lead fall—the kind you hope for—only generates about 2 to 5 kN of force. Even a surprisingly big fall rarely exceeds 6 kN. This means that a good nut placement is more than twice as strong as it needs to be for a typical fall.
But here is the most critical caveat in all of trad: the placement is the weakest link. A 14 kN nut placed in a flaring, shallow, or loose rock crack can fail at less than 2 kN. The number on the nut is a promise from the manufacturer if and only if you, the climber, do your job correctly. Rock quality determines placement security. This shifts the focus from the gear’s inherent strength to the quality of your judgment. It’s a system, and every part matters, including the belayer understanding the forces in a proper belay which manages that force on the other end of the rope.
How Do I Choose and Organize My First Set of Nuts?

With a foundational trust in the gear established, the next step is building your personal toolkit. The goal is to select a versatile starter rack and organize it on your harness for efficiency and speed. An organized rack is a safe rack, allowing you to find the right piece quickly when you’re getting pumped on a classic Yosemite Decimal System 5.8 trad route.
What are the main types of nuts for a climbing rack?
While the world of passive pro is vast, a complete beginner‘s focus should be on a few key types. Your standard nuts are the workhorses of your rack of nuts and should be your first purchase. Brands like Wild Country Rocks or Black Diamond Stoppers feature a simple, effective taper and a subtle curve, making them perfect for the majority of placements you’ll encounter on most trad climbs.
While a set of standard nuts is the foundation, your full trad rack will eventually expand with more specialized passive pro. Hexes are six-sided chocks that are excellent in iced-up cracks or irregular constrictions where a nut won’t sit well. Tricams are unique pieces that can be placed passively like a nut or actively like a cam in horizontal cracks and pockets. For the thinnest of seams, highly specialized Ballnuts offer protection where nothing else will fit, though they are considered advanced gear.
For a beginner, the best path is to start with the core principles of building your first trad rack and begin with one solid set of standard nuts before adding these complementary nuts side by side.
Which beginner nut set is the best for me: DMM, Wild Country, or Black Diamond?
Choosing your first set of nuts often comes down to three excellent industry leaders. DMM Wallnuts are widely considered a top choice for overall versatility. They feature a complex, grooved face and are made from a slightly softer alloy, which helps them “bite” and seat securely in irregular placements, especially in softer rock like the sandstone of Indian Creek. Wild Country Rocks are a timeless classic, beloved for their simple, intuitive design. Their crack shape is straightforward, making them incredibly easy to place and, just as importantly, easy for your partner to clean. They are a fantastic, no-fuss option for any new leader. Black Diamond Stoppers are known for their durability, made from a harder alloy that resists wear. Their shape is a bit more squared-off, which works exceptionally well in blocky granite and makes them very easy to clean, though they may offer slightly less purchase on smoother, more uniform rock.
Nut Sets Comparison: DMM Wallnuts, Wild Country Rocks, and Black Diamond Stoppers
An interactive guide to help you choose the best nut set for your climbing needs.
Key Feature
Complex curved and grooved shape; irregular placements softer aluminum alloy.
Pros
- Excellent “bite” and stability in irregular placements.
- High-quality construction.
Cons
- Complex shape can be slightly harder for a follower to clean.
Best For…
Versatile use on varied rock types, especially where placements are subtle or irregular (e.g., UK gritstone, granite).
Key Feature
Simple, single-curve design; three-point contact system.
Pros
- Very intuitive to place and easy to clean.
- A time-tested, reliable design.
- Generally less expensive.
Cons
- Less effective in flared or complex placements compared to Wallnuts or offsets.
Best For…
Climbers who prioritize simplicity and ease of cleaning, or those climbing in areas with straightforward, regular cracks.
Key Feature
Tapered, rectangular/square shape with rounded edges. Harder alloy.
Pros
- Very easy to clean.
- Durable construction.
Cons
- Harder alloy provides less “bite” on smooth rock.
- Can feel less stable in irregular cracks.
- Floppy wire on larger sizes.
Best For…
Areas with many parallel-sided constrictions. Climbers on a tighter budget.
Once you’ve made your choice, you need to rack them. The carabiners you use are an important part of the system, so understanding choosing the right carabiner for the job is a crucial next step.
What is the most efficient way to rack nuts on my harness?
The standard professional method is to split your standard 10-12 nut sets across two or three carabiners, organized by size. The color-coding on modern nuts makes this easy. For example, the smallest nuts (e.g., sizes 1-4) might go on one carabiner, the mid-range on a second, and the largest on a third. This prevents a massive, unwieldy cluster of gear and makes it faster to select the right nut size.
The best carabiners for this job are ovals or those with a “clean nose” keylock design, as they are less likely to snag on other gear or the nut wires themselves. A strong gate spring is also a plus, preventing the carabiner from opening accidentally.
Pro-Tip: When you rack your nuts, arrange them so that the smallest size on each carabiner is at the front (closest to the gate). This front-loading technique allows you to use your thumb to quickly flick through the nuts one by one, like a deck of cards, to find the perfect size without taking them all off.
This rack organization on your gear loops is critical, but it only works if you’re starting with a foundation of ensuring your climbing harness fits correctly for both comfort and safety.
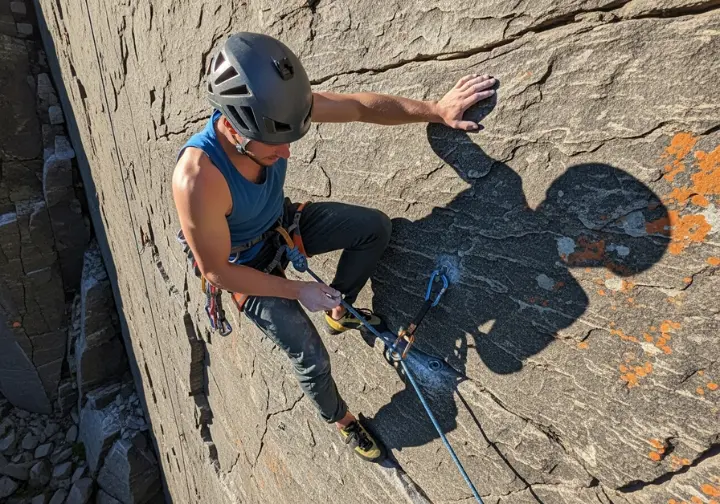
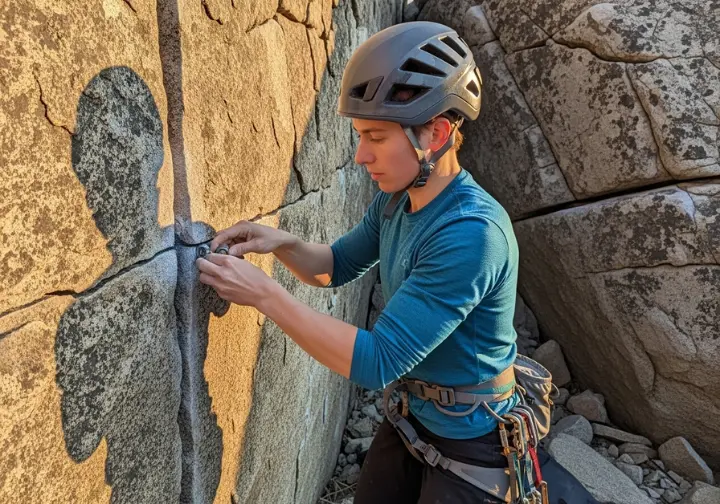
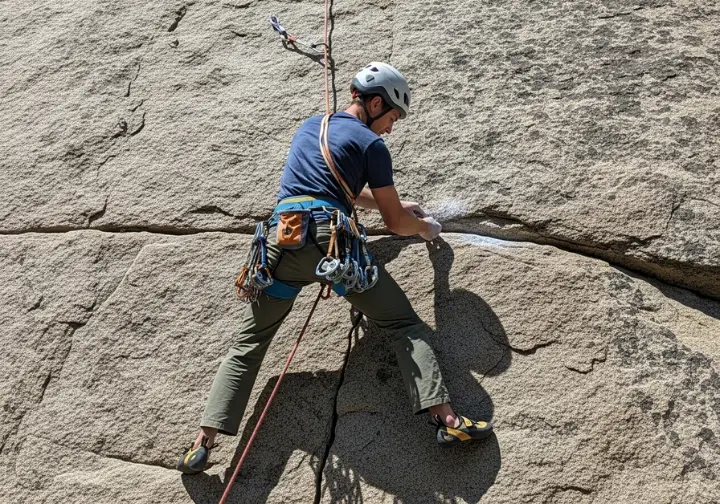
How Do I Place and Evaluate a Nut Like an AMGA Guide?
With your rack organized and hanging at your side, it’s time to approach the rock and learn the craft of placement. This is where theory meets practice. To do it like a professional, you need a repeatable mental checklist. The Five Pillars are a principle-based framework that AMGA guides use to assess every single placement, ensuring it’s a bomber placement.
What are the five pillars of a “bomber” nut placement?
This checklist for placement evaluation should become second nature, a rapid-fire assessment you perform on every piece you place. A bomb-proof placement starts here.
The first and most important is Pillar 1: Rock Quality. Your gear is only as strong as the rock is solid. This is the first step in any rock-quality assessment: check the rock. Tap the area. Does it sound solid, or hollow? Look for and avoid loose flakes, expanding cracks, or detached blocks. Even natural anchors like chockstones or horns need to be checked for integrity.
Pillar 2: Constriction. Nuts are not for parallel-sided cracks. They fundamentally require a taper, a spot where the crack width narrows in the downward direction. A constricting crack is a nut’s best friend. The more pronounced the taper, the more secure the nut.
Pillar 3: Surface Contact. A good placement maximizes the amount of the nut’s surface contact area. More contact equals more friction and more stability. A nut teetering on two small points is far less secure than one seated flush against both walls of the crack. Size-matching accuracy is key here; you want to choose a nut that is the largest nut that fits securely in the chosen spot.
Pillar 4: Direction of Pull. Always anticipate the direction of pull in a potential fall—it’s almost always down and slightly out from the rock. The nut orientation, and especially its cable orientation, must align with this force.
Finally, Pillar 5: Set the Piece. A nut simply placed in a crack can wiggle out from the rope’s movement. Once you’re happy with the placement, place the nut firmly. Then, give it a tug—a sharp, downward pull on the sling to seat it. For smaller or more delicate placements, you may want to set it gently to avoid damaging the rock.
Mastering these pillars is the key to placing single, reliable pieces. The next step in your journey is learning how to combine them into an equalized anchor by building bombproof trad anchors.
What is the #1 mistake beginners make that causes gear to fail?
Mastering the five pillars is the foundation, but even a perfect placement can be rendered useless by one common and dangerous error: failing to extend the placement.
When your rope runs directly through the carabiner on a nut, any movement of the rope—from you climbing past it, from the belayer taking in slack—pulls the placement in multiple directions. This up-and-down or side-to-side motion can easily “walk” or “lift” a nut right out of its constriction, often when you least expect it. This can dangerously increase your level of runout and is a failure of proper runout management.
The solution is simple and non-negotiable: ALWAYS use at least a quickdraw to connect your rope to the nut. A quickdraw creates a flexible pivot point, isolating the nut from the rope’s movement and ensuring the pull remains in the intended downward direction. On trad routes that wander, or when placing gear before or after a roof, you should use an even longer sling (an alpine draw) to create a straighter rope path and reduce rope drag. This is a fundamental application of gear, and a comprehensive guide to quickdraws will explain their anatomy and use in greater detail.
How do I remove (or ‘clean’) a stuck nut?
Now that you know how to place a secure piece, the next step in becoming a good partner is learning how to remove it efficiently. The golden rule of cleaning is: look before you touch. Analyze how the trad leader placed the nut to understand how to reverse the process.
Your techniques should be progressive. Start with the gentlest method: a simple upward wiggle with your fingers is often enough. If that fails, escalate to firm but controlled upward taps on the bottom of the nut with your nut tool. For more stubborn pieces, you can use the hook on your nut tool to get behind the nut and lever it out, or use the tool’s point to jab at the opposite side of a chockstone that might be holding it in.
Pro-Tip: Many climbers underutilize the hook on their nut tool. For a truly stuck nut, try placing the hook on the nut cable as close to the head as possible and give it a firm tap with the palm of your hand. This direct, upward shock can often break the friction when straight tapping on the nut itself fails.
Remember to be patient and methodical. However, if a nut is truly “welded” in place from holding a fall, know when to give up. A $10 piece of gear is never worth a dangerous, exhaustive struggle high off the ground or damaging the rock trying to wrench it out. The ease of removal and re-usability are part of the clean climbing ethos; sometimes you have to leave nuts behind.
How Can I Develop Sound Judgment and Practice Safely?
These hands-on skills are vital, but long-term safety and competence in trad climbing come from building experience in a structured, progressive way. Sound judgment isn’t something you read about; it’s something you build through mileage, guided by professional standards and proven practice methodologies.
What are the official AMGA standards for trad climbing experience?
The American Mountain Guides Association (AMGA) is the organization that sets the highest standard for professional climbing instruction and guiding in the United States. Looking at their prerequisites for instructor certification can give us a valuable benchmark for what the professional community considers foundational experience.
To even enroll in the AMGA Single Pitch Instructor (SPI) course, a candidate must have a documented history of leading a minimum of 15 traditional climbing routes. To be eligible for the final assessment and certification, this requirement increases significantly to 40 documented trad leads. This data isn’t meant to be a barrier or a rigid rule for recreational climbers. Rather, it serves as a powerful illustration of the “mileage” that the top professional body considers necessary to achieve basic competency and the ability to manage risk for others. You can review the full AMGA’s official Single Pitch Instructor program standards on their website. For those interested in a broader view of instructional qualifications, comparing this to the path to CWI certification for indoor climbing can be very insightful.
What is a safe, progressive way to practice placing nuts?
Reaching that level of experience safely requires a deliberate, ground-up approach. You don’t just jump on the sharp end; you build the skills piece by piece, starting on an easy trad climb with a difficulty grade in the 5.6–5.8 starter range.
Step 1: Ground School. This is non-negotiable. Practice placement occurs at ground level practice first. Spend hours at the base of a crag, walking along and placing nuts. Find every crack, constriction, and pod you can. Place a nut, evaluate it with the Five Pillars, and then have a partner try to pull it out. This builds muscle memory for the physical motions without any risk.
Step 2: Mock-Leading. Once you are proficient on the ground, the next step is to place gear while on the complete security of a toprope. This allows you to experience the workflow, pump, and mental stress of leading without any real consequence if a piece fails. You place your gear, clip the rope, and your belayer can even weight each piece after you climb past to give you feedback on its quality.
Step 3: Mentorship. The single fastest and safest way to practice trad is by following an experienced mentor or hiring a certified guide. Following a seasoned leader up a route allows you to clean their gear, analyze their gear placements, and understand why they chose a specific piece for a specific spot. This is the apprenticeship that turns a novice into a competent partner. This entire progression is a core tenet of how to learn rock climbing safely.
Where can I get my own printable Pocket Card for the crag?
To help you apply these principles in the field, we’ve created a tool you can take with you in your crag pack. This printable pocket-card is designed to bridge the gap between reading this article and standing at the base of a climb. It transforms these concepts into a persistent field tool, reinforcing the most critical safety information at the moment it’s needed most.
Your Free Trad Nut Pocket Card
Bridge the gap between reading and doing. This printable pocket-card reinforces the 5 Pillars of a bomber placement and provides a quick guide for cleaning stuck gear. Download it, print it, and put it in your pack as a field-ready safety tool.
Side one of the card features a simple visual checklist of the Five Pillars, complete with icons for quick reference and a bold question at the bottom: “Did you extend it?” Side two provides a simple flowchart for removing a stuck nut and a bulleted list of common mistakes and their solutions. This card is more than a cheat sheet; it’s a tool to help you build the right habits from the very beginning, a form of quantified quality check for every placement.
Conclusion
The journey from a nervous beginner to a confident trad leader is one of the most rewarding in all of climbing. It’s a path of continuous learning, but it rests on a few simple, powerful truths. The gear itself, with its 10-14 kN ratings, is incredibly strong, but a placement is only ever as strong as your judgment. Your repeatable framework for exercising that judgment is the Five Pillars: Rock Quality, Constriction, Surface Contact, Direction of Pull, and Setting the piece.
Remember that failing to extend your placements with a quickdraw or sling is the most common and dangerous beginner error, leading to gear “walking” out of even perfect constrictions. Finally, true competence comes from safe, structured practice: start with ground school, progress to mock-leading on a toprope, and seek out mentorship whenever possible.
Download your free Trad Nut Pocket Card now and start building the judgment that will keep you safe for a lifetime of adventure.
Frequently Asked Questions about Climbing Nuts
What is the difference between trad and sport climbing?
Trad vs sport climbing comes down to protection. Trad climbing requires the leader to place their own removable protection (like nuts and cams) as they ascend, while sport climbing utilizes a pre-established line of permanent, fixed bolts for protection. Consequently, trad climbing involves significantly more gear, constant risk assessment, and a greater degree of self-reliance.
How many nuts should a beginner carry?
For how many nuts to carry, a standard beginner rack should consist of one full set of standard nuts, which typically includes size 4–11 nuts, sometimes up to size 13. This provides a versatile range of options for most moderate climbs without being overly heavy, complex, or expensive to start.
Can you place nuts in horizontal cracks?
Yes, nuts can be placed very securely in horizontal cracks, but orienting for the direction of pull is absolutely critical. The nut must be placed so that a downward fall pulls it sideways into a constriction within the horizontal crack, not straight out of the opening. It is crucial to always extend these placements with a sling to ensure the force is directed properly.
How hard should I pull to ‘set’ a nut?
You should give the nut a single, sharp, firm tug downwards on the attached quickdraw or sling. The goal is not to yank it with your full body weight, but to give it a decisive “snap” that wedges it securely into its final position. This prevents it from wiggling or shifting out of place due to rope movement as you climb past.
Risk Disclaimer: Rock climbing, mountaineering, and all related activities are inherently dangerous sports that can result in serious injury or death. The information provided on Rock Climbing Realms is for educational and informational purposes only. While we strive for accuracy, the information, techniques, and advice presented on this website are not a substitute for professional, hands-on instruction or your own best judgment. Conditions and risks can vary. Never attempt a new technique based solely on information read here. Always seek guidance from a qualified instructor. By using this website, you agree that you are solely responsible for your own safety. Any reliance you place on this information is therefore strictly at your own risk, and you assume all liability for your actions. Rock Climbing Realms and its authors will not be held liable for any injury, damage, or loss sustained in connection with the use of the information contained herein.
Affiliate Disclosure: We are a participant in the Amazon Services LLC Associates Program, an affiliate advertising program designed to provide a means for us to earn advertising fees by advertising and linking to Amazon.com. As an Amazon Associate, we earn from qualifying purchases. We also participate in other affiliate programs. Additional terms are found in the terms of service.


