

In this article
Welcome to the world of bouldering. You’re ready to move past the gym’s worn-out rental equipment to get your own new bouldering gear, but stepping into the gear market can feel overwhelming. The sheer volume of specialized gear and the fear of making an expensive mistake is a common hurdle for new climbers. This guide cuts through the noise. We will provide a simple, phased approach to buying the right gear for bouldering, focusing on what you need, when you need it. This strategic method ensures you get the best value while building a solid foundation of skill and safety. We’ll cover the bare essentials for the gym, safety equipment for the outdoors, a comfort kit for progression, and how to care for your new investment.
Your Bouldering Gear Hierarchy: What to Buy and When
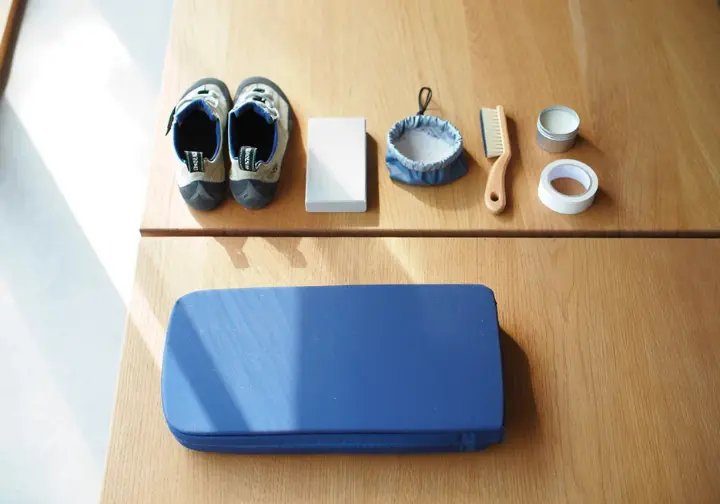
To immediately answer your primary question—”What do I need to start bouldering?”—we’ve organized the gear into a clear, prioritized hierarchy. This tiered system helps you manage your budget by starting affordably at an indoor gym and investing more as you commit to the sport and venture outdoors. Think of it as building a complete starter kit piece by piece.
- Tier 1: Absolute Essentials
- Climbing Shoes
- Chalk
- Chalk Bucket
- Tier 2: Outdoor-Only Essential
- Crash Pad
- Tier 3: Recommended Progression Kit
- Bouldering Brush
- Climbing Tape
- Skin Care (Salve, File, Clippers)
Tier 1: The Bare Minimum Gear for Indoor Bouldering
This is the foundational kit every new climber needs to stop renting and start training effectively. Choosing the right climbing gear from this tier has the most direct and immediate impact on your skill development. These items are your entry ticket to consistent practice and tangible progress.
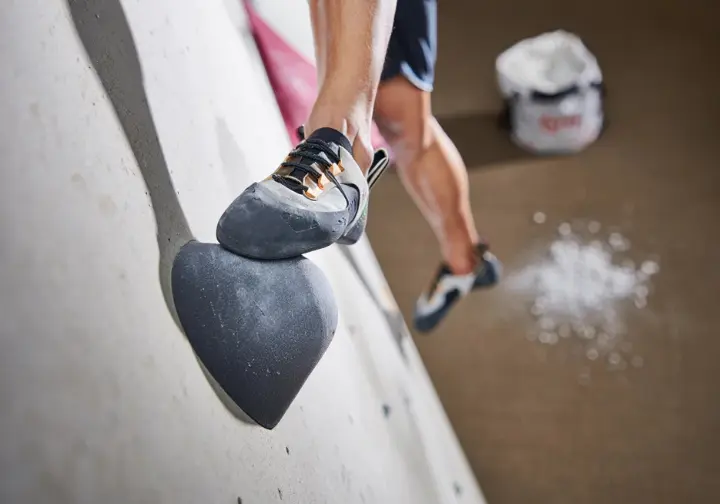
Climbing Shoes: Your Most Important First Purchase
Climbing shoes, often called rock shoes, are your most important first purchase. Their sticky rubber and precise fit are non-negotiable for standing on small holds, providing a performance boost that regular sneakers simply cannot match. A proper fit is paramount for learning to trust your feet and transfer power to the wall. Resist the temptation to choose overly comfortable shoes; a snug fit with no dead space in the heel or arch is what you need. Your toes should be flat or slightly curled, touching the front of the shoe but not in painfully scrunched, tight climbing shoes.
We recommend a neutral, relatively stiff shoe for beginners. This design encourages the development of proper footwork and builds intrinsic foot strength. It prevents you from forming bad habits by relying on the aggressive downturn of advanced shoes before your technique is ready. Beginners must learn basic footwork, and these shoes force that. Transitioning from rental to personal climbing shoes is a big step, so making the right choice matters.
The material of the shoe also affects its fit over time. Unlined leather shoes can stretch up to a full size, which can make initial sizing difficult. In contrast, synthetic shoes offer a consistent fit with minimal stretch, making them a more predictable choice for a first pair. When you find the right pair, they will quickly become your favorite climbing shoes. For a deeper look at all the variables, REI has an excellent guide on how to choose climbing shoes.
Popular Beginner Models
| Model Name | Key Feature | Best For |
|---|---|---|
| La Sportiva Tarantula | All-around comfort and performance | Versatility and durability |
| Black Diamond Momentum | Soft, breathable knit upper | Comfort during long sessions |
| Evolv Defy | Asymmetrical comfort design | A first step toward performance fit |
| Scarpa Origin | Flat profile, dual strap closure | Ease of use and quick adjustments |
Chalk: The Science of Superior Grip
Climbing chalk, primarily magnesium carbonate (MgCO3), serves one critical function: it absorbs sweat from your hands. By keeping your skin dry, it dramatically increases the coefficient of friction between your fingers and the climbing hold, giving you a more secure grip on the stone. It’s not about adding a layer, but about removing moisture. This is one of the most fundamental rock climbing accessories.
Chalk comes in three main forms, each with pros and cons. Loose chalk offers excellent coverage but can be messy and is often restricted in climbing gyms. Chalk balls contain loose chalk in a porous fabric, reducing dust and mess, making them a gym-friendly choice. Liquid chalk, which contains alcohol, provides a durable, dust-free base layer but can be very drying on the skin. You can find detailed breakdowns of the differences in traditional climbing chalk to suit your preference.
Some chalks contain additives like drying agents or essential oils. If you have sensitive skin, you may want to look for purer formulas without these extras.
Chalk Selection Matrix
| Chalk Form | Mess Level | Application Speed | Gym Friendliness |
|---|---|---|---|
| Loose Chalk | High | Fast | Low (often banned) |
| Chalk Ball | Medium | Medium | High |
| Liquid Chalk | Low | Slow (must dry) | Very High |
Chalk Bag vs. Chalk Bucket: A Boulderer’s Choice
It’s important to understand the difference between a chalk bag and a chalk bucket. A chalk bag is smaller, worn on a waist belt with a chalk bag slung across the back, and is ideal for roped climbing where you need access to chalk while on the wall. A bouldering bucket, essentially a large chalk bag, sits on the ground and is the standard choice for bouldering.
A bucket’s practical advantages are clear for boulderers. Its wide, stable base prevents spills as you move between the mats and the wall, and the large opening allows for easy, two-handed chalking before an attempt. This is a small detail that enhances the bouldering workflow.
Many chalk buckets also come with features tailored to the boulderer’s needs. You’ll often find multiple brush holders, zippered pockets for phones and climbing tape, and a secure roll-top or magnetic closure. These features keep your essentials organized and prevent a chalk explosion inside your larger gym bag, making it a key piece of equipment for bouldering beginners.
Tier 2: The Outdoor Bouldering Safety Imperative
Moving your bouldering from the controlled environment of a climbing gym to the unpredictability of real rock outdoors introduces a new set of risks. This section focuses on the single most important piece of gear you must have before climbing outside. It is not an accessory or a convenience item; it is an essential layer of protection.
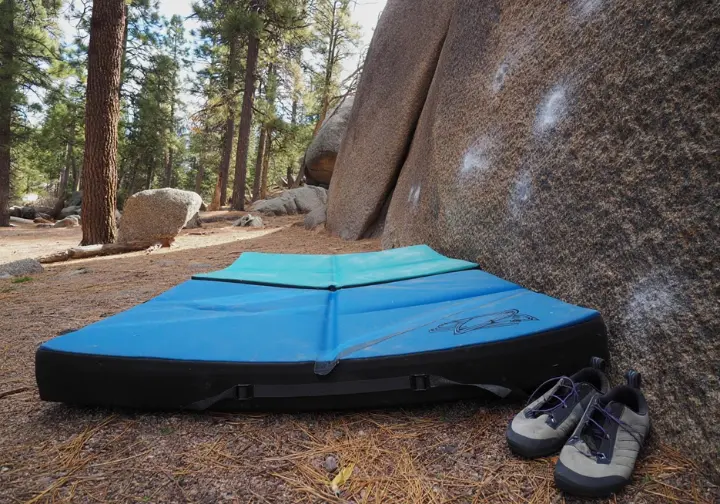
Understanding the Crash Pad: Your Personal Safety Net
Let’s be clear: a crash pad, also called a bouldering pad or bouldering mat, is a non-negotiable, mandatory piece of safety equipment for outdoor bouldering. It is the only thing that protects a climber from the hard, uneven ground during a fall from a boulder problem. Its construction is a simple but effective two-foam system. A stiff, top layer of closed-cell foam distributes the force of your impact, while a thick, soft middle layer of open-cell foam absorbs the energy and cushions your landing.
When considering how to choose a bouldering crash pad, thickness is a primary factor. For a first, all-around pad, look for a model that is 4 to 5 inches (10-13 cm) thick. This provides a great balance of fall protection and portability for most bouldering situations.
A critical concept to understand is “bottoming out.” This happens when a fall’s force is great enough to compress the foam completely, causing you to hit the ground through the pad. A quality pad with the right foam density and sufficient thickness is specifically engineered to prevent this from happening when a climber slips.
Pad Folding Styles: Hinge vs. Taco Explained
Crash pads fold for transport, and there are two main designs. The “Hinge Fold” uses two separate foam sections joined by fabric. This style folds flat, making it easy to store and carry, and it lays perfectly flat on even ground. Its major downside is the “gutter” at the hinge, which creates a dead spot with poor protection.
The “Taco Fold” design uses one continuous piece of foam that bends in the middle. Its main advantage is that it offers continuous, uninterrupted protection with no dead spot. However, it doesn’t store flat, can be awkward to carry, and the constant fold can degrade the foam over time. When you are buying your first bouldering pad, these are the core differences to weigh.
For most beginners, a medium-sized hinge-style bouldering pad is the most versatile and practical first choice. It’s easier to manage and transport. The hinge gap is a manageable issue that can be mitigated with smart, strategic crash pad placement at various bouldering areas or under particularly sketchy boulders.
Tier 3: The Comfort, Progression, and Skin Care Kit
Once you have your essential safety and performance gear, it’s time to consider the accessories that enhance comfort and accelerate progress. These items are not strictly mandatory for a complete beginner, but they prevent minor issues, allow you to climb longer, and help you practice more effectively.
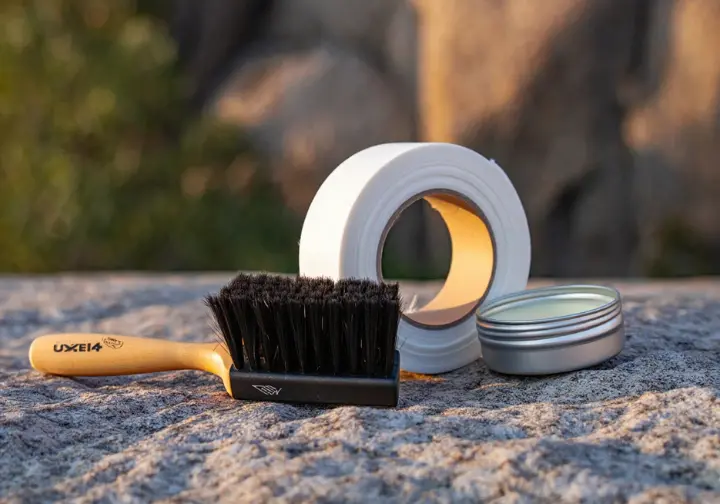
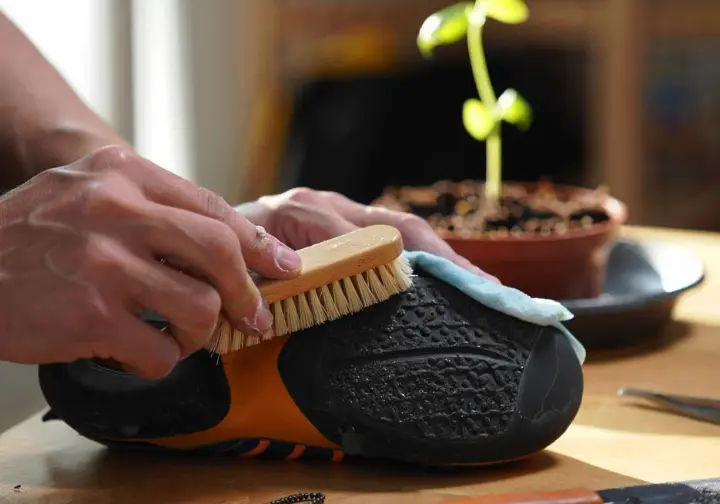
The Bouldering Brush: Clean Holds, Better Grip
The primary function of a bouldering brush is to clean holds on the bouldering wall. By removing excess chalk, caked-on shoe rubber, skin oils, and dirt, you restore the hold’s natural texture. This simple tool can dramatically improve friction and give you a noticeably better grip, which is a key part of the art of brushing holds.
Brushes come with two main bristle types: boar’s hair and nylon. Boar’s hair is generally considered the gold standard for its ideal combination of stiffness and cleaning ability. Nylon is a durable and effective vegan-friendly alternative that also gets the job done well and is one of the most common climbing brushes.
When climbing outdoors, remember to practice good brushing ethics. Brushing helps preserve rock for other climbers and is a key part of the “Leave No Trace” ethos. However, over-aggressive brushing can damage delicate rock surfaces. Never use a wire brush, as it will permanently scar the rock.
The Climber’s Skin Toolkit: Taping and Healing
For many new climbers, skin health quickly becomes a limiting factor in their training. The abrasive nature of climbing holds can cause painful “flappers” (torn calluses) and split fingertips that can end a bouldering session abruptly. Learning how to deal with bad skin is part of the sport of climbing.
Standard athletic tape is a versatile tool. It can be used to protect skin on sharp holds, provide structural support to finger tendons/pulleys, and, most commonly, to create a protective layer over a torn flapper so you can continue climbing with less pain.
A proactive skin kit is a wise investment. It should contain nail clippers (short nails are a must), a skin file or sandpaper for gently sanding calluses and prevent them from tearing, and a moisturizing climbing salve. Here’s a pro tip: If you get a flapper, clean the wound, trim the dead skin, apply an antiseptic, and tape it up to finish your session. Applying a balm after climbing promotes healing and keeps your skin pliable for the next session.
Authority Building: Smart Ownership and Sustainability
This guide is more than a shopping list; it’s about fostering a deeper understanding of your relationship with climbing and your equipment. Proper maintenance maximizes the value of your gear, while sustainable purchasing choices allow you to align your hobby with responsible practices from the very beginning.
Making Your Gear Last: Essential Maintenance
Proper gear care extends the life of your expensive equipment, ensures its safety performance, and provides the best long-term value from your investment. Your gear is a set of tools, and like any good tool, it performs best when well-maintained.
Following proper care instructions for climbing shoes is simple. Always air them out after every session. Never leave them in a hot car, as the heat can delaminate the rubber glue. To clean them, use mild soap and cool water, then let them air-dry completely away from direct sun or heat sources.
Your crash pad also requires care to maintain its protective qualities. Whenever possible, store it open and unfolded to prevent permanent creasing and foam degradation. You can spot-clean the outer cover, and you should promptly patch any tears to protect the internal foam. A little care will extend the life of your crashpad significantly.
The Sustainable Start: Eco-Friendly Gear Choices
Aligning your new hobby with environmental responsibility is a great practice to start from day one. When shopping, you can look for specific eco-friendly features in your gear. This includes climbing shoes made with recycled rubber, vegan shoes that use durable synthetic materials instead of leather, and gear made with recycled fabrics.
Third-party certifications like bluesign® are a good indicator of a brand’s commitment to sustainability. This standard ensures that textiles are made with responsible chemical use and minimal environmental impact. For those wanting to learn more, there are great resources on the best sustainability certifications for climbing gear.
Finally, embrace the “reduce, reuse, repair” mantra. When your first pair of shoes wears out, consider resoling them. This is a cost-effective and sustainable alternative to buying a new pair. You can even connect with local climbing organizations or guides to ask about gear swaps or resoling services.
Conclusion: Your Smart Start Action Plan
Starting a new sport should be exciting, not confusing. By following a strategic approach, you can build your bouldering gear for beginners kit intelligently, ensuring you have what you need to progress safely and have fun.
- Start with Rentals: For your first few gym visits, rent shoes. This confirms your interest before you make a financial commitment.
- Prioritize the Essentials First: Your first purchase should be a well-fitting, neutral-profile pair of shoes and a chalk bucket. The trio of climbing shoes, a chalk bag, a crash pad is a great start.
- Invest in Safety for the Outdoors: Before your first trip to real rock, a high-quality crash pad is a non-negotiable safety investment.
- Build Your Care Kit Progressively: As you climb more, a brush, tape, and a skin care kit become invaluable. These small purchases prevent injuries and maximize your time on the wall.
- Think Long-Term and Sustainably: Care for your own gear to make it last. When it’s time to replace or upgrade, consider eco-friendly options and repair or resole whenever possible. This leads to a more enjoyable bouldering experience overall.
Frequently Asked Questions about Beginner Bouldering Gear
How much does it cost to get a full beginner bouldering setup? +
When do I know it’s time to upgrade from my beginner climbing shoes? +
What is the most common mistake beginners make when buying gear? +
Do I need a helmet for bouldering? +
We are a participant in the Amazon Services LLC Associates Program, an affiliate advertising program designed to provide a means for sites to earn advertising fees by advertising and linking to Amazon.com. As an Amazon Associate I earn from qualifying purchases. We also participate in other affiliate programs. The information provided on this website is provided for entertainment purposes only. We make no representations or warranties of any kind, expressed or implied, about the completeness, accuracy, adequacy, legality, usefulness, reliability, suitability, or availability of the information, or about anything else. Any reliance you place on the information is therefore strictly at your own risk. Additional terms are found in the terms of service.


