
In this article
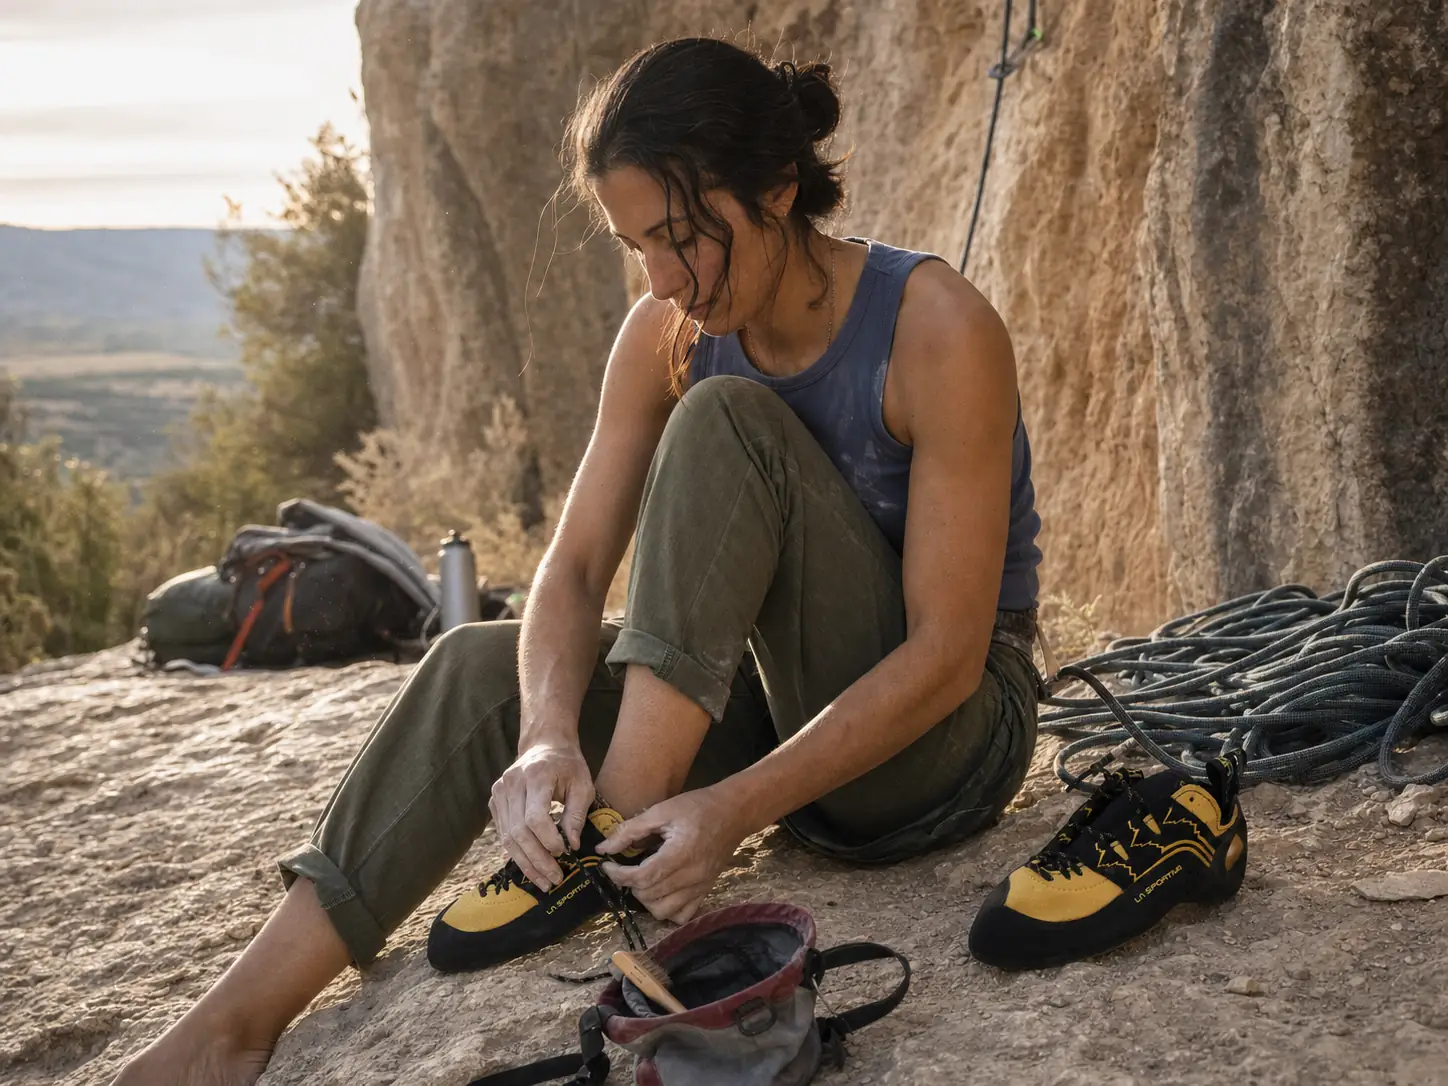
There is a shoe that will let you stand on a dime edge forty feet up a vertical face, and there is a shoe that will let you keep tension through a kneebar in a cave. They are not the same shoe, and no amount of “best overall” ranking changes that. Ask sport climbers who have been at it a decade what finally fixed their footwear problem and you get a consistent answer: they stopped shopping by review scores and started shopping by the angle of the rock they were actually on. This guide sorts the best climbing shoes for sport climbing by route angle first, then covers what the roundups skip — how to size for a thirty-move pitch instead of a six-move boulder, when to resole, and how to get through a redpoint season without wrecking your feet.
How Downturn, Asymmetry, and Closure Actually Work
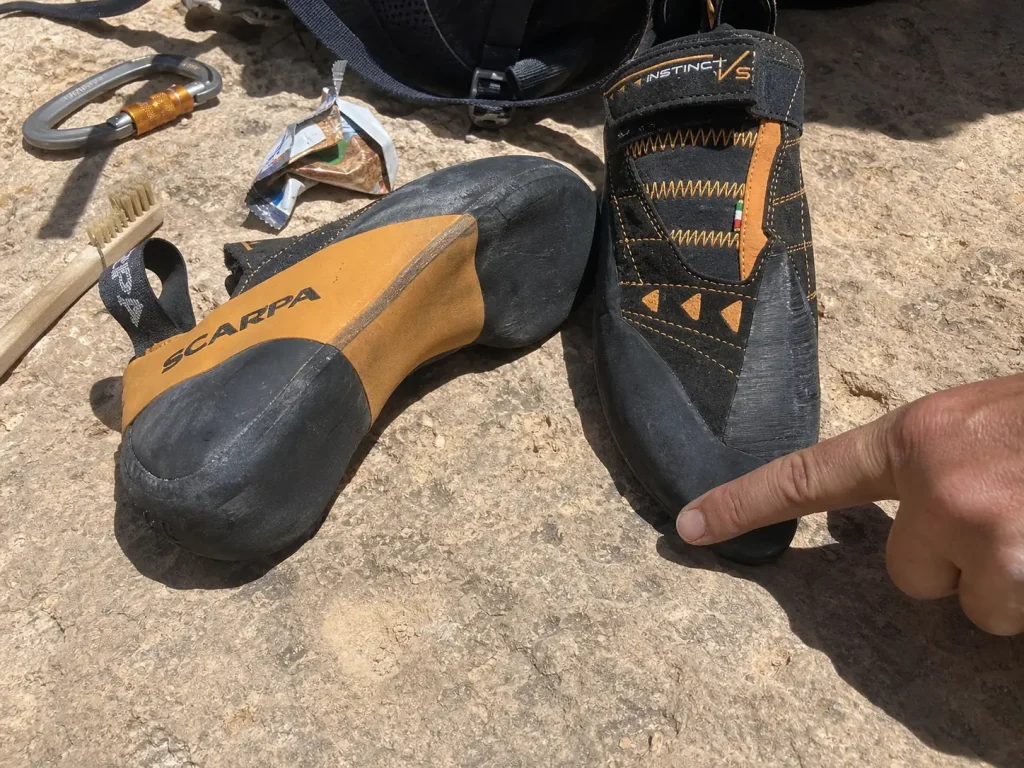
Every product page lists aggressive downturn like it is one dial you turn up as you get stronger. It is not. Two shoes can carry nearly identical downturn and behave like completely different tools on the same route, because the second variable is doing something else entirely. Sorting this out is the difference between buying a shoe that suits your climbing and buying the shoe that looked most serious on the shelf. If you want the wider version of this conversation across every discipline, our guide to matching a climbing shoe to your discipline, foot shape and rock covers the ground this section compresses.
The Downturn Axis and What It Buys You on Steep Rock
Climbing shoe downturn is the curve that pulls the toe box downward, so the shoe sits like a hook rather than a flat platform, in contrast to the flat last climbing shoe your feet actually enjoy standing in. On an overhanging route, that curve lets you pull with your foot instead of just standing on it. Your toes stay loaded and engaged even when the wall is leaning away from you, which is the whole game on steep terrain.
On vertical rock, that same curve does very little for you and costs you comfort. A heavily downturned shoe on a dead-vertical face is a tool being used sideways. It still works, because good footwork works in most shoes, but you paid for a feature you are not using and you are standing in a shape your foot resents.
The practical read: more downturn as the wall leans back, less downturn as it stands up. An aggressive downturned shoe earns its keep in steep sport climbing and quietly taxes you everywhere else. If you are not sure yet whether the aggressive shoe is the right move for where your climbing actually is, our breakdown of whether you’re actually ready for an aggressive shoe is the honest version of that decision.
The Asymmetry Axis and Precision on Vertical Edges
Asymmetry is a different thing wearing similar marketing language. It describes how far the shoe angles inward toward the big toe, concentrating force onto a single point rather than spreading it across the front of the foot. High asymmetry gives you a precise tip to place on small holds. It is a targeting feature, not a pulling feature.
This is why the two axes have to be read separately. An asymmetric climbing shoe can be strongly angled with only moderate downturn, which makes it excellent on technical face climbing and no better than adequate on a roof. Another shoe can be heavily downturned with a blunter, less asymmetric toe, which makes it superb in deep pockets and on steep terrain and genuinely poor at standing on a credit-card edge. Reading the spec sheet as one number labeled aggressiveness collapses two useful pieces of information into a marketing word.
Stiffness, or Why Two Shoes Edge Differently
Stiffness is the third variable and the one climbers underrate most, and it comes down to two things: sole thickness and whether the shoe uses split-sole construction. A thicker sole and a full midsole hold their shape when you load them, so a tiny edge stays a usable platform. Split-sole construction cuts the midfoot away entirely, which buys flex and toe-scumming ability at the cost of edging support. A soft shoe folds around whatever it touches, which is exactly what you want when you need rubber to wrap a rounded feature and exactly what you do not want when the hold is the width of a pencil.
Soft shoes also demand more from your feet. The rigid shoe does some of the work of holding a position; the soft shoe hands that work back to your toes and calves. That is a fair trade on steep terrain where sensitivity is the priority. It is a bad trade on a long vertical pitch where your feet are already the limiting factor.
Here is where most people go wrong: they buy the most downturned, softest, most aggressive shoe available because it resembles what the strong climbers at the gym are wearing, then discover it is close to useless on the vertical warm-up pitch that shares the same crag day. The shoe was never bad. It was answering a question the route was not asking.
Laces, Velcro, and Slippers on a Redpoint Burn
Closure matters more in sport climbing than in almost any other discipline, because you are in the shoe for a long time and you take it on and off between attempts all day.
A lace-up climbing shoe lets you tune tension along the length of the foot, which is genuinely useful on a long pitch where you want the toe box snug and the midfoot just secure. You can also slacken it at a rest, which sounds trivial until you are hanging on a draw at move twenty with numb feet. A Velcro closure is faster between burns and holds tension well, which is why it dominates on steep terrain where sessions are short and frequent. A slipper climbing shoe gives sensitivity and speed and not much else, which makes it ideal as a warm-up shoe and mediocre for the send.
Closure also does quiet work on fit volume. A lace-up will accommodate a high-volume shoe requirement or cinch down for a low-volume shoe foot far better than two strips of Velcro can, which is one reason the same model in the same size can feel entirely different on two people. This is most of what is actually going on behind the men’s climbing shoe and women’s climbing shoe split: the gendered fit is really a volume and last-width difference, and plenty of climbers are better served by the version that does not match the label.
For the complete version of that argument, including how each closure ages, we have the full breakdown of laces versus Velcro.
Vertical and Technical Faces Need Shoes Built to Edge
Vertical sport climbing is a footwork game rather than a power game. The route is not pushing you off the wall. You fall because your foot rolled off something the size of a credit card edge, usually while you were thinking about your hands. What you need here is a platform that stays rigid under load on almost nothing, and that is a different shoe from the one that wins in a cave.
This is the terrain of technical granite edges, vertical limestone with small pockets, and welded tuff faces where the holds are subtle enough that you have to trust rubber you cannot really feel. Micro-edging on this rock rewards two things: a stiff platform that does not fold, and enough asymmetry to put a precise point on the hold. Soft, blunt shoes turn a small edge into a guess.
What you give up is real and worth naming. A dedicated edging beast is worse at toe-hooking, less forgiving on long hangs, and less pleasant to spend a full day in. If most of your climbing is moderate-angle gym mileage and general crag days, a high-performance climbing shoe built purely for a crimpy route is a second shoe rather than a first one, and an all-arounder shoe will serve you better on the bolted route you actually get on most weekends.
Scarpa Instinct VS — Best for Vertical and Technical Faces
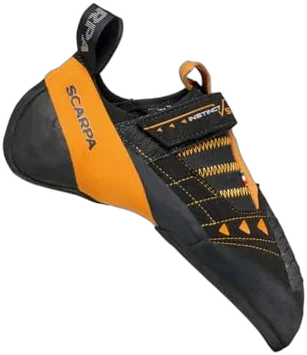
The Scarpa Instinct VS is the shoe you reach for when the route is steep enough to be interesting and vertical enough that your feet decide the outcome. The stiffness is the point. On a technical face, the difference between a hold you can stand on and a hold you slide off is often whether the shoe kept its shape when you weighted it, and this one does.
The trade-offs are honest. It is a firm shoe, so it asks more of your feet on the first few sessions than a soft slipper does, and it is not the tool for wrapping rubber around a rounded tufa. Scarpa’s shoe last also runs its own way, which matters more than the model name if you have a wide foot or a low-volume one, and the Vibram XS Grip2 rubber on it is a compound that rewards being kept off warm-up laps. Our guide to how the rest of the Scarpa lineup is laid out sorts the VS from the VSR and the LV, which is the distinction people get wrong most often when buying this shoe online.
Butora Acro Comp — Best Pure Edger

Most aggressive shoes go soft as they go downturned, on the theory that steep climbing needs sensitivity. The Butora Acro Comp does not, and that makes it a specialist worth knowing about. It keeps a rigid platform inside an aggressive shape, which is the exact profile for crimpy vertical and slightly-past-vertical routes where the holds are small but the wall still asks you to stand rather than pull.
Butora’s own FriXion rubber is part of why that works. It is a firmer compound than the softest sticky rubbers on the market, which is a liability on a smeary tufa and an asset when you are asking a two-millimeter edge to stay a platform for the length of a hard sequence.
The honest caveat: a stiff aggressive shoe is unforgiving about sloppy foot placement. It will not save a foot that lands half on the hold. Climbers who came up on soft gym shoes sometimes find the first few sessions frustrating for exactly this reason, then find their footwork tightens up because the shoe stopped covering for them.
Match the shoe to the terrain, not the grade. A 5.11 on a vertical face and a 5.11 in a cave want opposite shoes, and climbers who shop by grade end up owning three versions of the same tool. Look at the angle of the route you actually want to send this season, then buy for that.
Moderate Overhang Is Where Most Sport Routes Live
Most sport crags are not caves. They sit somewhere between just-past-vertical and maybe twenty degrees over, with the occasional steeper section thrown in to keep you honest. This is the angle band where a climber spends the bulk of a season, and it is the reason the “one shoe” question has a real answer rather than a dodge.
In this band, moderate downturn paired with medium stiffness is the balance point. You get enough edging capability for pockets and crimps, enough give to smear when the rock turns rounded, and enough comfort to stay in the shoe through a full session instead of pulling it off between every burn. A specialist would beat it at either extreme. Nothing beats it across the whole middle.
Both picks in this section come in men’s and women’s lasts, and since this is a general recommendation rather than a gendered one, both variants are worth linking. The difference is not just sizing: heel cup volume and last shape change too, which our guide to how women’s lasts differ beyond just a smaller size walks through properly.
La Sportiva Katana Lace — Best Overall for Sport Climbing
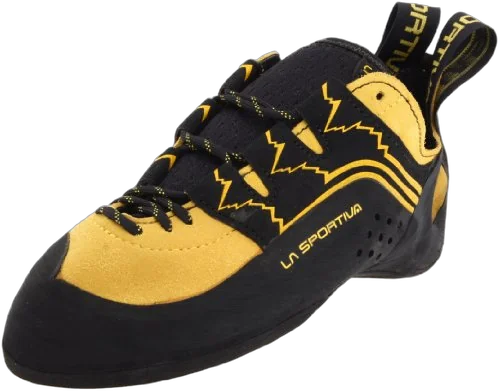
The case for the La Sportiva Katana Lace (men’s · women’s) is coverage rather than peak performance. It can stand on small footholds on a forty-five degree overhang and come close to what dedicated aggressive shoes manage there, while staying stiff enough to edge on a vertical face and soft enough to smear when the rock turns friction-dependent. That is a genuinely unusual range.
The lace closure is doing real work in a sport context. You can run the toe snug and the midfoot only secure, then slacken everything at a rest without taking the shoe off. On a twenty-five move pitch with a mid-route stance, that is worth more than it sounds, and on an onsight attempt where you cannot pre-plan the rests it matters more still.
Underneath it, La Sportiva’s P3 rand system is the reason the shoe keeps its shape rather than relaxing into a slipper after a season. That is a different design philosophy from the no edge technology approach some of their other models use, where the rubber wraps the toe with no defined edge at all and asks your foot to do the shaping. Neither is better in the abstract. The P3 build simply holds its downturn longer, which is what you want in a shoe you plan to resole rather than replace.
The limitation to know about before you buy: La Sportiva lasts run narrow, and the Katana is not the exception. If your feet are wide, this shoe will tell you so within ten minutes. Our full La Sportiva lineup guide and how their lasts run covers which models in the range actually accommodate a wider foot, which saves a return shipment.
La Sportiva Skwama — Best for Moderate Overhang and All-Day Sensitivity
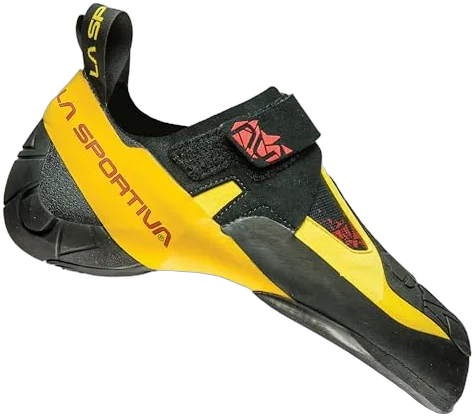
If your sport days lean toward pocketed or overhanging limestone rather than technical edging, the La Sportiva Skwama (men’s · women’s) is the version of the all-arounder tuned toward feel. The softness pays off in two places: wrapping rubber around rounded features, and toe-hooking, where a stiff shoe fights you.
The cost is edging precision. On a genuinely small edge, a soft shoe folds where a stiff one holds, and you notice it immediately. This is the Katana versus Skwama decision in one sentence: pick the Katana if your season includes real vertical technical routes, pick the Skwama if it is mostly steep and pocketed.
The lack of a break-in period is worth flagging because it changes how you size the shoe, which the sizing section below gets into properly.
In Steep Caves and Roofs, Soft and Grabby Wins
Cave climbing rearranges the whole priority list. On a real cave pitch, your feet are not standing on anything. They are pulling. Toe hooks, heel hooks, keeping tension through a kneebar so your hands get a half-second of relief. Edging precision stops mattering somewhere around the point where the wall passes thirty degrees over, and the ability to wrap rubber around a feature starts mattering more than anything else on the spec sheet.
The profile here is soft and heavily downturned. The shoe should conform rather than hold a rigid platform, and the toe box should be built to take load from above as well as below. This is also the terrain that wears shoes out in unusual places, which the wear section covers later, because scumming and kneebars abrade rubber that normal climbing never touches.
The common mistake is buying this shoe first. Someone sees the strong crew at the gym in soft comp shoes, buys the same thing, and then discovers it is close to useless at the local vertical crag where they actually climb most weekends. If you are projecting a steep route and want to work the moves without burning the whole day doing it, our guide to working the moves without burning the whole day pairs naturally with this kind of terrain.
Scarpa Drago — Best for Steep Caves and Roof Climbing
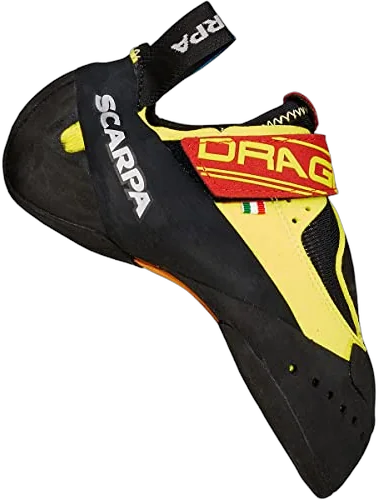
The Scarpa Drago is a specialist and makes no apology for it. In deep pockets and on overhung terrain it is about as good as climbing footwear gets, and the toe-hooking rubber coverage is the feature people actually buy it for. On a tufa-heavy limestone cave pitch, the shoe does things stiffer models simply cannot.
Then there is the other half of the sentence, which most roundups bury. The blunt toe profile struggles on small pockets, the softness means it is not built to edge, and the rubber wears quickly because soft compounds always do. This is the shoe for a steep pocketed cave pitch and the wrong shoe to also expect to perform on a technical vertical face the same afternoon.
Buy it as a second or third pair, once you know your season includes real steep terrain. Buying it first is how people end up with an expensive shoe that lives in the bottom of the pack.
The Budget Sport Shoe That Still Performs
Here is the honest version of this section: if you are new to leading sport routes, your footwork is the limiting factor and not your shoe. A good beginner climbing shoe and a good budget sport shoe are close to the same object, and the same pair doubles as your gym climbing shoe without anyone noticing. A flat, comfortable shoe you can actually wear for a full session will teach you more in a month than an aggressive shoe you pull off between every burn, because time on the wall is what builds foot placement and you get more of it in a shoe that does not hurt.
What a budget shoe genuinely cannot do is worth naming, because pretending otherwise is what sponsored roundups do. It will not hold a true micro-edge, and it will not keep tension on steep terrain the way a downturned shoe does. Those limits show up at the point where the routes get technical, which is later than most beginners expect. Until then, the shoe is not what is stopping you.
The anti-sell applies here too. Three brand-new shoes for gym, crag and project is marketing rather than necessity for someone who gets outside twice a month. One comfortable pair, worn until your footwork is genuinely there, then a performance shoe chosen for the angle you actually climb. If you are earlier in the process than this article assumes, our roundup of six neutral beginner shoes worth buying is the better starting point.
La Sportiva Finale — Best Budget Sport Shoe
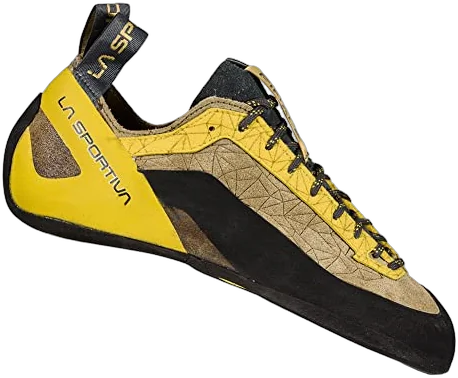
The La Sportiva Finale (men’s · women’s) does the thing a first sport shoe should do, which is get out of the way. The flat-to-mild profile and forgiving last mean you can keep it on through a full crag day, and the durable outsole survives the kind of foot-dragging every new leader does before placements get clean.
There is a sizing trap attached to this purchase that has nothing to do with the shoe. Newer climbers routinely get talked into a downsize they are nowhere near ready for, usually by someone enthusiastic behind a shop counter, and end up in a shoe they take off every ten minutes. A shoe you avoid wearing teaches you nothing.
If you are moving off rentals, buy the shoe you will keep on your feet, not the one that looks like what the strong climbers wear. The transition pair’s job is mileage. You can buy precision later, once your placements are clean enough to use it.
Rock Type Changes the Answer
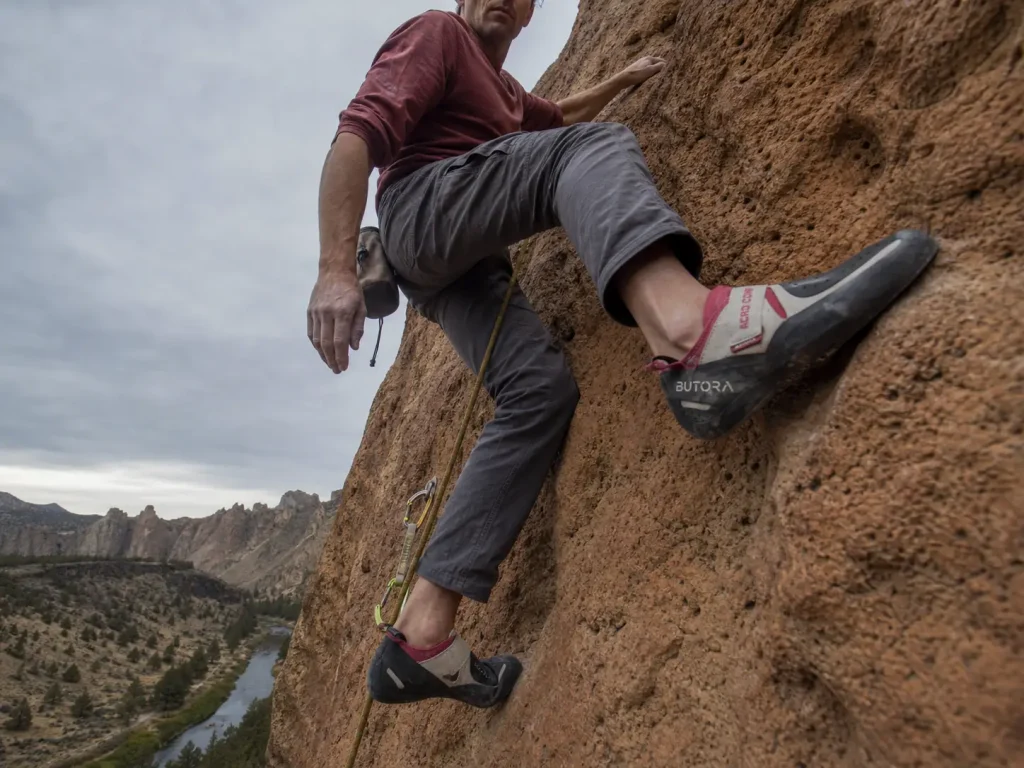
Two climbers can both say they are sport climbing and be doing almost unrelated things with their feet. One is pulling on limestone tufas at the Red River Gorge. The other is smearing on rounded volcanic tuff at Smith Rock. Same discipline label, opposite footwork, genuinely different shoe answers.
Angle gets you most of the way to the right shoe. Rock type is the correction factor on top of it, and it is the variable the roundups skip because it requires knowing something about specific crags rather than specific products.
Limestone Pockets and Tufas
Limestone sport crags reward soft and grabby. Pocket climbing asks you to load two or three toes into a hole rather than stand on an edge, which means the shoe needs to conform to the shape rather than hold a platform against it. Tufas, where the rock forms rounded vertical ribs, are essentially a squeeze-and-friction problem, and rubber that wraps beats rubber that resists.
Stiff edging shoes underperform here in a way that surprises people who bought them for their precision. The precision is real. It is just aimed at a feature this rock does not have much of.
Granite Edges and Crystals
Granite is the opposite argument. The features are small, crystalline and positive, which is exactly what a stiff, asymmetric shoe was designed for. Here the platform matters, because the hold is small enough that a folding shoe turns a usable edge into a slip.
Granite also chews rubber faster than limestone. The crystals that make the rock climbable are abrasive, and a soft compound disappears against them noticeably faster than it does on polished limestone.
Volcanic Tuff and the Art of Smedging
Welded tuff, the rock at Smith Rock and much of Ten Sleep, does not fit either category. The features are rounded, subtle, and friction-dependent rather than positive, and the technique climbers use there has its own name: smedging, a blend of smearing and edging where you roll onto a rounded feature and trust rubber contact rather than a defined edge.
A mid-stiffness shoe with good rubber contact wins here. Fully soft shoes give you feel but not enough support to hold the roll; fully stiff shoes give you a platform the rock never provides a place to put.
Rubber compound interacts with all of this, and with temperature more than most climbers account for. Stickier compounds grip better and wear faster, and the same shoe performs measurably differently on cold rock than on rock that has been in the sun all afternoon. Our guide to why the stickiest rubber isn’t automatically the best buy works through the compound-by-compound version of that trade.
Sizing for 30 Moves, Not 6
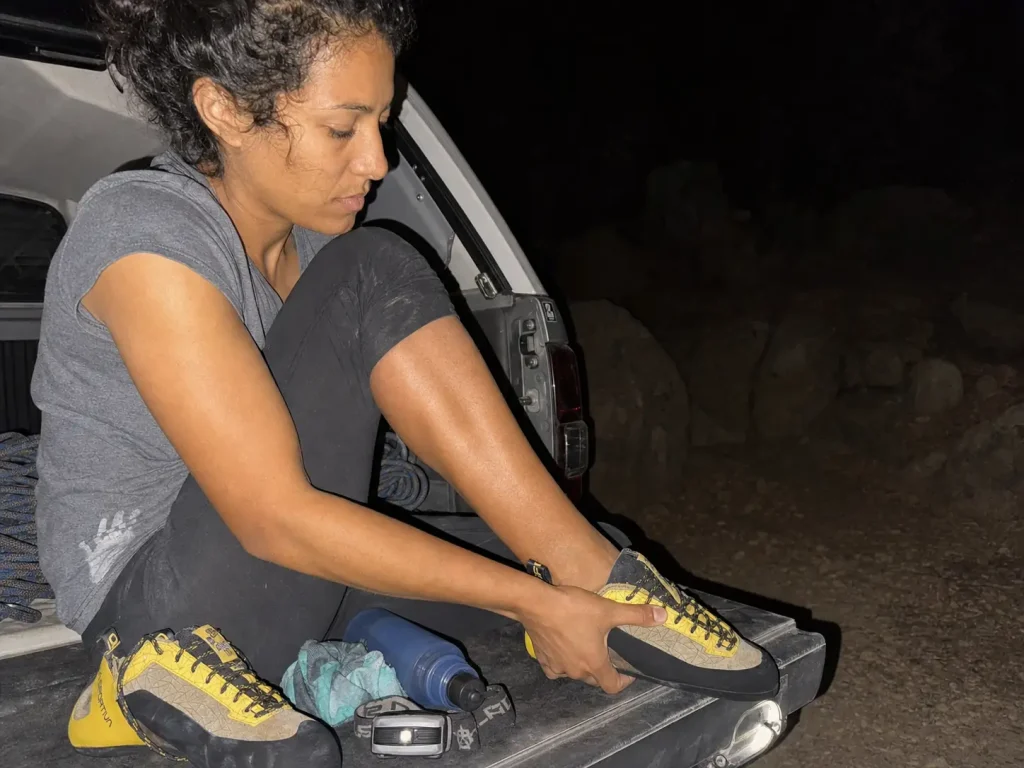
Picture the burn that ends without a fall. You are at move twenty-five of a thirty-move pitch, the climbing has gone well, and your feet have simply stopped reporting useful information. You come off because you cannot feel the foothold, not because you could not do the move. The climbing was fine. The shoe was sized like a boulder shoe.
This is the single biggest sizing error in sport climbing, and it happens because the loudest sizing advice in climbing comes from bouldering culture, where the math is completely different.
Why Pitch Length Changes the Math
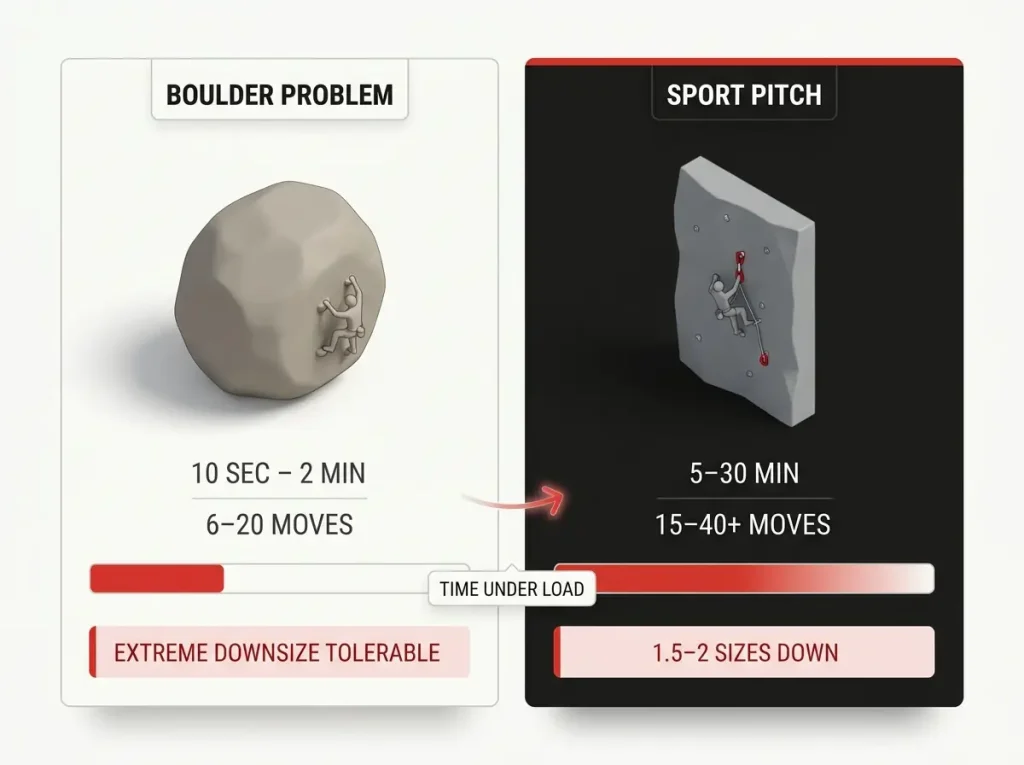
The duration difference is the whole argument. A sport attempt typically runs five to thirty minutes from tying in to clipping the anchors. A boulder problem runs ten seconds to two minutes. That is not a small gap, and it changes what “too tight” means in a way no product page acknowledges.
A shoe tight enough to survive twenty seconds of maximum-effort bouldering is a shoe your foot will be negotiating with by minute eight. Pain that is irrelevant across six moves becomes the deciding factor across thirty, because your foot is under continuous compression the entire time rather than in short bursts with rests between.
The consequence is practical rather than philosophical: sizing that a strong boulderer would call reasonable will cost you sends on routes. The physics that separate bouldering from sport climbing run deeper than effort duration, but for footwear purposes, duration is the variable that matters most.
How Much to Actually Size Down
Most sport climbers land around one and a half to two sizes down from street shoe size. That is meaningfully less aggressive than typical bouldering convention, and it is the number to start from rather than the number to beat. Sizing down further does not buy you performance past a certain point. It buys you a shorter tolerance window, which on a long pitch is the opposite of what you want.
What you are aiming for is a shoe with no dead space in the toe box, toes flat or very slightly curled, and a heel that does not lift when you weight a foothold. What you are not aiming for is the shoe you can only tolerate for one attempt. If you cannot leave it on through a warm-up and a burn, it is too small for what you are asking it to do.
A useful way to sanity-check the number: put the shoe on and try to stand flat-footed on the ground. In a correctly sized sport shoe your toes will be firmly packed and slightly curled but your heel will still sit down without a fight. In a shoe sized like a boulderer’s, your heel wants to lift and your arch feels actively cramped the moment you stop pointing your toes. That second sensation is survivable for a boulder problem and corrosive over a thirty-move pitch.
Brand last shape complicates the number more than the number itself does. The same nominal size fits differently between manufacturers, and foot volume matters as much as foot length. Our complete guide to the full fit framework, brand last by brand last is the piece to read before ordering anything online.
Leather Stretch vs Synthetic Sizing for Month Three
Upper material decides where the shoe ends up, and it is why two people can follow identical sizing advice and get different results.
Leather uppers stretch appreciably with use, sometimes close to a full size in the areas under the most tension, so the stretch break-in is a real part of the sizing calculation rather than folklore. Synthetic microsuede barely moves. Size a leather shoe for where it lands after break-in and a synthetic shoe for how it feels the day you put it on, because in three months the leather shoe will have changed and the synthetic one will not have.
This also affects the Skwama-style shoes marketed as requiring no break-in. That claim is usually accurate, and it means what you feel in the first session is close to what you get permanently. Sizing those shoes as if they will stretch into comfort is how people end up with a shoe that is simply too small forever.
Beneath all of this is a physiological reality worth understanding: researchers studying the evolutionary biomechanics of the human forefoot have documented how the front of the foot handles and distributes sustained load, and a climbing shoe is a device for concentrating that load into a much smaller area than the foot evolved to use. Sustained compression across a long pitch is not just discomfort. It is a real mechanical load on a structure that was not designed for it, which is why the foot health section later in this guide exists.
Test a performance shoe by standing in it, not by walking in it. Put it on, step onto the smallest edge you can find at the shop or the gym, and hold your weight there for thirty seconds. If your toes go numb in that half-minute, they will go numb at the crux, and no break-in period fixes a shoe that is a full size too small.
Building a Two-Shoe Quiver
Watch an experienced sport climber at the crag and you will notice something that looks like fussiness. They warm up and belay in a beat-up, slouchy pair that has clearly seen better seasons, while a pristine downsized pair stays zipped in the pack until the actual attempt. Then those come out for one burn and go straight back in.
That is not precious behavior. That is the difference between a resole in nine months and a resole in three.
Why Warm-Up Laps Are the Hidden Cost
Softer, stickier rubber performs better and wears faster. Both halves of that are always true, and the second half is the one nobody prices in when they buy a performance shoe.
An aggressive shoe’s high-performance life is a finite resource measured in rubber thickness, and every lap you climb in it spends some of that resource. The problem is that warm-up laps, easy mileage, and standing around at the base in your shoes spend it at exactly the same rate as a redpoint attempt while returning none of the benefit. You are burning your best rubber on climbing that would go fine in any shoe you own.
The community language for this is worth learning because it tells you how seriously experienced climbers take it. Send shoes and project shoes are the dedicated pair. A redpoint burn is one real attempt. The quiver is the working rotation. Nobody built that vocabulary for a habit that did not matter.
The Two-Pair System That Actually Works
The system is simpler than it sounds. One all-day comfort shoe handles warm-ups, belaying, easy mileage and anything in the gym. One downsized pair kept at a true performance fit comes out only for genuine attempts.
A variant some climbers prefer: two sizes of the same model. A comfortable size for mileage and a downsized size for the attempt, which keeps the feel consistent and only changes the fit. It costs more up front and removes the adjustment period between pairs.
There is a bookkeeping argument underneath the comfort argument. A resole runs a meaningful fraction of what a new pair costs, and a performance shoe that only ever touches redpoint attempts can go two or three times longer between resoles than the same shoe used for everything. Spread across a season, the second pair is not really an extra purchase. It is the thing that stops you from buying a third pair of the expensive shoe.
Rotation also protects the fit, not just the rubber. A downsized shoe worn for hours at a time stretches and packs out in the exact places you sized it to be snug, so the pair that felt precise in March feels sloppy by July. Keeping it off your feet during warm-ups and belay shifts means the fit you bought is still the fit you have when the send window opens.
What the quiver is not is three specialist shoes for someone who gets outside twice a month. The second pair starts paying for itself when you are climbing enough that resoles are a recurring expense rather than an occasional one, which realistically means climbing once or twice a week with a project you are working. Below that, one good all-around shoe and honest care is the correct answer, and anyone telling you otherwise is selling something. The same logic that governs projecting a route without wasting burns applies to your rubber: spend the finite resource on the attempts that count.
Worth pairing with an actual physical warm-up, too. The habit of not warming up in your send shoes goes hand in hand with having a warm-up routine that actually holds up at the crag, and climbers who take one seriously usually end up taking the other seriously as well.
Five Ten NIAD Moccasym — Best Warm-Up and Belay Shoe
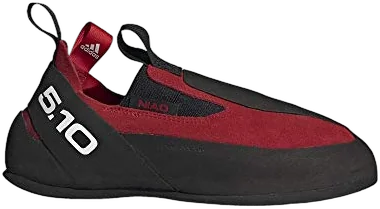
The Five Ten NIAD Moccasym has been the default answer to this job for decades, and the reason is unglamorous. It slips on without a closure system, it is comfortable enough to leave on between burns, and it climbs easy terrain perfectly well without asking anything of you.
One sizing note specific to this shoe: the unlined leather stretches considerably, more than most climbers expect. Buy it snug knowing it will relax, because a Moccasym sized for day-one comfort becomes a slipper that falls off by month two.
You do not need this exact shoe. Any comfortable pair you already own that still has rubber on it does the job, including the shoes you were about to retire. The point is the habit, not the purchase.
Reading the Wear on a Project Shoe
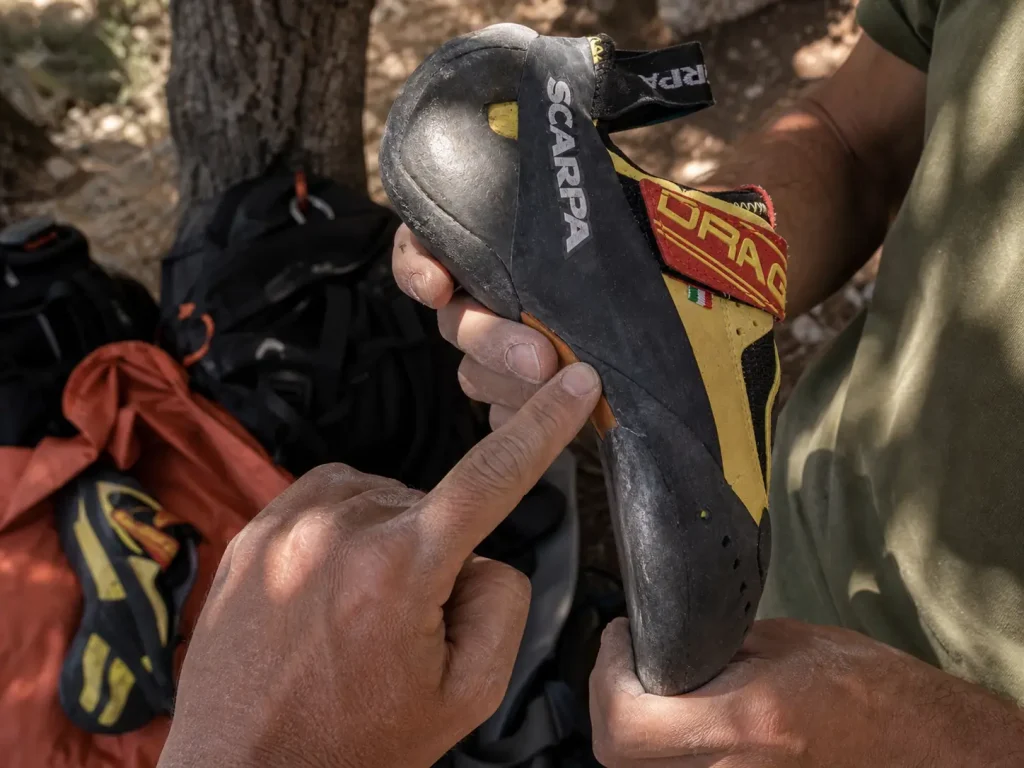
Halfway through a project, you turn the shoe over during a rest and notice something you have been half-avoiding all week: a faint recession forming near the big toe. Now you have a decision. Nurse it through the send and hope, or send it for a resole now and lose a week of climbing in your best shoes.
Getting that call right is worth real money, and it hinges on one specific spot rather than a general impression of wear.
The Big Toe Is the Only Spot You Need to Check
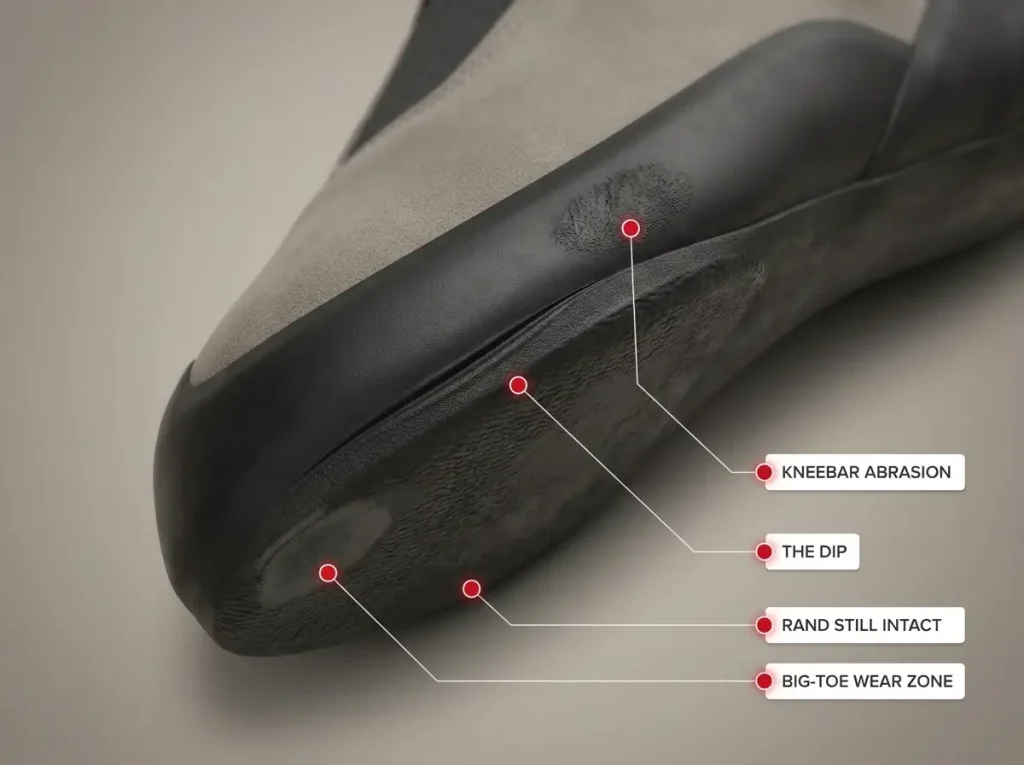
Roughly ninety percent of outsole wear on a climbing shoe concentrates at the big toe. Not the ball of the foot, not the heel, not the general sole area. One zone, at the front, on the inside.
That makes the diagnostic fast. You do not need to evaluate the whole shoe or compare it to how it looked new. Flip it over, look at the big toe, and everything you need to decide is right there. Climbers who check the whole sole tend to miss the window because the rest of the shoe still looks serviceable while the one zone that matters has gone thin.
Finding “The Dip” Before It’s Too Late
The dip is the community name for the thing you are looking for: a visible recession where the outsole meets the rand, near the big toe, while the rand rubber above it is still intact and firm. That is the resole window. Send the shoe in when you see it.
Past that point the rand gets breached, and the economics change immediately. A resole on an intact rand is a routine repair. A resole after the rand is compromised needs a toe cap added on top, which typically runs somewhere around ten to thirty dollars extra on the repair bill, and it permanently shortens the shoe’s total lifespan.
The reason is structural rather than cosmetic. The rand is the band of rubber wrapping the perimeter of the shoe, and it is what holds the tension that keeps the downturn pulling the way the designer intended. Once a resoler has to rebuild part of it, the shoe never quite returns to its original shape or tension. Every future resole starts from a worse baseline, and climbers who ride a project shoe until the sole goes smooth often find the second resole is not worth paying for at all.
At one or two sessions a week, most shoes reach that window within three to nine months. This is also the argument for buying a shoe you intend to keep: resoling climbing shoes costs a fraction of replacing them, and a well-built pair can go through several cycles before the upper gives up. Our complete guide to the exact moment to send them in for a resole breaks the timeline down further, including how to find a resoler worth trusting.
What Projecting Does to a Shoe That Normal Climbing Doesn’t
Here is the part general durability advice misses entirely. Climbing spread across varied routes distributes wear across the whole front of the shoe. Projecting a single route for weeks does the opposite: it concentrates identical movements onto identical rubber, dozens of times.
If the crux involves a specific toe placement, that placement happens on every burn. Forty attempts is forty repetitions of the same abrasion on the same square centimeter, compressed into a few weeks rather than spread across a season of varied routes. A shoe that would comfortably last nine months of general cragging can reach the resole window in three.
That is why the mid-project check matters more than the end-of-season check. By the time the season ends, the decision has already been made for you. Flip the shoe over between burns instead, while you still have the option of sending it in before the send rather than after it.
Steep sport terrain adds two more wear patterns that vertical climbing barely produces. Kneebars abrade the top of the rand, an area that normally sees almost nothing. Toe scumming on overhanging rock wears the upper surface of the toe box rather than the sole. Velcro straps also fatigue from dozens of on-off cycles between burns, which is a mundane failure mode nobody warns you about until a strap stops holding tension mid-season.
The mistake is waiting until the sole looks rounded and smooth. By then the window has closed, and a routine resole has become a resole-plus-toe-cap bill on a shoe with less life left in it. Once the shoes are back, keeping the rubber alive between resoles is what stretches the interval to the next one.
Foot Health Across a Redpoint Season
The gym version of this conversation is a joke on a t-shirt: pain is temporary, sends are forever. The research suggests the second half applies to the damage as well, and this section is the honest counterweight to an article that has just spent several thousand words recommending downturned shoes.
None of what follows is an argument against performance footwear. It is an argument for using it deliberately rather than continuously.
What the Research Actually Found
A peer-reviewed 2022 study of sport climbers found claw toes, hallux limitus and hallux valgus, which is the clinical name for bunions, among the most frequent chronic foot findings in the population. These were not rare outcomes at the tail of the distribution. They were the common ones.
A frequently-cited 2001 study went further, finding hallux valgus in fifty-three percent of climbers with five or more years of experience climbing at UIAA IX and above. That is a majority outcome among experienced hard climbers, which reframes the whole conversation. The full peer-reviewed epidemiological study of foot injuries in sport climbers is worth reading if you are heading into a serious season.
This is not a reason to stop climbing hard. It is a reason to stop treating foot pain as a personality trait.
Why Downturn Concentrates the Damage
The mechanism is straightforward once someone explains it. Aggressively downturned shoes compress the forefoot by roughly twenty to thirty percent, which concentrates load onto the first and second metatarsal heads rather than distributing it across the foot.
That specific area is where neuromas develop, where bunion progression starts, and where hammer toe formation begins. The shoe is not incidentally near the problem area. It is loading precisely the structure that fails. The Mountaineers, a longtime climbing-education nonprofit, has documented the bunion risk climbers face in practical terms, and the compression figures come from that work.
Closure style feeds into the same mechanism, which is why it is worth a second look here rather than only in the fit discussion. A lace-up distributes tension along the whole length of the foot and lets you slacken the forefoot independently of the midfoot. A single-strap slipper or a two-Velcro shoe applies its tension in fewer places, which tends to mean more pressure concentrated where the straps sit. Over one pitch the difference is negligible. Over a season of projecting in the same pair, it is not.
The variable that matters is not whether you wear an aggressive shoe. It is how many hours per week that compression is sustained, over how many consecutive months. A climber who owns the most downturned shoe on the market and wears it for forty minutes a week is under less cumulative load than one in a moderate shoe who never takes it off between routes.
Rotating Out Without Losing Send-Day Performance
The mitigation is the two-pair system from the quiver section, doing double duty. Reserve the most aggressive shoe for genuine attempts and spend everything else in something flatter, and the total hours of forefoot compression across a season drops substantially without costing you a single send.
Sketch out a normal week and the gap becomes obvious. Two crag days with four burns each, at five to thirty minutes per attempt, is well under an hour of actual climbing in the aggressive shoe. Those same two days spent belaying, warming up and standing around at the base in that shoe can run to several hours of continuous compression on the same forefoot structure. The climbing was never the part doing the damage. The hours around the climbing were.
This is also where sport climbing differs from bouldering in a way that matters medically rather than just athletically. A boulderer’s aggressive shoe comes off constantly because the efforts are short. A sport climber’s stays on through belaying, warming up and long approaches between routes, which means the same shoe accumulates far more compression hours per season without anyone noticing the difference.
Add a deliberate off-period. After a hard project wraps, spend a few weeks climbing in the comfortable pair before the next one starts. Climbers who cycle this way tend to make it through more seasons than those who wear the same downturned shoe from March through October.
Some signals are worth acting on rather than climbing through: numbness that persists after the shoe comes off, a toe that no longer straightens on its own, pain at the base of the big toe that shows up walking rather than climbing. Those are structural changes rather than the ordinary discomfort of a tight shoe, and they do not resolve by being ignored.
If a shoe you already own has become the problem, stretching a shoe that’s gone too tight, without wrecking it is the practical first move before you replace it.
Take your shoes off between burns. Every time, not just when they hurt. It costs thirty seconds, it lets circulation return before the next attempt, and over a season it is the cheapest foot-health intervention available. Climbers who leave aggressive shoes on while belaying are paying a real long-term price for a small convenience.
The Short Version
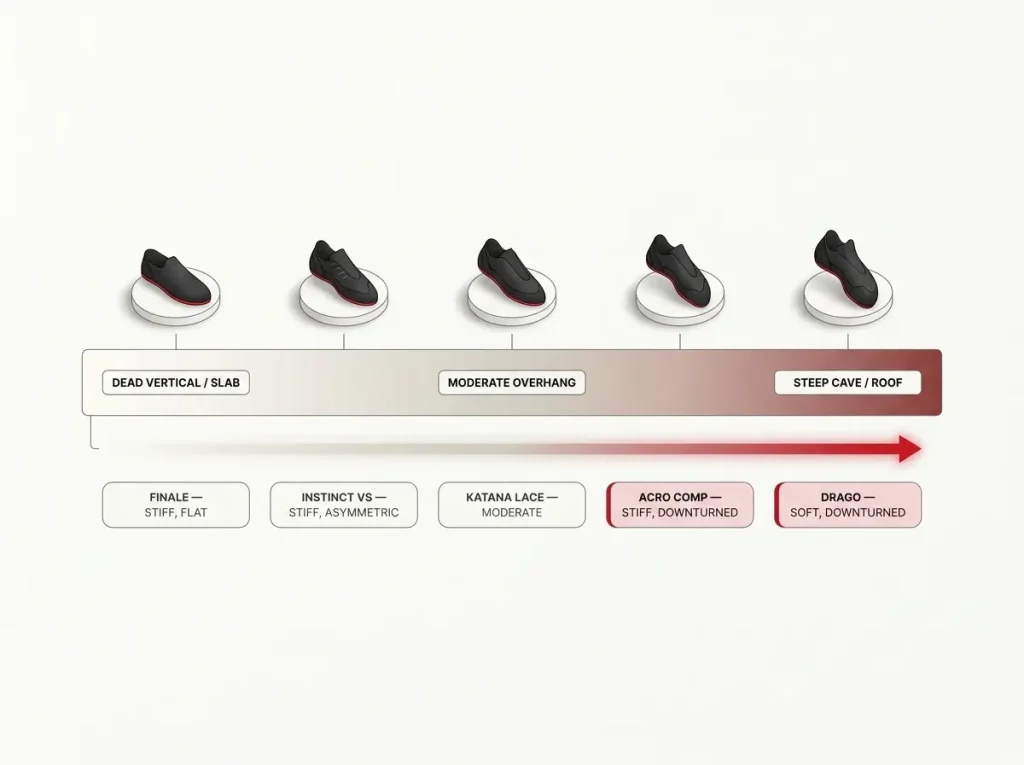
Angle picks the shoe. Vertical and technical rock wants stiff and asymmetric, steep and pocketed rock wants soft and downturned, and most sport routes sit in the middle where a moderate all-arounder like the Katana Lace beats both specialists.
Size for the length of the pitch, not for the hardest six moves. A shoe that goes numb at move twenty-five ends the burn as surely as falling does, and one and a half to two sizes down is the honest starting point for routes.
The second pair is cheaper than it looks. Warming up in your send shoes is the most expensive habit in sport climbing, and it costs you rubber and foot health at the same time.
Before you buy anything, go pull the shoes out of your pack and check the big toe for the dip. Then look at the angle of the route you actually want to send this season, and buy for that route rather than for a ranking.
Frequently Asked Questions
01What is the difference between sport climbing shoes and bouldering shoes?
The main difference is time under load. Sport pitches run five to thirty minutes versus ten seconds to two minutes for a boulder problem, so sport shoes are sized less aggressively and favor sustained comfort. Bouldering shoes can be tighter because the pain window is short.
02Should sport climbing shoes be aggressive and downturned or flat?
It depends on the angle you climb. Flat to moderate downturn suits vertical and technical faces, while aggressive downturn suits steep and overhanging terrain. If you own one shoe, moderate downturn covers the widest range of sport routes.
03How tight should sport climbing shoes fit?
Most sport climbers size down about one and a half to two sizes from street shoe size. Aim for snug with no dead space, but not so tight your feet go numb before the anchors. Leather uppers stretch appreciably, synthetic uppers barely move.
04When should I resole my climbing shoes?
Resole when a visible dip appears between the sole and the rand near the big toe, while the rand rubber is still firm. Waiting past that point breaches the rand, which adds a toe cap to the repair and permanently shortens the shoe’s life.
05La Sportiva or Scarpa for sport climbing?
Neither brand is better. Their lasts fit different feet, and that matters far more than the badge. La Sportiva runs narrow through the midfoot, while Scarpa offers low-volume and standard options across most models, so buy the last that matches your foot shape.
Safety Notice: Rock climbing and mountaineering are inherently high-risk
activities that can involve physical trauma or fatal incidents. The information on Rock Climbing Realms is for
educational and informational purposes only. Techniques and advice presented here are not a substitute
for professional, hands-on instruction. Conditions and risks vary by location. Always seek guidance
from a qualified instructor before attempting new techniques. By using this website, you agree that you
are solely responsible for your own safety. Any reliance you place on this information is strictly
at your own risk, and you assume all liability for your actions. Rock Climbing Realms and its authors
will not be held liable for any harm, damage, or loss sustained in connection with the use of this information.
Affiliate Disclosure: We are a participant in the Amazon Services LLC Associates Program, an
affiliate advertising program designed to provide a means for us to earn advertising fees by advertising and linking
to Amazon.com. As an Amazon Associate, we earn from qualifying purchases. We are also an official affiliate partner
of Black Diamond Equipment via the AvantLink network. If you click on a Black Diamond affiliate link and make a
purchase, we may earn a commission at no additional cost to you. We also participate in other affiliate programs.
Additional terms are found in the terms of service.