
In this article
Most failed trips to Peru don’t fall apart on a summit pitch. They fall apart in Huaraz, on the drive up from Lima, or on a “beginner” peak that was never the walk-up the brochure promised. Ask anyone who’s turned back on Ishinca at 3:30 in the morning with feet they couldn’t feel: the mountain rarely beats you with technical difficulty. It beats you with altitude, bad timing, and gear that looked fine at sea level. The Cordillera Blanca is the most accessible range of 6,000-meter peaks on earth, and that accessibility is exactly what gets people in trouble. This guide walks through which peaks match your skill, when to go, how to actually acclimatize, what a do-it-yourself climb really costs, and the hazards the tour pages quietly leave out.
Why the Cordillera Blanca Is Peru’s Mountaineering Heartland
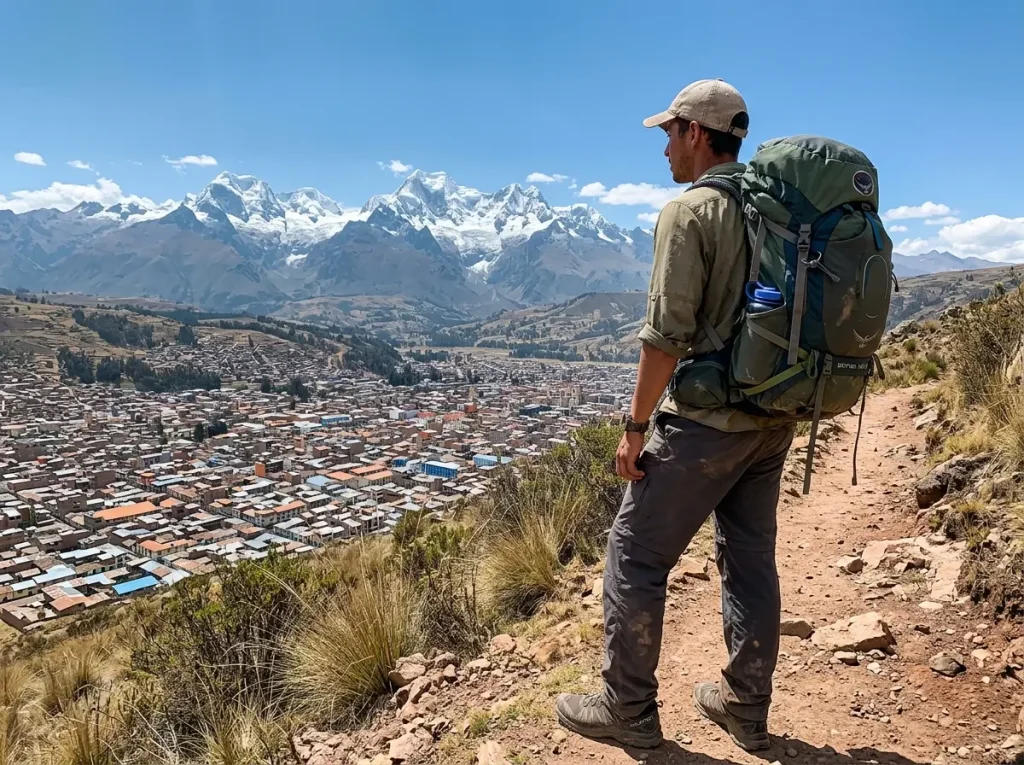
Every climber heading to Peru ends up in the same dusty mountain town. Huaraz sits at roughly 3,050 meters (10,000 feet) in the Ancash region, wedged between the white wall of the Cordillera Blanca and the bare brown ridges of the Cordillera Negra. You sleep here, eat here, drink your fill of coca tea, and run your acclimatization hikes from here before you touch a glacier. It is the staging ground for the whole thing.
What makes this range special is density. The Cordillera Blanca holds more than 30 peaks over 5,000 meters and 18 over 6,000 meters, packed into a strip you can drive the length of in an afternoon. Nowhere else on the planet puts that many high glaciated summits within a short approach of a single town with hostels, gear shops, and pizza. It’s why this corner of Peru sits comfortably among the world’s most famous mountain peaks and the routes that define them, and why it’s the natural place to learn the craft of going high.
Huaraz — the basecamp town that runs the whole show
Huaraz isn’t pretty, but it’s perfect for the job. The gear-rental shops, the climbing guides, the burro handlers, and the SERNANP park office are all within a few blocks. You can land with a duffel of personal kit and assemble almost everything else here.
Blanca vs Huayhuash — where to point your first trip
People hear about the Cordillera Huayhuash because of the film Touching the Void, and it is stunning. It’s also more remote, more committing, and a longer trek just to reach the peaks. For a first Peruvian climbing trip, the Blanca’s shorter approaches and easier bailouts make it the smarter choice. Save the Huayhuash for when you know how you handle altitude.
The lay of the land
The range organizes itself into valleys, or quebradas. The Ishinca Valley is the friendly classroom, with two beginner peaks and a hut a day’s walk from the road. Llanganuco and Quebrada Llaca hold bigger objectives. Huascarán, the highest peak in the range at 6,768 meters, looms over all of it. Learning the valleys is half of learning the Blanca.
Peru’s Peaks, Ranked by What They Actually Demand
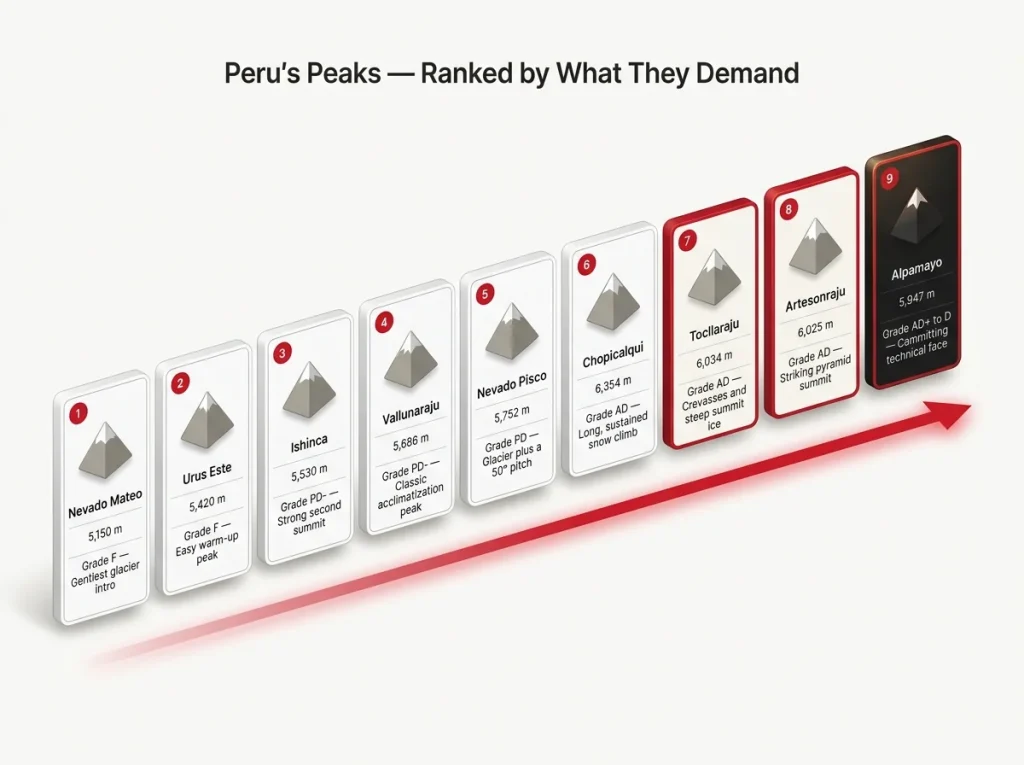
Most lists of Peru’s peaks read like a postcard rack: fifteen beautiful summits, all elevation and no honesty about what each one asks of you. Sort them instead by difficulty, using the French Alpine grade, and the picture gets useful. That grade runs F (facile, easy), PD (peu difficile, a little difficult), AD (assez difficile, fairly hard), then D and TD for the technical end. It rates the hardest part of the route, not how tired you’ll be.
The entry tier is where most people start: Nevado Mateo at 5,150 meters (graded F) is the gentlest true glacier intro, Urus Este at 5,420 meters, Ishinca at 5,530 meters (PD-), Vallunaraju at 5,686 meters, and the famous Nevado Pisco at 5,752 meters (PD). The step up is Tocllaraju at 6,034 meters (AD), the classic first 6,000-meter peak, along with Chopicalqui at 6,354 meters. The technical classics sit above all of it: Huascarán at 6,768 meters, Alpamayo at 5,947 meters (AD+ to D), and Artesonraju at 6,025 meters, the pyramid often said to have inspired the Paramount Pictures logo.
Here’s the part the postcard rack skips. PD does not mean “stroll.” Pisco’s normal route crosses loose moraine, then a glacier where you rope up, and it includes a roughly 40-meter pitch at around 50 degrees before the final push to the top. That’s a serious snow slope by any beginner’s standard. It’s the same kind of grade-versus-reality trap that catches first-timers on the supposedly easy slopes of peaks like Mount Elbrus: an easy number on paper still hides a glacier and real altitude.
Beginner glacier peaks (F to PD)
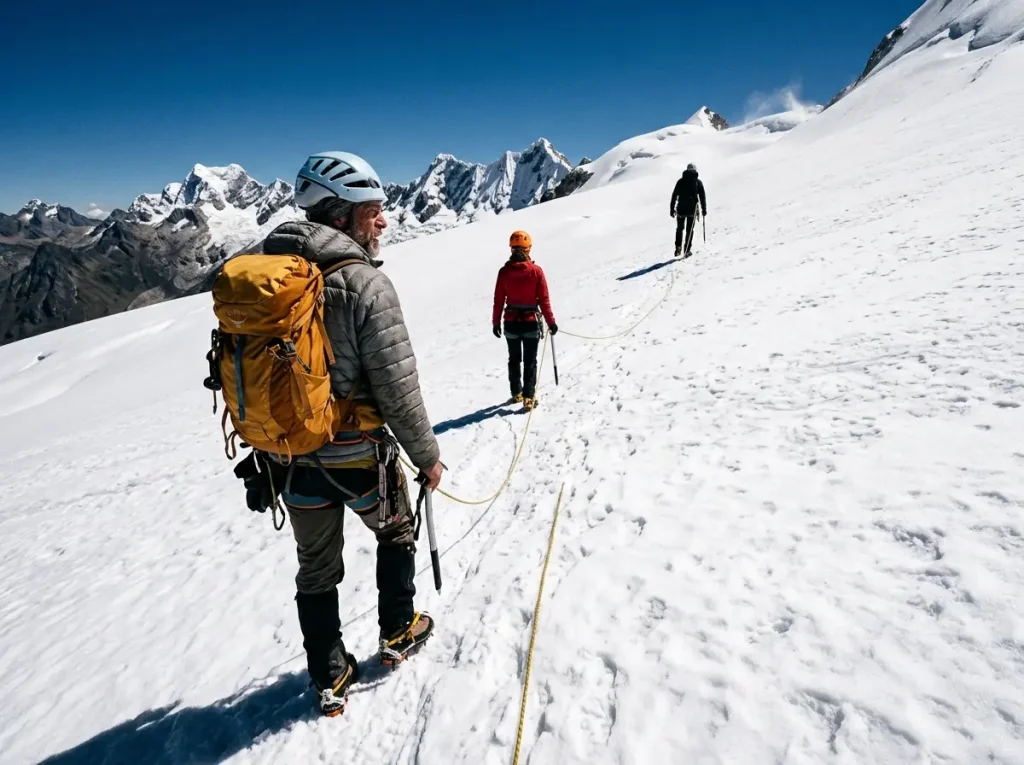
Mateo, Urus, Ishinca, and Pisco are where you build your base. All are glaciated, all require crampons and a rope, and all reward someone who already moves well on snow.
The first 6,000-meter step-up (AD)
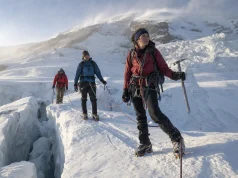
Tocllaraju is the natural progression after a 5,000-meter peak. It brings sustained glacier travel, real crevasse navigation, and 50-to-60-degree icy pitches near the top across a summit day that can run 15 hours. Earn it on the smaller peaks first.
The technical classics (D and TD) — admire from a distance for now
Alpamayo gets called the most beautiful mountain in the world, and it is a genuinely hard, committing climb. Huascarán is the high prize but a long, glaciated expedition in its own right. These are goals to build toward over seasons, not to bag on your first trip.
Which Peru Peak Is Actually Your First One
This is where good intentions go sideways. Someone reads that Pisco is a “beginner” peak, books it as their first-ever mountain, and shows up having never worn crampons. The word “beginner” in a Peruvian climbing context means beginner mountaineer, not beginner outdoors person. There’s a wide gap between the two, and nobody selling a trip wants to draw that line for you.
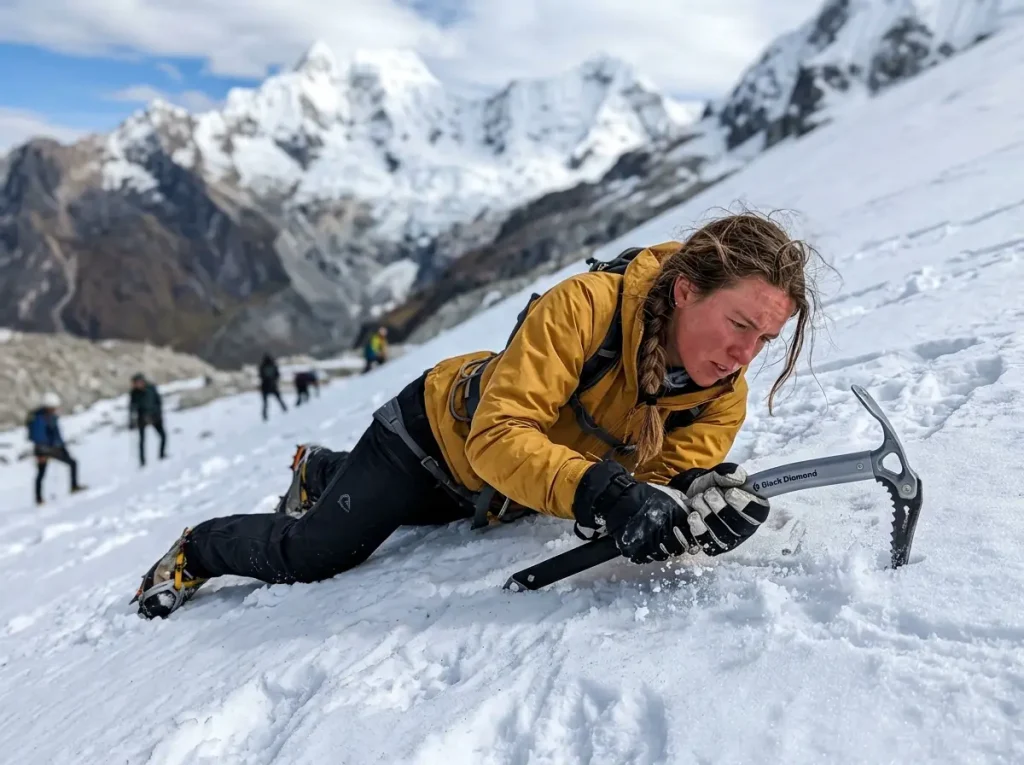
Before you fly down, you want a handful of skills already dialed in, not learned on the fly at 5,500 meters. You should be comfortable walking in crampons on varied snow, moving as part of a roped glacier team, and throwing a clean ice-axe self-arrest without having to think about it. Basic crevasse awareness helps too. These are the same fundamentals that make a peak like Mount Shasta a sane first glacier climb back home. Fitness is necessary but it is not the same thing as mountaineering competence. A marathoner with no snow skills is still a beginner on a glacier.
The skills you need before you land
Take a glacier-travel or mountaineering course at home, or hire a guide for a skills day on your first acclimatization peak. Cramponing, roped travel, and self-arrest are cheap to learn and expensive to skip.
Mateo, Ishinca, Pisco — what each really asks
If you’re truly new to snow, Mateo (F) is the honest first peak. Ishinca (PD-) is a strong second. Pisco (PD) gives you that 50-degree pitch and a bigger glacier, so treat it as a graduation, not an orientation.
When Tocllaraju makes sense (and when it doesn’t)
Tocllaraju is the peak people reach for too soon. The clip above shows exactly why its crevassed glacier and steep summit ice make it a step up, not a starter. It makes sense after you’ve stood on a 5,000-meter summit, slept at altitude, and know you keep working up high. It does not make sense as the first glacier you ever rope up on.
The Best Time for Mountaineering in Peru
The Cordillera Blanca runs on a dry-and-wet calendar, not a summer-and-winter one. The dry season stretches from May to September, and the heart of it, June through August, gives you the most stable weather, the clearest skies, and the firmest snow. July is the sweet spot. That’s when you get hard névé underfoot in the early morning and the best odds of a clean summit window.
The within-season nuance is what separates a smooth trip from a frustrating one. Early in the season you may find deeper, less consolidated snow that slows trail-breaking. Late in the season the snowpack melts out more, bridges over crevasses thin, and rockfall picks up on the lower slopes as ice that held stones in place lets go. Outside the dry window, from October into April, the snowpack turns unstable and most serious objectives become a gamble not worth taking.
Start your summit push in the dark, usually between midnight and 3 a.m., so you cross snow slopes and glacier bridges while they’re still frozen and firm. By late morning the same slope turns to slush, the bridges sag, and rockfall wakes up. The early start isn’t machismo, it’s the safest snow you’ll get all day.
The dry-season window (May to September)
Bookend your trip inside this window with a buffer. Weather still moves through, and you want spare days to wait one out rather than forcing a marginal forecast.
Why July is the sweet spot
Midwinter for the southern hemisphere means cold, stable air and refrozen snow. Colder is better here: firm névé climbs faster and safer than soft afternoon mush.
Reading conditions within the season
Talk to climbers coming down as you head up. Recent on-the-ground reports beat any month-by-month average for telling you what the snow is actually doing this week.
Why Acclimatization Wrecks More Peru Trips Than Weather
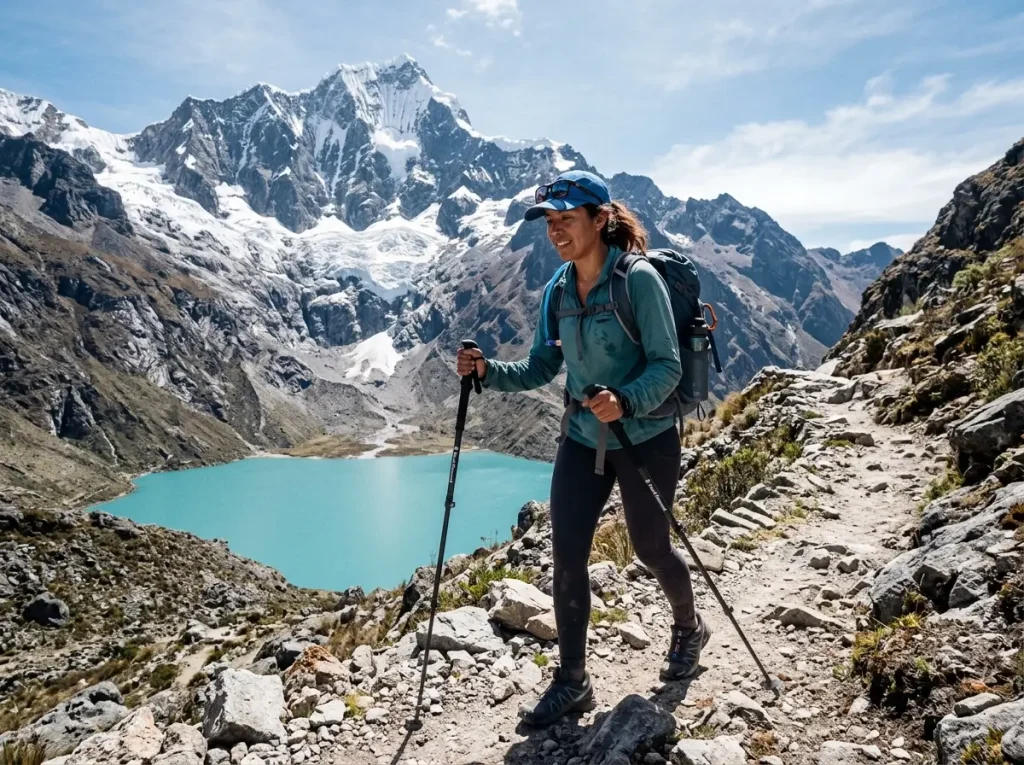
If one mistake ends more Peruvian climbs than any other, this is it, and it has nothing to do with strength. The failure pattern is almost always the same. A fit, capable climber flies from Lima at sea level up to Huaraz at 3,050 meters, feels a little headachy but basically fine after a day, skips the unglamorous 5,000-meter warm-up peak, and goes straight at a 6,000-meter objective. Somewhere above 5,500 meters the wheels come off: crushing headache, vomiting, no power in the legs, or worse. The mountain didn’t get harder. Your system never got the time it needed.
The fix is boring and it works. Plan on roughly two weeks of acclimatization for a 5,000-meter peak and about three weeks for a 6,000-meter peak. Sleep at least three full nights in Huaraz before you sleep anywhere above 4,000 meters. Then use the “climb high, sleep low” principle: gain altitude on day hikes like Laguna 69 at around 4,600 meters or Laguna Churup at about 4,500 meters, then descend to sleep low in Huaraz. The high exposure pushes your system to build more oxygen-carrying red cells; the low sleep keeps you from digging a hole you can’t climb out of. It’s the same altitude math that decides attempts on big Andean peaks everywhere, and there’s a full acclimatization protocol worth reading before you book flights.
The piece that gets glossed over everywhere is learning to read the warning signs. Acute mountain sickness (AMS) feels like a bad flu stacked on a worse hangover: headache, nausea, fatigue, no appetite, broken sleep. You can usually wait it out by stopping your ascent and resting low. The two that turn deadly are different animals. High-altitude pulmonary edema (HAPE) is fluid in the lungs, and it shows up as breathlessness even at rest and, in bad cases, pink frothy sputum. High-altitude cerebral edema (HACE) is swelling in the brain, and it looks like stumbling, confusion, and a climber who suddenly can’t walk a straight line. For HAPE and HACE the treatment is not rest. It’s immediate descent, right now, in the dark if you have to. The American Alpine Institute’s primer on recognizing HAPE and HACE is worth committing to memory before you go, because the person who has HACE is often the last to realize it.
Don’t treat your first 5,000-meter peak as a separate goal from your 6,000-meter one. Climb Ishinca or Pisco as the acclimatization peak, on purpose, a week before you go high. Standing on a real summit at altitude tells you more about whether you’re ready than any number of lagoon day hikes.
The staged acclimatization plan that works
Land, rest, hike high and sleep low for several days, climb a 5,000-meter peak, recover, then go for the bigger objective. Front-load patience and you buy yourself a summit.
Climb high, sleep low — the lagoon hikes
Laguna 69 and Laguna Churup are the standard altitude triggers out of Huaraz, and they’re gorgeous in their own right. A pair of Black Diamond Distance Z trekking poles saves your knees on the steep, rocky descents and folds down small enough to stuff in a daypack.
Telling AMS, HAPE, and HACE apart
Memorize the difference between “feels awful but stable” and “needs to go down now.” That single judgment call is the most important skill on the mountain.

Permits, Fees, and Guides in Huascarán National Park
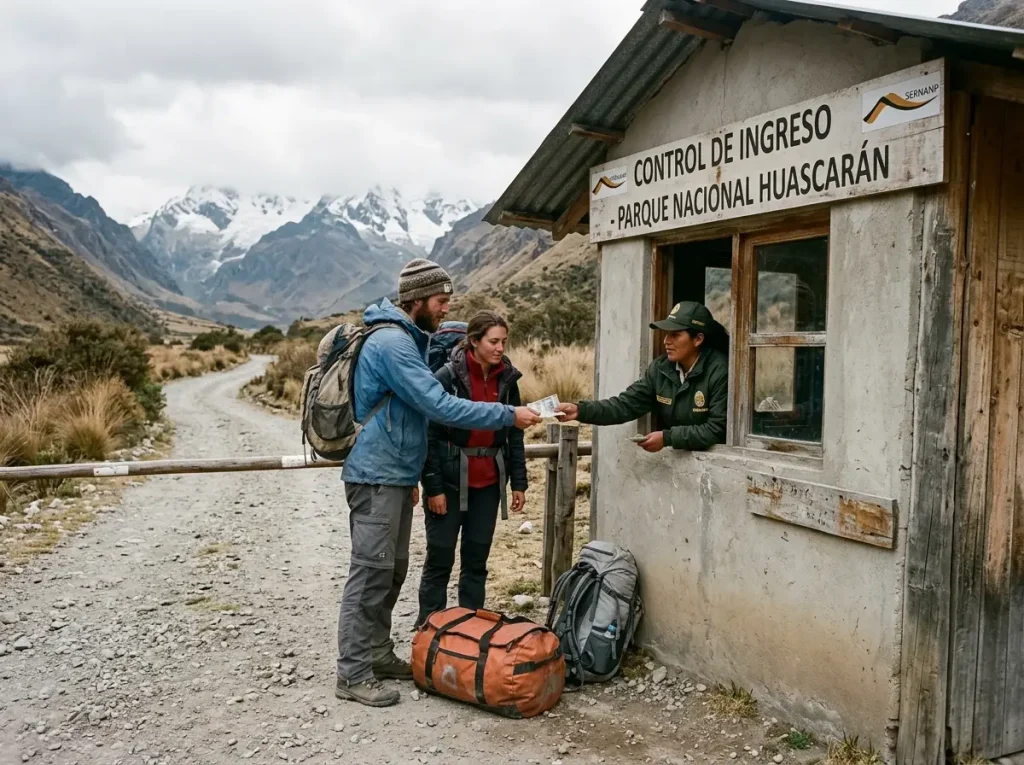
Here’s something the package pages bury: you pay the park, not just a guide. The Cordillera Blanca’s high peaks sit inside Huascarán National Park, a UNESCO World Heritage site managed by SERNANP, and you need to pay the park entrance fee and carry your ticket to climb there. You can buy it at the park checkpoints, through an operator, or at the SERNANP office in Huaraz on Jirón Federico Sal y Rosas 555.
Budget cash in soles, because the checkpoints don’t take cards. Historically the fee has run around S/150 for a multi-day foreigner ticket and about S/30 for a single day, but rates change, so confirm the current 2026 number at the office when you arrive. The official details live on the SERNANP page for Huascarán National Park. Getting the paperwork right is its own small skill, and the permit mistakes that get climbers turned away at the checkpoint are easier to avoid than to fix on the spot.
Buying your SERNANP ticket (and what it costs)
Get it before you walk in, keep the receipt, and carry enough soles for the whole party. Rangers do check at the trailheads and huts.
Do you actually need a certified guide?
A guide isn’t legally mandatory for every peak, but for anything glaciated it’s strongly advised unless your team genuinely owns the skills. The honest test is simple: if nobody in your group can run a crevasse rescue, hire a guide.
Casa de Guías and finding qualified people
The Casa de Guías in Huaraz is the home of the Peruvian Mountain Guides Association (AGMP) and the place to find certified, accountable guides rather than whoever has a cheap flyer. Ask for certification, check it, and don’t shop on price alone for the person managing your rope.
Arrieros, Burros, and What a DIY Climb Really Costs
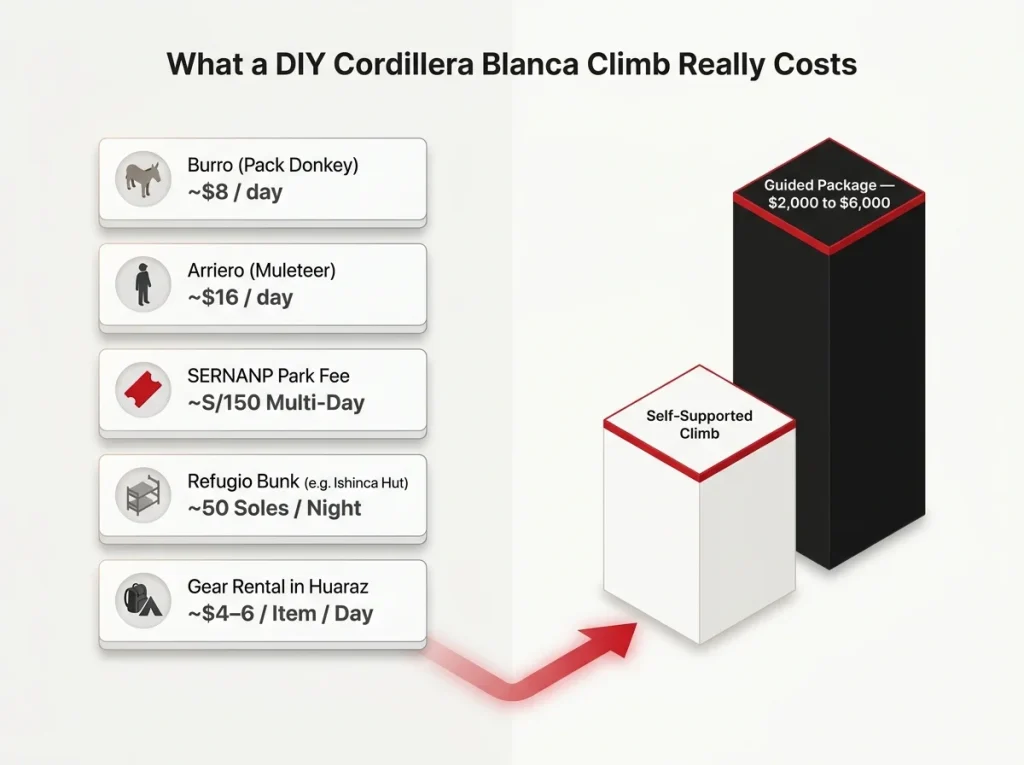
The tour operators quote $2,000 to $6,000 for a guided peak, and for many climbers that’s money well spent. But if you’ve got the skills and want to do it yourself, the à-la-carte reality is far cheaper than those packages suggest, and almost nobody breaks down the actual numbers.
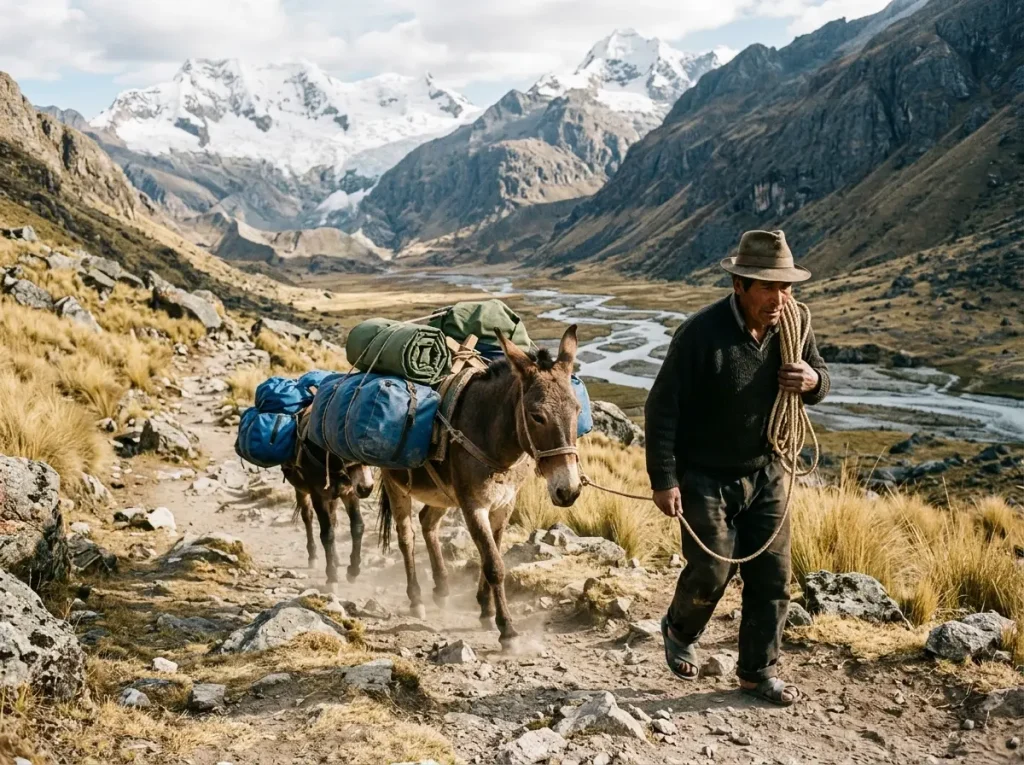
Hauling gear to base camp is handled by arrieros, the local muleteers, and their burros, the pack donkeys. A burro runs roughly US$8 a day and an arriero around US$16 a day, and you’re expected to cover their food and shelter too. Renting bulky gear in Huaraz costs about US$4 to $6 per item per day, or S/20 to 30, so a sleeping bag might be six dollars a day and trekking poles four. A bunk in a mountain refugio, like the Ishinca hut, runs around 50 soles a night. Stack those up and a self-supported climb of an Ishinca Valley peak costs a fraction of a guided package. This is the opposite end of the spending spectrum from a full-service Everest expedition, and the gap is mostly labor and logistics you can do yourself.
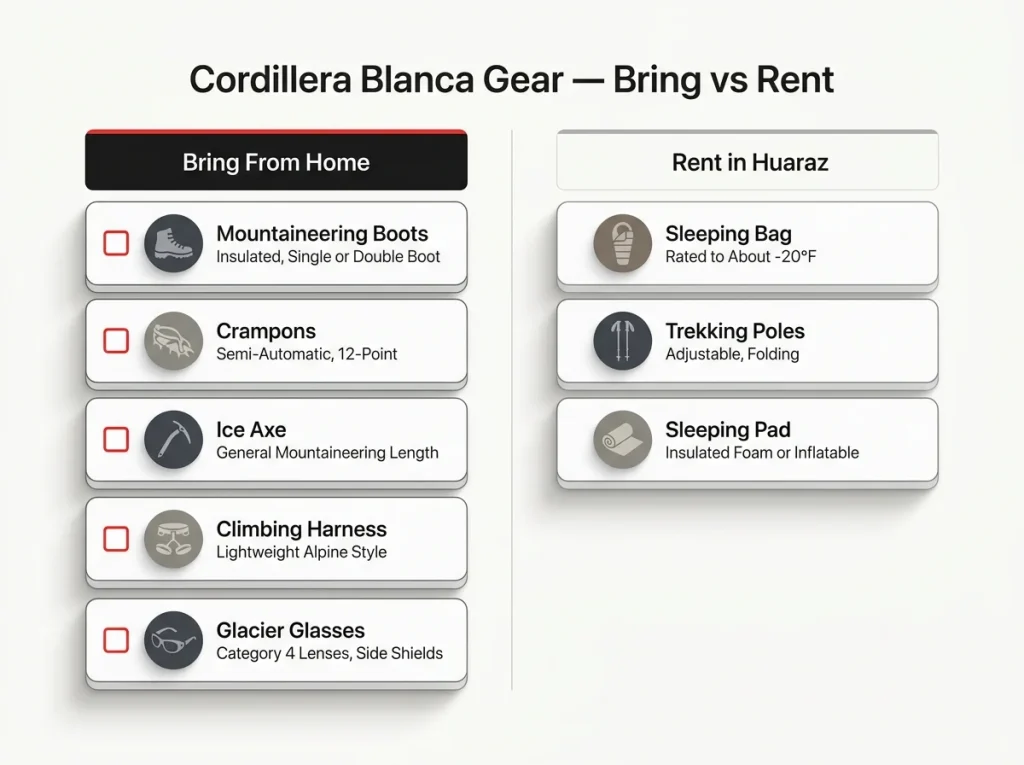
Rent the bulky, generic stuff in Huaraz and fly with only the technical, personal-fit gear. A four-season sleeping bag and trekking poles cost a few dollars a day to hire and eat your baggage allowance to bring. Your boots, harness, and glacier glasses are the things that have to fit you, so those come from home.
The à-la-carte cost breakdown
Park ticket, burro, arriero, a hut night or two, and a handful of rental items. Write the list out before you go and the trip stops looking expensive.
Self-supported vs a guided package
Self-supported saves real money and teaches you more, but it puts every safety decision on your team. A guided trip buys judgment and rescue capacity. Be honest about which one you’re qualified for.
What to rent in Huaraz vs fly with
Rent: sleeping bag, poles, foam pads, sometimes a tent. Bring: boots, crampons fitted to those boots, harness, helmet, and glacier glasses.
Gear That Matters for the Cordillera Blanca
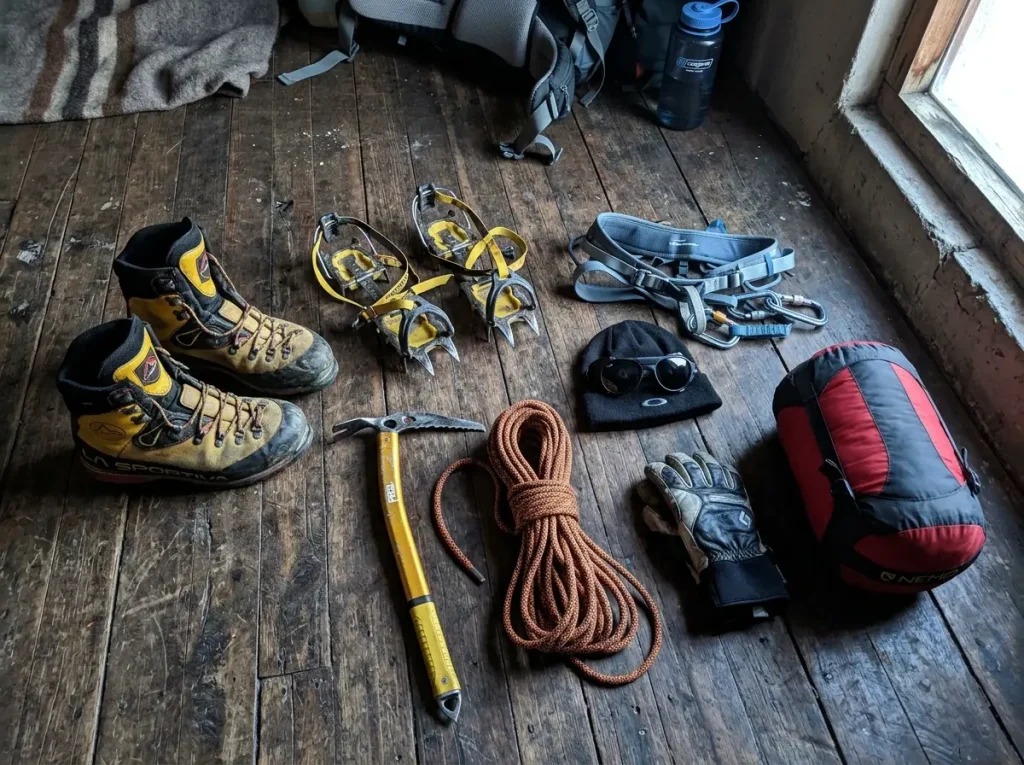
There’s a story you hear in Huaraz every season. A climber shows up with comfortable three-season hiking boots, figures they’ll be fine, and turns around an hour below the summit of Ishinca at 3:30 a.m. with feet going numb, while the rest of the team stands around losing their own warmth waiting. Cold feet end more beginner summit bids in the Blanca than bad technique ever will. The gear that matters here is the gear that keeps you climbing when it’s well below freezing and the sun hasn’t touched the slope yet.
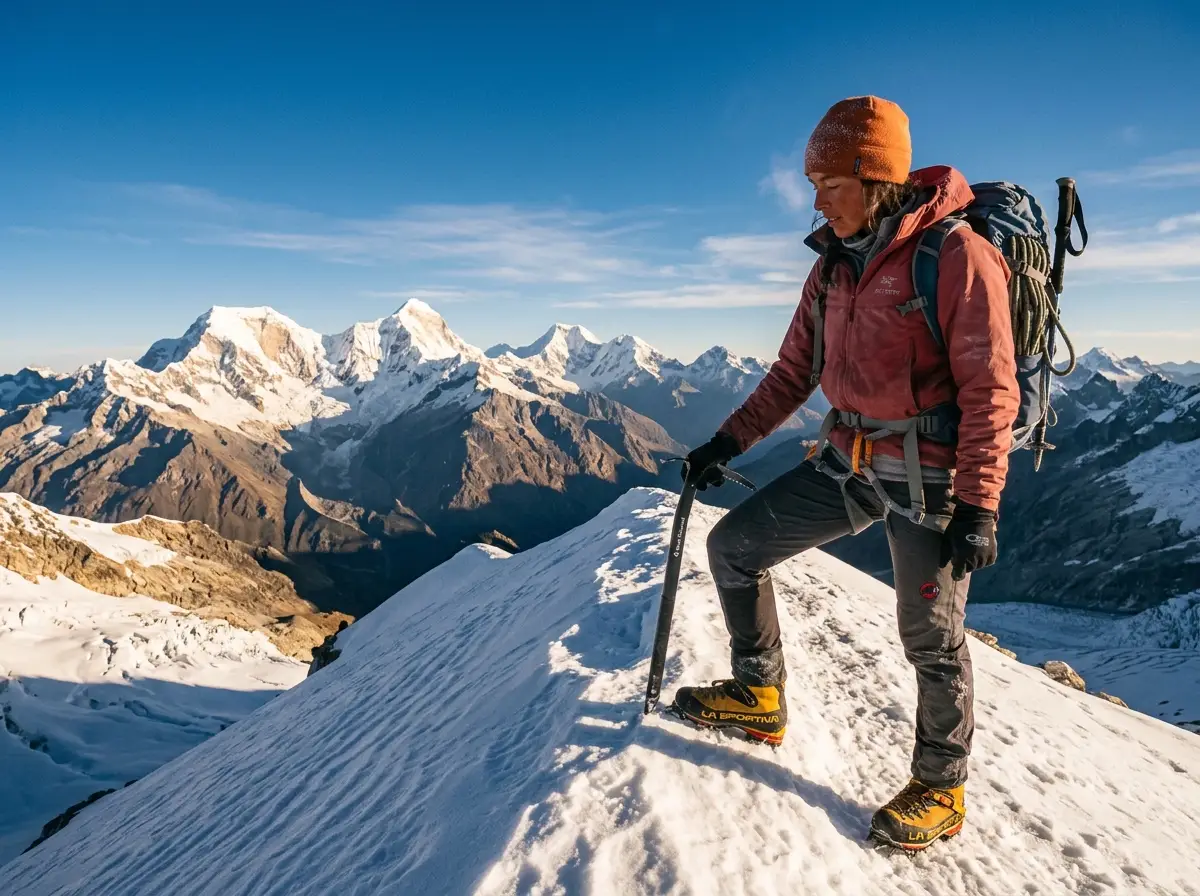
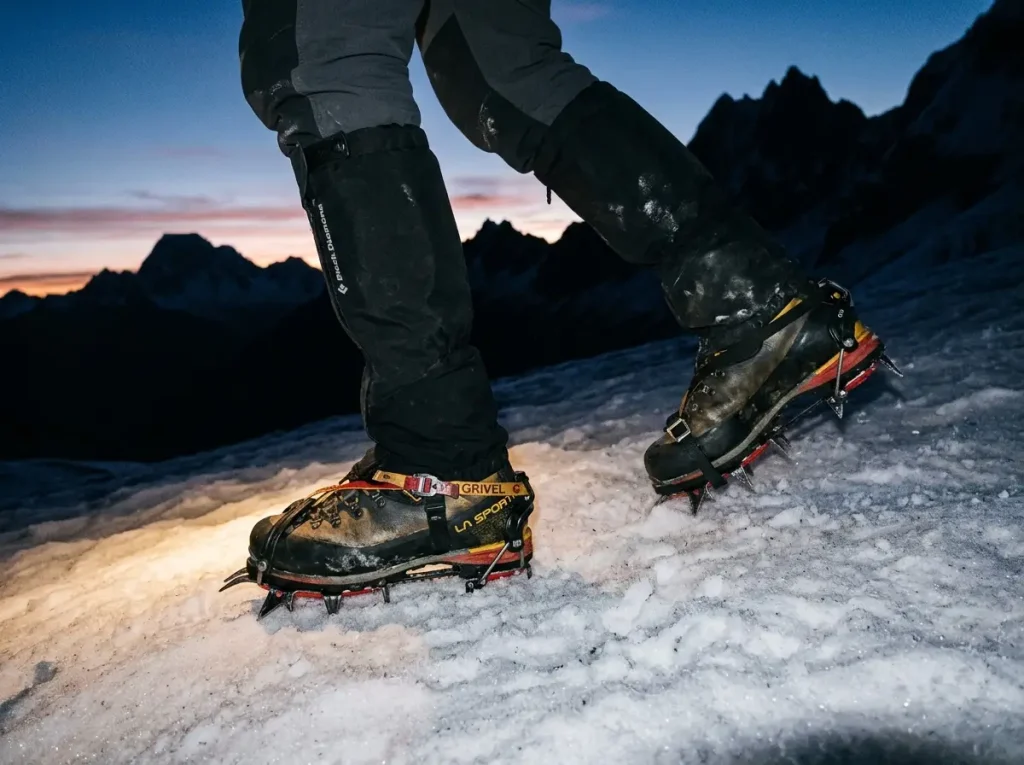
Start with the boots, because they’re the thing people get wrong. For most 5,000-to-6,000-meter peaks in the Blanca, a single insulated leather mountaineering boot like the La Sportiva Nepal Evo GTX (women’s version here) is the workhorse: warm enough for the standard objectives, stiff enough to take a crampon, and far cheaper than a true double boot. When you’re aiming at a cold high camp on a 6,000-meter peak, the step up is a double boot like the La Sportiva G2 SM, with a removable insulated liner that adds serious warmth for not much weight. Brands like Scarpa build comparable doubles, but the La Sportiva pair is what most Blanca climbers actually reach for. Either way, the boot has to take a step-in crampon, which rules three-season hikers out entirely.
Crampons need to match the boot. A welted mountaineering boot pairs with a semi-automatic crampon that clips a wire bail over the toe welt and a heel lever at the back, fast to put on with gloved hands and rock-solid on steep snow. The Petzl Vasak LeverLock crampons are the classic 12-point choice, and the Grivel G12 New Matic is a proven budget-friendly alternative that does the same job, holding solid when you’re front-pointing up a 50-degree pitch. For glacier travel and self-arrest you want a straightforward general-mountaineering axe, and the Black Diamond Raven is the forgiving standard that’s been on a million beginner climbs. Pair it with a lightweight alpine harness like the Petzl Altitude that you can step into over crampons, and a foam climbing helmet like the Petzl Meteor, which isn’t optional anymore given how much rock and ice the receding glaciers have loosened.
Two more pieces people underestimate. Glacier glasses are mandatory, not a nice-to-have: the sun reflecting off snow this close to the equator at 5,000-plus meters will burn your corneas and bring on snow blindness fast, so you want category-4 lenses with side coverage like the Julbo Camino Glacier glasses. And for high camps you want real warmth in your bag. A synthetic mummy rated to around -20°F (-29°C), like the ALPS Mountaineering Blaze, handles the cold nights without the worry that down brings in damp tent conditions. If you’d rather not fly with a bag that bulky, this is exactly the kind of thing worth renting in Huaraz instead.
Boots and crampons — the system that keeps your feet
Think of boots and crampons as one system, not two purchases. Fit the crampon to the boot before the trip, walk in them, and confirm the binding actually locks. A mismatch discovered at base camp is a trip-ender.
Axe, harness, and helmet
These three are your glacier-travel kit. None are heavy, all are non-negotiable, and the right mountaineering ice axe for your height and objective matters more than most beginners think. The same care goes into picking an alpine harness that’s actually worth the money.
Glacier glasses, sleeping bag, and what to rent
Glasses and a warm bag round out the kit. Bring the glasses, consider renting the bag, and you’ll save weight and money without cutting a corner that matters.
The Real Hazards Nobody Sells You On
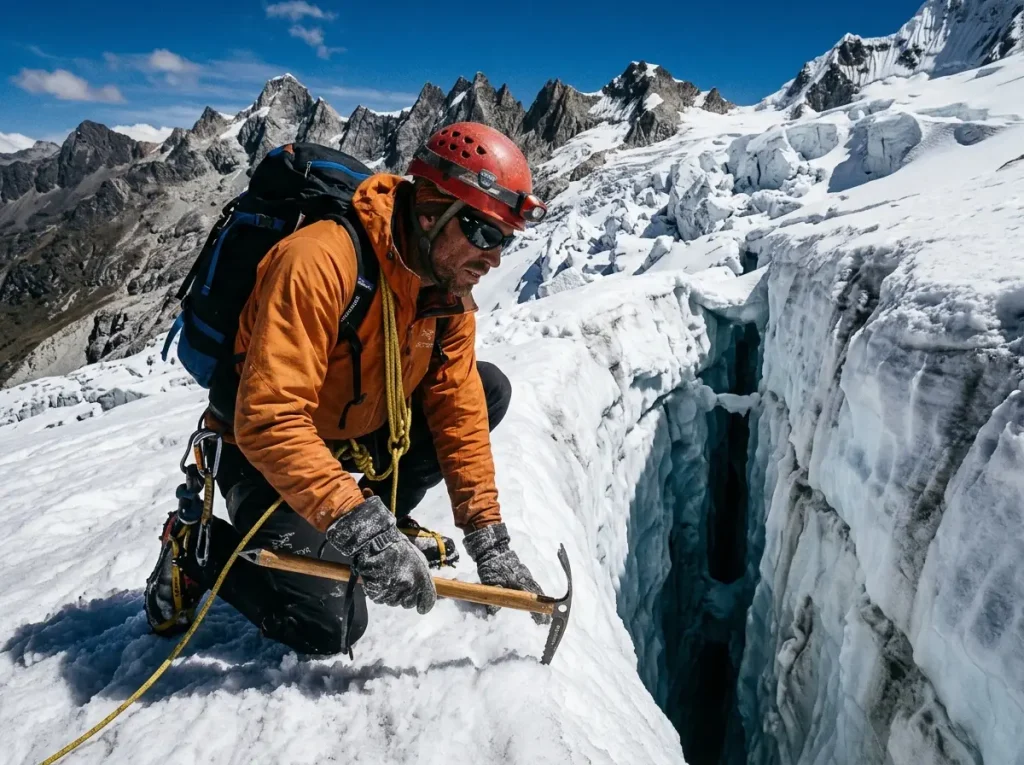
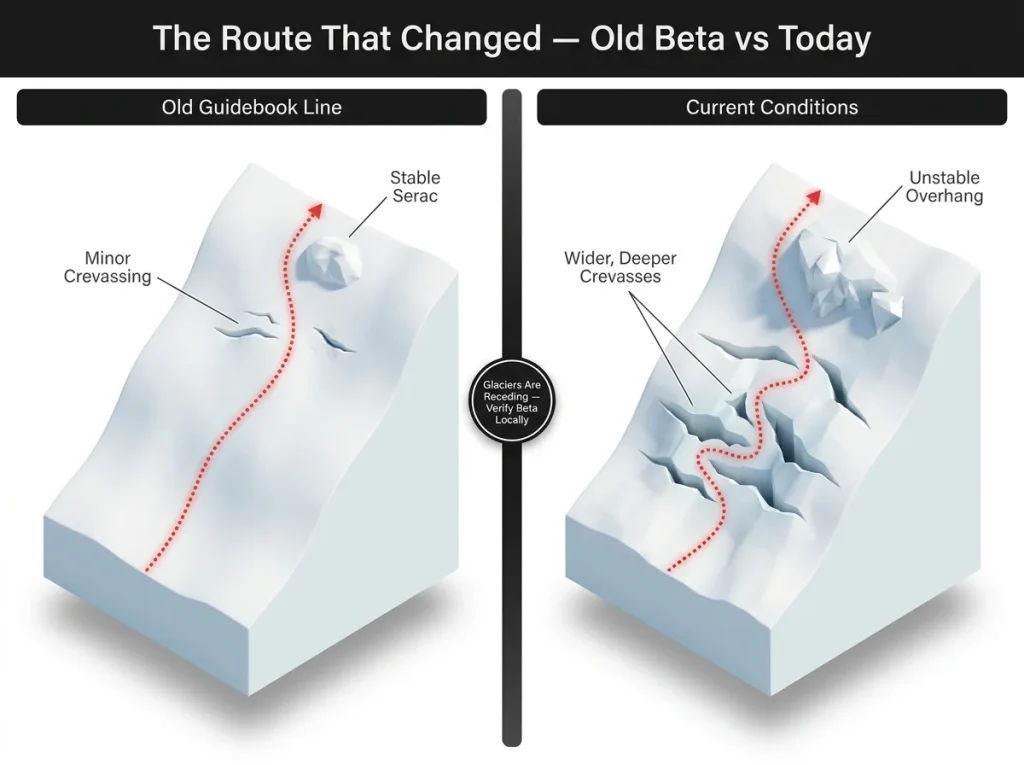
A company selling you a trip has every reason to make the mountain sound just hard enough to feel like an accomplishment and just safe enough to book. The honest version is messier, and the biggest reason is that the Cordillera Blanca is changing fast. Its glaciers are retreating quickly, and routes that were straightforward snow plods a decade ago now hold crevasses, thin bridges, and icefall that shift every single season. On Huascarán’s Garganta route, the going through the icefall has grown more difficult and more technical than the old guidebooks describe. The lesson is blunt: don’t trust old beta. Get current conditions in Huaraz before you commit to anything.
Objective hazard, the stuff that can hurt you regardless of how well you climb, is real here. Alpamayo is the clearest example. Its famous Ferrari route on the southwest face has been largely abandoned for the French Direct because serac and cornice collapse on that face has been fatal for multiple parties, including a group of eight in a single 2003 event. A mountain doesn’t care how strong or careful you are when a cornice the size of a car lets go above you. That’s not a reason to stay home; it’s a reason to pick your objective, your line, and your day with clear eyes.
The summit is only halfway. Most crevasse falls and bergschrund trouble happen on the way down, when you’re tired, the snow has softened, and your guard is low. Follow your uphill track back down, stay roped, and resist the urge to freelance a shortcut. Plenty of climbers summit and still don’t make the descent count.
Glaciers that moved since the guidebook
This is the same glacier-recession story now reshaping ranges worldwide, including the changing objectives in the North Cascades. Assume the printed beta is optimistic and verify locally.
Why the descent is the hazardous half
Plan your turnaround time before you start, and honor it. A summit reached too late is a descent done in soft snow and fading legs.
Get current beta in Huaraz
The guides at Casa de Guías and the climbers coming off the peaks know what’s happening this week. That intel is free, current, and worth more than any forecast, the same way hard-won conditions reports from any big range get passed hand to hand.
Conclusion
Peru rewards the climber who plans backward from acclimatization, not forward from a summit photo. Pick your peak by the skills it actually demands, not by how it looks on a postcard. Give yourself the two to three weeks it takes to go high, and learn to tell ordinary altitude misery from the two conditions that mean go down now. And before you step onto any glacier, get this week’s conditions from people who were just up there, because the mountain you read about may not be the mountain that’s standing today.
Do that, and the Cordillera Blanca turns from a place where trips quietly fall apart into the best classroom in the world for learning how to go high. Build the trip around the time it takes to acclimatize, and the summits take care of themselves.
Frequently Asked Questions
01What is the best mountain to climb in Peru for beginners?
Nevado Mateo (5,150 m, graded F) is the gentlest true glacier intro, with Ishinca (5,530 m) and Pisco (5,752 m) as natural next steps. All are glaciated, so you still need crampons, roped travel, and a solid self-arrest before you start.
02What is the best time of year for mountaineering in Peru?
The dry season runs May to September, and June through August is the most stable, with July the sweet spot for firm snow and clear skies. The wet season from October to April leaves the snowpack unstable and most peaks unsafe.
03Do you need a permit or guide to climb in the Cordillera Blanca?
Yes to a permit: you need a SERNANP entrance ticket for Huascarán National Park, bought at checkpoints or the Huaraz office in cash soles. A certified guide isn’t legally required for every peak, but for glaciated climbs it’s strongly advised unless your team can run its own crevasse rescue.
04How long does it take to acclimatize before climbing in Peru?
Plan about two weeks for a 5,000 m peak and three weeks for a 6,000 m peak. Sleep at least three nights in Huaraz before going above 4,000 m, use climb-high-sleep-low day hikes, and climb a 5,000 m peak before any 6,000 m objective.
05How much does it cost to climb Huascarán or Alpamayo?
Guided expeditions on these peaks typically run a few thousand dollars, while a self-supported climb costs far less once you add up the SERNANP fee, burro and arriero day rates, hut nights, and gear hire. The trade-off is that self-supported puts every safety decision on your own team.
Safety Notice: Rock climbing and mountaineering are inherently high-risk
activities that can involve physical trauma or fatal incidents. The information on Rock Climbing Realms is for
educational and informational purposes only. Techniques and advice presented here are not a substitute
for professional, hands-on instruction. Conditions and risks vary by location. Always seek guidance
from a qualified instructor before attempting new techniques. By using this website, you agree that you
are solely responsible for your own safety. Any reliance you place on this information is strictly
at your own risk, and you assume all liability for your actions. Rock Climbing Realms and its authors
will not be held liable for any harm, damage, or loss sustained in connection with the use of this information.
Affiliate Disclosure: We are a participant in the Amazon Services LLC Associates Program, an
affiliate advertising program designed to provide a means for us to earn advertising fees by advertising and linking
to Amazon.com. As an Amazon Associate, we earn from qualifying purchases. We are also an official affiliate partner
of Black Diamond Equipment via the AvantLink network. If you click on a Black Diamond affiliate link and make a
purchase, we may earn a commission at no additional cost to you. We also participate in other affiliate programs.
Additional terms are found in the terms of service.