

In this article
Finger taping is a familiar ritual at any climbing gym or crag, yet the reasons behind it and its actual effectiveness are often shrouded in a bit of mystery. Rock climbers reach for tape for a multitude of reasons: to manage pain, support an existing finger injury, protect their skin from abrasion, or even for a psychological boost. This guide aims to cut through the noise, offering a clear look at the real benefits and limitations of finger taping. We will explore proper techniques for how to tape fingers for climbing, drawing from evidence and expert insights, so you can make informed choices about how to tape your fingers to support your rock climbing endeavors and keep those crucial tools, your fingers, healthy and ready for the send. Learning how to use climbing tape effectively is a key skill.
Understanding Your Fingers: The Climber’s Crucial Tools
To truly grasp how and why finger taping might be beneficial, it’s important to first understand the structures you’re working with. This section delves into the essential finger anatomy for climbers, the forces involved in gripping, and the common climbing injuries that can sideline us. This knowledge forms the foundation for making smart decisions about taping and overall finger care, especially when considering finger-intensive moves on the wall.
Anatomy of the Climber’s Finger
The fingers, complex structures of bones, joints, tendons, and pulleys, are a climber’s primary connection to the rock. The bones, or phalanges, form the finger’s segments, articulating at the metacarpophalangeal (MCP), proximal interphalangeal (PIP), and distal interphalangeal (DIP) joints. These joints allow the intricate movements needed for various grips but are also subjected to significant stress. Powering these movements are the flexor tendons (flexor digitorum superficialis – FDS, and flexor digitorum profundus – FDP), which originate in the forearm and run through a tunnel-like structure called the flexor sheath to attach at different points on the phalanges of the finger.
Keeping these powerful tendons anchored close to the bones is the critical flexor pulley system, a series of fibrous bands. This system comprises annular pulleys (A1-A5) and cruciate pulleys (C1-C3). Their primary job is to prevent “bowstringing”—the tendon pulling away from the bone like a bowstring from a bow—which would lead to a significant loss of mechanical efficiency and grip strength. For climbers, the A2 and A4 pulleys are particularly vital. The anatomy of the finger flexor pulleys shows they attach directly to the bone of the proximal and middle phalanges, respectively, making them robust but also the most frequently injured when subjected to the high forces of climbing. Understanding how to go about diagnosing finger flexor pulley injuries is also important for proper care, especially for the ring finger or middle fingers, which are often affected.
Biomechanics of Gripping and Force
Climbing places extraordinary demands on our fingers, often requiring them to support our entire body weight on minuscule holds. Different grip types distribute these forces differently, with the crimp grip—whether open, half, or full/closed—being a common culprit in finger injuries. The biomechanics of the crimp involve flexion at the PIP joints and often hyperextension at the DIP joints. This position, while allowing climbers to maximize force on small edges, significantly loads the A2 and A4 pulleys. It’s not merely a “bad habit” but a mechanically efficient, albeit risky, way to utilize small holds.
The forces involved can be staggering; research indicates that the force experienced at the A2 pulley can be three to four times greater than the force applied at the fingertip. For recreational climbers, this can mean loads around 380 Newtons (N), spiking to 450N or even higher during dynamic movements or when a climber’s feet unexpectedly slip. Considering the A2 pulley’s average rupture strength is around 400N, it’s clear why these structures are vulnerable. Pulley injuries are especially common during eccentric loading—when a muscle lengthens under load, like when slowly releasing a hold or catching oneself after a slip. Over time, experienced climbers’ pulleys can adapt and thicken, but the risk remains, particularly if you are not focused on improving your grip strength for various holds appropriately. For those interested in the specifics, further reading on the forces on flexor tendon pulleys during climbing and a biomechanical analysis of H-taping can provide deeper insights.
Common Finger Injuries in Climbers
Pulley injuries (strains and ruptures of A2, A3, A4) are the most prevalent acute finger injuries among climbers, frequently affecting the ring finger or middle finger. Symptoms often include an audible “pop” at the time of injury, followed by acute finger pain, swelling, bruising, and potentially visible bowstringing of the tendon. These finger/pulley injuries are typically graded (e.g., Schöffl’s Grades I-IV), with Grade I being a minor strain and Grade IV indicating multiple or complete ruptures requiring more intensive treatment. Much like how a twisted ankle can range in severity, so too can finger injuries.
Tenosynovitis is another common issue, an overuse tendon injury characterized by inflammation of the tendon sheath. Climbers might experience pain along the palmar side of fingers, mild swelling, and a persistent soreness that lingers after climbing. Collateral ligament strains, affecting the sides of the finger joints (often the PIP of the middle finger), usually result from a sudden sideways force on the finger, leading to localized pain and swelling. Joint capsulitis or synovitis, an inflammation of the joint capsule itself due to high pressures and repetitive stress, can cause stiffness and diffuse joint pain. Beyond these structural issues, skin injuries like “flappers” (torn-off calluses or skin) and “splits” (deep, painful cracks at the fingertips) are frequent, caused by friction and abrasion against the rock or plastic holds. While seemingly minor, these can abruptly end a climbing day. Familiarizing oneself with the common types of climbing injuries and understanding rock climbing injuries in more detail can be beneficial, as can strategies for managing other common climbing-related overuse injuries. Even a banged pulley needs careful attention.
The Great Debate: Does Finger Taping Really Work?
The climbing community often discusses the true efficacy of finger taping. Does it provide real mechanical support, or is it more of a comfort blanket? This section weighs the purported benefits against scientific findings, exploring its impact on strength, injury prevention, post-injury support, and the undeniable psychological aspects, including a comparison of key studies on H-tape. The tape’s effectiveness is a key point of discussion.
Purported Benefits vs. Scientific Reality
Climbers tape their fingers hoping for a range of benefits: structural support for vulnerable joints and pulleys, protection for their skin, a reduction in pain, prevention of new injuries, and sometimes, an enhancement in performance or confidence. However, when we look at the scientific evidence, the picture becomes more nuanced. Studies investigating tape’s impact on finger strength and the activation of flexor muscles (FDS/FDP) in uninjured climbers generally show no significant difference whether taped or untaped. This suggests that standard taping methods don’t inherently make your fingers stronger.
Regarding the prevention of pulley injuries in healthy climbers, there’s little scientific backing. Research on both circumferential (simple tape ring) taping and H-taping has not demonstrated a significant prophylactic effect. Where tape does show more promise is in the context of an existing pulley rupture. Evidence indicates that H-taping can help reduce the tendon-bone distance (bowstringing) in an injured finger, a mechanical improvement that circumferential taping doesn’t offer effectively. While some studies suggest tape offers low-level evidence for pain reduction, its role in short-term pain management during rehabilitation and the significant psychological benefits—like increased confidence and proprioceptive feedback—are widely acknowledged by climbers. For those seeking more depth, research on finger taping and strength and a systematic review of annular ligament taping offer further reading, though true gains come from building actual finger strength through training.
H-Tape Deep Dive: Schöffl vs. Salas
Two key studies offer differing perspectives on H-tape, a popular method for pulley support, often referred to as the h-type finger method. The Schöffl et al. (2007) study involved live climbers who had existing A2 or combined A2/A3 pulley ruptures. Their findings were significant: H-taping decreased the tendon-bone distance by 16% and increased crimp strength by 13% in these injured fingers. This led to the recommendation of H-tape as a beneficial tool during the rehabilitation phase of pulley ruptures.
In contrast, the Salas et al. (2022) study utilized a cadaveric model to assess H-taping’s effectiveness both prophylactically (to prevent tears in intact pulleys) and for stabilizing partial tears. Their results indicated that H-taping was not effective in preventing initial ruptures in healthy pulleys, nor did it provide significant stabilization for partially torn pulleys in their model. The differing conclusions likely stem from variations in study design: Schöffl looked at live climbers with chronic, full ruptures, focusing on bowstringing and functional strength during rehabilitation, while Salas used a cadaver model to examine ultimate failure force in the context of prevention or acute partial tear stabilization. The consensus from both is that H-tape’s primary supported role appears to be in improving the mechanics of an already ruptured pulley during recovery, not in preventing healthy pulleys from tearing or fully bracing partially torn ones against high acute loads. You can explore the original research on H-tape impact and further biomechanical analysis of H-taping methods for more details.
The Undeniable: Skin Protection & Confidence
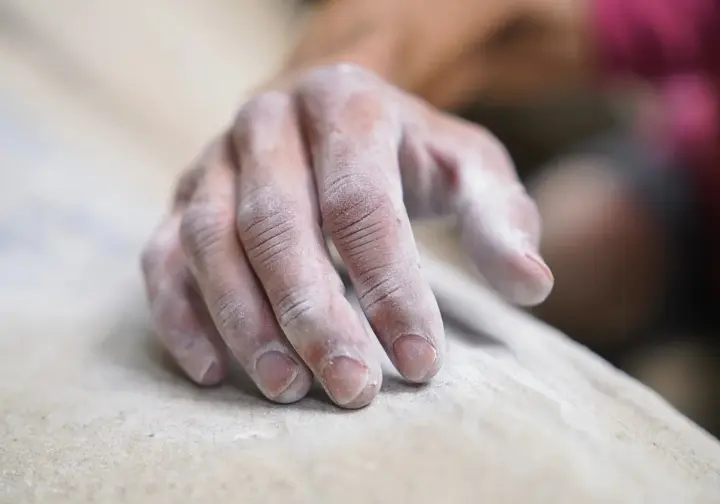
While the debate continues on structural support, one of the clearest and most consistent benefits of finger taping is skin protection. Tape acts as a direct physical barrier between your skin and abrasive rock surfaces or plastic holds. This helps prevent painful flappers, blisters, and allows climbers to continue sessions even with minor skin damage that would otherwise be too sensitive. Many climbers can attest to why climbers tape their fingers for this reason tape alone, especially on raw fingers.
Beyond the physical, the psychological impact of taping is significant. The sensation of a taped finger can reduce the perception of discomfort and pain, leading to a boosted sense of confidence, especially when using a finger that feels vulnerable or is recovering from an injury. Tape can also serve as a valuable proprioceptive cue – a physical reminder that a particular finger needs to be treated with more care. This encourages more mindful hand movement, which is beneficial during rehabilitation or when managing minor tweaks. There might also be a placebo effect at play, where the belief in the tape’s efficacy contributes to a positive outcome. This doesn’t negate the benefit but helps understand the multifaceted ways tape for climbing skin protection works, making climbing tape as a practical gift for hand care a thoughtful option.
Choosing Your Armor: A Guide to Climbing Tapes
Selecting the correct tape is just as important as the taping technique itself. The market offers various options, and understanding their properties—material, adhesive, rigidity—will help you choose wisely. This section navigates the types of tape climbers use and compares some common brands, aiding your finger tape selection.
Key Properties of Effective Climbing Tape
The most common material for standard athletic tape is 100% cotton, often featuring a zinc oxide adhesive. Some specialized tapes, like Leukotape P, use a rayon backing for increased strength. Adhesive strength is paramount; the tape must stay put during sweaty, chalky climbing sessions. However, very aggressive adhesives can leave residue or irritate the skin. “High-tac” medical-grade adhesives are often preferred. For providing structural support to joints and pulleys, the tape must be rigid and non-stretch; tape shouldn’t stretch if support is the goal. This is a critical distinction from elastic tapes like kinesiology tape (often a stretchy tape), which serve entirely different purposes such as pain modulation and proprioception, and are unsuitable for stabilizing finger structures under climbing loads. If your tape doesn’t grip, it’s not doing its job.
Other desirable properties include durability to withstand abrasion and resist peeling, breathability for comfort (though less critical for support tapes), and the ability to be torn by hand, both widthwise and lengthwise, for easy customization on the fly. When choosing the right climbing tape, the “climbing-specific” label is less important than these actual performance characteristics. The unique properties of Leukotape P make it a strong contender for specific applications. Good adhesion is key, so managing chalk and sweat for better adhesion is also part of the equation.
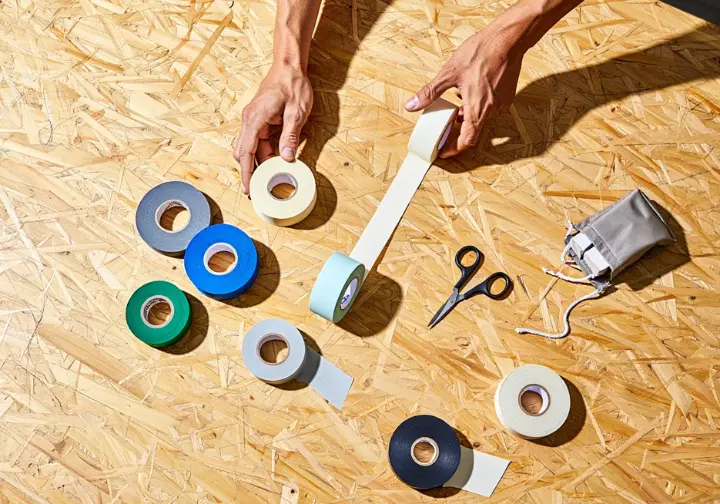
Types of Tape Used by Climbers
Climbers primarily use a few categories of tape. Standard Athletic Tape, often called zinc oxide tape or athletic finger tape, is typically 100% cotton with a zinc oxide-based adhesive. It’s widely available and generally affordable, but the quality can vary significantly in terms of adhesion, tension loss under stress, and ease of tearing; sometimes, athletic tape won’t suffice for rigorous climbing. Climbing-Specific Tapes are marketed by numerous climbing brands like Metolius, Black Diamond, Evolv, and Friction Labs. These are engineered to be non-stretch, highly adhesive even when battling chalk and sweat, durable against abrasion, and easily tearable. Some also claim to leave minimal residue. This is often the preferred finger tape for many.
Leukotape P stands out as a rigid, rayon-backed strapping tape featuring an aggressive zinc oxide adhesive. It’s renowned for its high tensile strength and ability to maintain tension, making it popular for robust support applications like H-taping. However, its strong adhesive often necessitates an underwrap (like Cover-Roll) to protect the skin from irritation and make removal less painful. It’s also worth noting that Leukotape P contains latex, which can be an issue for individuals with allergies. Lastly, Kinesiology Tape is an elastic tape with very different properties and application principles. It’s designed to lift the skin, promote circulation, and provide proprioceptive feedback, but it does not offer the rigid structural support needed for finger pulleys in climbing. Understanding how and why climbers use finger tape helps in selection, and it’s useful to see a comparing climbing tape vs athletic tape discussion to understand nuances.
Tape Brands Comparison
When selecting a climbing finger tape, brand reputation and user experience play a significant role. Metolius Climbing Tape, typically cotton with zinc oxide adhesive, is often reported as easy to tear. However, reviews on its adhesion can be mixed, with some users finding it less effective with sweat or noting changes in newer product versions. Flashed Finger Tape generally receives positive feedback for being very durable, having a strong, superior adhesive that sticks well, and leaving no residue, though it might be on the pricier side. Be wary of cheap tape as it often fails under stress.
Friction Labs Tape is another option designed specifically for climbers, marketed as non-stretch, very sticky, and easily tearable into thin strips, catering to precise taping needs. As previously mentioned, Leukotape P is a rayon-backed tape known for its aggressive adhesive, exceptional rigidity, and durability in maintaining tension. Its downsides include not being breathable, often requiring an underwrap due to its strong adhesive which can irritate skin, leaving residue, and containing latex. Other brands like Black Diamond or Evolv Magic Tape are also available, though detailed comparative reviews are not always abundant; user comments sometimes describe Black Diamond tape as “okay, nothing special.” For specific products, checking reviews of Metolius climbing tape or browsing user discussions on best climbing tape can offer valuable insights.
Mastering the Craft: Step-by-Step Finger Taping Techniques
Knowing which tape to use is half the battle; applying it correctly is the other. This core section provides detailed, step-by-step instructions for the most common and effective finger taping techniques climbers use for pulley and joint support, as well as for skin protection, emphasizing proper application for efficacy and safety. Understanding how to tape fingers for climbing involves mastering these methods.
General Principles for Application
Effective taping starts with good preparation and adherence to some fundamental principles. First, skin preparation is key: always apply tape to clean, completely dry skin. Ensure the area is free of dirt, oils, chalk residue, and moisture. Wiping the skin with rubbing alcohol beforehand can enhance adhesion. Critically, appropriate tension must be used. The tape should be snug enough to provide support but NEVER so tight that it restricts blood flow. Regularly check circulation by observing fingertip color (it shouldn’t be pale or blue), warmth, and sensation. If circulation is compromised, remove the tape and reapply more loosely.
When wrapping, anchor the tape and overlap layers correctly. Start with an anchor strip if the technique calls for it. Overlap each subsequent circumferential layer by approximately one-third to one-half of its width; this ensures the tape job is secure and durable. Try to end the tape on the top or side of the finger, where it’s less likely to catch and peel. For optimal bonding, allow the adhesive to set by applying tape 20-30 minutes before you start climbing. Some climbers also find that rounding the edges of the tape with scissors can help prevent peeling. These general taping application principles are widely applicable, and even tips for making kinesiology tape stick can offer insights into maximizing adhesion for any tape type. Adhering to these guidelines is part of the fundamental safety practices in climbing.
H-Taping for Pulley Support
The H-taping method is primarily used for supporting A2 or A3 pulleys after an injury, such as a strain or rupture, has occurred. Its goal is to reduce tendon-bone distance (bowstringing) and reinforce the healing pulley when it’s subjected to load. Always use a rigid, non-stretch tape for this technique. To prepare the “H,” cut a long piece of tape approximately 10cm long and 1.5cm wide (a medium-width tape often works well). From each end, make two parallel lengthwise cuts towards the middle, stopping short to leave an uncut central “bridge.” The width of this bridge should correspond to the area of the pulley being supported. This process creates four “arms.”
Position your finger slightly bent, about 30 degrees of flexion at the PIP joint, or in a gentle crimp. This functional position is important for the tape to work correctly when you grip. Place the central bridge of the “H” over the palmar aspect of the injured pulley (base of proximal phalanx for A2, or over PIP for A3/bowstringing reduction as per Schöffl). Wrap one pair of arms circumferentially around the finger—one arm going proximally from the bridge, the other distally. Then, wrap the second pair of arms over or adjacent to the first pair to secure them. Ensure the tape is snug but does not constrict blood flow. The biomechanical aim is to mimic the damaged pulley function. This method is recommended during the rehabilitation phase of pulley injuries, not as a preventative measure for healthy pulleys. For further guidance, refer to resources on the H-tape method for pulley injuries or a visual guide to H-taping. It’s also helpful to have a clear picture of understanding the pulley system being supported.
X-Taping (Figure-8) for Joint Stability
X-taping, also known as figure-8 taping, is a technique used to provide support to the finger joints, particularly the PIP (proximal interphalangeal) and DIP (distal interphalangeal) joints. It’s beneficial for supporting collateral ligaments and the joint capsule. This method can also offer some degree of support to the A2, A3, and A4 pulleys simultaneously, while allowing more flexibility than H-taping. Use a thin piece of rigid, non-stretch tape for this.
To apply, start by creating an anchor with one or two circular wraps of tape below the target joint. For example, if supporting the PIP joint, anchor on the proximal phalanx. From the anchor, bring the tape diagonally across the palmar (or sometimes dorsal, depending on the specific need) aspect of the joint. Continue with a circular wrap above the joint (e.g., on the middle phalanx for PIP joint support). Then, bring the tape diagonally back across the joint in the opposite direction, crossing the first diagonal strip to form an “X” or a figure-8 pattern. Secure the end of the tape with a final circular wrap over one of the anchor points, ideally finishing on the top or side of the finger to prevent peeling. The “X” configuration provides multi-directional support, helping to limit excessive sideways motion (varus/valgus stress) and hyperextension or hyperflexion of the joint. It’s commonly used for general joint support, managing minor sprains, or when dealing with conditions like capsulitis where some support is needed without excessive restriction. You can find more on figure-8 taping for finger joints and specific applications like taping for finger capsulitis in climbers.
Buddy Taping for Ligament Support
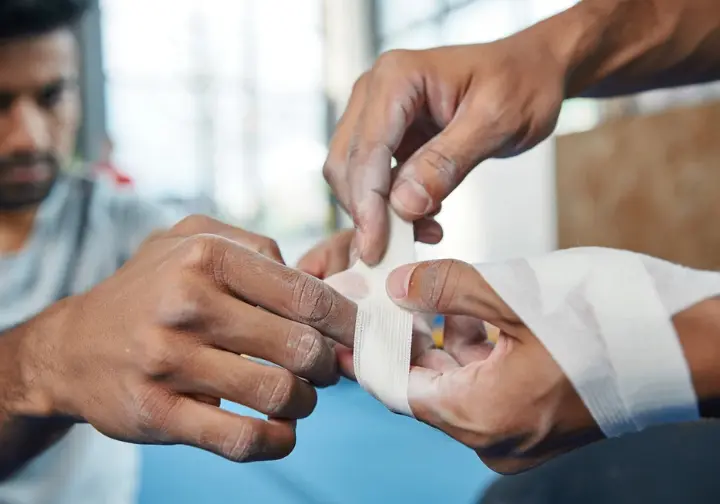
Buddy taping is a straightforward technique used to support an injured finger by securing it to an adjacent healthy finger. This limits the injured finger’s independent movement, particularly sideways motion, thereby reducing stress on damaged structures. It is especially useful for collateral ligament sprains, which affect the sides of the finger joints. For example, you might tape the index and middle fingers between the first and second knuckles, or other affected knuckles.
To apply buddy tape, take two short strips of tape. Place one strip circumferentially around both the injured finger and its healthy neighbor, positioning this strip above the affected joint. Place the second strip similarly below the affected joint. The tape should be snug enough to provide support but still allow for comfortable flexion and extension of the fingers together. For a specific collateral ligament injury, it’s often recommended to tape the injured finger to the finger on the opposite side of the injury. For example, if the ulnar collateral ligament (pinky side) of the middle finger is injured, you would tape the middle finger to the index finger. The use of buddy taping for finger injuries is common, though its application for pulley injuries is more debated. Some experts advise against it for pulleys, arguing it doesn’t protect them adequately and can lead to weakness in the healthy finger, while others see it as a temporary aid. Consulting expert advice on treating finger injuries can provide further clarity.
Techniques for Skin Protection (Splits, Flappers, Cracks)
Protecting your skin is one of the most straightforward and effective uses of climbing tape. For painful split fingertips, a method popularized by Metolius involves applying a thin strip of climbing tape to the tip of your finger, extending slightly down both the pad and fingernail side. Then, starting from the tip, wrap circumferentially downwards, overlapping each layer. Anchor this with a figure-8 wrap around the PIP joint to prevent it from rolling off. Pinch out any slack on the fingernail side to ensure a snug fit. These fingertip tapers can be very helpful. This technique shows how to tape a split finger tip effectively.
To protect raw fingers or prevent finger flappers on pads or knuckles, apply layers of tape directly over vulnerable areas. An “X” pattern of tape over a knuckle can provide protection while still allowing for some flexibility. If a flapper has already occurred, clean the wound thoroughly. You might consider placing a small piece of non-stick pad or even the smooth backing paper from the tape itself over the raw area before applying tape over it to prevent the adhesive from sticking to the wound. For general cuts and abrasions, clean the wound, apply a non-adherent dressing if needed, and then secure it with tape to shield it from further irritation and contamination. For those wondering how to tape hands for rock climbing in a more comprehensive way, especially for crack climbing or navigating sharp rock cracks, tape gloves are common. These involve using wider tape to create multiple layers across the back of the hand, often extending from the wrist to the knuckles, and can include wraps around the thumb and fingers. Secure these at the wrist with a sort of cuff, being careful not to wrap too tightly, especially considering forearm pump. Part of skin care also involves maintaining clean holds to reduce skin abrasion.
Strategic Taping: When (and When Not) to Tape
Understanding when taping is appropriate—and when it might be counterproductive—is crucial for long-term finger health. This section offers guidance on using tape for injury management and skin protection, discusses its prophylactic use, and highlights situations where taping should be avoided, considering different climber levels. It addresses the common question of “how to tape fingers for climbing” in various scenarios.
Taping for Injury Management and Recovery
Tape can be a valuable tool in managing and recovering from specific finger injuries, provided it’s used correctly and as part of a broader rehabilitation plan. For A2, A3, or A4 pulley strains or ruptures (typically Grades I-III), H-taping is often recommended after the acute phase to reduce bowstringing and support the healing pulley as you gradually reintroduce load. The duration of taping can vary depending on the grade of injury, potentially for 3 months for Grade I/II injuries and up to 6 months for Grade III. Acute management might also involve splinting. For collateral ligament sprains, buddy taping is a common approach to limit lateral stress on the affected joint, while X-taping or specific splints can also offer stabilization.
When dealing with tenosynovitis, the primary treatment is rest and careful load management. While H-tape might be used if there’s associated pulley stress or for general support during a cautious return to activity, tape itself doesn’t directly address the inflammation of the tendon sheath. For joint capsulitis or synovitis, a figure-of-eight taping technique is often recommended when restarting climbing to support the inflamed joint. If significant swelling is present, a compression wrap like Coban can be used. It’s vital to understand that tape is an adjunct to, not a replacement for, a comprehensive rehabilitation program that includes specific exercises for mobility, strength, and proprioception. The ultimate goal is usually to wean off the tape as the tissue recovers and strengthens. For insights on specific conditions, consider resources on rehab for rock climbing finger tenosynovitis and the general treatment for pulley injuries in climbers. An important aspect of any recovery is incorporating mobility work into your recovery.
Taping for Essential Skin Protection
One of the most clear-cut uses for finger tape is protecting your skin. It’s wise to consider pre-emptive taping on areas of your fingers that are particularly vulnerable to cuts, splits, or excessive abrasion, especially when you know you’ll be climbing on sharp holds or particularly coarse rock. This can prevent minor skin issues from becoming session-ending problems. During long climbing sessions or on multi-day trips where your skin will be subjected to repeated stress, taping can help preserve its integrity as it progressively thins out. This is crucial for both sport climbing and bouldering.
Certain climbing styles also lend themselves to specific taping strategies for skin protection. For instance, tape gloves are almost indispensable for crack climbing, protecting the backs of your hands and fingers during hand and fist jams in cracks. Similarly, specific fingertip or knuckle taping can be beneficial when tackling routes with thin finger cracks or sharp pockets. If you do sustain minor wounds like cuts, splits, or flappers, taping (after proper cleaning) can allow you to continue your session if the injury isn’t severe enough to warrant stopping. Knowing when to tape for climbing and general tape for finger protection in climbing are useful pieces of knowledge. Additionally, using chalk effectively to manage skin moisture can complement taping for overall skin health, whether on grippy plastic indoors or outside on rock.
Prophylactic Taping: Myth vs. Reality
The idea of taping healthy, uninjured fingers to prevent injuries, particularly pulley injuries, is a common practice among climbers. However, the general consensus among medical professionals and researchers is that this type of prophylactic taping does NOT effectively prevent initial pulley injuries and is not generally recommended for this purpose. The external support provided by tape is likely insufficient to counteract the high forces experienced by internal finger structures during intense climbing. Even if a finger feels a bit “tweaky,” tape isn’t a guaranteed shield.
While prophylactic taping for pulley injury prevention is largely unsupported by evidence, tape might offer a psychological benefit or provide proprioceptive feedback for fingers that feel “tweaky” or slightly unstable. This sensation can make a climber feel more secure, but it shouldn’t be mistaken for robust mechanical protection. It’s critical to distinguish between taping to prevent pulley injuries (which has little backing) and pre-emptive taping for skin protection (which is a valid and effective practice). Considerations also vary for different climber levels. Beginner climbers or a new climber are often advised to climb with bare hands initially to allow their skin to toughen and to develop natural proprioception. They might use tape primarily for acute skin issues. Advanced climbers or seasoned climbers may use tape more strategically for supporting diagnosed injuries or for specific skin protection needs on demanding projects. There’s ongoing discussion about the effectiveness of taping for overuse injury avoidance and many expert opinions on taping for injury prevention available. For newcomers, focusing on advice for beginners on developing good habits is often more beneficial than relying on tape.
When to AVOID Taping (Contraindications)
While tape can be helpful, there are situations where it should be avoided or used with extreme caution. Never tape directly over an open wound that hasn’t been properly cleaned and dressed. Doing so increases the risk of infection and can be very painful upon removal. Always use a sterile, non-adherent dressing on the wound first, then secure it with tape. If you experience an allergic reaction to the tape adhesive, such as redness, itching, or a rash, remove the tape immediately and consider trying a hypoallergenic alternative. An ankle sprain might need different considerations than a finger issue.
One of the most critical contraindications is restricted circulation. If your fingertip becomes numb, tingly, unusually cold, or turns pale or bluish after taping, the tape is too tight. Remove it immediately and reapply more loosely. If tape worsens your pain or seems to aggravate an existing condition, or your finger hurts more with it, it should also be removed. Crucially, tape should not be used to mask severe pain or to push through a suspected significant injury, such as a complete pulley rupture or a fracture, without a proper medical evaluation. Finally, avoid habitual or over-reliant taping without a specific need. Constant taping can hinder the natural toughening of your skin (callus development) and may diminish your fingers’ natural proprioceptive feedback. General contraindications for kinesiology tape can often be adapted for athletic tape, and general advice for athletic taping should always be heeded. Ultimately, learning fundamental safety in climbing includes knowing when not to use certain aids.
Beyond the Tape: Holistic Finger Health
Taping is just one small piece of the finger care puzzle. For long-term finger health and resilience, a more comprehensive approach is necessary. This involves diligent warm-ups, targeted strengthening (including antagonist muscles), smart load management, adequate rest, good skin care, and considering alternatives like splints or dedicated rehab exercises when needed. This is about more than just your tape game.
Warm-Up and Strengthening Essentials
A proper finger warm-up is non-negotiable for preparing your fingers and entire body for the demands of climbing. Its purpose is to increase blood flow to tissues, enhance tissue elasticity, lubricate joints, and neurologically prime your system, all of which reduce injury risk. A good warm-up should include some general cardiovascular activity, dynamic stretching focusing on the shoulders, elbows, wrists, and fingers, followed by specific finger activation. Progressive loading is key; this could involve easy climbing on large holds for a significant number of moves (some suggest 100-120 moves to prepare pulleys) or performing sub-maximal hangs on a hangboard.
Finger flexor strengthening, primarily through controlled and progressive hangboarding using various grip types, is vital for building robust fingers. However, don’t neglect the antagonist muscles—those that extend your fingers and wrists. Strengthening these muscles using exercises like rubber band finger extensions, rice bucket workouts, or reverse wrist curls helps maintain muscle balance around the joints and can prevent common overuse injuries. The importance of warm-ups for sport climbing is well-documented, and specific finger warm-up routines for climbing are readily available. You can also explore effective warm-up strategies to optimize your preparation. Following a good hangboard protocol during boarding sessions is also beneficial.
Load Management and Active Recovery
Many climbing injuries, especially those affecting the fingers, are the result of doing “too much, too soon.” Effective load management is therefore a cornerstone of injury prevention and sustainable progress. This means gradually increasing your climbing volume (how much you climb), intensity (how hard you climb), and frequency (how often you climb). Pay close attention to how your body responds. Learn to differentiate between the normal discomfort of training and the warning signs of an impending injury, and be prepared to adjust your climbing plans accordingly. Even a couple finger injuries can be a sign to reassess.
Adequate rest days are just as important as training days. Rest allows your tissues to repair and adapt, preventing cumulative fatigue that can lead to injury. Prioritize quality sleep and good nutrition, as these are fundamental pillars of recovery. On your rest days, consider active recovery methods. These might include light activities like walking or cycling, dedicated mobility work, or gentle stretching. Such activities can promote blood flow and aid recovery without adding significant stress to your tissues. Good resources exist for climbing injury prevention and management and for healing nagging finger injuries with load management. A well-rounded approach involves integrating mobility for active recovery and strength.
Skin Care and Alternatives to Tape
Good skin care is essential for climbers, as healthy skin allows for more comfortable and consistent training. This involves managing calluses by regularly filing down any thick, uneven, or loose edges to prevent them from tearing off as flappers, while still maintaining a protective layer. Moisturizing is also key. Use climbing-specific salves or general moisturizers after climbing, especially before bed, to keep your skin supple. Chalk and dry environments can quickly lead to dry, cracked skin, which is prone to splitting. Don’t forget to clean your hands thoroughly after each climbing session to remove chalk and grime that can cause irritation or infection from the grippy gym environment or outside rock. Your palms need care too.
While tape is a common tool, there are alternatives. For significant injuries like severe pulley tears or suspected fractures, rigid splints may be necessary for proper immobilization. For crack climbers, reusable crack gloves offer a durable and often more comfortable alternative to creating tape gloves for every session. Ultimately, the best long-term “alternative” for managing chronic finger issues or recovering from an injury is a dedicated rehabilitation program. This should include targeted exercises prescribed by a knowledgeable professional to restore mobility, strength, and proper hand function, rather than relying solely on passive supports like tape. You can find expert advice on skin care for climbers and explore alternatives to climbing tape for cracks. Don’t forget that using brushes as part of skin and hold care can also contribute to healthier skin by keeping holds cleaner and less abrasive, especially important for slab climbs or when dealing with a squishy finger.
Expert Corner: Debunking Myths & Advanced Insights

Navigating the world of finger taping can be confusing, with plenty of anecdotal advice and persistent myths. This section aims to clarify common misconceptions, offer insights from climbing physiotherapists and doctors, and highlight frequent taping mistakes, providing a more nuanced, expert-informed perspective. Some additional tips can be found here.
Common Taping Myths Debunked
Several myths about finger taping persist in the climbing community.
Myth 1: “Tape makes fingers stronger.” Reality: Scientific research consistently shows that taping does not significantly increase muscle activation or maximum voluntary contraction (MVC) in uninjured climbers. Any strength gains observed with H-tape after a pulley rupture are more likely due to improved biomechanical efficiency (reduced bowstringing) rather than enhanced muscle power.
Myth 2: “Taping fully prevents all finger (pulley) injuries.” Reality: There is little to no scientific evidence supporting the idea that prophylactic taping prevents initial pulley injuries in healthy fingers. Tape is unlikely to provide sufficient reinforcement to internal structures against the high forces involved in climbing.
Myth 3: “All taping techniques are equally effective for pulley support.” Reality: Different taping methods have distinct mechanisms and levels of evidence. H-taping shows some potential for support after an injury, while simple circumferential taping is largely ineffective for providing structural pulley support.
Myth 4: “If you tape an injury, you can climb on it as hard as you want.” Reality: Tape is not a magical fix that makes an injured finger invincible. Climbing hard on a taped injury without respecting the healing process risks worsening the damage and prolonging recovery; this doesn’t stop climbers sometimes, unfortunately.
Myth 5: “Taping will make your fingers/tendons weaker over time.” Reality (Nuance): Tape itself doesn’t inherently weaken tissues. However, chronic over-reliance on tape as a substitute for proper loading, strengthening, and rehabilitation can lead to a failure to develop optimal tissue resilience and adaptation.
Myth 6: “The tighter the tape, the better the support.” Reality: Over-tightening tape is harmful. It restricts blood flow, can cause pain or numbness, and offers no additional supportive benefit beyond a snug, comfortable application. For further reading, you can find expert discussion on taping myths and discussions on the long term effects of finger taping. It’s similar to debunking myths about climbing gear, like shoe fit.
Insights from Climbing Medical Pros
Several medical professionals specializing in climbing injuries have shared valuable insights on finger taping. Dr. Volker Schöffl, a prominent researcher, is known for his work on H-taping for post-pulley rupture. His studies suggest it can reduce bowstringing and improve strength in injured fingers during rehabilitation. He emphasizes H-tape for rehab, not prevention, and also stresses the importance of climbing-specific warm-ups. Dr. Jared Vagy, often known as “The Climbing Doctor,” advocates for a “Rock Rehab Pyramid” approach. He views H-taping as a tool for the re-introduction phase of climbing after a pulley injury, not as a preventative measure, and highlights the importance of proper movement patterns and load management. He often mentions Leukotape P for its rigidity. Information from sources like climbing.com often echoes such expert advice.
Esther Smith, a Doctor of Physical Therapy, focuses on active rehabilitation and controlled loading rather than prolonged rest for many climbing injuries. She often recommends buddy taping as a temporary support during re-integration to climbing but cautions against tape being used to replace pulley function or as a means to make fingers stronger. A consensus among these experts is that H-tape’s primary role is in the rehabilitation of diagnosed pulley injuries, not in preventing injuries in healthy individuals. They all underscore the necessity of a holistic approach to finger health that extends far beyond just taping. You can hear directly from Dr. Volker Schöffl on taping and get advice from Dr. Jared Vagy on trying hard after finger injuries.
Common Taping Mistakes to Avoid
Even with the best intentions, taping can be ineffective or even harmful if done incorrectly. One common mistake is taping too tightly. This can restrict circulation, leading to pain, numbness, or discoloration of the fingertip. Always check circulation after taping and pre-cutting strips can help avoid accidental over-tightening. Another error is using the wrong technique for the intended goal, for instance, using simple circumferential wraps hoping to support a pulley. This is generally ineffective. Understanding the purpose of each technique is key. One might see a photo courtesy climbing.com illustrating a technique, but understanding the why is crucial.
Poor skin preparation—applying tape to dirty, sweaty, or oily skin—will result in poor adhesion, causing the tape to peel or slip quickly. Always clean and dry the skin thoroughly before application. A critical mistake is taping over serious undiagnosed injuries or using tape to mask significant pain. This can worsen the injury and delay appropriate medical treatment. If you have severe or persistent pain, seek a medical evaluation. Applying tension to the very ends of the tape strips can make them prone to peeling; anchor and end tape strips with no tension. Finally, insufficient overlap between tape layers creates a weak structure that can unravel. Aim to overlap wraps by at least one-third to one-half of the tape’s width. Learning about common errors in athletic taping and reading troubleshooting climbing tape issues can help refine your technique, contributing to avoiding common pitfalls for safer climbing. This includes not just finger care but also being mindful of other potential issues, like a sore ankle from a bad landing in the bouldering gym after many attempts on a problem.
Key Takeaways on Finger Taping for Climbers
- Finger taping is most reliably effective for skin protection (preventing finger flappers, covering splits) and can offer psychological benefits like increased confidence or proprioceptive feedback for a good finger.
- For structural support, H-taping shows promise in rehabilitating diagnosed pulley ruptures by potentially reducing bowstringing and improving mechanics, but taping is generally NOT effective for preventing initial pulley injuries in healthy fingers.
- Correct application technique (e.g., whether to rip off a thin piece and apply it to the back of the injured finger or use another method), proper skin preparation, and avoiding over-tightening (which can restrict circulation) are crucial for any taping method to be safe and effective.
- Taping should be a strategic tool, not a crutch; prioritize holistic finger health through proper warm-ups, strengthening (including hang boarding), load management, rest, and seeking professional advice for injuries rather than relying on tape to pull through pain on climbs.
- Always listen to your body. If tape causes pain, restricts circulation, or if you suspect a serious finger/pulley injury, remove the tape and seek medical evaluation from a professional knowledgeable about climbing injuries. The gear you’ll use, like tape, should help, not hinder.
Frequently Asked Questions
Can finger taping actually make my fingers stronger for climbing? >
Should I tape my fingers before every climbing session to prevent injuries? >
What is the single most important taping technique to learn for pulley injuries? >
How do I know if I’m taping my fingers too tightly? >
We are a participant in the Amazon Services LLC Associates Program, an affiliate advertising program designed to provide a means for sites to earn advertising fees by advertising and linking to Amazon.com. As an Amazon Associate I earn from qualifying purchases. We also participate in other affiliate programs. The information provided on this website is provided for entertainment purposes only. We make no representations or warranties of any kind, expressed or implied, about the completeness, accuracy, adequacy, legality, usefulness, reliability, suitability, or availability of the information, or about anything else. Any reliance you place on the information is therefore strictly at your own risk. Additional terms are found in the terms of service.


