

In this article
You’ve mastered the basic moves, you’re a regular at the gym, but your progress has stalled. Every V3 or 5.10a feels like a hard limit, and the internet offers a dizzying mix of advice: “just climb more,” “start hangboarding,” “lift heavy.” This confusion is the biggest barrier to progress. This article cuts through the noise. We present a clear, science-backed 4-week introductory strength plan designed not for immediate grade-chasing, but for a far more important goal: building a resilient, injury-proof “chassis” that will support a lifetime of healthy climbing. Discover why antagonist (pushing) exercises are the secret to preventing common climbing injuries in your elbows and shoulders. Understand the critical science of why your tendons adapt slower than your muscles, and why this fact must dictate your training. Get a complete, week-by-week plan with two strength sessions designed to supplement, not replace, your time on the wall. Learn the principles of progressive overload to safely continue building strength long after you complete the initial program.
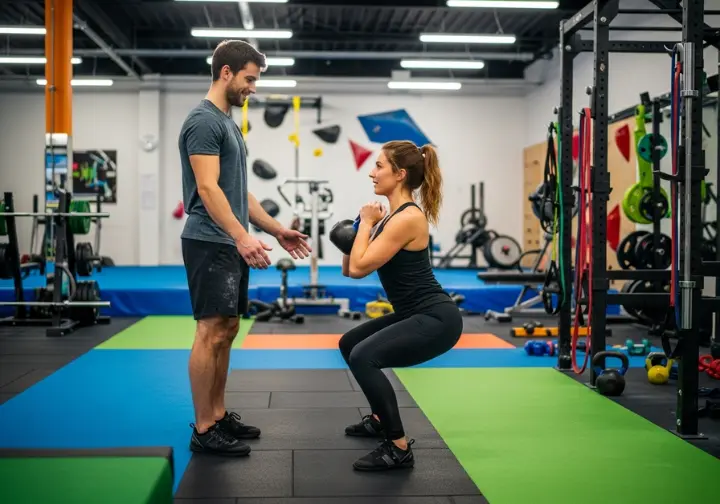
Why is Supplemental Strength the Most Important Rule for New Climbers?

Why does climbing alone create injury-prone imbalances?
Deconstructing the “just climb” heuristic reveals that while it is valuable for initial skill acquisition, it is a double-edged sword that reinforces muscular imbalances. The sport is inherently “pull-dominant,” heavily favoring the lats, biceps, and finger flexors. This creates the visible “climber’s hunch,” a symptom of poor posture that predisposes the athlete to shoulder and elbow injuries. Framing supplemental strength training as “pre-habilitation” positions it as the necessary counterbalance to these negative structural effects. This imbalance is only half of the story; the other half lies hidden deeper, within the very tissues that connect your new, powerful muscles to your bones. Research on resistance training and injury prevention provides robust evidence linking resistance training to both performance and injury prevention in climbers, validating the need for a structured program. For a deeper look at how these imbalances manifest, see our guide on the common causes of elbow pain in climbers.
Why do your tendons adapt slower than your muscles?
Connective tissue—tendons and ligaments—operates with a significantly lower blood supply than muscle tissue. This physiological reality introduces the concept of “adaptation lag”: muscles get stronger much faster than the connective tissues that attach them to bone. Picture putting a powerful engine into a weak car chassis; the inevitable result is breakdown. This “adaptation lag” justifies a cautious, low-volume, high-quality training approach for novices. High-stress tools like hangboards and campus boards are explicitly excluded for beginners, as they can easily cause injury when muscles exert more force than tendons can handle. Understanding this critical safety principle allows us to build a resilient foundation, starting with three essential pillars of movement. A research topic on climbing injuries reinforces the importance of managing tissue adaptation, and our science-driven deep-dive into climbing injuries connects this concept to comprehensive prevention and treatment strategies.
What are the Building Blocks of a Resilient Climber?
How does pushing strength prevent shoulder and elbow injuries?
Pushing movements—exemplified by the humble Push-up—are the most critical form of antagonist training for climbers. They create balanced joint forces at the shoulder and elbow, acting as “brakes” to the powerful pulling muscles. The pectorals, serratus anterior, and triceps are the key muscles strengthened, and their role in stabilizing the shoulder girdle is pivotal. This stability translates directly to improved posture and serves as a primary defense against common overuse injuries. With the “brakes” in place, we can now build a stronger foundation for the “engine” of your upper body pulling power. For broader context, see our guide on targeted strength training for climbers.
Why are horizontal rows a better starting point than pull-ups?
While pull-ups are a great exercise, horizontal rows are superior for novices. They build the foundational musculature of the rhomboids and middle/lower trapezius—muscles essential for scapular control and long-term shoulder health. The row movement pattern is also more biomechanically specific to pulling the body into the wall on overhanging terrain, a key climbing skill. Now that the upper body is balanced, we connect it to the true source of power in climbing: the legs and core. Ready to progress beyond rows? Our guide to builds climbing-specific strength will help.
How do core and leg strength save your arms?
“Core strength” for climbers is best redefined as stability and “body tension,” moving far beyond sit-ups. A rigid trunk keeps feet on the wall and prevents “barn-dooring” on difficult moves. Power travels through the kinetic chain, efficiently transferring from the legs, through the core, to the arms. Legs are the primary movers in climbing; exercises like Squats and Deadlifts build the raw power to drive upward, conserving precious grip strength. With the “why” and “what” established, it’s time to assemble these pillars into your actionable 4-week training blueprint. Explore our deep dive into foundational and advanced core exercises for practical drills.
How Do You Execute the 4-Week Introductory Strength Plan?

What does the weekly schedule look like?
The program is structured around two dedicated strength sessions per week: Strength A and Strength B. A sample integration looks like Monday: Strength A, Tuesday: Climb, Wednesday: Rest, Thursday: Strength B, Friday: Rest, Saturday: Climb, Sunday: Rest. The goal of each session is stimulation and quality movement, not annihilation or fatigue. A successful session leaves you feeling strong, not destroyed. The full 4-Week Plan is presented below in a clear, easy-to-read table format, detailing exercises, sets, reps, and rest for each day. A recent randomized controlled trial on female climbers supports the layout presented, and our home-based rock climbing workout routine offers supplementary guidance for those training primarily at home.
| Week | Strength A | Strength B |
|---|---|---|
| 1 | Push-up 3×8–10, Inverted Row 3×8–10, Goblet Squat 3×10, Plank 3×30 s | Push-up 3×8–10, Inverted Row 3×8–10, Romanian Deadlift (dowel) 3×10, Hanging Knee Raise 3×8 |
| 2 | Push-up 3×10–12, Inverted Row 3×10–12, Goblet Squat 3×12, Plank 3×35 s | Push-up 3×10–12, Inverted Row 3×10–12, Romanian Deadlift (light KB) 3×12, Hanging Knee Raise 3×10 |
| 3 | Push-up 4×8–10, Inverted Row 4×8–10, Goblet Squat 4×10, Plank 4×30 s | Push-up 4×8–10, Inverted Row 4×8–10, Romanian Deadlift (light KB) 4×10, Hanging Knee Raise 4×8 |
| 4 (Deload) | Push-up 2×8, Inverted Row 2×8, Goblet Squat 2×8, Plank 2×20 s | Push-up 2×8, Inverted Row 2×8, Romanian Deadlift (dowel) 2×8, Hanging Knee Raise 2×6 |
You’ll notice that Week 4 looks different from the first three. This isn’t a mistake; it’s a planned, strategic part of the process called a deload.
Why is Week 4 a “Deload” Week?
A deload week is a planned, temporary reduction in training volume and/or intensity. The principle of supercompensation states that the body adapts and gets stronger during recovery, not during the workout itself. The deload is the period where the body solidifies the strength gains made in the previous three weeks of hard work. This concept is often missing from beginner advice but is a cornerstone of all legitimate athletic training programs. For context on how a single deload week fits into a larger framework, explore our science-backed, year-long periodization framework.
Pro-Tip: Treat the deload like an investment, not a vacation. Light movement keeps joints lubricated and maintains neuromuscular patterns while connective tissues catch up.
How Do You Master Each Essential Exercise?
How do you perfectly perform Push-ups and Inverted Rows?
Push-up: Begin in a high plank position, core braced tight enough that your belt buckle points toward your chin. Lower under control until your chest gently hovers above the floor, elbows tucked at roughly a 45-degree angle. Press back up without letting hips sag or pike. The common faults—flared elbows, sagging hips—create shear forces on the shoulder and lumbar spine; correct them by resetting the plank and squeezing glutes and abs before each rep. Inverted Row: Set rings or a bar at hip height, hang beneath with straight body line, and initiate each pull by driving shoulder blades down and back. Common faults include hip sag and biceps-dominant rowing; cue a rigid plank from head to heel and think “pull with the back, finish with the arms.” Full range of motion and controlled tempo are non-negotiable for both movements. With your upper body dialed, we move to the powerful movements that build your chassis and engine.
How do you master foundational Squats and Deadlift hinges?
Squat (Bodyweight or Goblet): Chest proud, hips back, knees tracking over toes. Descend until hip crease is just below the knee, drive up through mid-foot. The most frequent faults—knees caving inward and heels lifting—are corrected by screwing the feet into the floor and sitting back rather than straight down. Deadlift (Dowel Rod or Light Kettlebell): This is a learning drill for the hip hinge pattern, not a max-effort lift. Maintain a neutral spine from crown to tailbone, push hips back until hamstrings stretch, then drive hips forward to stand. Faults like rounded back or yanking the load are prevented by bracing the core as if expecting a punch and initiating movement with hamstrings and glutes. Quality over quantity governs every rep. Finally, we’ll forge the link that connects your upper and lower body into a single, unshakeable unit.
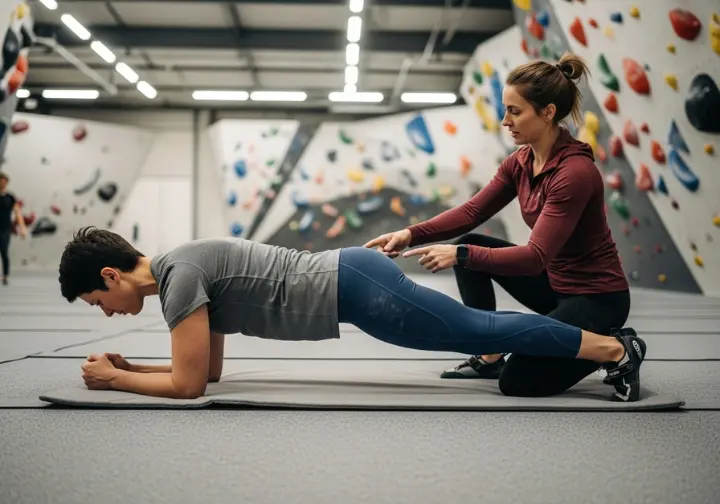
How do you build unshakeable Core Tension?
Plank: Start face-down, elbows under shoulders, forearms parallel. Posterior pelvic tilt flattens the low back and lights up the abs. Maintain a straight line from head to heels; common faults—hip sag and hip pike—are fixed by squeezing glutes and quads as hard as the abs. Hanging Knee Raises: From a dead hang with shoulders engaged, raise knees to waist height without swinging. Control the negative; the down phase is where most athletes lose tension. Swinging, momentum, and neglecting the lowering phase are the chief faults. The objective is maximal tension and stability, not simply moving the knees up and down. You now have the knowledge and the plan for the next four weeks. But the journey doesn’t end there. For a broader gym-based plan that folds these drills into a periodized schedule that includes recovery, see our periodized schedule that includes recovery.
Pro-Tip: Film yourself from the side during planks and rows. One 15-second clip often reveals faults invisible in the mirror and accelerates form correction dramatically.
What Comes After Week 4?

How do you apply progressive overload without getting injured?
The first 4-week cycle was for motor learning and tissue preparation; subsequent cycles are for driving adaptation. Follow the Movement Quality Hierarchy for safe progression, prioritizing in this order: master form—perfect technique on every rep; increase reps—reach the top of the prescribed rep range; increase sets—add one more set to an exercise; increase difficulty—move to a harder variation, such as progressing from a Kneeling Push-up to a Standard Push-up; add weight—the final step, used sparingly and only when the preceding options are exhausted. A 2023 meta-analysis on resistance training confirms that structured resistance training leads to significant performance improvements, justifying this progression model. When you’re ready to map out the bigger picture, our smart rock climbing training program provides a comprehensive framework.
When is it safe to start using a hangboard?
A clear, responsible answer is needed: at least one year of consistent climbing and a solid foundational strength base are prerequisites. The “tendons adapt slower than muscles” rule remains the primary reason for caution. Early hangboarding is one of the fastest routes to finger injury for a novice. Initial strength gains are primarily neural—the brain getting better at recruiting existing muscle—rather than hypertrophic, another reason to prioritize movement quality first. Study on rapid neural adaptation illustrates this principle among elite climbers. When the time eventually comes, our beginner’s training plan for the hangboard offers a safe and structured introduction.
Conclusion
Supplemental strength training is essential for long-term injury prevention because climbing creates predictable muscular imbalances. Your tendons and ligaments adapt much slower than your muscles; this “adaptation lag” must dictate the pace of your training progression. A resilient climber is a balanced athlete—prioritize foundational movements like pushing, horizontal pulling, squatting, and core bracing. True progress is built on a foundation of perfect movement quality: first master the form, then gradually increase volume, and only add weight as a final step. You’ve taken the first step toward building a more resilient, injury-proof climbing foundation. Explore our full library of Training Guides to continue your journey.
Frequently Asked Questions about Beginner Strength Training for Climbers
This feels too easy. Shouldn’t I be exhausted after a workout?
No, the goal of this program is stimulation, not annihilation. A successful session should leave you feeling energized and strong, not so fatigued that it negatively impacts your next climbing day where you practice technique. Embrace the discipline of leaving the gym with gas left in the tank.
Will strength training make me bulky and too heavy for climbing?
No, this type of low-volume, high-quality training will not make you bulky. The program is designed to stimulate neural adaptations—making your nervous system more efficient at recruiting muscle—and build foundational strength, not significant muscle mass (hypertrophy). You’ll get stronger without adding non-functional weight.
What if I feel pain, especially in my elbow or shoulder, during an exercise?
You must immediately stop the exercise if you feel any sharp joint or tendon pain. It is crucial to differentiate between delayed onset muscle soreness (DOMS), which is normal, and sharp, localized pain, which is a signal of potential injury. The antagonist exercises in this plan are a primary tool for addressing pain related to imbalances. If pain persists, consult a qualified clinician.
How many days a week should I be climbing while on this plan?
The ideal frequency is 2–3 climbing sessions per week. This allows for adequate recovery between strength sessions and climbing, preventing overtraining and ensuring your body has time to adapt. Log your sessions to monitor fatigue and adjust as needed.
Risk Disclaimer: Rock climbing, mountaineering, and all related activities are inherently dangerous sports that can result in serious injury or death. The information provided on Rock Climbing Realms is for educational and informational purposes only. While we strive for accuracy, the information, techniques, and advice presented on this website are not a substitute for professional, hands-on instruction or your own best judgment. Conditions and risks can vary. Never attempt a new technique based solely on information read here. Always seek guidance from a qualified instructor. By using this website, you agree that you are solely responsible for your own safety. Any reliance you place on this information is therefore strictly at your own risk, and you assume all liability for your actions. Rock Climbing Realms and its authors will not be held liable for any injury, damage, or loss sustained in connection with the use of the information contained herein.
Affiliate Disclosure: We are a participant in the Amazon Services LLC Associates Program, an affiliate advertising program designed to provide a means for us to earn advertising fees by advertising and linking to Amazon.com. As an Amazon Associate, we earn from qualifying purchases. We also participate in other affiliate programs. Additional terms are found in the terms of service.


