

In this article
- Understanding Fundamentals: When and Why These Skills Are Vital
- Essential Gear for Basic Self-Rescue for Climbers
- Mastering Essential Knots for Self-Rescue
- How to Escape the Belay: Step-by-Step Instructions
- How to Ascend a Rope: Techniques for Going Up
- Practicing Self-Rescue Skills: The Path to Competence
- Knowing Your Limits: When to Call for Professional Rescue
- Conclusion: Building Confidence Through Self-Rescue Mastery
- Frequently Asked Questions about Basic Self-Rescue for Climbers
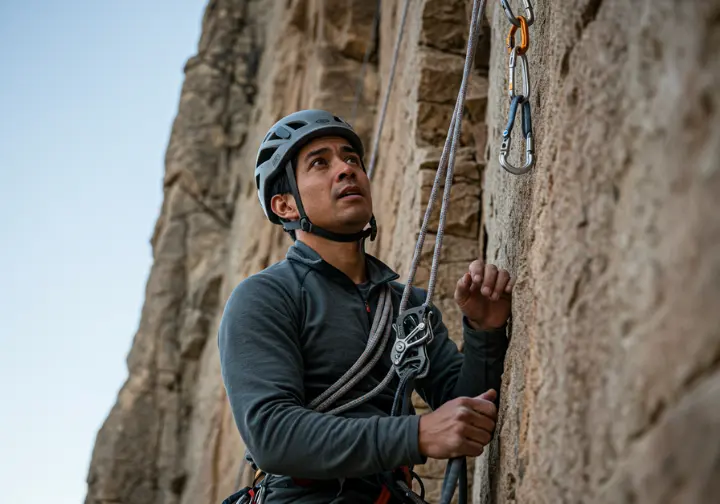
Knowing why self-rescue skills are non-negotiable for climbers venturing beyond easily accessible areas is paramount. Preparedness and self-reliance are keys to managing unexpected critical situations and any self-rescue situation. We will explore two cornerstone climbing self-rescue techniques: Escaping the Belay and Ascending a Rope, which are foundational for any climber’s safety arsenal and part of essential self-rescue. These abilities can transform a potential tragedy into a manageable event, especially when professional rescue or a rescue team is unavailable or delayed. Mastering these skills cultivates preparedness, self-reliance, and significantly boosts a climber’s psychological readiness for high-stress self rescue scenarios. Are you prepared to handle the unexpected when out on the cliff or during any adventure? This guide on essential self-rescue: escape belay, ascend rope will be a great way to start.
Understanding Fundamentals: When and Why These Skills Are Vital

Defining “Escaping the Belay” and “Rope Ascension (Prusiking)” outlines the core purposes and critical scenarios where each technique becomes essential for a climber’s safety or to assist a partner. Self-rescue proficiency is an indispensable skill set for climbers in environments where immediate external help isn’t guaranteed, such as multi-pitch routes or remote alpine terrain, making self rescue skills a useful self-rescue skill to possess.
Defining “Escape Belay”: Purpose and Critical Scenarios
Belay escape involves the belayer systematically transferring the load from their personal belay device to a secure, independent anchor. This is a core part of many rock self rescue procedures.
The primary goal of this escape is to free the belayer/rescuer to perform other critical tasks, such as assisting an injured partner with first aid or retrieving essential gear. Learning how to escape a belay is fundamental.
Critical scenarios for needing to escape the belay include a partner requiring a haul, needing to descend to an injured partner for first aid, or retrieving a misjudged short rope.
It’s also vital if a climber is unconscious or risks further injury by being lowered over hazardous terrain; in such a situation, removing your body from the belay system becomes a priority. This skill is often the first step in more complex rescue situations.
Before initiating an escape, unwavering confirmation of anchor integrity is paramount; the anchor must be unquestionably secure and potentially multi-directional if the pull angle will change.
Reinforcing the anchor before starting is a critical go/no-go decision, as belay system safety hinges entirely on it. For further information, consider exploring resources on understanding belay escape techniques.
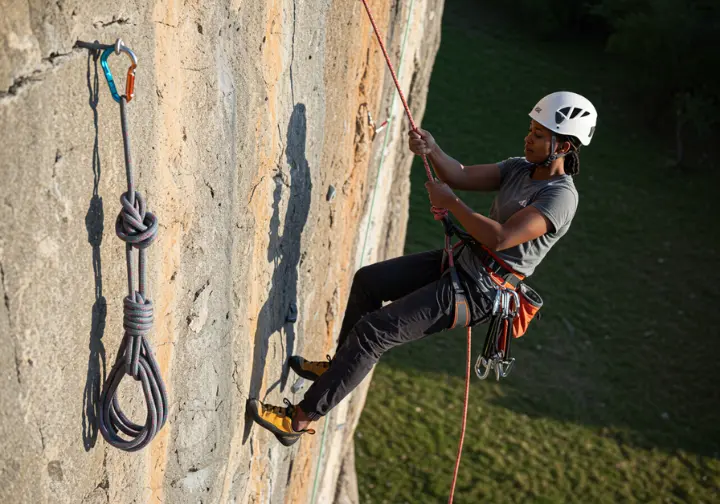
Defining “Rope Ascension” (Prusiking): Purpose and Critical Scenarios
Rope ascension, or “prusiking,” is the technique of climbing a fixed rope using friction hitches (like Prusik knots) or mechanical ascenders; a common method is ascending a rope with prusiks. You might use a primary ascender and a second ascender for efficiency.
The basic principle utilizes two friction points: one for the harness and one for a foot loop, which are alternately weighted and slid upwards. You can learn more about basic prusiking principles from various instructional resources.
The primary purpose in self-rescue is upward movement when normal climbing is impossible or unsafe, a key technique in emergency rope climbing.
This includes scenarios like needing to reach an injured climber above, ascending a fixed rope after having rappelled past an anchor, or if ropes are stuck.
It can also be used for self-extraction from a crevasse or retreating from a mid-pitch position if lowering isn’t an option. Rope ascension is physically demanding and typically a last resort if safer options like being lowered or re-climbing are unfeasible.
The integrity of the climbing rope, anchor, and friction hitches is crucial due to repeated dynamic loading and potential impact force during the ascend.
Essential Gear for Basic Self-Rescue for Climbers
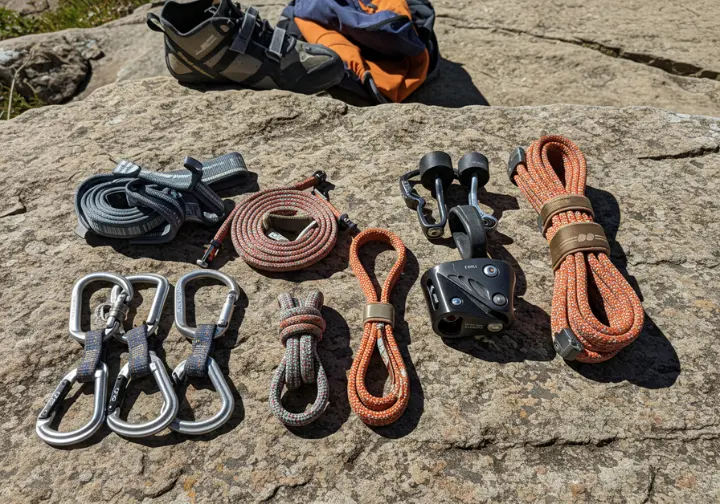
Here we detail the non-negotiable gear for basic self-rescue, emphasizing multi-functional items typically carried on a multi-pitch climb, rather than specialized, bulky rescue gear. Effective self-rescue relies on proficient use of standard climbing equipment, improvising with tools already carried to ensure availability without adding significant weight to your on-harness rescue kit.
Core Components of Your Self-Rescue Kit
Key items for escaping the belay include several locking carabiners (HMS and D-shaped), a cordelette (5-7m of 7mm accessory cord), various length sewn slings, the belay device itself, and Prusik loops.
For rope ascension, the improvised kit typically includes at least two locking carabiners, friction hitch material (Prusik loops, Hollow Block, or accessory cord), and a double-length sling (120cm or 240cm) for a foot loop. An assisted braking belay device (ABD) can also be part of an efficient ascension system, and you might consider if your new belay device has these capabilities.
A comprehensive personal self-rescue kit, as suggested by AMGA guidelines, includes a helmet, harness, locking carabiners, both ATC-style and GriGri-style belay devices, anchor material (cordelette/quad-length sling), Prusik cord, and alpine draws.
You can explore AMGA recommended self-rescue gear for more detailed lists. Multi-functionality is key, minimizing weight by selecting items serving multiple purposes.
Critical Considerations for Soft Goods: Cords and Slings
The condition and suitability of materials, especially cords and slings for friction hitches and anchors, are critical; worn, damaged, or incorrectly sized cords can lead to system failure. The sheath of the rope should be intact.
Friction hitches depend on the specific interaction between the hitch cord and climbing rope, influenced by relative diameters, materials (nylon, Dyneema), and cord condition. This prusik cord and rope diameter interaction is a key factor for their effectiveness.
Prusik cords that are too thin may lack strength, while those too thick may not grip effectively. The diameter of a Prusik cord should generally be 50-70% of the climbing rope’s diameter for optimal grip.
Regular inspection and replacement of these soft goods are vital, especially if you likely encounter rough rock. The “sawing action” of a rope running over a sling at an anchor can also compromise the sling’s integrity, necessitating vigilance. Using single-length slings or an extra double-length sling correctly is important.
Mastering Essential Knots for Self-Rescue
Proficiency in a select set of versatile knots is fundamental. This involves covering not just how to tie-in or fashion them but their applications, behaviors, limitations, and the importance of practice under duress for any self-rescue scenario. Having Proficiency in a select set of versatile knots is a cornerstone of safe climbing and good rigging.
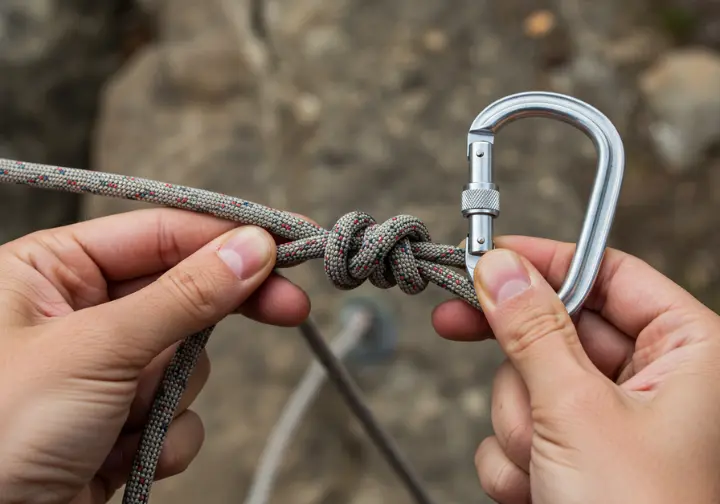
Key Friction Hitches: Prusik, Klemheist, Autoblock
Friction hitches are designed to grip a rope when weighted but slide when unweighted.
The Prusik hitch, widely recognized, is often used for ascending and securing loaded ropes during a prusik knot ascent. The number of wraps depends on rope/cord diameter difference for optimal grip.
The Klemheist knot is an effective alternative, usable with cord or webbing, and often considered easier to slide up a rope than a Prusik, especially when unweighted.
It is directional and grips best when pulled downwards. Learning about Klemheist knot applications can broaden your rescue toolkit.
The Autoblock (French Prusik) is less prone to jamming after heavy loading compared to a classic Prusik and releases smoothly.
It’s often used as a rappel backup (sometimes called a third-hand backup) and can be adapted for the harness attachment in an ascension system. The Bachmann hitch, incorporating a carabiner, is another option.
Load Management and Anchor Knots: Munter, Mule, Clove, Figure-Eight
The Munter Hitch (Italian Hitch) is extremely versatile for belaying, rappelling, and managing loads in rescue systems; it forms the basis of the Munter Mule Overhand (MMO) for tying off loaded ropes.
The Mule Knot, backed by an Overhand, is a releasable slip knot used to secure a loaded Munter or belay device hands-free.
The Clove Hitch is excellent for securing a rope to a carabiner, common for personal anchoring and as an adjustable backup in rope ascension.
It’s easily adjustable but can slip if cyclically loaded on only one strand.
The Figure-Eight Loop (on a Bight or Follow-Through) is standard for tying into harnesses and creating strong, fixed loops for anchors or backups.
The Alpine Butterfly Knot creates a secure mid-rope loop loadable in three directions, useful for equalized anchors or isolation loops; understanding the applications of the Alpine Butterfly knot is beneficial.
The Double Fisherman’s Bend is standard for joining accessory cords for Prusik loops.
How to Escape the Belay: Step-by-Step Instructions
Detailed, step-by-step instructions for escaping the belay are provided here, covering foundational actions and comparing common methods, emphasizing safety and reversibility. Knowing these steps can make a critical difference in an emergency. Understanding the transfer-of-tension steps is key.
Foundational Steps: Assess, Hands-Free, Secure Anchor
Before any action, assess the partner’s condition and environment; communicate clearly if possible.
The first mechanical step is to go “hands-free” by securing the belay device in a locked position, typically using a Mule Knot backed by an Overhand on a bight.
It’s wise to review the initial steps for escaping the belay to ensure a solid understanding, especially concerning tension—belay escape.
With hands free, rigorously evaluate and reinforce the anchor to ensure it’s unquestionably strong, reliable, and multi-directional if needed.
This is non-negotiable as the entire load will transfer to it.
Prepare for load transfer by setting up the chosen mechanism to take the climber’s weight off the belayer’s device and onto the reinforced anchor.
The specifics of this rigging setup diverge based on the selected escape method.
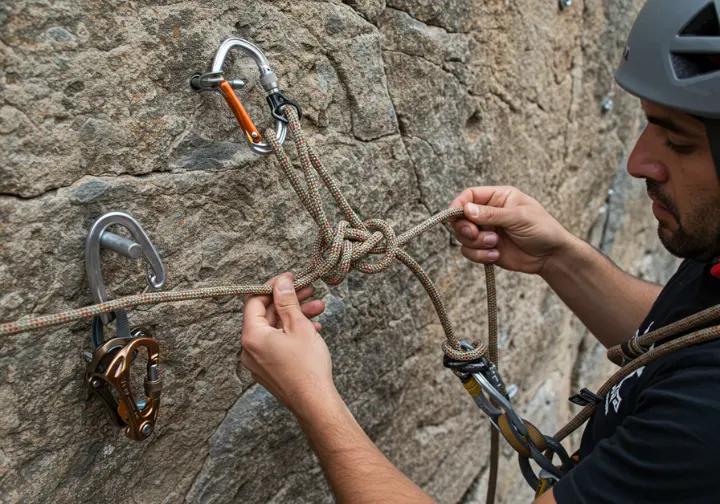
Method 1: Standard Releasable Hitch Technique
This widely taught method uses a friction hitch (e.g., Prusik, Klemheist) on the loaded rope, connected to the anchor, to take the climber’s weight. This is one of the fundamental climbing self-rescue techniques.
After going hands-free and beefing up the anchor, attach the friction hitch to the load strand (climber-strand) above the belay device, ensuring correct tying and dressing.
Connect the friction hitch loop to the anchor master point with a locking carabiner to the anchor master point.
A highly recommended step is to create a backup on the brake strand of the original climbing rope by tying a Munter Mule Overhand (MMO) and attaching it to the anchor. Don’t forget this crucial backup overhand knot.
Some climbers follow the Libby Peter belay escape method, which incorporates similar principles.
Slowly release tension from the Mule Knot securing the belay device to gradually transfer the load to the friction hitch, monitoring it closely.
Once the hitch holds the full load, remove the original belay device; the system is secured with the friction hitch primary and MMO as backup. This method is versatile and offers good control.
Method 2: Munter-Mule on Rope to Anchor
This technique also uses an initial friction hitch to temporarily hold the load but then establishes a Munter Hitch with the main climbing rope directly to the anchor as the primary load-bearing point.
After locking off the belay and reinforcing the anchor, secure the rope with a Prusik to the anchor as in Method 1.
Next, tie a Munter Hitch with the load strand of the climbing rope (between climber and Prusik) onto a separate locking carabiner at the anchor master point.
Secure this Munter with a Mule Knot and Overhand backup. The Munter Mule Overhand applications are extensive in rescue scenarios.
Carefully release or slide the Prusik hitch, allowing it to slacken, transferring the climber’s full weight to the Munter-Mule on the main rope.
The Prusik now serves as a backup, and the original belay device can be removed.
This creates a very secure and releasable system directly on the main rope.
Troubleshooting Common Belay Escape Issues
If a friction hitch slips, causes include incorrect tying, wrong cord diameter, or icy/wet ropes; solutions involve re-tying, using appropriate cord (5-7mm for Prusiks), or trying a Klemheist. These are common rope-rescue problems.
When troubleshooting friction hitch problems, systematic checking is key.
Difficulty transferring load smoothly can stem from too much slack or jerky release; minimize slack rope and release the initial tie-off slowly.
An inadequate anchor is a critical oversight that must be addressed before full load transfer.
If found late, carefully re-establish safety and fix anchor deficiencies.
Forgetting a backup happens due to rushing or stress; use a mental checklist and always ensure redundancy in the escaped system.
Reversibility is a key differentiator in methods; standard releasable hitches or Munter-Mule systems offer better options to transition back to lowering or belaying if needed, unlike jam-knot methods.
How to Ascend a Rope: Techniques for Going Up
Exploring methods for ascending a fixed rope when climbing is not feasible involves covering foundational safety checks and comparing two common improvised ascension systems. What would you do if you found yourself needing to go up your own rope without being able to climb?
Foundational Steps: Rope/Anchor Security and Backup System
Before any ascent, it is absolutely vital to confirm the rope is securely fixed to a “bomber” anchor capable of withstanding repeated, jerky loads from a weighted rope.
When confirming anchor security for rope ascent, leave no room for doubt.
A fatal error is ascending a merely “stuck” rope or only one strand of a rappel system assuming the knot will hold.
Establish a backup knot (e.g., Overhand on a bight, Clove Hitch) on the rope below your primary ascension attachments, clipped to your harness belay loop with a locking carabiner, before starting.
This attachment provides essential redundancy as friction hitches are not full-strength attachments.
This backup knot must be re-tied frequently (every 5-10 feet) as you ascend, ensuring the new knot is tied and secured before removing the old one to safeguard your life.
Method 1: Ascending with Two Friction Hitches (Prusik/Klemheist System)
This classic method uses two independent friction hitches: a waist hitch (e.g., Prusik) clipped to the harness belay loop, and a foot loop hitch (e.g., Klemheist with a double-length sling for a foot loop) tied below the waist hitch. This is a primary technique for ascending a rope with prusiks.
Those interested in prusiking with two friction hitches will find this technique effective.
The ascent sequence involves: sliding the waist hitch up, sitting to weight it, sliding the unweighted foot loop hitch up, standing in the foot loop (unweighting the waist hitch), and then sliding the waist hitch further up.
Adjusting the foot loop length is crucial for efficiency and avoiding strain.
Continuously advance your backup knot every 5-10 feet. A Klemheist is often preferred for the foot loop due to easier sliding.
Method 2: Ascending with an Assisted Braking Device (ABD) and One Friction Hitch
This method uses an assisted braking belay device (ABD) (e.g., GriGri, or tube belay device in guiding mode) as the primary harness attachment, with a single friction hitch (Prusik/Klemheist) and foot loop tied above the ABD. This system can sometimes capture progress.
Learning about ascending with a GriGri and friction hitch can provide more options.
Ensure the ABD is correctly loaded for ascending a fixed line and attached to your harness—on your belay loop.
The ascent sequence: sit on the ABD, slide the upper foot loop hitch up, stand in the foot loop (creating slack below it), pull this slack through the ABD, then sit back on the ABD.
Always maintain a backup knot below the ABD, advancing it regularly.
A GriGri often provides less friction than some tube devices in this application.
Consider a redirect carabiner on the foot hitch for ergonomics on steep terrain.
Critical Safety: Approaching the Anchor During Ascent
Heightened vigilance is required when approaching an anchor during rope ascension, as complacency can set in.
The rope must always remain taut between the anchor and the ascenders to prevent slack and high fall factors if a slip occurs near the anchor. This is a key caution.
Consulting Petzl guidance on approaching anchors can reinforce these safety points.
Even a small fall near an anchor with slack can generate surprisingly high forces, potentially damaging gear or causing injury.
Petzl’s technical information demonstrates how a small amount of slack significantly increases impact forces.
Meticulous slack management and smooth, controlled upward progress are critical when nearing the anchor to minimize potential fall factors.
Avoid making large climbing moves on the rock face without simultaneously taking in slack through the ascension system.
Practicing Self-Rescue Skills: The Path to Competence
True self-rescue proficiency comes from regular, realistic, and safe hands-on practice, ideally initiated under professional supervision. Simply reading self-rescue literature or a self rescue book about these rescue skills is not enough. Taking a self-rescue course is highly recommended.
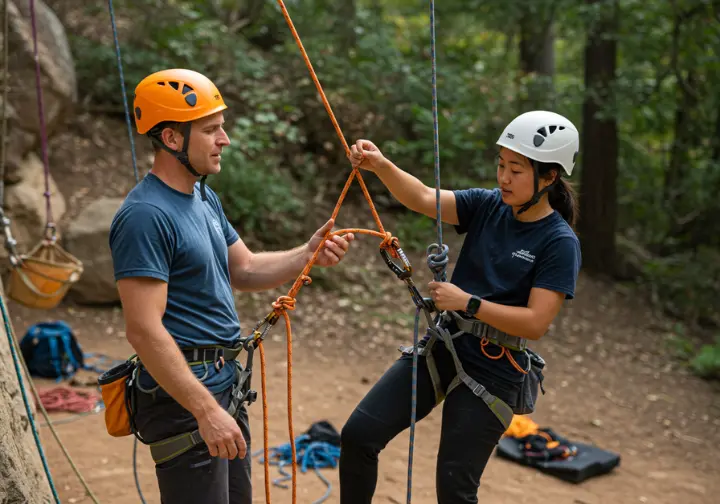
Importance of Professional Instruction and Progressive Practice
Theoretical self-rescue knowledge from articles or videos is a starting point, but no substitute for regular, realistic, hands-on practice; initial training should ideally occur under the supervision of qualified professionals or certified guides.
Experts and manufacturers like Petzl stress learning from professionals before relying on these skills.
Understanding the importance of professional climbing instruction cannot be overstated.
A progressive approach to practice is recommended: start on safe ground focusing on mechanics, then move to low-angle, low-consequence environments, and finally to controlled vertical settings close to the ground with a backup rope system.
Incorporate realistic scenarios like using weighted ropes for haul bags and practicing transitions between rescue phases.
Regular practice is essential as these skills are perishable; it reinforces muscle memory and keeps procedures fresh for when you need them.
Developing Muscle Memory and Problem-Solving Heuristics
The objective of practice extends beyond cognitive understanding to develop muscle memory for complex sequences and intuitive heuristics for problem-solving under emergency pressure.
The ability to improvise and adapt solutions to unique incident circumstances, and apply correct tactics, is built upon this foundation.
Resources on developing self-rescue muscle memory can offer further insights into effective practice.
Skills degrade over time if not reinforced; what seems clear in a self-rescue course can become muddled months later without refreshment.
Maintaining proficiency is a critical responsibility.
Many scenarios involve managing a partner’s weight or coordinated actions, so practicing with a partner (or simulated partner) is essential to understand system dynamics, communication, and physical demands of various self-rescue tactics.
Knowing Your Limits: When to Call for Professional Rescue
Considering the crucial judgment call of when to attempt self-rescue versus when to call for professional help, like search and rescue, requires honest self-assessment and risk management. Recognizing your limitations is a strength, not a weakness.
Assessing Feasibility and Potential for Worsening the Situation
It’s vital to recognize the limitations of one’s abilities, gear, and the specific circumstances.
Calling for professional rescue is a responsible and often life-saving judgment call, not a failure, especially if you lack rope-rescue experience.
If a problem isn’t solvable by straightforward maneuvers (e.g., escape belay, tandem rappel), complex self-rescue is unlikely to be safe or successful.
Examining lessons from climbing accidents often reveals the importance of timely calls for assistance.
Consider if you possess both the skills and appropriate gear for first aid and extrication or evacuation.
Attempting self-rescue beyond one’s capabilities can transfer risk to the rescuer, potentially creating a second victim and complicating professional efforts.
A poorly executed self-rescue can worsen the victim’s condition or place the rescuer in a more precarious position.
This demands an honest self-assessment against the problem’s complexity.
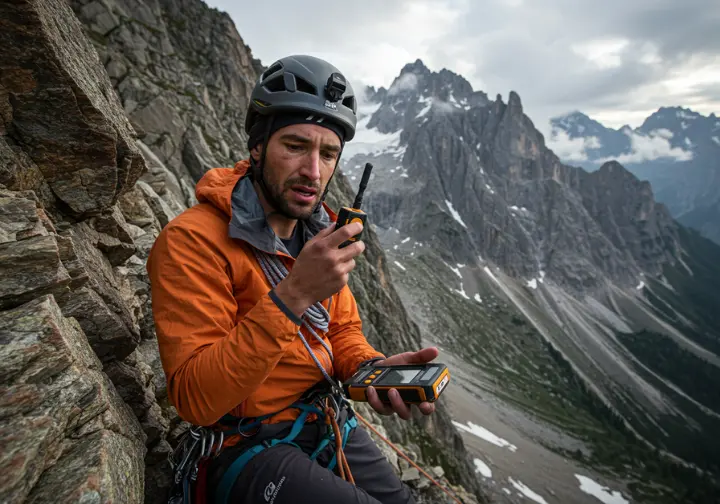
Time, Communication, and the “Solo” Conundrum
Time is critical: weigh the projected time for self-rescue against the victim’s medical condition deterioration (e.g., “Golden Hour”) and estimated arrival of professional help.
A slow, fumbled self-rescue might be more detrimental than a timely call for proficient external assistance or further assistance.
The UIAA guidance on mountain safety often touches on the time factor in rescues.
If possible, try to summon assistance (shouting, phone, satellite device) before or concurrently with initiating self-rescue, especially if unsure of success.
This is crucial if professional rescue is known to be unavailable or conditions make it impossible, where self-reliance is paramount but must be realistically assessed.
The “solo” conundrum of leaving an incapacitated partner to get help involves immense responsibility and risk, demanding extremely high self-rescue skill for the person going for aid and a grim assessment of the victim’s stability. This is a difficult self rescue situation.
Conclusion: Building Confidence Through Self-Rescue Mastery
Mastering belay escape and rope ascension profoundly enhances a climber’s safety, preparedness, and confidence, transforming them into an active agent in emergencies. The core benefits include improved personal safety, capacity to assist a partner, and heightened self-reliance in remote areas. Consistent practice leads to smoother execution and reduced cognitive load under pressure. These are essential self rescue skills.
Learning self-rescue deepens understanding of rope mechanics and anchor principles, leading to better decision-making in routine climbing and potentially averting incidents. Proficiency in self-rescue contributes to a safer climbing community, fostering a culture of collective capability and responsibility. Prioritize hands-on training from qualified professionals, supplemented by reputable self-rescue literature, and maintain skills through regular, safe practice. We hope this guide helps you on your way.
Frequently Asked Questions about Basic Self-Rescue for Climbers
What are the absolute first steps if I need to escape the belay? +
Is prusiking up a rope very difficult physically? +
Can I use any cord for Prusik hitches? +
How often should I practice self-rescue skills? +
We are a participant in the Amazon Services LLC Associates Program, an affiliate advertising program designed to provide a means for sites to earn advertising fees by advertising and linking to Amazon.com. As an Amazon Associate I earn from qualifying purchases. We also participate in other affiliate programs. The information provided on this website is provided for entertainment purposes only. We make no representations or warranties of any kind, expressed or implied, about the completeness, accuracy, adequacy, legality, usefulness, reliability, suitability, or availability of the information, or about anything else. Any reliance you place on the information is therefore strictly at your own risk. Additional terms are found in the terms of service.

