

In this article
- Decoding Half Dome: Ascent Options & Initial Considerations
- The Essential Groundwork: Planning Your Half Dome Ascent
- Gearing Up: Essential Equipment for Half Dome
- The Ascent: In-Depth Beta for Your Chosen Path
- Safety First: Navigating Risks on Half Dome
- The Way Down: Descent Strategies
- Beyond the Ascent: History, Ethics, and Stewardship
- Guided Options for Half Dome
- Summiting Success: Key Takeaways for Your Half Dome Climb
- Frequently Asked Questions
Half Dome, a name that resonates with climbers and adventurers worldwide, stands as a sentinel in Yosemite National Park. Its sheer granite faces and iconic silhouette represent both a formidable challenge and an irresistible draw. This guide delves into the two primary paths to its summit: the demanding Cables Route hike and the committing world of technical rock climbing. We aim to provide comprehensive, actionable information—the “beta”—to help you plan and successfully undertake your chosen Half Dome adventure. Prepare for a journey of meticulous preparation and profound respect for this magnificent natural wonder and mountain.
Decoding Half Dome: Ascent Options & Initial Considerations

To truly appreciate a yosemite climbing half dome objective, understanding its formation and the ways to its summit is foundational. This section looks into Half Dome’s geology, a brief history of ascent, and compares the main methods to reach the top. This will help you start thinking about which path to this Yosemite icon aligns with your aspirations and capabilities.
Half Dome’s Majesty: Significance and Ascent Overview
Half Dome’s impressive stature is a result of its specific geological formation of Half Dome; it’s a prominent quartz monzonite batholith, distinguished by its unique shape – a classic dome formation. It rises nearly 5,000 feet above Yosemite Valley, a commanding feature of the Sierra Nevada landscape. Before modern climbers set their sights on it, the indigenous Ahwahnechee people knew this granite monolith as Tis-sa-ack, a name carrying deep cultural significance that predates its recreational allure.
There are two main ways to reach its summit. The first is the Cables Route hike, a strenuous, permit-required trek. The second involves technical rock climbing on its sheer faces, a more committing endeavor. Beyond being a climbing objective, Half Dome holds an iconic status within Yosemite climbing and is a symbol of Yosemite’s grandeur, famously immortalized in Ansel Adams’ iconic photograph of Monolith, The Face of Half Dome.
Cables vs. Technical Routes: A Comparative Snapshot
Choosing between the Half Dome Cables hike and a technical rock climbing route involves weighing fundamental differences. The cables route, while not requiring technical climbing skills, demands considerable endurance and a good head for heights due to the exposure. Technical rock climbing routes, on the other hand, necessitate specialized rock climbing abilities, climbing equipment, and a deeper understanding of understanding traditional climbing techniques.
Time commitments also vary greatly. The cables hike is typically a very long day, often 10-12 hours or more. Technical routes like the Regular Northwest Face (RNWF) frequently span one to three days, potentially involving bivouacs on the wall. Permit systems differ too; a lottery-based dome permit is needed for the Half Dome cables day hike (one of the popular dome hikes), while wilderness permits are required for overnight technical climbs. Both demand advance planning. This article will provide specific, detailed information—the “beta,” a term climbers use for route information, and you can learn more about the definition of climbing beta—for both the cables and selected technical routes. For official details on the cables, the official Half Dome cables information from the National Park Service is your primary resource.
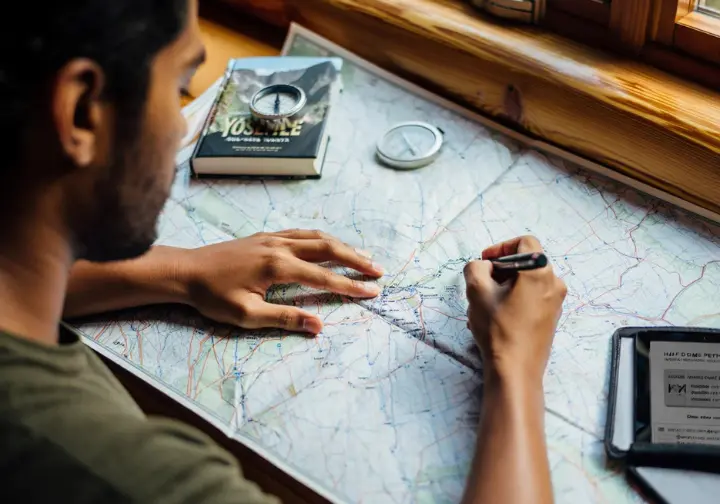
The Essential Groundwork: Planning Your Half Dome Ascent
Successful yosemite climbing half dome attempts in Yosemite National Park, California, begin long before setting foot on the trail. This section covers the vital pre-ascent planning: honest self-assessment, navigating the Half Dome permits process for both cables and technical climbs, choosing the best time to visit Yosemite, and developing comprehensive training strategies. This groundwork is indispensable.
Are You Ready? Self-Assessment for Half Dome
An honest self-assessment is the first step. For the cables hike, evaluate your endurance for a 14-16 mile trek with roughly 4,800 feet of elevation gain. Consider your comfort with significant exposure on the final cable section. The physical demands of the Half Dome hike are not to be underestimated.
Aspiring technical climbers must assess specific rock climbing skills. This includes proficiency in multi-pitch techniques, comfort with exposure on vertical terrain, and capability at specific grades (e.g., 5.7R for Snake Dike, 5.9 C1 or 5.12a for RNWF). Experience with aid climbing may also be necessary. A good resource for assessing technical climbing skills for a route like the RNWF can be found on Mountain Project. Risk tolerance is another factor for any climber; both ascent types carry inherent risks. Researching trip reports can offer realistic insights, which you can compare against your personal experience and what rigorous physical training for mountaineering objectives you’ve undertaken, considering the altitude involved.
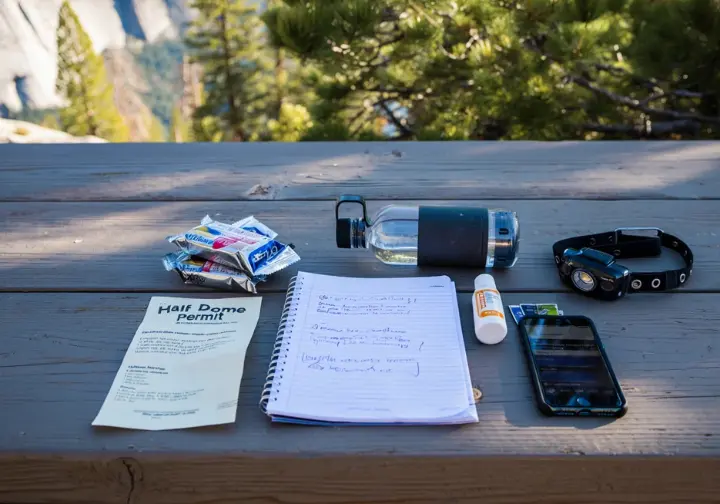
Permits: Your Golden Ticket to Half Dome
Permits are non-negotiable. For the cables, you’ll need a Half Dome Day Hike Permit, obtained via lottery on Recreation.gov. For overnight technical climbs, Yosemite Wilderness Permits are required, which sometimes offer an option to add Half Dome summit access if quotas allow. Understanding how to go about navigating permits for Yosemite climbing is a general first step.
The cables permit lottery typically runs from March 1-31 for the preseason draw, with a small number of daily lottery permits available two days in advance. Application fees apply, and around 225 Half Dome permits are for day hikers (or dome hikers), plus about 75 for backpackers. For the most current details, consult the official Half Dome permit lottery page. Climbers planning overnight ascents need to apply for Wilderness Permits, a separate process often requiring application well in advance. Details on Yosemite wilderness climbing permit information are available from the NPS. Demand for cables permits is extremely high, so be flexible with dates and consider weekdays.
Optimal Timing: Seasonality and Conditions
The prime season for Half Dome attempts, for both hikers and climbers, generally spans from late May to mid-October, the typical climb months. This is when the cables are usually up, and snow has mostly cleared from approaches and routes. You can often find the Half Dome cables installation and removal schedule on the NPS website.
Yosemite Valley weather can be dynamic. Afternoon thunderstorms are common in summer in the High Sierra, posing a significant lightning risk on exposed terrain like the summit and cables. Early starts are vital. Spring can mean lingering snow and wet rock on approaches or higher pitches, while early fall often brings stable weather but shorter daylight hours. Always check current conditions, including cable status, trail closures, and any Yosemite rockfall information closer to your trip. A broader understanding Sierra Nevada weather patterns can also be beneficial for planning your climb.
Training Regimen: Physical and Mental Prep
Physical training needs differ for the cables hike versus technical climbing. Cables hikers should focus on cardiovascular endurance—long hikes with elevation gain, trail running—and leg strength. A dedicated training plan for the Half Dome hike can make a significant difference.
Technical climbers require more specialized preparation. This includes climbing-specific strength (pull-ups, core work), endurance for long climbing routes, and targeted training for techniques like crack climbing, slab climbing (on slabs), or aid climbing, depending on the chosen route an advanced climber might select. Many find building climbing-specific strength at home an effective supplement to gym time. Mental preparation is equally important for both groups, involving building comfort with exposure and developing resilience. Some find resources on mental preparation for challenging climbs helpful. Acclimatization to altitude (Half Dome’s summit is over 8,800 feet elevation) is also advisable.
Gearing Up: Essential Equipment for Half Dome
Appropriate gear is fundamental for a successful and safe Half Dome ascent. This section outlines distinct rock climbing equipment needs for the Cables Hike, the technical Snake Dike route, and the formidable Regular Northwest Face, ensuring you are properly outfitted for your chosen challenge in this premier climbing area.
Cables Hike Gear Checklist & Rationale
For the Cables Hike, your checklist should include: sturdy hiking shoes/boots with good traction (consider choosing appropriate hiking footwear), layered clothing, a daypack (20-30L), and plenty of water. The NPS recommends 1 gallon (4L) per person; you can verify NPS guidelines on water for Half Dome in their management plan (page 18, section 4.2.3). Also pack high-energy snacks, sun protection, a headlamp, a basic first-aid kit, and durable gloves for the cables.
Proper footwear prevents blisters and provides stability for an enjoyable hike; layers help manage temperature shifts. Sufficient water and food combat dehydration and fatigue. Gloves protect hands and improve grip on the Half Dome cables. Trekking poles can aid balance and reduce knee strain. While some use via ferrata lanyards on the cables, this isn’t standard NPS advice and can complicate passage. The recommended gear for Half Dome hikers often includes similar items.
Snake Dike (5.7 R) Technical Climbing Rack
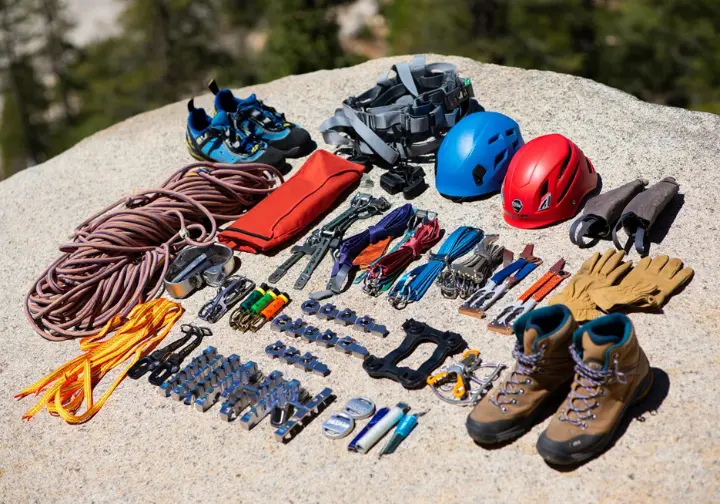
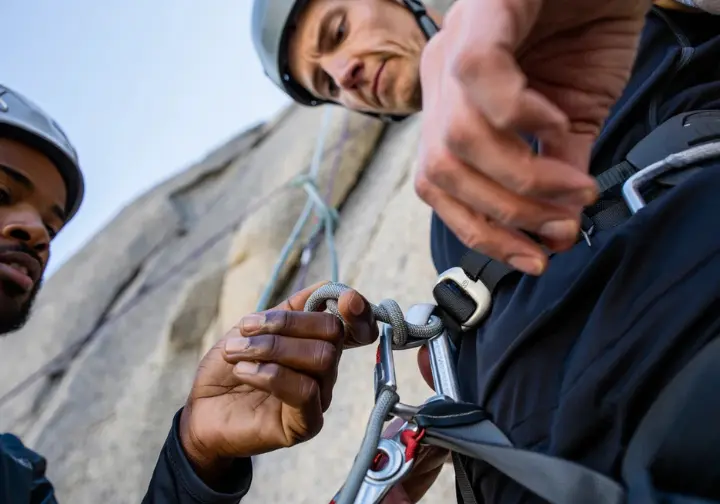
The typical gear for Snake Dike includes a standard rack of cams (e.g., doubles from micro to #2, single #3), a set of nuts, about 8-10 alpine draws/slings, and a 60m rope (a 70m can be useful). Personal gear includes a harness, helmet, and selecting climbing shoes for slab routes like Snake Dike is important. A belay/rappel device is also necessary.
The “R” rating signifies runout climbing on this rock face; protection can be sparse, demanding confidence in slab techniques for any climber. Small cams and nuts are important for the initial pitches. Some climbers carry two ropes for rappelling, though many descend via the cables, requiring hiking gear. You can find detailed Snake Dike gear recommendations on sites like SuperTopo. For those unfamiliar with the style, understanding runout slab climbing is key.
Regular Northwest Face (VI 5.9 C1) Big Wall Kit
The RNWF, a Grade VI big wall (one of Yosemite’s classic big walls), demands an extensive kit that many aid climbers will be familiar with. This includes a double set of cams (micro to #4, possibly #5, #6), multiple sets of nuts, potentially pitons, 15-20 quickdraws/alpine draws, and two ropes (lead and haul/tag line, 60-70m). Essential aid climbing gear includes aiders, daisy chains, and hooks. A comfortable big wall harness, durable climbing shoes, and a helmet are vital. For insights into RNWF big wall gear strategy, online forums can be invaluable.
Bivy gear for multi-day ascents includes a portaledge and fly (unless relying on natural ledges like Big Sandy), sleeping bags, pads, stove, fuel, multi-day food, headlamps with extra batteries, and wag bags. Efficient hauling systems, potentially using rock climbing ascenders for big walls, and robust self-rescue knowledge are critical. A comprehensive gear list for Half Dome RNWF can be found on resources like SuperTopo.
General Climbing & Bivy Logistics Gear
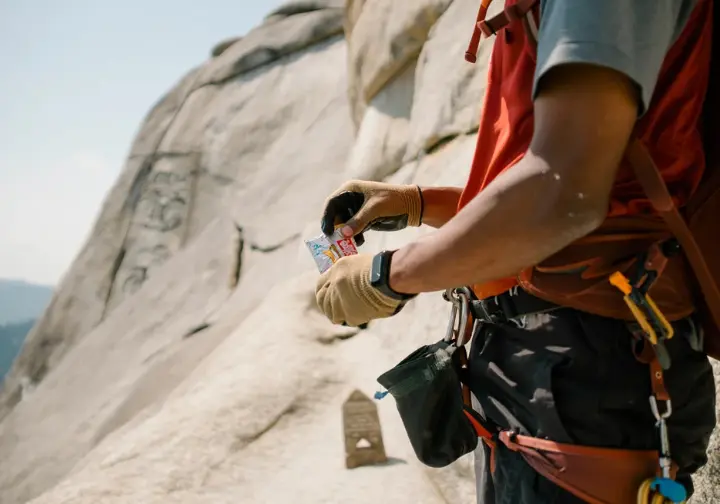
Water strategy is key: carry enough, or know sources (e.g., Merced River near Little Yosemite Valley or LYV) and have a filter/purification. Food planning means high-energy snacks for day trips and calorie-dense meals for multi-day climbs, respecting Yosemite bear canister regulations for overnight stays. Navigation tools (perhaps even detailed Yosemite maps, map and compass/GPS) are vital, especially for approaches to technical climbs which can be complex in this vast area.
The importance of a quality climbing helmet cannot be overstated for any climbing activity on Half Dome. All visitors must adhere to Leave No Trace principles for climbers, including packing out all trash and properly disposing of human waste (wag bags are mandatory on walls).
The Ascent: In-Depth Beta for Your Chosen Path
This core section delivers detailed, actionable “beta” for the Half Dome Cables Hike, the Snake Dike technical route, and the Regular Northwest Face technical ascent. We cover approaches, key sections, and specific techniques to help you navigate your yosemite climbing half dome experience.
Option 1: The Half Dome Cables Hike Journey
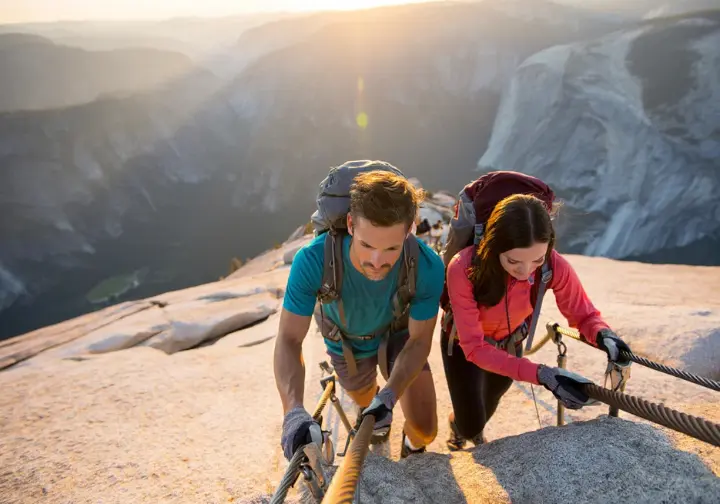
The primary approach is via the Mist Trail, starting from Happy Isles (shuttle stop #16). This strenuous ~7-8 mile one-way trek passes Vernal Fall and Nevada Fall, continuing through Little Yosemite Valley to the summit. The ascent of the Subdome (or subdome area), a steep granite staircase sometimes referred to as rock stairs, precedes the cables and is demanding itself. The dome trail leads hikers to this point.
The final 400-foot ascent involves navigating the Half Dome cables on a 45+ degree granite slab with a significant slope. The system uses paired steel cables and wooden planks (stiles) attached to metal poles drilled into the rock, every 10-12 feet. Maintain three points of contact, use gloves, allow space, be patient, and avoid the cables if thunderstorms threaten or the rock is wet. The Half Dome cables management plan details (pages 6-7) offer further insight. The summit (or top) offers panoramic views of Yosemite Valley, the High Sierra, and the unique perspective from this iconic monolith. Reinforce the need to be mindful of time for the long descent. Practicing good etiquette on crowded routes like the cables is also important.
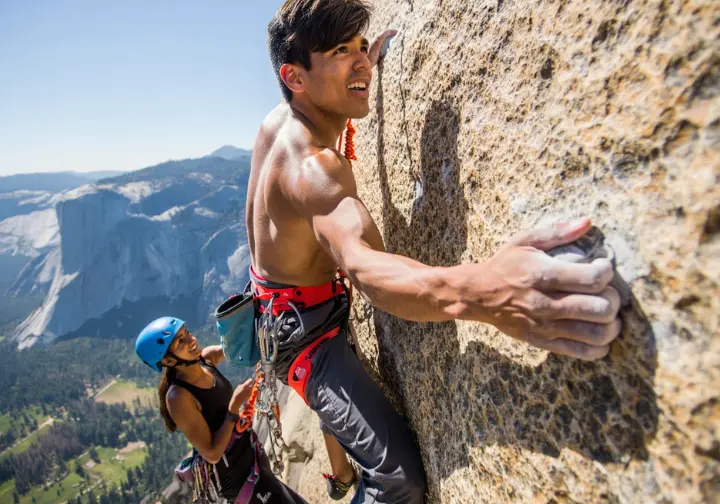
Option 2: Technical Climb – Snake Dike (5.7 R)
The approach to Snake Dike is typically via the John Muir Trail past Vernal and Nevada Falls, then a climber’s trail towards Lost Lake. This approach is long and can involve some route finding. The route follows a striking dike system up the southwest face, characterized by friction slab climbing – one of Yosemite’s incredible slab climbs on the sunny southern aspect – with intermittent cracks on the rock surface for protection. Many pitches are runout, demanding solid footwork and mental composure. For detailed Snake Dike route beta, Mountain Project is a reliable source.
While graded 5.7, certain moves can feel harder due to exposure or sparse protection. The psychological aspect of the runouts is often considered a primary challenge. After the technical pitches, about 1000 feet of 3rd and 4th class scrambling leads to the true summit, requiring continued care. You can often find Snake Dike topo and pitch information online. Remember that essential trad climbing skills for Snake Dike are a prerequisite for this climb.
Option 3: Technical Climb – Regular Northwest Face (VI 5.9 C1 / 5.12)
The “Death Slabs” approach to the RNWF is challenging, involving 3rd and 4th class scrambling, often with loose rock, to reach the base of the RNWF’s vertical northwest face. Caution, experience, and potentially an early start are advised to minimize rockfall risk. The RNWF itself offers 23 pitches of sustained climbing. Key sections include the Robbins Traverse, the Zig-Zags (often aid climbed), and the iconic Thank God Ledge, a small overhanging ledge.
A 2015 rockfall altered pitches 10-12; this section now often involves a pendulum or more difficult free climb /aid climbing, and beta for how it has been free climbed can vary. For the most current beta for RNWF post-rockfall, check recent climbing reports and articles. Common bivy ledges include Big Sandy Ledge (often crowded). Plan bivies based on party speed. Climber.org trip reports sometimes contain RNWF bivy ledge information. Efficiently using quickdraws effectively on multi-pitch routes is a small but important skill for such a long endeavor.
Safety First: Navigating Risks on Half Dome
This section focuses on critical mountain safety considerations and risk mitigation for any Half Dome ascent. It covers weather hazards, rockfall, crowd management, and emergency preparedness, all crucial for a safe experience in Yosemite NP.
Weather Hazards: Lightning, Rain, and Exposure
Weather is a primary hazard. Afternoon thunderstorms in the Sierra Nevada summer are common, bringing lightning, rain, hail, and temperature drops. Being on the cables, summit, or any exposed ridge during a lightning storm is extremely dangerous. Check forecasts and start early. The NPS warnings about wet conditions on Half Dome are clear: wet granite is incredibly slippery. Hypothermia is also a risk if caught unprepared in rain or wind. Layering is vital. Broader advice on managing weather risks in alpine environments can be found through organizations like the American Alpine Club.
Rockfall Awareness and Mitigation Strategies
Rockfall is an inherent objective hazard in mountainous terrain like Yosemite. Half Dome, being a massive rock monument of granite, is susceptible to natural erosion and dislodged rocks. For technical climbers, rockfall can be triggered by parties above, rope drag, or naturally. Wearing a helmet is non-negotiable; the critical role of a climbing helmet cannot be overstated. Pay attention, avoid lingering in gullies or below others, test holds, and communicate about loose rock. The Death Slabs approach to RNWF is particularly known for rockfall. For more on understanding Yosemite rockfall dynamics, the NPS provides information. You can also review climbing safety statistics related to rockfall from the NPS.
Managing Crowds, Fatigue, and Altitude
Crowds, especially on the Cables Route, can lead to waits and frustration. Start very early, consider off-peak times, and practice patience. Fatigue significantly impacts decision-making and physical performance. Half Dome ascents are long and strenuous; underestimating the effort can lead to exhaustion. The effects of altitude on hikers can also be a factor, as Acute Mountain Sickness (AMS) can affect anyone above 8,000 feet of elevation. Acclimatization, hydration, and nutrition are key. Descend if symptoms worsen. Good communication within your party and benefits of taking unplanned breaks to manage fatigue are important. Some general advice on managing crowds on popular trails can also be applied here.
Emergency Preparedness and Self-Rescue Basics
Carry essential emergency gear: first-aid kit, headlamps with extra batteries, whistle, and an emergency communication method (cell phone service is unreliable; satellite messenger/PLB recommended for remote climbs). Leave a detailed itinerary with someone reliable. For technical climbers, self-rescue skills are vital (escaping a belay, ascending a rope, partner rescue). Know Yosemite park emergency contacts (911) and signaling procedures. The NPS provides general Yosemite search and rescue information and access to basic self-rescue techniques for climbers can be found on climbing community sites. Properly understanding your belay equipment for emergencies is also a foundational part of preparedness.
The Way Down: Descent Strategies
Getting down from Half Dome’s summit safely and efficiently is just as important as the ascent. This section outlines common descent procedures, whether you’ve hiked the cables or completed a technical climb.
Descending the Cables Route Safely
Descending the Half Dome cables can feel more challenging than ascending for some, due to facing outwards on the steep hiking section. Use the same techniques: three points of contact, go slowly, and be courteous. Allow ample time for the descent back to Yosemite Valley, which is many a mile and can take almost as long as the ascent, especially when fatigued. General Half Dome descent considerations are covered in many comprehensive hike guides.
Consider returning via the John Muir Trail from Nevada Fall instead of the Mist Trail; it’s longer but less steep, though it misses close-up Vernal Fall views. The John Muir Trail as an alternative descent offers a different perspective from the main dome trail. Always carry a headlamp, as many finish in the dark.
Descent After Technical Climbs (RNWF, Snake Dike)
The most common descent for technical climbers from the summit of Half Dome is via the Cables Route, all the way to the valley floor. Climbers need appropriate footwear (hiking shoes or sturdy approach shoes) and sufficient water/food for this long hike down after their climbs. Stashing hiking gear at the base of the climb or carrying it over the route are options; essentials like water and a headlamp are crucial regardless. SuperTopo’s beta for routes like Snake Dike often mentions climber descent via Half Dome cables.
Rappelling routes like RNWF is generally not recommended due to length and complexity. Snake Dike is sometimes rappelled, but many still walk off. The descent is a significant part of the objective. Forums discussing logistics of carrying gear over technical routes can provide insight. Even your choosing ropes suitable for long descents or walk-offs can be a factor if rappelling is considered.
Beyond the Ascent: History, Ethics, and Stewardship
Half Dome is more than a physical challenge; it’s a place with a rich history and cultural significance. Understanding this, along with practicing Leave No Trace ethics and stewardship, is crucial for protecting this iconic landmark for future generations. Many historic Yosemite ascents occurred on this very dome.
A Storied Past: Notable Half Dome Ascents
George Anderson achieved the first known summiting of Half Dome in 1875, laboriously drilling holes for iron eyebolts. This effort laid the groundwork for the eventual cables system. You can often find details about the first ascent of Half Dome by George Anderson in general park information. These early ascents were remarkable feats.
Technical climbing history on Half Dome includes the first ascent of the Regular Northwest Face in 1957 by climber Royal Robbins, Mike Sherrick, and Jerry Gallwas—a landmark in American big wall climbing. The history of the Regular Northwest Face is well-documented. Other significant ascents, like the first free ascent of RNWF or Alex Honnold’s free solo climb achievements, illustrate evolving climbing standards. Half Dome’s role in art, particularly Ansel Adams’ “Monolith, The Face of Half Dome,” cemented its iconic status. Learning about similar groundbreaking ascents on El Capitan can provide further context to Yosemite’s climbing heritage.
Leave No Trace and Yosemite Stewardship
Practicing all seven Leave No Trace (LNT) principles is vital. These include planning ahead, traveling on durable surfaces, disposing of waste properly (pack out ALL trash, including food scraps and toilet paper), leaving what you find, minimizing campfire impacts, respecting wildlife, and being considerate of other visitors. For technical climbers on multi-day routes, this means using wag bags. The official Leave No Trace guidelines for Yosemite are provided by the NPS.
Respect wildlife by storing food properly (bear canisters if camping), maintaining a safe distance, and being aware of potential closures for wildlife like nesting peregrine falcons. A stewardship mindset involves actively protecting the resource: pick up litter, stay on trails, and educate others. Following responsible climbing practices is part of this. It’s also important to be mindful of respecting cultural significance and closures at other iconic formations, a principle that applies universally.
Guided Options for Half Dome
For those seeking expert support, professional guiding services offer a way to experience Half Dome, whether for the cables hike or technical climbs. This section briefly explores these options for a sure Half Dome experience.
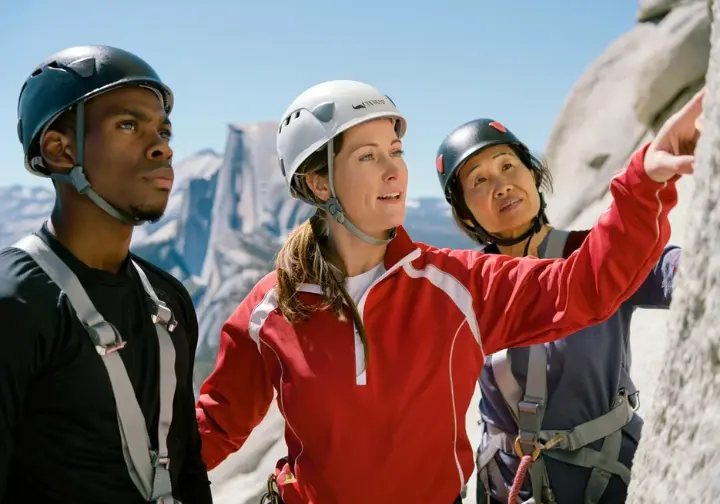
Hiring Guides for Cables or Technical Routes
Guided trips are available for both the Half Dome Cables hike and for technical rock climbs like Snake Dike or even the RNWF, some of the most iconic Yosemite climbs. Several commercial services are authorized in Yosemite National Park. Benefits include increased safety, expert instruction, logistical support (permits, gear, food), and local knowledge. The Yosemite Mountaineering School and Guide Service is one option; other private outfitters also exist. Research reputable, certified services. While costly, the investment can be worthwhile. The benefits of guided Half Dome hikes are often highlighted by concessioners. Even with a guide, learning essential skills before attempting guided climbs is beneficial.
Summiting Success: Key Takeaways for Your Half Dome Climb
Half Dome presents two distinct paths to its iconic summit – the strenuous Cables Hike and demanding technical rock climbs. Each route requires specific preparation, unique skills, and a profound respect for the mountain’s environment for a clean ascent.
Thorough planning is the cornerstone of any Half Dome attempt. This means securing necessary permits well in advance, dedicating yourself to diligent training for both the physical and mental challenges ahead, and carefully packing the appropriate gear tailored to your chosen objective and the prevailing conditions you might encounter on this big dome.
Safety is absolutely non-negotiable. Take the time to understand and actively mitigate risks associated with weather, potential rockfall, the effects of altitude, and physical fatigue. Always prioritize and practice Leave No Trace ethics to help protect Yosemite’s natural beauty for all future visitors.
Whether you find yourself hiking the cables or methodically tackling a multi-pitch route, the endeavor to “Unlock Half Dome” is a significant undertaking. It’s an experience that promises not only immense personal reward but also a deep, lasting connection with one of America’s most revered natural wonders, culminating in reaching the summit area (perhaps even taking a photo on the famous “diving board” feature, if conditions and safety allow). We encourage you to continue building your climbing knowledge and skills; our blog offers a wealth of resources for dedicated climbers aiming to explore destinations like Yosemite and beyond, including other mountains in the Sierras or even Sequoia and Kings Canyon National Parks.
Frequently Asked Questions
How hard is it to actually climb the Half Dome cables? >
What are my chances of getting a Half Dome permit? >
What is the best month to climb Half Dome? >
Can a beginner rock climber attempt a technical route on Half Dome? >
We are a participant in the Amazon Services LLC Associates Program, an affiliate advertising program designed to provide a means for sites to earn advertising fees by advertising and linking to Amazon.com. As an Amazon Associate I earn from qualifying purchases. We also participate in other affiliate programs. The information provided on this website is provided for entertainment purposes only. We make no representations or warranties of any kind, expressed or implied, about the completeness, accuracy, adequacy, legality, usefulness, reliability, suitability, or availability of the information, or about anything else. Any reliance you place on the information is therefore strictly at your own risk. Additional terms are found in the terms of service.


