

In this article
- Gearing Up: Specialized Equipment for Mixed Climbing Essentials
- Mastering Mixed Terrain: Core Techniques for Transitions
- The Art of Transition: Moving Between Ice and Rock
- Protecting the Climb: Anchors and Gear Placement in Mixed Terrain
- Decoding M-Grades and Choosing Your Mixed Climbing Path
- Safety First: Critical Considerations for Mixed Climbing Transitions
- Training for Mixed Climbing’s Unique Demands
- Conclusion: Embracing the Vertical Dance of Ice and Rock
- Frequently Asked Questions about Master Ice & Rock: Mixed Climb Transition Guide
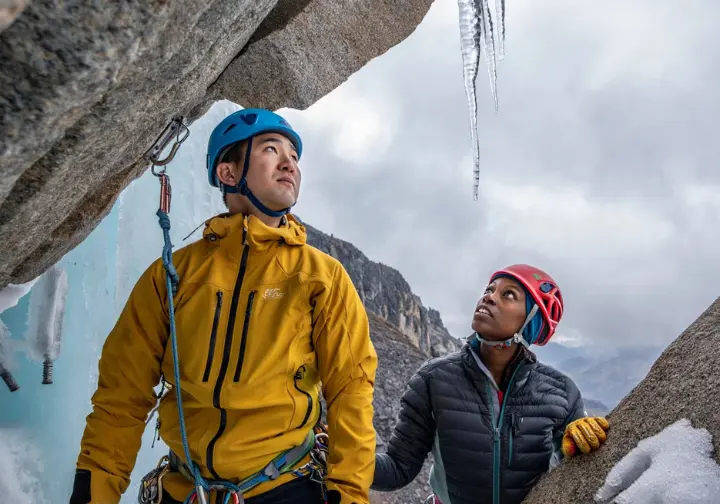
What is mixed climbing? It presents a captivating fusion of ice climbing and rock climbing techniques, demanding a versatile skillset for any climber to navigate routes that combine these distinct mediums. This climbing discipline is fundamentally defined by ascending lines that feature both ice and rock, utilizing specialized ice climbing equipment like ice tools and crampons throughout the entire climb, regardless of the surface. This continuous use of climbing gear distinguishes it from alpine climbing routes where climbers might switch between rock shoes and crampons for separate pitches. The allure of mixed climbing lies in tackling complex, beautiful lines otherwise impassable by singular disciplines, pushing physical limits and sharpening mental acuity through constant environmental assessment and creative problem-solving. For many, this is the essence of winter sports in the mountains.
This guide delves into the mixed climbing essentials: transitioning between ice and rock. We’ll cover everything from understanding the unique terrain and its challenges to cultivating the necessary mindset. We’ll explore the specialized equipment required, core mixed climbing techniques for mastering movement on both ice and rock, and the critical art of moving between these surfaces. Furthermore, we will address how to protect mixed climbs, decode M-grades for climbing route selection, prioritize safety in hazardous environments, and outline effective training strategies. If you’re ready to expand your climbing horizons, read on to discover how to confidently and skillfully dance between ice and rock.
Defining the Terrain: More Than “A Bit of Both”
At its heart, mixed climbing involves the continuous application of ice tools and crampons on both frozen features and bare stone; these tools effectively become extensions of the climber’s body. This approach is fundamentally different from multipitch routes where climbers might swap gear for distinct ice and rock sections. The terrain encountered can vary widely, from predominantly rock routes that are “iced-up” with verglas or snow, characteristic of Scottish winter climbing, to ice routes presenting clear sections of water ice interspersed with dry rock segments. Such icy conditions often render traditional rock climbing techniques ineffective on these terrains.
Mixed climbing shares a strong connection with alpine climbing due to the variable terrain inherent in many high-mountain environments. Dry-tooling, which is the practice of using ice tools and crampons on rock devoid of ice or snow, is not merely a training exercise but a fundamental component technique for the rock portions of mixed routes. Indeed, some mixed climbs may feature substantial dry-tooling sections, compelling the ice climber to overcome overhangs or rock roofs solely on tools to link separated ice features or to gain access to an ice pitch. For those seeking a deeper understanding of its scope, further information can be found by researching defining mixed climbing and its scope.
The Unique Challenges and Demands
A primary challenge in mixed climbing is the constant need to simultaneously assess and adapt to two different mediums. Climbers must evaluate ice solidity for ice tool placements and ice screws while also analyzing rock feature soundness for cams, nuts, or delicate dry tool hooks. This continuous, dual assessment imposes a significant cognitive load. Particularly in remote alpine settings or on long climbs, mixed climbs often demand a higher level of commitment and can present challenging climbs.
The combined complexity of techniques, varied climbing gear, and potential for rapidly changing conditions can make retreat far more complicated than on straightforward rock or ice climbs. Successfully protecting a mixed climb requires a profound understanding of both ice and rock protection methods. More critically, it demands knowing how to effectively combine these different types of gear to build secure ice anchors and protect pitches that traverse both mediums. A valuable resource for understanding hazards is available when assessing risk in alpine environments. One important caveat is that retreat itself can be a complex undertaking.
Cultivating the Mixed Climbing Mindset
Adaptability forms the cornerstone of the mixed climbing mentality. Climbers must be prepared to fluidly switch techniques, adjust gear usage, and modify their mental approach as the terrain dictates. Rigidity in thought or technique can be a significant impediment to success and safety in this varied environment. Each unique juxtaposition of ice and rock can present a novel puzzle, demanding strong problem-solving skills to be overcome. The ability to creatively assess situations and devise effective solutions for both movement and protection is paramount for any seasoned climber.
A high degree of mental composure and confidence in one’s abilities and gear is necessary to trust specialized equipment on unconventional placements, such as ice tool picks on minute rock edges or crampon points on verglassed slabs. This trust is built through extensive experience and deliberate practice. Rushing placements or transitions in mixed terrain can lead to insecure positions or critical errors. A methodical, patient pace, allowing time for careful assessment and precise execution, is often safer and ultimately more efficient. Effectively managing cognitive load also involves systematic assessment routines and clear partner communication, aspects crucial for maintaining mental focus to conquer fears. Further insights can be found on developing alpine climbing judgment.
Gearing Up: Specialized Equipment for Mixed Climbing Essentials

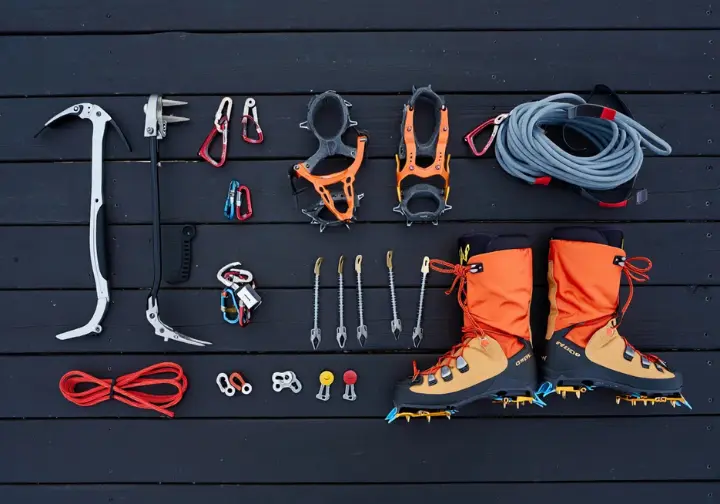
This section details the essential gear for mixed climbing, highlighting specialized tools and gear adaptations necessary for efficiently and safely navigating hybrid ice and rock terrain. Mixed climbing gear often involves compromises to achieve versatility across different mediums, a key aspect for any climber venturing into this discipline. Proper ice climbing tools and protection are fundamental.
Ice Tools: Your Dual-Medium Connection
Modern mixed climbing typically employs hybrid or technical ice tools specifically engineered for this dual purpose. These modern ice tools feature aggressive pick angles suitable for hooking small rock features, comfortable ergonomic handles for leashless climbing, and robust construction to withstand torquing stresses. Reputable manufacturers like Petzl, Black Diamond, and Grivel offer a range of ice tools optimized for these demands. The choice of pick is critical; T-rated (Technical) ice picks are essential due to their superior strength and durability required for high loads during torquing and dry tooling basics. B-rated (Basic) picks, thinner and shaped for ice penetration, are generally reserved for pure ice routes. An all-around ice tool might be sought by those frequently engaging in varied winter climbing.
Tool head configuration often involves a preference for one ice tool with a hammer and the other with an adze. However, some climbers, particularly beginners or those concerned about injuries from dislodged tools, may opt for hammers on both. While traditional wrist leashes are less common with modern ergonomic grips, leashless climbing has become the norm, offering greater freedom and easier gear placement. To prevent ice tool loss on committing routes, umbilical tethers (often called ice clippers for attachment systems) connecting tools to the climbing harness are highly recommended. You can find more details on selecting appropriate ice climbing tools for your needs. Some designs may feature a solid snow basket if the tool is also intended for mountaineering approaches.
Crampons: Precision on Ice and Rock
For technical mixed climbing, mono-point crampons are generally favored. The greater precision of a single front point allows for more nuanced footwork on small rock edges, tiny solution pockets, or old pick holes. Dual front points, while offering more stability on pure ice, can be less precise and more prone to “skating” or feeling insecure on rock surfaces. Key technical features include adjustable or replaceable front points and effective anti-balling plates, though the latter is less critical on predominantly rock routes. A secure, precise fit with mixed climbing boots is paramount.
Highly specialized “fruit boots,” with crampons bolted directly to the sole, are used for very high-end dry tooling and competition climbing but are less versatile for general mixed and alpine climbing applications. The evolution of equipment like mono-point crampons has directly enabled the development and refinement of advanced mixed climbing techniques. This precision becomes especially critical when delicately placing a foot on a tiny rock edge after ascending an ice pitch. For more on technical features of mountaineering crampons, consider external resources.
Boots, Ropes, and Other Crucial Gear
Mixed climbing boots must balance stiffness for front-pointing on steep ice and edging on rock holds, with adequate insulation and some flexibility for approaches. Mountaineering boots are a common choice here. Compatibility with the chosen crampon binding system is crucial. Dry-treated ropes are essential for mixed climbing as they prevent water absorption, which can make ropes heavy, stiff, difficult to handle, and reduce their strength and dynamic performance in freezing conditions. Half or twin rope systems, and sometimes even different ropes for specific objectives, are often preferred for reduced rope drag on wandering pitches, redundancy in case of damage, and enabling full-length rappels. Having spare layers of clothing is key for warmth.
A climbing helmet is non-negotiable due to high risks of falling ice, rock, and dropped equipment; it should fit comfortably over warm headwear. A comfortable, adjustable climbing harness with sufficient gear loops (some integrate with ice clippers like Petzl’s Caritool) is vital to accommodate layers and a mixed rack. Lightweight Dyneema or Spectra slings are favored as they absorb less water, and quickdraws with wiregate carabiners are often preferred as they are less prone to freezing shut. A glove system, with thin gloves for mixed climbing for leading and warmer insulated ice gloves for belaying, plus spares, is advisable for warmth. A streamlined summit pack may be needed for longer routes to carry extra layers.
Protection: Your Lifeline on Varied Terrain
A mixed climber’s protection rack must be versatile enough to protect both ice and rock sections effectively, often adjusted based on the anticipated ratio of ice to rock on the intended climbing route. Proficiency in placing solid ice screws quickly and efficiently is a vital skill, with various lengths carried for differing ice conditions. Modern ice screws, including options like ultra-light aluminum ice screws, are advantageous. Stainless steel ice screws resist rust. A comprehensive selection of traditional rock protection typically includes wired nuts (Stoppers) of various sizes and a range of cams (Spring-Loaded Camming Devices – SLCDs) to fit different rock cracks.
Despite being less common in modern rock climbing, pitons (including the ice piton type) retain significant value in mixed climbing, providing crucial protection in thin or icy cracks, frozen moss, or features where nuts/cams may not hold securely. A small selection can be invaluable. Specialized ice pitons or hooks like Spectres, Bulldogs, or Warthogs are designed for use in frozen turf, thin ice overlying rock, or icy cracks where traditional ice screws are ineffective. Much mixed climbing gear represents a compromise, balancing robustness for rock with performance on ice, unlike highly specialized gear for single disciplines. For further learning, explore the principles of placing ice screws.
Mastering Mixed Terrain: Core Techniques for Transitions
This section explores the fundamental mixed climbing techniques essential for proficiently navigating mixed terrain. We will delve into the specifics of dry tooling basics, which is the use of ice tools on rock, and the specialized methods for using crampons effectively on rock surfaces, both critical for smooth and secure movement. These skills are vital for any ice/mixed climbers.
Dry Tooling Fundamentals: Ice Tools on Rock
Dry tooling, the practice of using ice tools and crampons to ascend rock surfaces devoid of ice or snow, is an indispensable technique for navigating the rock sections of a mixed route and is often practiced as a discipline in its own right, sometimes in a climbing gym environment on artificial holds. Experienced rock climbers often find dry tooling involves distinct movements and body mechanics, sometimes feeling counter-intuitive as ice tools fundamentally alter interaction with holds. The security of an ice tool placement on rock depends on the rock feature’s nature, its quality, and critically, the direction of pull applied. Common placements include utilizing the pick on positive rock edges, wedging the pick into cracks, or hooking small depressions or pockets (huecos).
Key dry tooling movements include the Stein Pull (inverting the ice axe, pick upwards, wedging it into a crack/feature above, then pulling down on the handle for upward momentum, effective on overhangs). Another is the Torque Pull, executed by wedging the pick into a rock crack and pulling sideways or rotationally on the handle to create torque for stability and upward progress, often used in vertical cracks. Underclings with ice tools are also common, similar to rock climbing underclings but adapted for tools. Will Gadd’s “90-90-90” principle is fundamental for stable ice tool placements on rock: the ice tool shaft should be ~90° to the hold’s horizontal axis, the pick ~90° on its roll axis (not twisted), and the pull directed ~90° downwards relative to the hold’s front-to-back axis. Adherence prevents ice tools from skating or “blowing” off holds, especially marginal ones, and underscores the importance of precise body positioning. While seemingly counter-intuitive, holding ice tools with a relatively loose grip, thumbs open when possible, can conserve energy, reduce forearm pump, and increase sensitivity to feedback from the pick placement. Developing psychological trust in ice tool placements on rock, which are often minimal or blind, is a gradual process built through progressive practice and is fundamental for committing to difficult moves, especially during transitions. Responsible dry toolers also consider ethical implications, choosing durable rock or designated areas to avoid damaging rock, especially established rock climbs not intended for ice tool use. For further information, one might explore advanced dry tooling maneuvers.
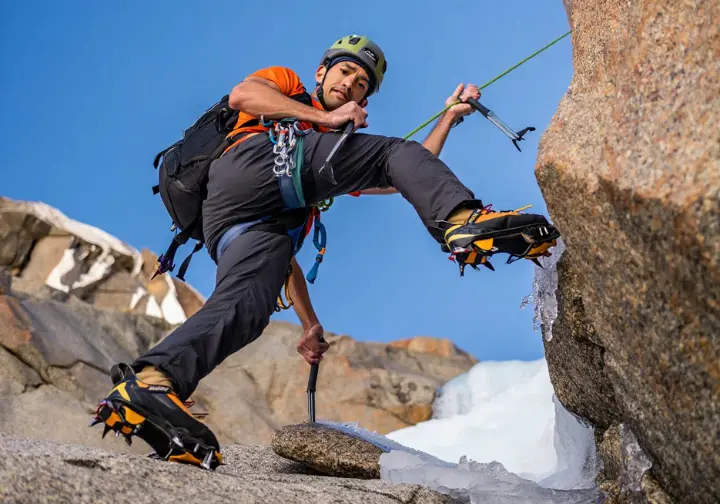
Mastering Crampons on Rock: Precision Footwork
Using crampons on rock is a core mixed climbing skill that presents unique challenges and requires a distinct approach to footwork compared to flexible rock shoes, due to the rigid platform of mountaineering boots and sharp crampon points. This interface demands precision, confidence, and an understanding of force transmission for the climber. A primary technique, especially with mono-point crampons, is front-pointing on small rock features like tiny edges, crystals, or solution pockets. Success depends on accurate foot placement, maintaining balance over the placement, and applying pressure directly through the point.
Edging with crampons, similar to rock shoe edging, involves using the side points of the crampons on larger rock edges or incuts by angling the boot, though the feel is different due to the rigid sole and metal points requiring careful weight distribution. “Crampon-skating,” the unnerving sound of crampons scraping insecurely, indicates lack of purchase and is often caused by imprecise placements, incorrect body positioning, or attempting to use them on smooth, featureless slabs of rock. Deliberate, precise placements and careful weighting are key to avoidance; aggressively kicking rock can damage gear and rock, rarely improving security. Effective crampon work is supported by smooth weight shifts, optimal body positioning, and actively using feet to push and support weight, conserving arm strength. The type of rock (e.g., granite vs. limestone) also influences crampon performance on different terrains. Learning about techniques for walking in crampons can provide a foundational understanding.
The Art of Transition: Moving Between Ice and Rock
This section focuses on the critical skill of transition between ice and rock, often the crux of a mixed pitch. It will cover core principles applicable to all such movements and then delve into specific strategies for moving from ice to rock, and rock to ice, including managing ice tools and crampons effectively for a smooth transition.
Core Principles for All Transitions
Before committing to any movement into a transition zone, a thorough assessment of both the medium being left and the medium being entered is paramount. This involves evaluating ice quality (solid, brittle, thin ice), rock nature (positive holds, cracks, smoothness), and the security of potential initial placements for ice tools and crampons. Mentally rehearse the sequence of moves before execution; visualize where each ice tool and foot will go, in what order, and anticipate any shifts in body position and balance that will be required. This pre-planning can significantly improve efficiency and reduce hesitation. What challenges will you face?
The classic climbing rule of maintaining three points of contact, where feasible, provides crucial stability, especially during the inherently less secure moments of shifting from one medium to another. Avoid sudden, jerky, or rushed movements, as these can dislodge marginal placements or lead to a loss of balance; controlled, deliberate actions are generally safer and more efficient. Ensure that any necessary protection (ice screws for upcoming ice, rock gear for upcoming rock) is readily accessible before starting the transition. If a transition looks particularly challenging or insecure, consider placing protection just before committing to it. Clear and concise communication with your climbing partner regarding intentions, security of placements, and readiness to move is vital, especially if the transition involves complex moves or potential hazards. The “commitment point,” the moment the climber decisively shifts weight onto the new medium, is often the point of highest vulnerability and requires careful setup. For a broader view, consult resources on fundamental mixed climbing techniques.
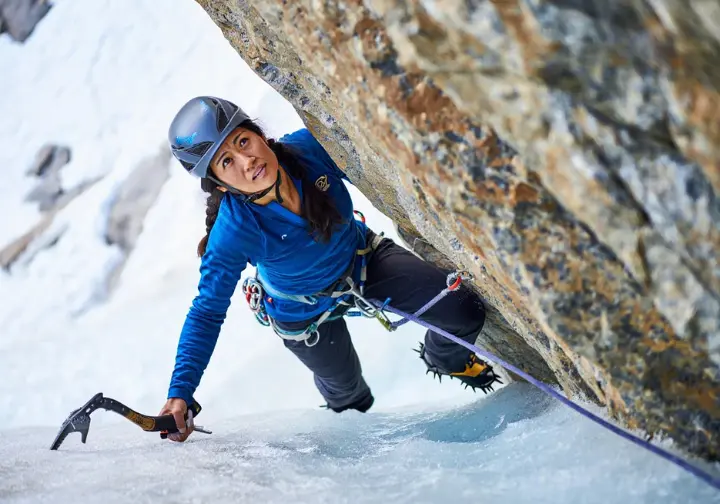
Ice-to-Rock Transition Strategy and Execution
From your last secure stance on ice, carefully scan the adjacent or overhead rock for positive features for initial ice tool placements, such as distinct edges, small cracks suitable for pick torques or stein pulls, or secure pockets. Simultaneously, identify potential footholds for your crampons on the rock, which might be small ledges, incuts, or even slight changes in angle. Critically evaluate the rock quality: is it solid rock, or does it appear loose rock, friable, or covered in slippery verglas or moss? Before reaching for the rock, ensure your last ice tool placements and foot placements in the ice are as secure as possible, as these will be your anchors while initiating the transition.
Carefully reach out with one ice tool and test potential rock placements, applying principles like Will Gadd’s 90-90-90 for stability. Lightly tap or probe the feature to gauge its solidity, prioritizing placements that offer a good downward pull or a secure hooking opportunity. Once an ice tool placement on rock feels reasonably secure, cautiously begin to weight it, listening and feeling for any signs of instability, and anticipate balance changes if moving onto a different angle (e.g., slab from vertical ice). With at least one ice tool securely on rock and body weight balanced, carefully lift one cramponed foot from its ice placement and precisely place it onto a chosen rock feature, often involving delicate front-pointing or using other crampon points. Avoid scraping or kicking, then smoothly shift weight onto this foot. Once the first foot is securely weighted, bring the second foot from the ice onto another rock placement, then work to secure further ice tool/foot placements to fully establish on rock and place protection as soon as stable. Further guidance on navigating mixed terrain can be found through expert resources.
Rock-to-Ice Transition Strategy and Execution
From your last secure stance on rock, carefully examine the ice you intend to move onto, looking for visual cues that suggest solidity such as blue ice or clear ice, and concave features rather than convex bulges which might be under tension or unstable ice. Identify specific targets for your initial ice tool swings and try to gauge if the ice appears thick enough for secure ice tool placements and subsequent ice screws. Ensure your last ice tool/hand placements and foot placements on the rock are as solid as possible, as these will provide your platform for reaching and swinging onto the ice. Many ice climbs present such challenges.
Reach out and make a controlled, accurate swing with one ice tool into your chosen ice target, aiming for the satisfying “thunk” of a solid placement, as the sound and feel provide valuable feedback. Before fully committing weight, gently test the placement by tugging downwards and outwards; if it feels insecure (e.g., hollow, “dinner-plating,” shifting), try a different spot. Once one ice tool feels secure in the ice, consider placing the second ice tool to create a more stable platform before moving your feet. Then, with ice tools secure, carefully lift one cramponed foot from its rock placement and execute a well-aimed kick to drive the front-points into the ice, aiming for solid purchase with the heel relatively low. Smoothly shift weight, bring the second foot over, make further placements to fully establish on ice, and place ice screws as soon as quality ice and a stable stance allow. Learning about understanding ice quality for placements is beneficial for any aspiring ice climber. How does ice behave in different temps?
Managing Tools and Crampons During Transitions
Being able to efficiently swap ice tools between hands or match hands on a single, good ice tool placement can be vital for maintaining balance, conserving energy, or reaching the next hold during a delicate transition sequence. Maintain constant awareness of your crampon points, as they can easily snag on rock features, slings, ropes, or even your own clothing, especially when maneuvering in complex, constricted, or overhanging terrain. Such snags can disrupt balance or cause falls.
Before placing an ice tool pick or crampon points on rock after they have been on ice or snow, ensure they are free of any accumulated snow or ice debris. This cleaning is crucial because any debris can compromise the security of the placement on rock, leading to slips. These moments are not just movement challenges but also significant protection cruxes; the ability to place reliable protection immediately before, during (if feasible and safe), or immediately after a transition is a key component of overall safety and confidence. This involves anticipating protection ice needs and having the appropriate gear readily available. Familiarizing yourself with general ice climbing safety practices is a good step.
Protecting the Climb: Anchors and Gear Placement in Mixed Terrain

This section covers the complex art of placing protection and constructing anchors in terrain that intersperses ice and rock. It will emphasize principles of adaptability, redundancy, and quality assessment for both ice screws and various types of rock gear, which are fundamental for safe passage through such variable ever-changing surface environments.
Principles of Mixed Protection and Anchors
The protection strategy for a mixed climb must be inherently fluid and adaptable, capable of shifting seamlessly between utilizing ice screws and placing rock gear and back again as the terrain dictates. Route-reading in this context involves a dual assessment: identifying viable movement sequences while simultaneously spotting opportunities for protection, as gear availability can influence the chosen line. Standard anchor principles (SERENE/ERNEST) are fundamental. However, achieving effective equalization between disparate types of protection, such as an ice screw and a rock cam, requires careful consideration of forces and material properties. These ice anchors must be impeccable.
Continuous and critical assessment of the quality of the ice for screw placements and the rock for gear placements is non-negotiable for safety. What appears to be a solid placement from a distance may prove unreliable upon closer inspection and testing. When constructing anchors combining ice and rock protection, overall strength and reliability are often governed by the “weakest link” in the system or by the quality of the equalization achieved. Ice is generally considered less predictable and often less strong than good quality rock, making meticulous assessment of each anchor component crucial. If one medium offers significantly better protection opportunities, it may be wise to build the anchor primarily around those pieces if geometry permits. Information on building effective climbing anchors can be found from reputable sources.
Effective Ice Screw and Rock Pro Placement
Ideal ice for screws is solid ice, dense, and well-bonded, often appearing blue or clear; climbers should avoid placing ice screws in aerated, “chandeliered,” significantly sun-affected, or very thin ice if better options exist, and the sound of tapping ice can indicate quality. A common guideline is to place ice screws perpendicular to the ice surface, though some suggest a slight downward angle (10-15°) in very good ice or a slight upward angle in poorer ice. For placement, clear loose surface ice, create a small starting dimple with an ice tool if needed, start the ice screw by hand ensuring threads engage cleanly, then use the hanger to efficiently drive it in, often optimally at waist level from a stable stance. Efficient racking on harness “ice clippers” allows quick, one-handed access even with gloves.
Standard rock climbing protection like nuts (Stoppers) and cams (SLCDs) are placed as they would be in traditional climbing, but consideration must be given to ease of placement and removal while wearing gloves. Icy or wet cracks can negatively affect the holding power of cams; in such conditions, well-placed nuts or hexcentrics might offer more security. Pitons are exceptionally valuable in mixed climbing as these metal spikes, hammered into cracks, can provide solid protection in thin or irregular cracks where nuts or cams are ineffective, in icy cracks where other gear might slip, or in sections of frozen turf or moss. Always be vigilant for opportunities to use natural protection like slinging solid rock spikes, horns, chockstones, or threading slings through rock tunnels. Learning about ice screw placement best practices is highly recommended.
Decoding M-Grades and Choosing Your Mixed Climbing Path
This section will demystify the M-grading system specific to mixed climbing, explaining how these grades relate to perceived difficulty and other grading systems. It will also provide crucial guidance on selecting appropriate mixed routes based on grade, current conditions, and individual/partner skill levels to ensure a safe and progressive experience for all mixed climbers.
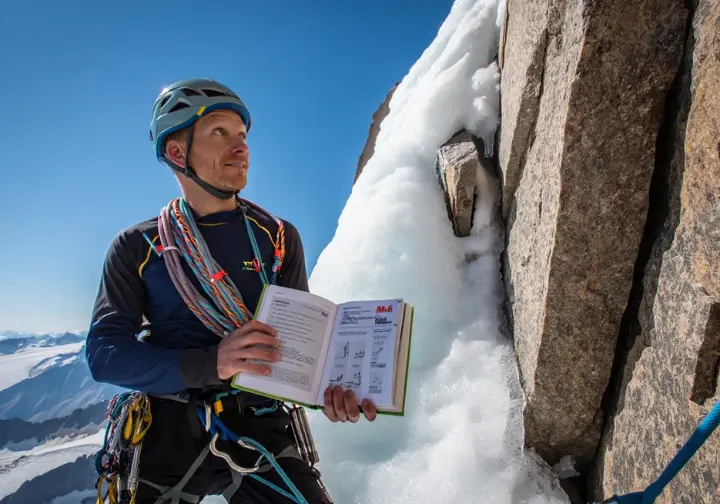
Understanding the M-Grading System (M1-M8 Focus)
M-grades, typically ranging from M1 to M16, quantify the technical difficulty of ascending routes involving both steep rock and ice, utilizing ice tools and crampons throughout. These grades primarily reflect the physical and technical challenge of the hardest moves on a climbing route and often do not explicitly account for protection quality, especially as many harder M-graded routes are established with fixed bolts. M1-M3 grades represent easy climbing to moderate, approximately equivalent to YDS 5.5-5.7, generally on low-angle terrain with good rock holds and manageable ice. On some M1-M3 routes, ice tools may not be required for the entire pitch, or hands might be used on rock, serving as an excellent introduction for newcomers to mixed climbing.
M4 is moderate to challenging (approx. YDS 5.8), possibly involving ice up to WI4, with occasional technical dry tooling moves on positive features. M5 is challenging (approx. YDS 5.9), often longer and more sustained than M4, with potential WI4 ice sections and more technical dry tooling, though still generally relying on standard placements. M6 (approx. YDS 5.10) can feature vertical to slightly overhanging terrain with WI4-WI5 ice (pillars, icicles), requiring proficiency in torques and stein pulls, and possibly figure-fours/nines. M7 (approx. YDS 5.11) involves powerful moves on long, overhanging sections, difficult WI5-6 ice, and consistent use of advanced dry tooling techniques. M8 (approx. YDS 5.11+) typically involves longer sustained M7 climbing with even punchier cruxes or more intricate dry tooling. An M-grade signifies difficulty when executed with ice tools and crampons, employing specific mixed climbing techniques, not simply a rock grade climbed in boots. For a broader context, review the official UIAA climbing difficulty scales.
Selecting Appropriate Mixed Routes for Progression
When choosing a mixed route, begin by effectively interpreting available information from guidebooks and online resources like Mountain Project or UKClimbing, including route descriptions, topos, M-grades, typical ice/rock conditions, aspect, and protection style. Pay close attention to descriptions indicating the nature and frequency of transitions, as this significantly impacts difficulty and style. For climbers new to mixed terrain, a progressive approach is best, starting with routes graded M1-M3, and then considering M4-M5 routes as skills and confidence develop. Desirable characteristics for early routes include well-defined and solid ice sections, reasonably featured rock, good protection options (bolted routes can be good for focusing on movement), manageable length and commitment, and clear descent paths for a good climbing day.
Beyond grade, critical factors include current conditions: ice stability (well-formed vs. thin/detached/rotten ice) and rock state (dry, wet, verglassed), which can dramatically alter a route’s difficulty, often more than the guidebook grade suggests. An honest assessment of your and your partner’s skill level in ice climbing, rock climbing, mixed techniques, and transitions is crucial for choosing routes within your capacity. Understand the route’s protection style (bolts, traditional gear, or combination) and ensure the team has the appropriate gear, skills to place it, and comfort with that style. Evaluate objective hazards like avalanche danger, rockfall/icefall potential, and consider the time of year (mixed climbing season) and aspect for their influence on conditions and daylight, always having potential escape or retreat options in mind. Seeking advice from experienced local climbers or professional mountain guides for up-to-date conditions and route appropriateness is highly valuable, especially for high altitude objectives. For more on understanding climbing grade ratings, external resources are helpful.
Safety First: Critical Considerations for Mixed Climbing Transitions
This section underscores the paramount importance of safety in mixed climbing, with a particular focus on objective hazards inherent in mixed terrain, the specific risks encountered during transitions between ice and rock, the integrity and correct use of gear, and the critical roles of effective rope management, partner communication, and sound decision-making.
Inherent Hazards and Transition-Specific Risks
Mixed climbing environments present persistent objective hazards, including falling ice, which can be dislodged by leader movements, rope drag, natural thawing, or other parties above, especially during temperature fluctuations or under sun on frozen waterfalls. Loose rock is another significant danger, as ice tools and crampons can inadvertently dislodge blocks or stones, posing a threat to both climber and belayer, particularly when moving onto unfamiliar rock. When evaluating route safety and potential hazards, these factors are primary considerations.
If the climb is in alpine terrain or has snow-laden slopes, a thorough avalanche danger assessment is crucial, as even small slides can be severe for a roped party. Furthermore, the mountain environment is subject to rapid and unpredictable weather changes that can drastically affect ice stability, rock friction (wet/verglassed), visibility, and overall safety. The act of transition between ice and rock introduces specific vulnerabilities, such as a heightened risk of knocking ice debris onto rock holds below or dislodging rocks onto fragile ice formations. These points are often awkward, offering poor or marginal stances, which increases the risk of a slip or fall while switching techniques or managing gear. A primary risk during transitions is the failure of an ice tool or crampon placement; a pick popping unexpectedly from a rock hold or a crampon skating on a smooth surface can lead to a sudden fall, potentially with severe consequences including impact from the dislodged ice tool. These zones can also be notoriously difficult to protect adequately, potentially leaving the climber exposed during these critical moves, underscoring the need for meticulous cleaning and testing of placements on these frozen surfaces. For more on understanding objective hazards in mountains, consult authoritative sources.
Gear Integrity, Communication, and Decision-Making
It is strongly recommended to use climbing equipment that meets UIAA (International Climbing and Mountaineering Federation) safety standards; the UIAA Safety Label signifies rigorous testing. Regular, thorough inspection of all equipment before and after every climb for wear, damage, or aging (e.g., rope cuts, worn stitching, ice tool cracks) is essential, as mixed climbing is particularly hard on gear. Proficiency in fundamental climbing safety practices is vital, including proper belay techniques, secure knot tying, correct placement and assessment of both ice and rock protection, and appropriate use of all components in the safety chain. Effective rope management is critical to prevent snags on rock or ice features and to manage slack appropriately, especially if using half/twin ropes to reduce drag and offer redundancy.
Clear, unambiguous communication between climbing partners using standardized calls is a cornerstone of safety, especially in poor visibility or windy conditions. Always perform thorough pre-climb partner checks (knots, belay devices, harness buckles) and discuss the intended line, potential hazards, and protection strategy before embarking on a pitch, particularly before complex transitions. Ultimately, safety relies heavily on sound judgment and self-awareness, including an honest assessment of your own and your partner’s skill level, current physical/mental condition, prevailing environmental conditions, and collective risk tolerance. Recognizing when conditions are too dangerous or a climbing route is too difficult and making the correct decision to retreat, for which having a viable plan (e.g., building V-threads on ice) is crucial, is one of the most important skills for any climber. Check UIAA safety standards for climbing gear for more information.
Training for Mixed Climbing’s Unique Demands
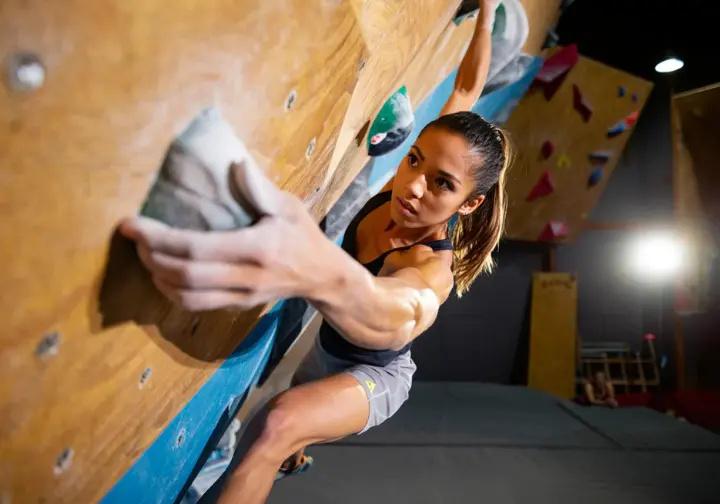
This section outlines specific training strategies to develop the unique physical attributes and movement skills required for mixed climbing. It will cover targeted strength and endurance exercises, the importance of practicing specialized movements like dry tooling, and mental preparation techniques to handle the sport’s challenges. This training is key to improving your overall climbing prowess.
Physical Conditioning: Building Specific Strength and Endurance
Mixed climbing places significant emphasis on upper body pulling strength, particularly lock-off strength, a powerful core for linking movements and maintaining tension, and considerable calf strength and endurance for sustained front-pointing on ice or small rock edges with crampons. Forearm endurance for maintaining grip on ice tools over long pitches is also crucial. Foundational strength exercises include pull-ups with varying grip widths and static lock-offs at different arm angles, ideally performed while gripping ice tools or tool-like handles to enhance specificity. Ice tool hangs, progressing from two arms to one arm and eventually adding weight, directly develop the grip strength and shoulder stability required for secure ice tool placements. An ice-beast workout routine might incorporate many such elements.
A variety of core exercises should target strength and stability, such as hanging leg raises (progressing to full inversions for advanced climbers), two-point planks (one hand, opposite foot, adding weight), and rotational exercises like weighted kayaker twists. Single-leg calf raises, with full range of motion and potential added weight, are crucial for developing strength and endurance for prolonged crampon use. Unilateral lower body strength from exercises like pistol squats and weighted box squats is also beneficial. For power-endurance, climbing multiple laps on routes equipped for dry tooling (in specialized gyms or appropriate outdoor crags) is highly effective, and interval training with periods of high-intensity climbing followed by short rests can train recovery capacity. Consider specific incline pull-ups to simulate steeper terrain. For those looking to structure their regimen, an advanced mixed climbing strength training plan could be beneficial. These phases of training build towards peak performance.
Practicing Movement Skills and Mental Preparation
Regular and dedicated dry tooling practice is essential for refining ice tool placements on various rock features (edges, cracks, pockets), mastering key movements like stein pulls and torques, and developing an intuitive feel for the security of ice tool placements. This practice can occur in dedicated dry tooling gyms, on designated dry tooling crags, or on carefully chosen outdoor rock where it is ethically acceptable and doesn’t damage established rock climbs. Finding safe areas to practice precise crampon placements on various rock features helps build confidence and crucial footwork technique for mixed terrain. If feasible, setting up mock transitions in a controlled environment, such as moving from a boulder to an artificial ice block (if available), can be highly beneficial for practicing the sequences of ice tool and foot movements. An example could be practicing on a short, safe icy wall.
While gym-based dry tooling offers valuable and accessible means to build strength and practice basic techniques, it’s important to recognize its limitations in fully replicating the three-dimensional complexity, hold variability, or psychological factors of outdoor mixed climbing, especially the nuances of natural ice or varied snow conditions. Therefore, gym training should ideally be supplemented with practice on actual rock and ice in appropriate outdoor settings. The mental aspects of mixed climbing are as demanding as the physical; visualization, by mentally rehearsing challenging sequences, transitions, and protection placements, can improve performance and reduce anxiety. Actively seeking unfamiliar routes or setting specific technical challenges during training enhances problem-solving skills and adaptability, while gradually exposing oneself to more challenging (but controlled) situations can build composure and improve decision-making under pressure. Understanding dry tooling practice considerations and ethics is also important.
Conclusion: Embracing the Vertical Dance of Ice and Rock
Mastering the intricate dance of moving between ice and rock is the essence of proficient mixed climbing. This proficiency requires not just isolated skills but their seamless integration, built upon a bedrock of solid foundational techniques in both mediums. Successful climb outcomes hinge on a comprehensive understanding and appropriate selection of specialized gear, the capacity for meticulous assessment of constantly changing conditions, the execution of deliberate, controlled movements, and an unwavering commitment to robust safety practices and clear communication. For the dedicated ice climber or rock climber looking to expand, this is pure adventure.
The path to becoming a proficient mixed climber is one of continuous learning, refinement, and dedicated practice; there are no shortcuts to developing the nuanced feel for ice tool placements on rock or the intuitive decision-making needed at critical transition points. Approach this discipline with patience and humility, progressing gradually. Seeking mentorship from experienced climbers or investing in professional instruction from mountain guides can significantly accelerate this learning process and instill best practices from the outset, helping to unlock a vast realm of climbing possibilities on challenging climbs. The rewards of mixed climbing extend beyond the summit, cultivating unique mental fortitude, adaptability, and problem-solving skills, ultimately fostering a deeper connection with the mountain environment and serving as a gateway to broader alpine competence.
Frequently Asked Questions about Master Ice & Rock: Mixed Climb Transition Guide
What is the single most important piece of specialized gear for mixed climbing compared to just rock or ice climbing? >
How dangerous is mixed climbing compared to sport climbing? >
Can I use my regular rock climbing shoes for the rock sections of a mixed climb? >
What’s the best way to start learning mixed climbing if I’m an experienced rock climber? >
We are a participant in the Amazon Services LLC Associates Program, an affiliate advertising program designed to provide a means for sites to earn advertising fees by advertising and linking to Amazon.com. As an Amazon Associate I earn from qualifying purchases. We also participate in other affiliate programs. The information provided on this website is provided for entertainment purposes only. We make no representations or warranties of any kind, expressed or implied, about the completeness, accuracy, adequacy, legality, usefulness, reliability, suitability, or availability of the information, or about anything else. Any reliance you place on the information is therefore strictly at your own risk. Additional terms are found in the terms of service.


